Integrating Neo4j with Google Genkit: A Practical Guide

Software Developer, LARUS Business Automation
21 min read
A comprehensive guide to leveraging graph-based vector storage, semantic search, and advanced knowledge graph applications using Google’s Genkit framework

Genkit x Neo4j: Advancing AI Data Retrieval
As AI agents become more complex, traditional vector databases often struggle with multi-hop reasoning and structured relationships. GraphRAG (Graph Retrieval-Augmented Generation) addresses these limitations by merging the semantic understanding of LLMs with the connected nature of Knowledge Graphs. See here for more details.
Google Genkit is an open-source framework that simplifies AI application development through an extensible plugin ecosystem. The Neo4j plugin integrates native vector search with Genkit, allowing documents to be stored as nodes while preserving their traversable relationships. This makes it ideal for GraphRAG pipelines that require both semantic similarity and structural context.
This guide covers the full integration process, moving from basic semantic search to advanced GraphRAG topologies and persistent chat memory.
1. Installation and Prerequisites
To get started, you first need to set up your Node.js or TypeScript environment. The integration relies on Genkit’s core libraries, the specific Neo4j plugin, an embedding provider (we will use Google AI in these examples), and the official Neo4j JavaScript driver.
Install the required dependencies:
npm install genkit genkitx-neo4j @genkit-ai/google-genai neo4j-driver
You will also need a running instance of Neo4j. This can be a local Docker container, a Neo4j Desktop instance, or a cloud-hosted Neo4j AuraDB instance. Ensure your Neo4j version supports vector search (version 5.26+ is recommended, but as we’ll see later, version 2026.01+ unlocks even more powerful native filtering features).
2. Initializing the Plugin and Connection Configuration
Initialize the plugin when creating your Genkit instance. You must provide at least an indexId and an embedder. The plugin acts as a bridge between Genkit’s abstraction layers and the underlying Cypher queries executed against the graph.
import { genkit } from 'genkit';
import { neo4j } from 'genkitx-neo4j';
import { googleAI } from '@genkit-ai/google-genai';

const ai = genkit({
  plugins: [
    googleAI(),
    neo4j([
      {
        indexId: 'my-vector-index',
        embedder: googleAI.embedder('gemini-embedding-001'),
      },
    ]),
  ],
});
You must specify a Neo4j index and the embedding model you want to use.
Managing Connection Credentials
You can configure the Neo4j connection in two ways:
1. Using environment variables: If no parameters are passed explicitly, the plugin will look for the following environment variables in your system:
NEO4J_URI=bolt://localhost:7687  # Neo4j's binary protocol
NEO4J_USERNAME=neo4j
NEO4J_PASSWORD=password
NEO4J_DATABASE=neo4j  # Optional: specify database name

# ..And other additional keys, like GOOGLE_GENAI_API_KEY=<apiKey>
2. Using the clientParams option: You can pass the connection configuration directly in your code during initialization:
neo4j([
  {
    indexId: 'my-vector-index',
    // define embedder
    embedder: googleAI.embedder('gemini-embedding-001'),
    clientParams: {
      url: '<connection URI>',
      username: '<username>',
      password: '<password>',
      database: 'neo4j', // Optional, default 'neo4j'
    },
  },
]),
Understanding the Configuration Options
The plugin is highly customizable. The Neo4jParams object allows you to map the Genkit abstractions perfectly to your specific graph schema:
- indexId: (required) Unique identifier for the vector index. The plugin creates the index if it does not exist.
- embedder: (required) Genkit embedder used to generate vectors (e.g. Gemini, OpenAI, etc.).
- clientParams: (optional) Connection details. Falls back to environment variables if omitted.
- label: (optional) Node label in Neo4j. Defaults to indexId.
- textProperty: (optional) Property name for the text content. Defaults to text.
- embeddingProperty: (optional) Property name for the vector. Defaults to embedding.
- idProperty: (optional) Property for unique document ID. Defaults to id.
- retrievalQuery: (optional) Custom Cypher RETURN clause to enrich retrieved results.
- searchType: (optional) Use ‘hybrid’ to combine vector and full-text search.
- fullTextIndexName: (optional) Custom name for the full-text index used in hybrid search.
- searchStrategy: (optional) Strategy instance. e.g. new MatchSearchClauseStrategy() for native in-index filtering (Neo4j 2026.01+).
- filterMetadata: (optional) Metadata fields to optimize for fast in-index filtering.
- ragModel: (optional) LLM used for HyDE and other GraphRAG strategies.
- customGraphRagConfigs: (optional) Definitions for custom multi-hop GraphRAG topologies.
3. Indexing and Retrieval
At its core, a vector store must be able to ingest documents (converting text to embeddings and storing them) and retrieve them based on a user’s prompt.
Import retriever and indexer references like so:
import { neo4jRetrieverRef } from 'genkitx-neo4j';
import { neo4jIndexerRef } from 'genkitx-neo4j';
Use the indexer reference with ai.index() to store documents and their embeddings into your Neo4j database:
import { Document } from 'genkit';

async function indexCompanyDocuments(ai: any): Promise<void> {
  // Use the indexer reference
  const INDEXER_REF = neo4jIndexerRef({
    indexId: 'my-vector-index',
    displayName: 'Company Documents Indexer'
  });
  const doc1 = new Document({
    content: [{ text: 'Neo4j integrates natively with Genkit.' }],
    metadata: { category: 'technology', uniqueId: 'doc-101' },
  });
  const doc2 = new Document({
    content: [{ text: 'Vector search allows semantic similarity matching.' }],
    metadata: { category: 'technology', uniqueId: 'doc-102' },
  });
  // Execute the indexing process
  await ai.index({
    indexer: INDEXER_REF,
    documents: [doc1, doc2]
  });
  console.log('Documents indexed successfully.');
}
Under the hood, Genkit calls the specified embedder (e.g., Gemini) to generate vectors for the text. The Neo4j plugin then executes a Cypher query to MERGE these documents as nodes in the graph, automatically creating the necessary Vector Index if it doesn’t already exist.
The indexer returns these 2 nodes, where we can see that the label name corresponds to the index name:

Use the retriever reference with ai.retrieve() to fetch semantically similar documents:
async function searchCompanyDocuments(ai: any, userQuery: string): Promise<Document[]> { {
  // Use the retriever reference
  const RETRIEVER_REF = neo4jRetrieverRef({
    indexId: 'my-vector-index',
    displayName: 'Company Documents Retriever'
  });

  const docs = await ai.retrieve({
    retriever: RETRIEVER_REF,
    query: userQuery,
    // Optional: limit number of results
    options: { k: 5 },
  });
  return docs;
}

async function main() {
    try {
        console.log('--- Start indexing ---');
        await indexCompanyDocuments(ai);

        console.log('--- Start search ---');
        const docs = await searchCompanyDocuments(ai, 'What is vector search?');
        console.log('Search results (content):', docs.map(d => d.content));
    } catch (error) {
        console.error('Error during execution:', error);
    }
}
main();

/*
The main() prints this a result like this:

--- Start indexing ---
Documents indexed successfully.
--- Start search ---
Search results (content): [
  [ { text: 'Vector search allows semantic similarity matching.' } ],
  [ { text: 'Neo4j integrates natively with Genkit.' } ]
]
Search results (metadata): [
  { category: 'technology', uniqueId: 'doc-102' },
  { category: 'technology', uniqueId: 'doc-101' }
]
*/
3.1 Custom Entity and Schema Mapping
The primary advantage of using a Graph Database as a vector store lies in combining semantic search with structural graph capabilities. In a real-world application, you rarely start with an empty database. You likely have an existing schema with nodes like :Product, :Employee, or :Article.
Instead of being constrained to a predefined schema, you can configure the plugin to use custom node labels, ID fields, and properties for text and embeddings. This enables you to integrate embeddings into an existing Neo4j domain model seamlessly.
For example, we can do this ingestion:
import { genkit, Document } from 'genkit';
import { neo4j, neo4jIndexerRef, neo4jRetrieverRef } from 'genkitx-neo4j';
import { googleAI } from '@genkit-ai/google-genai';

// 1. Initialization with custom mappings
const ai = genkit({
  plugins: [
    googleAI(),
    neo4j([
      {
        indexId: 'custom-entities-idx',
        embedder: googleAI.embedder('gemini-embedding-001'),
        // clientParams can be omitted if environment variables are set

        // Define your domain-specific schema mapping here:
        label: 'Article',
        textProperty: 'bodyContent',
        embeddingProperty: 'semanticVector',
        idProperty: 'articleId',
      },
    ]),
  ],
});

// 2. Ingestion over custom schema
async function ingestCustomArticles(ai: any) {
  const INDEXER_REF = neo4jIndexerRef({ indexId: 'custom-entities-idx' });

  const doc = new Document({
    content: [{ text: 'The integration of Genkit and Neo4j enables advanced GraphRAG.' }],
    // metadata keys must match the idProperty defined in the config (articleId)
    metadata: {
      articleId: 'art-001',
      author: 'Giuseppe Villani'
    },
  });

  await ai.index({
    indexer: INDEXER_REF,
    documents: [doc],
  });
  console.log('Article indexed successfully using custom schema.');
}
with this result:

When you index a document using this configuration, the plugin will execute a Cypher query targeting the :Article label, using articleId for merging, and storing the text in bodyContent.
// 3. Retrieval over custom schema
async function retrieveArticles(ai: any, query: string) {
  const RETRIEVER_REF = neo4jRetrieverRef({ indexId: 'custom-entities-idx' });
  const docs = await ai.retrieve({
    retriever: RETRIEVER_REF,
    query: query,
    options: { k: 5 },
  });
  return docs;
}

// 4. Execution Main
async function main() {
  try {
    console.log('--- Starting Custom Schema Workflow ---');

    // Perform ingestion
    await ingestCustomArticles(ai);

    // Perform retrieval
    const query = 'How do Genkit and Neo4j work together?';
    console.log(`Searching for: "${query}"`);

    const results = await retrieveArticles(ai, query);

    // Print results
    console.log('Search results (content):', results.map(d => d.text));
    console.log('Search results (metadata):', results.map(d => d.metadata));

  } catch (error) {
    console.error('Error during execution:', error);
  }
}

main();
4. Advanced Search: Metadata Filtering & Hybrid Search
Semantic search is not a silver bullet. Sometimes, you need exact keyword matches (e.g., searching for a specific product ID like “TX-9000” where vector distance might yield false positives), or you need to filter results based on strict criteria (e.g., only return documents where status = ‘ACTIVE’).
4.1 Metadata Filtering (Neo4j 2026.01+ Syntax)
The plugin supports advanced metadata filtering, allowing retrieval queries to include structured constraints alongside semantic similarity.
By using the MatchSearchClauseStrategy, the plugin leverages the new Vector Search syntax introduced in Neo4j 2026.01 (MATCH (n) SEARCH n IN VECTOR INDEX). This enables native in-index filtering, making queries significantly faster. Unlike post-filtering (which retrieves top-K vectors and then filters them, potentially returning zero results), in-index filtering evaluates the metadata conditions during the vector traversal.
See this article for more details.
To optimize performance, you can pass filterMetadata to explicitly instruct Neo4j to build index structures specifically for those fields.
import { MatchSearchClauseStrategy, neo4j, neo4jRetrieverRef, neo4jIndexerRef } from 'genkitx-neo4j';
import { Document, genkit } from 'genkit';
import { googleAI } from '@genkit-ai/google-genai';

const customIdx = 'my-filtered-index';
const uniqueId = `doc-${Date.now()}`;

const ai = genkit({
  plugins: [
    googleAI(),
    neo4j([
      {
        indexId: customIdx,
        embedder: googleAI.embedder('gemini-embedding-001'),
        clientParams: "<clientParams>",
        searchStrategy: new MatchSearchClauseStrategy(),
        filterMetadata: ['department', 'status'],
      },
    ]),
  ],
});

const newDocument = new Document({
  content: [{ text: 'Document without filter metadata configuration.' }],
  metadata: { department: 'IT', status: 'active' },
});

const indexerRef = neo4jIndexerRef({ indexId: customIdx });
const retrieverRef = neo4jRetrieverRef({ indexId: customIdx });

await ai.index({ indexer: indexerRef, documents: [newDocument] });

const docs = await ai.retrieve({
  retriever: retrieverRef,
  query: 'test query',
  options: {
    k: 10,
    filter: { department: 'IT', status: 'active' }
  }
});

console.log('docs', docs.map(d => d.content[0].text))
/*
Result:

docs [ 'Document without filter metadata configuration.' ]
*/
4.2 Hybrid Search (Vector + Full-Text)
Hybrid search blends exact full-text keyword matching with the semantic ranking of vector search. This is particularly useful when queries contain domain-specific jargon, part numbers, or exact names that must be matched precisely, while still leveraging semantic reasoning for the overall ranking
// 1. Initialization with Hybrid Search enabled
neo4j([
  {
    indexId: 'hybrid-search-idx',
    embedder: googleAI.embedder('gemini-embedding-001'),
    searchType: 'hybrid', // Enables both vector and full-text keyword retrieval
    fullTextIndexName: 'custom-fulltext-index', // Optional
    // A static keyword appended to every full-text search query.
    // Useful to scope results to a specific domain by default.
    fullTextQuery: 'documentation',
  },
])

// .. embedding operations

// 2. Retrieval using Hybrid Search
const RETRIEVER_REF = neo4jRetrieverRef({ indexId: 'hybrid-search-idx' });
const docs = await ai.retrieve({
  retriever: RETRIEVER_REF,
  query: query,
  options: { k: 5 },
});
return docs;
Note: Metadata filtering cannot yet be used in combination with the hybrid search approach. Attempting to pass filter: {…} while searchType: ‘hybrid’ is active will throw an error.
// !! This will throw at runtime:
// "Metadata filtering can't be use in combination with a hybrid search approach."
const docs = await ai.retrieve({
  retriever: RETRIEVER_REF,
  query: 'some query',
  options: {
    k: 10,
    filter: { status: 'active' }, // ← NOT allowed with hybrid search
  },
});
4.3 Custom Retrieval Queries and Graph Traversals
Standard vector similarity often fails to capture the structural context required for complex reasoning. By using the retrievalQuery parameter, you can override the default retrieval logic with custom Cypher queries that combine vector search with graph traversals and aggregations .
This approach is highly effective for expanding the context window to include related nodes. For example, instead of merely retrieving a document’s text, you can navigate the graph to include the author’s biography and other relevant articles they have written, providing the LLM with a more comprehensive background of the source .
// 1. Initialization with Advanced Graph Traversal Retrieval
neo4j([
  {
    indexId: 'custom-query-idx',
    embedder: googleAI.embedder('gemini-embedding-001'),
    // We navigate from the retrieved 'node' to its Author
    // and collect other documents written by the same person.
    retrievalQuery: `
      MATCH (node)-[:AUTHORED_BY]->(author:Author)
      OPTIONAL MATCH (author)<-[:AUTHORED_BY]-(other:Document)
      WHERE other <> node
      RETURN node.text AS text,
             {
               authorName: author.name,
               authorBio: author.bio,
               otherWorks: collect(other.title)[0..3]
             } AS metadata
    `
  },
])

// ... embedding and retrieval
5. GraphRAG Capabilities: Expanding Context
The plugin natively bundles advanced GraphRAG strategies. These strategies exploit the connected nature of your graph to provide significantly richer context to the LLM compared to simple vector similarity.
Parent-Child Retriever
The Parent-Child strategy chunks documents into smaller subchunks for dense, accurate vector matching, but retrieves the broader context (the “parent” document or chunk) to feed to the LLM.
Why is this important? Small cohesive text chunks yield the best vector embeddings for exact search, but providing only a tiny sentence to an LLM often results in hallucination due to lack of surrounding context. This strategy fixes that. The plugin provides a specific tool (parentChildIngestor) to automatically ingest data respecting this topology.
import { neo4jParentChildRetrieverRef } from 'genkitx-neo4j';

async function useParentChildGraphRag(ai: any, userQuery: string) {
  const INDEX_ID = 'graphrag-index';
  // 1. Ingest Data using the bundled Genkit Tool
  // NOTE: Ensure 'llm-chunk' is installed in your project for this tool to work
  const ingestorTool = ai.tool(`neo4j/${INDEX_ID}/parentChildIngestor`);
  await ingestorTool({
    documents: [{ text: "Massive corporate document text...", metadata: { source: "internal" } }]
  });
  // 2. Retrieve using Parent-Child strategy
  const PC_RETRIEVER_REF = neo4jParentChildRetrieverRef({ indexId: INDEX_ID });
  const parentDocs = await ai.retrieve({
    retriever: PC_RETRIEVER_REF,
    query: userQuery,
    options: { k: 3 }
  });
  return parentDocs;
}

// .. useParentChildGraphRag(..) execution
5.1 Hypothetical Question Retriever (HyDE)
HyDE uses the LLM to generate a hypothetical, ideal answer to the user’s query first, and then uses that generated text to query the vector space. This maps the user’s potentially vague question into the exact vocabulary used by the target documents.
import { neo4jHyDERetrieverRef } from 'genkitx-neo4j';

// 1. Configuration requires the 'ragModel' parameter
neo4j([
  {
    indexId: 'hyde-index',
    embedder: googleAI.embedder('gemini-embedding-001'),
    ragModel: 'googleai/gemini-2.5-flash' // Required to generate the hypothetical answer
  },
])
async function useHydeGraphRag(ai: any, userQuery: string) {
  const INDEX_ID = 'hyde-index';
  // 2. Ingest Data
  const ingestorTool = ai.tool(`neo4j/${INDEX_ID}/hydeIngestor`);
  await ingestorTool({
    documents: [{ text: "Information about Planet Zeta.", metadata: {} }]
  });
  // 3. Retrieve using HyDE strategy
  const HYDE_RETRIEVER_REF = neo4jHyDERetrieverRef({ indexId: INDEX_ID });

  const hydeDocs = await ai.retrieve({
    retriever: HYDE_RETRIEVER_REF,
    query: userQuery,
    options: { k: 3 }
  });
  return hydeDocs;
}

// .. useHydeGraphRag(..) execution
5.2 Custom / Generic GraphRAG
You can define entirely custom multi-hop graph retrieval strategies (e.g., finding a node, and returning all its “siblings”).
import { neo4jCustomRetrieverRef } from 'genkitx-neo4j';

// 1. Define custom Cypher traversal during initialization
neo4j([
  {
    indexId: 'custom-rag-index',
    embedder: googleAI.embedder('gemini-embedding-001'),
    customGraphRagConfigs: {
      'sibling-search': {
        systemPrompt: "Use the sibling documents to answer the question.",
        idMetadataKey: "docId",
        cypherIdParamName: "startIds",
        cypherQuery: `
          MATCH (start:Document)-[:SIBLING_OF]->(sibling:Document)
          WHERE start.id IN $startIds
          RETURN sibling.text AS siblingText
        `,
        cypherReturnTextField: "siblingText"
      }
    }
  },
])
// 2. Execute retrieval
async function useCustomGraphRag(ai: any, userQuery: string) {
  const CUSTOM_RAG_REF = neo4jCustomRetrieverRef({
    indexId: 'custom-rag-index',
    name: 'sibling-search'
  });
  const customRagDocs = await ai.retrieve({
    retriever: CUSTOM_RAG_REF,
    query: userQuery,
    options: { k: 3 }
  });
  return customRagDocs;
}

// .. useCustomGraphRag(..) execution
5.3 Under the Hood: Programmatic GraphRAG APIs
While relying on Genkit tools (ai.tool) or the plugin configuration is the recommended path for standard applications, you might need more granular control, especially when building custom ETL pipelines or integrating with external orchestration systems.
The plugin exposes the underlying utility classes — ParentChildRetriever, HypotheticalQuestionRetriever, and GenericGraphRagRetriever—allowing you to instantiate them dynamically and trigger ingestion or retrieval programmatically, bypassing the standard Genkit retriever abstractions.
The GenericGraphRagRetriever also exposes getNeo4jInstance(), which returns the underlying Neo4j driver. This is useful for advanced scenarios where you need to run raw Cypher queries as part of the same pipeline — for example, to manually create graph relationships between indexed nodes before retrieval.
Programmatic Ingestion: Instead of using the bundled Genkit tools, you can instantiate the retrievers directly and call their ingestDocument() methods:
import { neo4jIndexerRef, neo4jRetrieverRef } from 'genkitx-neo4j';
import {
  ParentChildRetriever,
  HypotheticalQuestionRetriever
} from 'genkitx-neo4j/rag-utils';


const indexId = 'programmatic-index';
const INDEXER_REF = neo4jIndexerRef({ indexId });
const VECTOR_RETRIEVER_REF = neo4jRetrieverRef({ indexId });

const clientParams = {
  url: '<connection URI>',
  username: '<username>',
  password: '<password>',
  database: 'neo4j', // Optional, default 'neo4j'
}

// ... ai instance ...

async function programmaticIngestion(ai: any, clientParams: any) {
  // 1. Direct Usage of ParentChildRetriever
  const pcRetriever = new ParentChildRetriever(
    ai,
    clientParams,
    INDEXER_REF,
    VECTOR_RETRIEVER_REF
  );

  await pcRetriever.ingestDocument({
    documents: [{ text: "Protocol X-99 details...", metadata: { topic: "security" } }]
  });

  // 2. Direct Usage of HyDE Retriever
  const hydeRetriever = new HypotheticalQuestionRetriever(
    ai,
    clientParams,
    INDEXER_REF,
    VECTOR_RETRIEVER_REF,
    'googleai/gemini-2.5-flash' // Explicitly pass the generation model
  );

  await hydeRetriever.ingestDocument({
    documents: [{ text: "Planet Zeta atmosphere facts..." }]
  });
}

// .. programmaticIngestion(..) execution
5.4 Standalone Custom GraphRAG Retriever
Similarly, if you need to generate custom GraphRAG topologies on the fly without defining them during the initial Genkit plugin setup, you can use the GenericGraphRagRetriever standalone class:
import { GenericGraphRagRetriever } from 'genkitx-neo4j/rag-utils';
import { neo4jIndexerRef, neo4jRetrieverRef } from 'genkitx-neo4j';

async function standaloneCustomRag(ai: any, clientParams: any, userQuery: string) {
  const INDEXER_REF = neo4jIndexerRef({ indexId: 'dynamic-rag-index' });
  const VECTOR_RETRIEVER_REF = neo4jRetrieverRef({ indexId: 'dynamic-rag-index' });

  // On-the-fly initialization of a custom GraphRAG strategy
  const genericRetriever = new GenericGraphRagRetriever(
    ai,
    clientParams,
    INDEXER_REF,
    VECTOR_RETRIEVER_REF,
    {
      systemPrompt: "Answer the question using ONLY the provided related context.",
      idMetadataKey: "docId",
      cypherIdParamName: "startIds",
      cypherQuery: `
        MATCH (start:Document)-[:RELATES_TO]->(related:Document)
        WHERE start.id IN $startIds
        RETURN related.text AS customText
      `,
      cypherReturnTextField: "customText"
    }
  );

  // Directly call the retrieve method, bypassing ai.retrieve()
  const retrievedDocs = await genericRetriever.retrieve(userQuery, 3);
  return retrievedDocs;
}

// .. standaloneCustomRag(..) execution
This is particularly useful in multi-tenant systems or when GraphRAG topologies need to be registered conditionally at runtime
import { configureNeo4jGraphRagRetrievers } from 'genkitx-neo4j';

const customConfigName = "sibling-search";
const indexId = 'genkit-test-index';

// Register custom GraphRAG retrievers on an existing Genkit instance
// without re-initializing the entire plugin
configureNeo4jGraphRagRetrievers(ai, {
  indexId,
  // use your configured embedder here
  embedder: googleAI.embedder('gemini-embedding-001'),
  clientParams,
  customGraphRagConfigs: {
    // example of GraphRAG retriever
    [customConfigName]: {
      systemPrompt: "Use the sibling documents to answer the question.",
      idMetadataKey: "docId",
      cypherIdParamName: "startIds",
      cypherQuery: `
        MATCH (start:Document)-[:SIBLING_OF]->(sibling:Document)
        WHERE start.id IN $startIds
        RETURN sibling.text AS siblingText
      `,
      cypherReturnTextField: "siblingText"
    }
  }
});

// ... embeddings

// create custom retriever
const CUSTOM_RETRIEVER_REF = neo4jCustomRetrieverRef({
  indexId,
  name: customConfigName
});


const retrievedDocs = await ai.retrieve({
  retriever: CUSTOM_RETRIEVER_REF,
  query: "<query>",
  options: { k: 3 }
});

// ... results
6. Genkit Chat Memory with Neo4j
Building conversational agents requires managing state. If you pass an infinitely growing list of previous messages to an LLM, you will quickly hit token limits, increase latency, and drive up API costs.
When initializing the Neo4jSessionStore, you can pass a configuration object to manage credentials and perfectly map the conversational state to your specific graph schema:
- url: (required) The connection URI for your Neo4j instance (e.g., bolt://localhost:7687).
- username: (required) The username for Neo4j authentication.
- password: (required) The password for Neo4j authentication.
- sessionLabel: (optional) Customizes the node label assigned to the root session node in the graph. Defaults to ‘GenkitSession’.
- messageLabel: (optional) Customizes the node label assigned to the individual message nodes within a thread. Defaults to ‘Message’.
- nextMessageRelType: (optional) Defines the cypher relationship type connecting a message to its chronological predecessor (forming the linked list of the chat history). Defaults to ‘NEXT’.
- lastMessageRelType: (optional) Defines the cypher relationship type that connects the main session node directly to the most recent message (acting as the head of the thread). Defaults to ‘LAST_MESSAGE’.
The plugin provides a Neo4jSessionStore, establishing a robust Session Persistence layer mapped natively to Neo4j. The module models conversation turns as linked graphs ((:Session)-[:LAST_MESSAGE]->(:Message)<-[:NEXT]-(:Message)), granting state persistence, easily tunable context limits, and long-term conversation analysis.
You can use setWindowSize(n) to limit the amount of historical messages injected into the context window, avoiding LLM token bloat while keeping the full history safely stored in the graph.
Note: setWindowSize(n) defines the number of conversation turns (i.e. pairs of user – assistant messages) to retain in context. Setting it to 2 on a thread of 6 messages will return the last 4 messages (2 turns × 2 messages each).
import { Neo4jSessionStore } from 'genkitx-neo4j';


async function startPersistentChat(ai: any, sessionId: string, userMessage: string) {

  // 1. Initialize the Neo4j backed session memory
  const neo4jStore = new Neo4jSessionStore({
    url: '<connection URI>',
    username: '<username>',
    password: '<password>',
  });

  // 2. Control Token Bloat: Only feed the last 10 messages into the LLM context
  neo4jStore.setWindowSize(10);
  // 3. Initialize the chat session
  const chat = ai.chat({
    model: 'googleai/gemini-2.5-flash',
    store: neo4jStore,
    sessionId: sessionId
  });
  // 4. Send message and persist to Graph
  const response = await chat.send(userMessage);
  console.log(response.text);
}

// .. startPersistentChat(..) execution
You can customize the node labels and relationship types to fit an existing application schema. You can also programmatically clear a user’s session history.
import { Neo4jSessionStore } from 'genkitx-neo4j';

async function manageChatSessions() {

  // Custom schema configuration
  const customStore = new Neo4jSessionStore({
    url: 'bolt://localhost:7687',
    username: 'neo4j',
    password: 'password',
    sessionLabel: 'AppSession',          // Defaults to 'GenkitSession'
    messageLabel: 'ChatMessage',         // Defaults to 'Message'
    nextMessageRelType: 'THREAD_NEXT',   // Defaults to 'NEXT'
    lastMessageRelType: 'THREAD_HEAD'    // Defaults to 'LAST_MESSAGE'
  });
  const sessionId = 'user-123-session';
  // Programmatically clear/delete all messages and relationships for a session
  await customStore.clear(sessionId);
  console.log(`Session ${sessionId} has been wiped.`);
}

// .. manageChatSessions(..) execution
6.1 Manual Session Management
Sometimes, passing the store directly to ai.chat() isn’t enough. If you are integrating with a decoupled frontend, analyzing historical thread data, or migrating state manually, you can interact with the underlying graph structures using the save() and get() primitives.
Calling save() multiple times on the same sessionId is additive: new messages are appended to the existing thread as new graph nodes, without overwriting previous ones. The LAST_MESSAGE relationship is updated to always point to the most recently added message.
This grants you full programmatic access to the conversational payload:
import { Neo4jSessionStore } from 'genkitx-neo4j';

async function manualSessionManagement() {
  const store = new Neo4jSessionStore({
    url: 'bolt://localhost:7687',
    username: 'neo4j',
    password: 'password',
  });

  const sessionId = 'test-session-1';

  // 1. Explicitly save a session payload to the graph
  await store.save(sessionId, {
    id: sessionId,
    state: { user: 'Alice', role: 'admin' }, // Store arbitrary state metadata
    threads: {
      main: [
        { content: [{ text: 'Can you help me reset the database?' }], role: 'user', metadata: {} },
        { content: [{ text: 'Of course. Please provide your credentials.' }], role: 'model', metadata: {} },
      ],
    },
  });

  // 2. Programmatically read and inspect the entire persisted state
  const sessionData = await store.get(sessionId);

  if (sessionData) {
    console.log('Session Metadata:', sessionData.state);
    console.log('Main Thread Message Count:', sessionData.threads.main.length);
  }
}

// .. manualSessionManagement(..) execution
Conclusion
Integrating Genkit with Neo4j allows developers to move beyond isolated vector retrieval by leveraging the structural context of knowledge graphs. This approach enables more accurate RAG systems capable of multi-hop reasoning and improved context management.
The genkitx-neo4j plugin provides a configurable bridge between Genkit’s abstractions and Neo4j’s engine, supporting features like native in-index filtering, advanced GraphRAG topologies, and persistent chat memory. As retrieval-augmented generation continues to evolve, this integration offers a robust foundation for building sophisticated, graph-backed AI applications.
Resources
Integrating Neo4j with Google Genkit: A Practical Guide was originally published in Neo4j Developer Blog on Medium, where people are continuing the conversation by highlighting and responding to this story.
Share Article


Explore
Related Articles

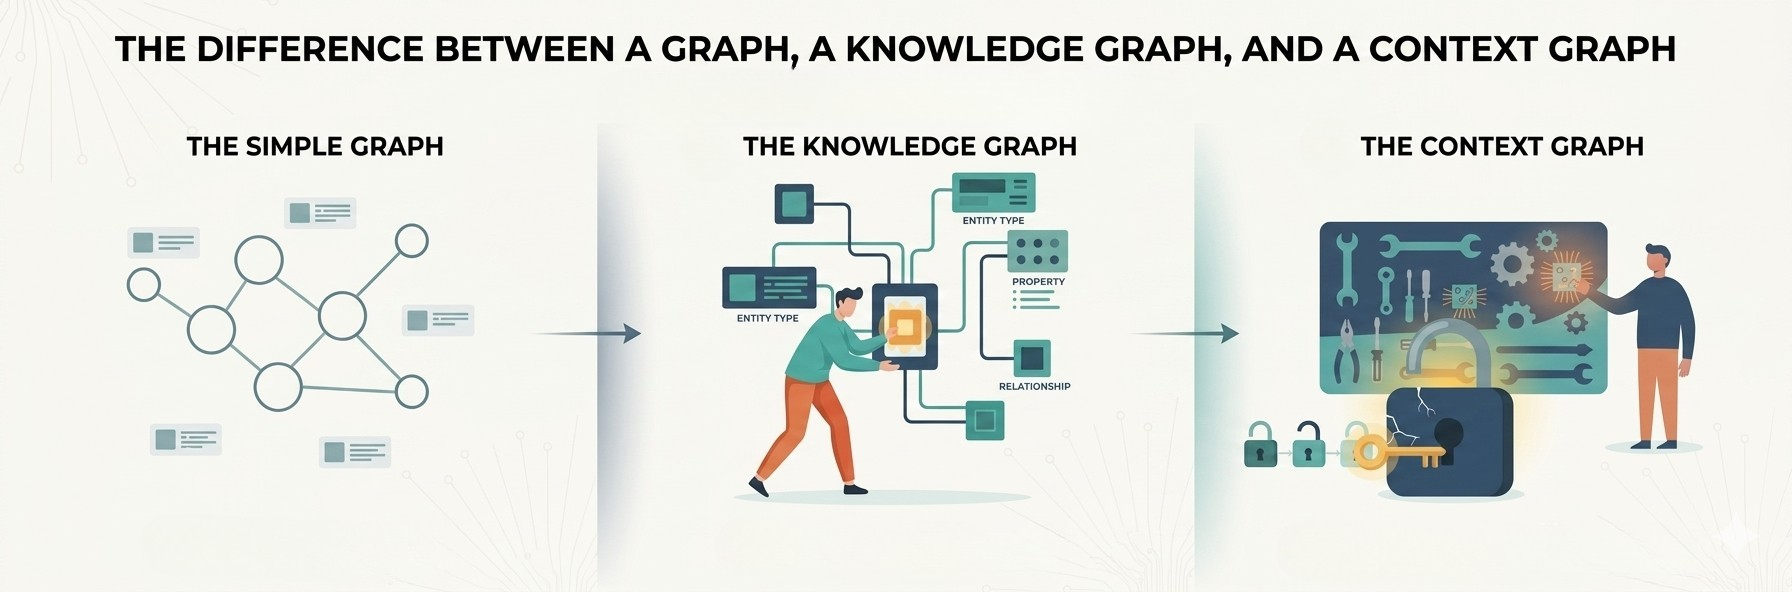
1 of 3: The difference between a graph, a knowledge graph, and a context graph
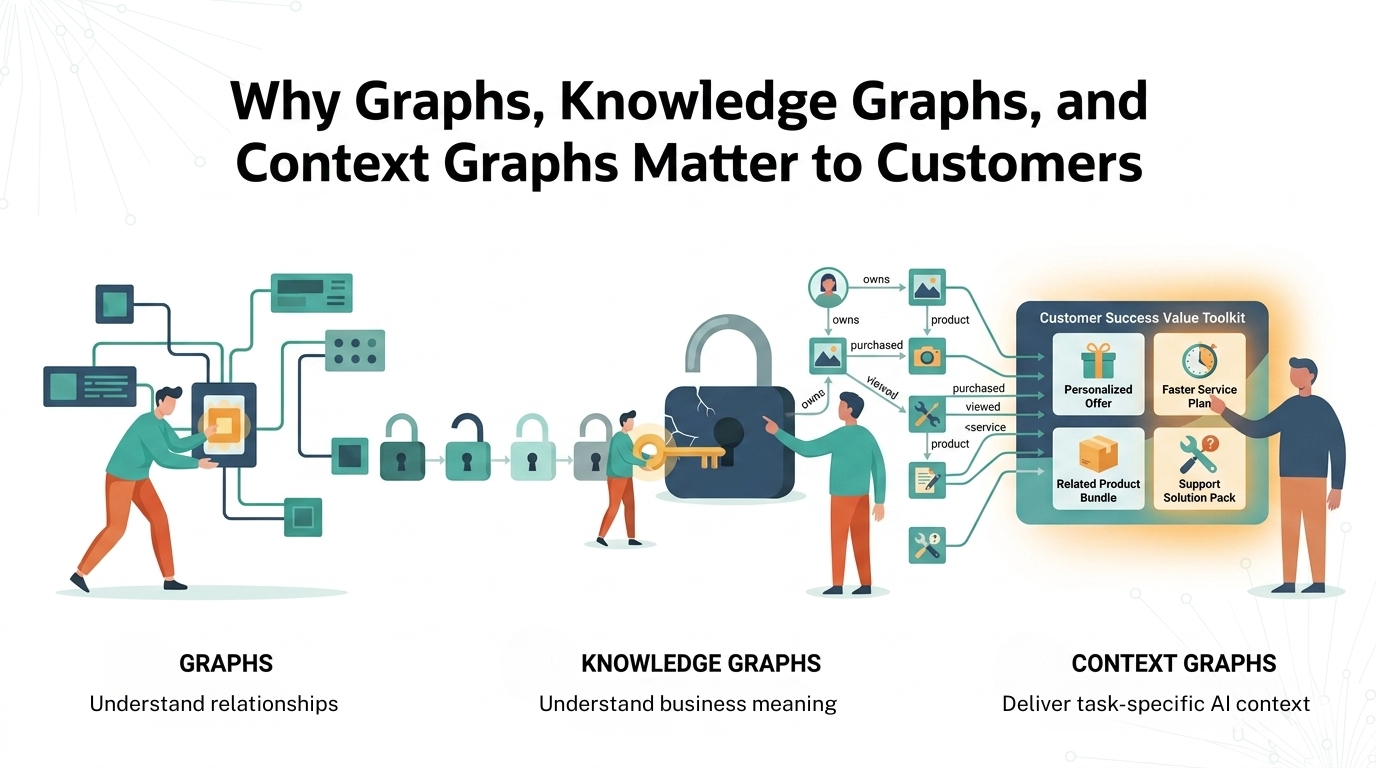
2 of 3: Why graphs, knowledge graphs, and context graphs matter to customers
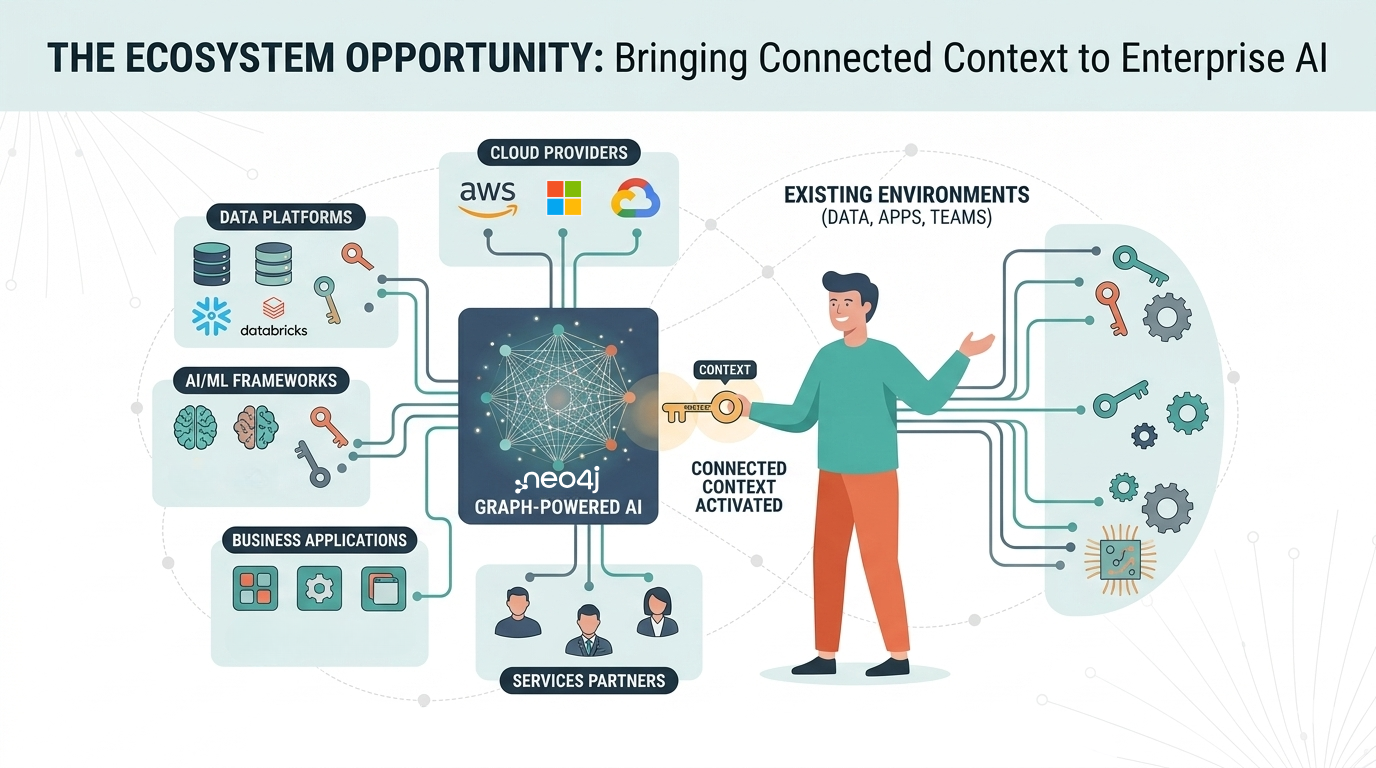
3 of 3: The graph ecosystem: Bringing connected context to enterprise AI