Just for Flask & React.js Developers: A New Neo4j Movies Template

COO of SilverLogic
10 min read

Introduction
Let’s jump right into it. You’re a Python developer interested in Neo4j and want to build a web app, microservice or mobile app. You’ve already read up on Neo4j, played around with some datasets, and know enough Cypher to get going. Now you’re looking for a demo app or template to get the ball rolling.
Enter the Neo4j Movies Template.
This blog post will walk you rating a movie on a sample movie rating application, from initial setup to viewing the list of movies you’ve rated.
What comes with the Neo4j Movies Template:
- Flask / React.js app ready to be bent to your will
- API Documentation
- More time coding, less time Googling for examples on how to:
- Use Neo4j Import Tool on Unix or Windows
- Use the new Python Bolt driver for Neo4j
Overview of the Data Model and the Implementation
The Classic Movie Database
This project uses a classic Neo4j dataset: the movie database.
It includes Movie, Person, Genre and Keyword nodes, connected by relationships as described in the following image:
(:Movie)-[:HAS_GENRE]→(:Genre)(:Movie)-[:HAS_KEYWORD]→(:Keyword)(:Person)-[:ACTED_IN]→(:Movie)(:Person)-[:WROTE]→(:Movie)(:Person)-[:DIRECTED]→(:Movie)(:Person)-[:PRODUCED]→(:Movie)
Additionally, users can add ratings to movies:
(:User)-[:RATED]→(:Movie)
Or, in table form:
| from | props_from | via | to | props_to |
|---|---|---|---|---|
| [User] | [api_key, username, password, id] | RATED | [Movie] | [id, title, tagline, summary, poster_image, duration, rated] |
| [Person] | [id,name,born,poster_image] | ACTED_IN | [Movie] | [id,title,tagline,summary,poster_image,duration,rated] |
| [Movie] | [id,title,tagline,summary,poster_image,duration,rated] | HAS_KEYWORD | [Keyword] | [id,name] |
| [Person] | [id,name,born,poster_image] | DIRECTED | [Movie] | [id,title,tagline,summary,poster_image,duration,rated] |
| [Person] | [id,name,born,poster_image] | PRODUCED | [Movie] | [id,title,tagline,summary,poster_image,duration,rated] |
| [Person] | [id,name,born,poster_image] | WRITER_OF | [Movie] | [id,title,tagline,summary,poster_image,duration,rated] |
| [Movie] | [id,title,tagline,summary,poster_image,duration,rated] | HAS_GENRE | [Genre] | [id,name] |
The API
The Flask portion of the application interfaces with the database and presents data to the React.js front-end via a RESTful API.
The Front-End
The front-end, built in React.js, consumes the data presented by the Flask API and presents some views to the end user, including:
- Home page
- Movie detail page
- Person detail page
- User detail page
- Login
Setting Up
To get the project running, clone the repo then check the project’s README for environment-specific setup instructions.
The README covers how to:
- Download and install Neo4j
- Prepare the database
- Import the nodes and relationships using
neo4j-import
Start the Database!
- Start Neo4j if you haven’t already!
- Set your username and password (You’ll run into less trouble if you don’t use the defaults)
- Set environment variables (Note: the following is for Unix; for Windows you will be using
set=…) - Export your Neo4j database username
export MOVIE_DATABASE_USERNAME=myusername - Export your Neo4j database password
export MOVIE_DATABASE_PASSWORD=mypassword - You should see a database populated with
Movie,Genre,KeywordandPersonnodes.
Start the Flask Backend
The Neo4j-powered Flask API lives in the flask-api directory.
cd flask-apipip install -r requirements.txt(you should be using a virtualenv)export FLASK_APP=app.pyflask runstarts the API- Take a look at the docs at https://localhost:5000/docs
Start the React.js Front-End
With the database and Express.js backend running, open a new terminal tab or window and move to the project’s /web subdirectory. Install the bower and npm dependencies, then start the app by running gulp (read the “getting started” on gulpjs.com). Edit config/settings.js by changing the apiBaseURL to https://localhost:5000/api/v0
Over on https://localhost:4000/, you should see the homepage of the movie app, displaying three featured movies and other movies below.
Click on a movie to see the movie detail page:
Click on a person to see that person’s related people and movies the person has acted in, directed, written or produced:
A Closer Look: Using the Python Neo4j Bolt Driver
Let’s take a closer look at what sort of responses we get from the driver.
Import dependencies, including the Neo4j driver, and connect the driver to the database:
Getting Ready
app = Flask(__name__)
app.config['SECRET_KEY'] = 'super secret guy'
api = Api(app, title='Neo4j Movie Demo API', api_version='0.0.10')
CORS(app)


driver = GraphDatabase.driver('bolt://localhost',
                              auth=basic_auth(config.DATABASE_USERNAME,
                              str(config.DATABASE_PASSWORD)))
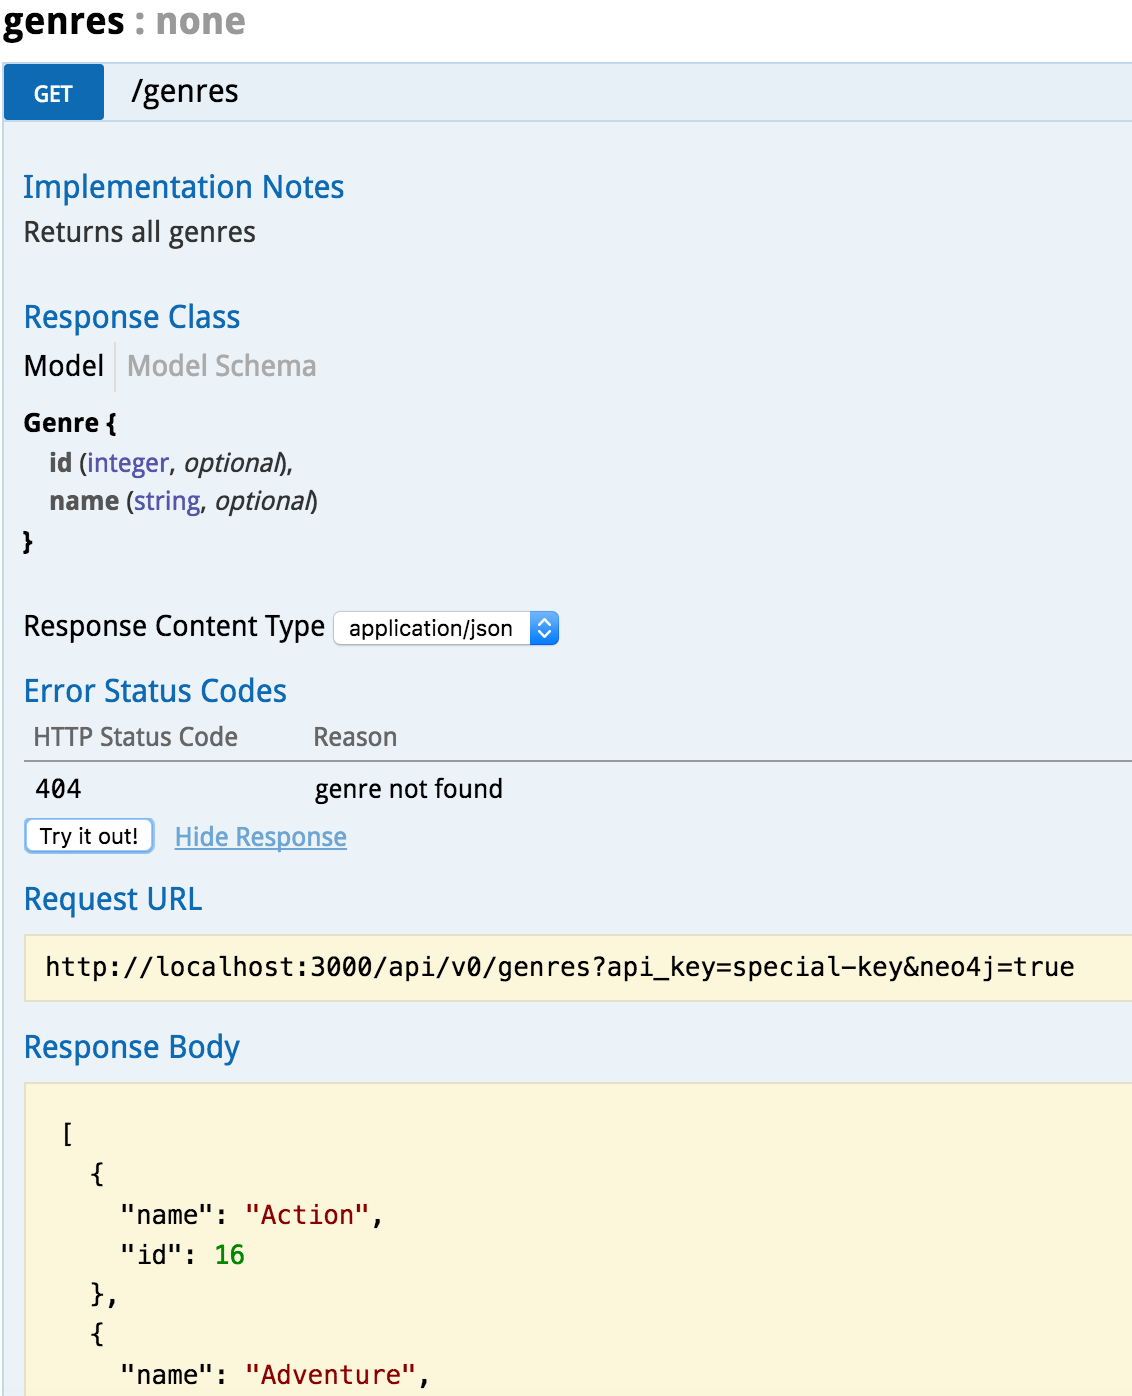
Let’s look at how we would ask the database to return all the genres in the database. The GenreList class queries the database for all Genre nodes, serializes the results, and returns them via /api/v0/genres.
class GenreList(Resource):
    @swagger.doc({
        'tags': ['genres'],
        'summary': 'Find all genres',
        'description': 'Returns all genres',
        'responses': {
            '200': {
                'description': 'A list of genres',
                'schema': GenreModel,
            }
        }
    })

    def get(self):
        db = get_db()
        result = db.run('MATCH (genre:Genre) RETURN genre')
        return [serialize_genre(record['genre']) for record in result]

...

def serialize_genre(genre):
    return {
        'id': genre['id'],
        'name': genre['name'],
    }

...

api.add_resource(GenreList, '/api/v0/genres')
What’s Going on with the Serializer?
The Bolt driver responses are different than what you might be used to if you’ve used a non-Bolt Neo4j driver.
In the “get all Genres” example described above,
result = db.run('MATCH (genre:Genre) RETURN genre')
returns a series of records:
An Example Record
{
   "keys":[
      "genre"
   ],
   "length":1,
   "_fields":[
      {
         "identity":{
            "low":719,
            "high":0
         },
         "labels":[
            "Genre"
         ],
         "properties":{
            "name":"Action",
            "id":{
               "low":16,
               "high":0
            }
         },
         "id":"719"
      }
   ],
   "_fieldLookup":{
      "genre":0
   }
}
The serializer parses these messy results into the data we need to build a useful API:
def serialize_genre(genre):
    return {
        'id': genre['id'],
        'name': genre['name'],
    }
Voila! An array of genres appears at /genres.
Beyond the /Genres Endpoint
Of course, an app that just shows movie genres isn’t very interesting. Take a look at the routes and models used to build the home page, movie detail page and person detail page.
The User Model
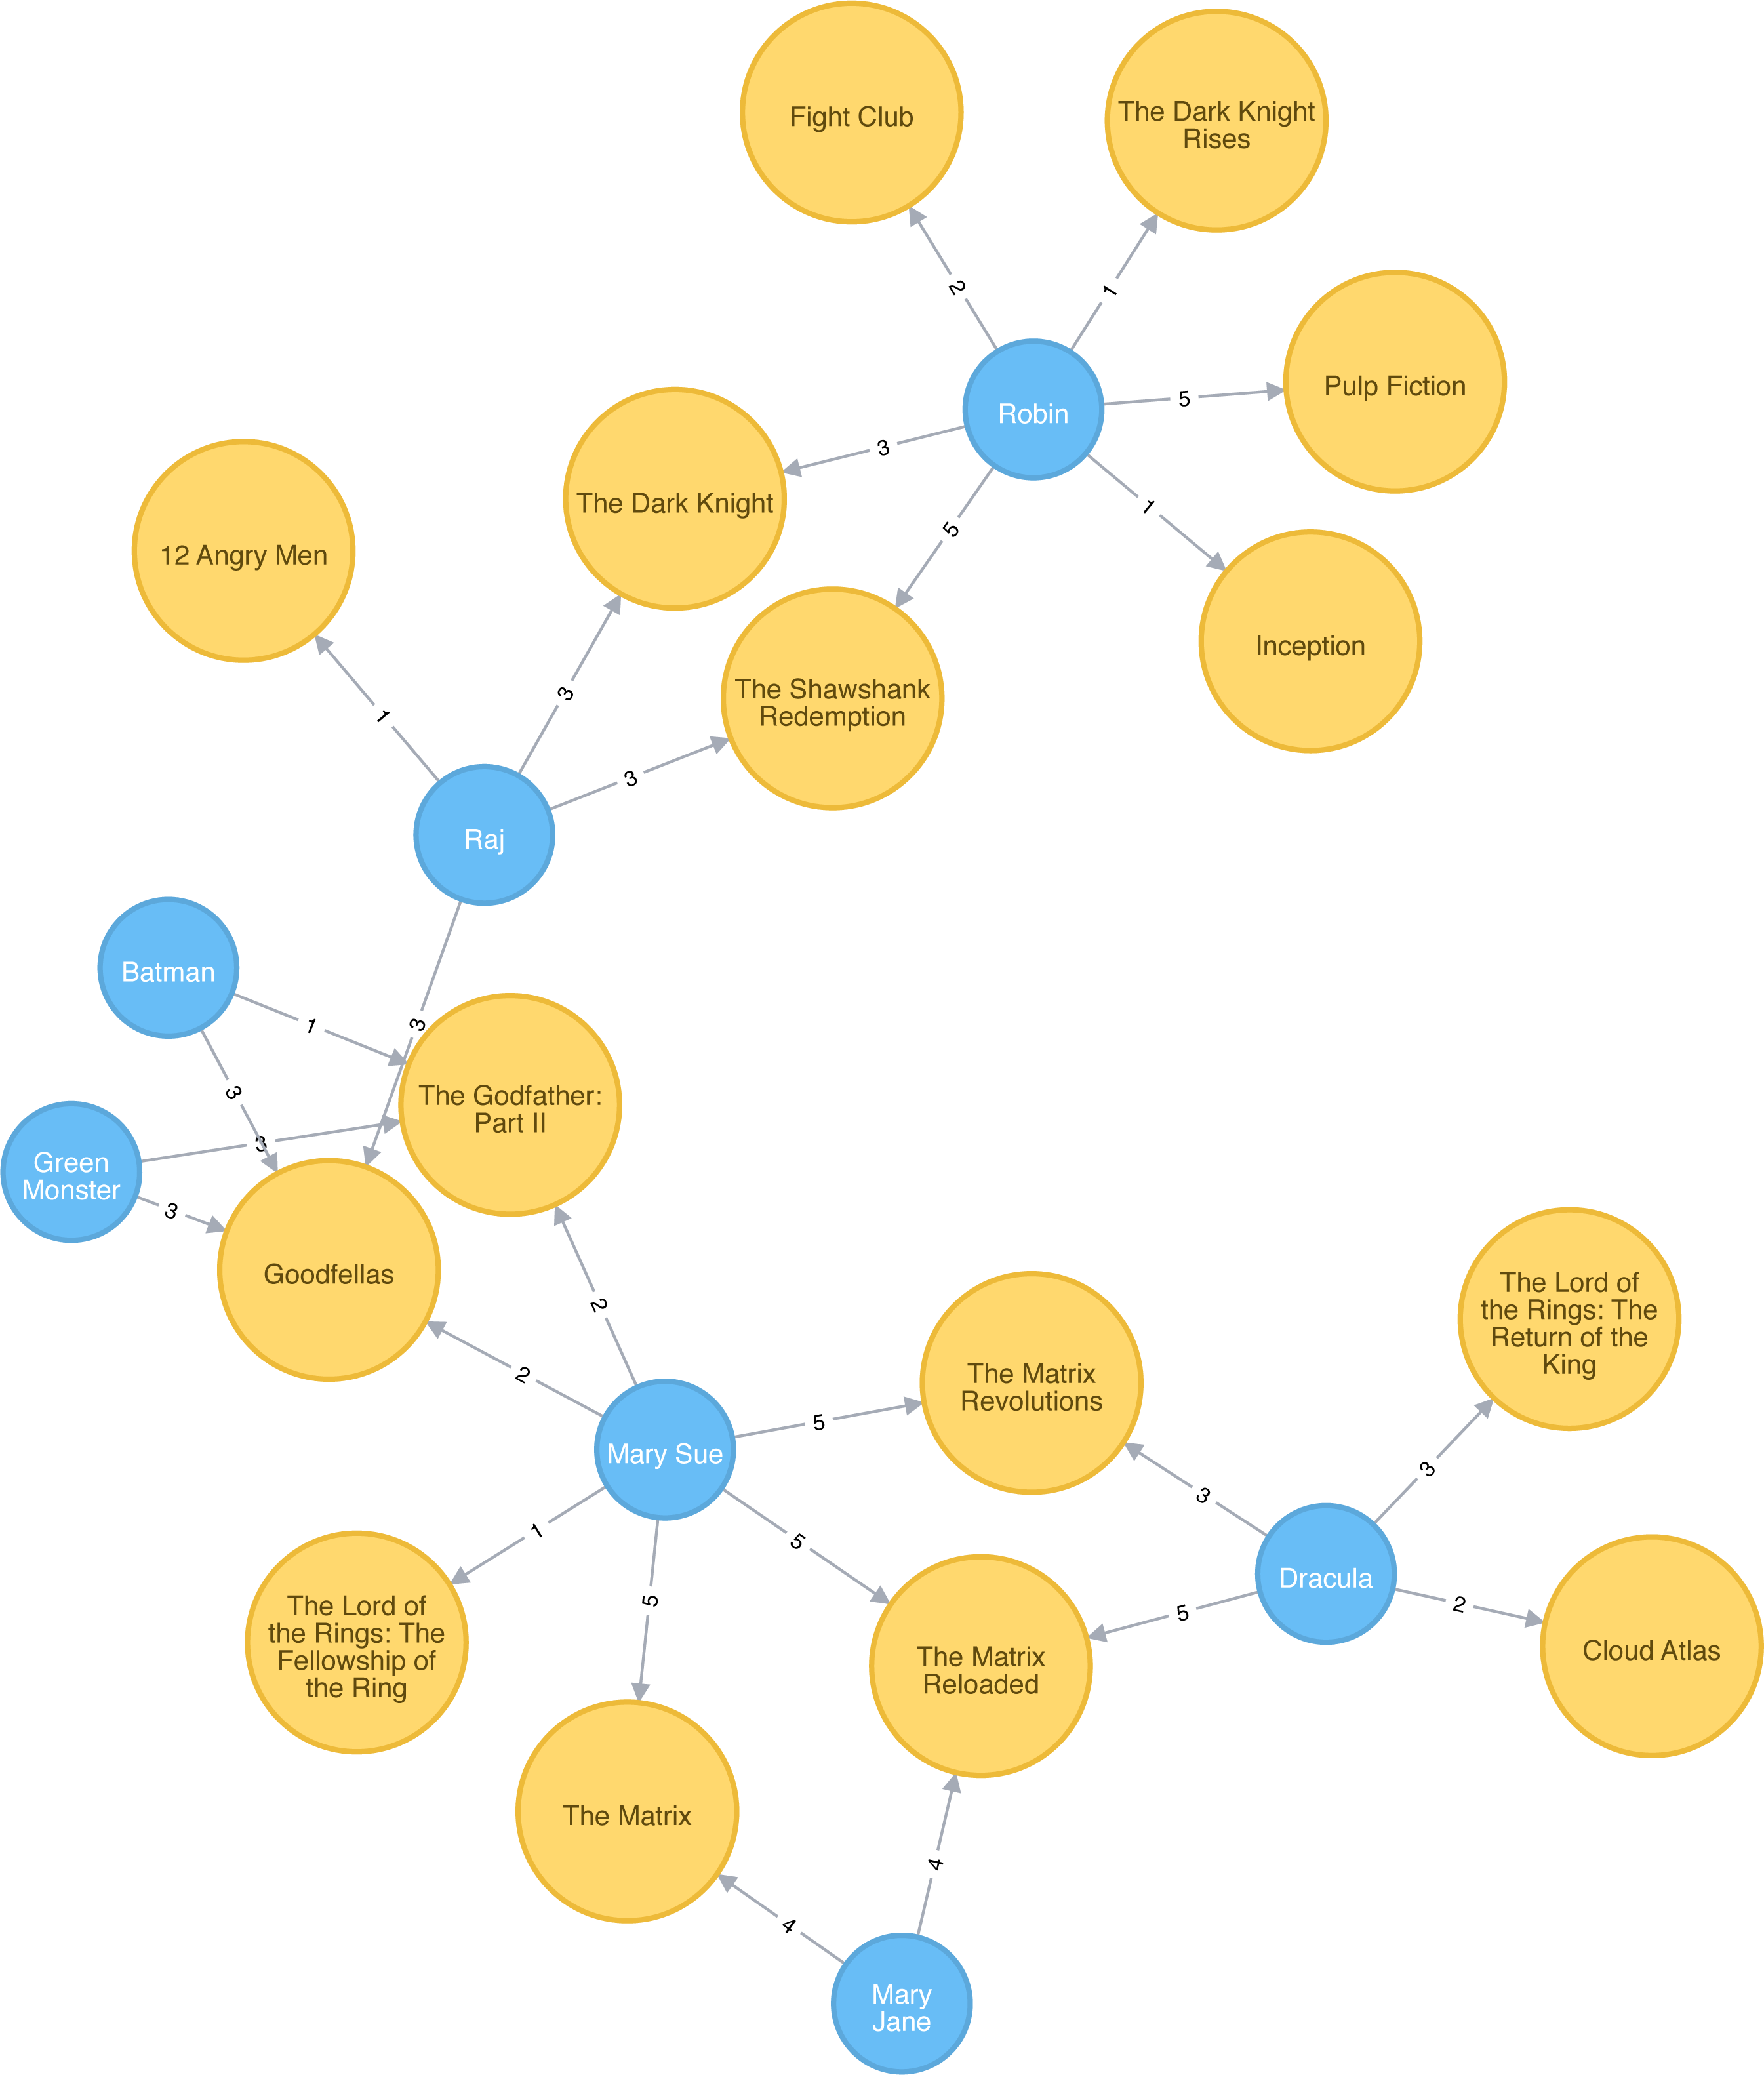
Aside from creating themselves and authenticating with the app, Users (blue) can rate Movies (yellow) with the :RATED relationship, illustrated below.
User Properties
password: The hashed version of the user’s chosen passwordapi_key: The user’s API key, which the user uses to authenticate requestsid: The user’s unique IDusername: The user’s chosen username
:RATED Properties
rating: an integer rating between 1 and 5, with 5 being love it and 1 being hate it.
Users Can Create Accounts
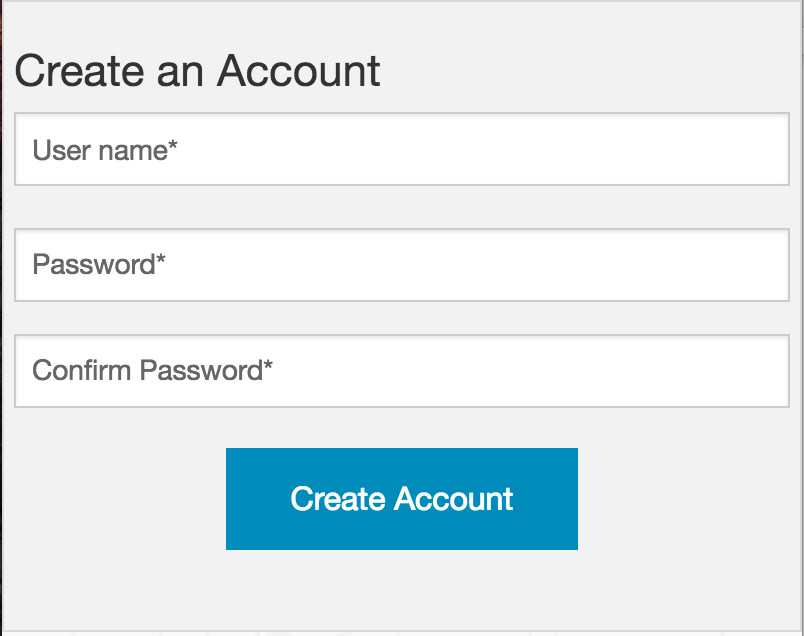
Before a User can rate a Movie, the the user has to exist, i.e., someone has to sign up for an account. Sign up will create a node in the database with a User label along with the properties necessary for logging in and maintaining a session.
Figure 1. web/src/pages/Signup.jsx
The registration endpoint is located at /api/v0/register. The app submits a request to the register endpoint when a user fills out the “Create an Account” form and taps “Create Account”.
Assuming you have the API running, you can test requests either by using the interactive docs at 3000/docs/ or by using cURL.
Use Case: Create a New User
Request
curl -X POST --header 'Content-Type: application/json'
             --header 'Accept: application/json' -d
                      '{ "username": "Mary Jane", "password": "SuperPassword"}'
                      'https://localhost:5000/api/v0/register'
Response
{
   "id":"e1e157a2-1fb5-416a-b819-eb75c480dfc6",
   "username":"Mary333 Jane",
   "avatar":{
      "full_size":"https://www.gravatar.com/avatar/b2a02..."
   }
}
Use Case: Try to Create a New User but Username is Already Taken
Request
curl -X POST --header 'Content-Type: application/json'
             --header 'Accept: application/json' -d
                      '{ "username": "Mary Jane", "password": "SuperPassword"}'
                      'https://localhost:5000/api/v0/register'
Response
{
   "username":"username already in use"
}
User registration logic is implemented in /flask-api/app.py as described below:
class Register(Resource):
    @swagger.doc({
        'tags': ['users'],
        'summary': 'Register a new user',
        'description': 'Register a new user',
        'parameters': [
            {
                'name': 'body',
                'in': 'body',
                'schema': {
                    'type': 'object',
                    'properties': {
                        'username': {
                            'type': 'string',
                        },
                        'password': {
                            'type': 'string',
                        }
                    }
                }
            },
        ],
        'responses': {
            '201': {
                'description': 'Your new user',
                'schema': UserModel,
            },
            '400': {
                'description': 'Error message(s)',
            },
        }
    })
    def post(self):
        data = request.get_json()
        username = data.get('username')
        password = data.get('password')
        if not username:
            return {'username': 'This field is required.'}, 400
        if not password:
            return {'password': 'This field is required.'}, 400

        db = get_db()

        results = db.run(
            '''
            MATCH (user:User {username: {username}}) RETURN user
            ''', {'username': username}
        )
        try:
            results.single()
        except ResultError:
            pass
        else:
            return {'username': 'username already in use'}, 400

        results = db.run(
            '''
            CREATE (user:User {id: {id}, username: {username},
                               password: {password},
                               api_key: {api_key}}) RETURN user
            ''',
            {
                'id': str(uuid.uuid4()),
                'username': username,
                'password': hash_password(username, password),
                'api_key': binascii.hexlify(os.urandom(20)).decode()
            }
        )
        user = results.single()['user']
        return serialize_user(user), 201
Users Can Log In
Now that users are able to register for an account, we can define the view that allows them to login to the site and start a session.
Figure 2. /web/src/pages/Login.jsx
The registration endpoint is located at /api/v0/login. The app submits a request to the login endpoint when a user fills a username and password and taps “Create Account”.
Assuming you have the API running, you can test requests either by using the interactive docs at 5000/docs/ or by using cURL.
Use Case: Login
Request
curl -X POST --header 'Content-Type: application/json'
             --header 'Accept: application/json' -d
                      '{"username": "Mary Jane", "password": "SuperPassword"}'
                      'https://localhost:5000/api/v0/login'
Response
{
  "token":"5a85862fb28a316ea6a1"
}
Use Case: Wrong Password
Request
curl -X POST --header 'Content-Type: application/json'
             --header 'Accept: application/json' -d
                      '{ "username": "Mary Jane", "password": "SuperPassword"}'
                      'https://localhost:5000/api/v0/register'
Response
{
   "username":"username already in use"
}
See Myself
Request
curl -X GET --header 'Accept: application/json'
            --header 'Authorization: Token 5a85862fb28a316ea6a1'
                     'https://localhost:5000/api/v0/users/me'
Response
{
  "id": "94a604f7-3eab-4f28-88ab-12704c228936",
  "username": "Mary Jane",
  "avatar": {
    "full_size": "https://www.gravatar.com/avatar/c2eab..."
  }
}
The code here is similar to that of /register. There is a similar form to fill out, where a user types in their username and password.
With the given username, a User is initialized. The password they filled out in the form is verified against the hashed password that was retrieved from the corresponding :User node in the database.
If the verification is successful, it will return a token. The user is then directed to an authentication page, from which they can navigate through the app, view their user profile and rate movies. Below is a rather empty user profile for a freshly created user:
Figure 3. /web/src/pages/Profile.jsx
Users Can Rate Movies
Once a user has logged in and navigated to a page that displays movies, the user can select a star rating for the movie or remove the rating of a movie he or she has already rated.
The user should be able to access their previous ratings (and the movies that were rated) both on their user profile and the movie detail page in question.
Use Case: Rate a Movie
Request
curl -X POST --header 'Content-Type: application/json'
             --header 'Accept: application/json'
             --header 'Authorization: Token 5a85862fb28a316ea6a1' -d
                      '{"rating":4}'
                      'https://localhost:5000/api/v0/movies/683/rate'
Response
{}
Python Implementation
class RateMovie(Resource):
    @login_required
    def post(self, id):
        parser = reqparse.RequestParser()
        parser.add_argument('rating', choices=list(range(0, 6)),
                            type=int, required=True,
                            help='A rating from 0 - 5 inclusive (integers)')
        args = parser.parse_args()
        rating = args['rating']

        db = get_db()
        results = db.run(
            '''
            MATCH (u:User {id: {user_id}}),(m:Movie {id: {movie_id}})
            MERGE (u)-[r:RATED]->(m)
            SET r.rating = {rating}
            RETURN m
            ''', {'user_id': g.user['id'], 'movie_id': id, 'rating': rating}
        )
        return {}

    @login_required
    def delete(self, id):
        db = get_db()
        db.run(
            '''
            MATCH (u:User {id: {user_id}})
                          -[r:RATED]->(m:Movie {id: {movie_id}}) DELETE r
            ''', {'movie_id': id, 'user_id': g.user['id']}
        )
        return {}, 204
Use Case: See All of My Ratings
Request
curl -X GET --header 'Accept: application/json'
            --header 'Authorization: Token 5a85862fb28a316ea6a1'
                     'https://localhost:5000/api/v0/movies/rated'
Response
[
  {
    "summary": "Six months after the events depicted in The Matrix, ...",
    "duration": 138,
    "rated": "R",
    "tagline": "Free your mind.",
    "id": 28,
    "title": "The Matrix Reloaded",
    "poster_image": "https://image.tmdb.org/t/p/w185/ezIur....jpg",
    "my_rating": 4
  },
  {
    "summary": "Thomas A. Anderson is a man living two lives....",
    "duration": 136,
    "rated": "R",
    "tagline": "Welcome to the Real World.",
    "id": 1,
    "title": "The Matrix",
    "poster_image": "https://image.tmdb.org/t/p/w185/gyn....jpg",
    "my_rating": 4
  }
]
Python Implementation
class MovieListRatedByMe(Resource):
    @login_required
    def get(self):
        db = get_db()
        result = db.run(
            '''
            MATCH (:User {id: {user_id}})-[rated:RATED]->(movie:Movie)
            RETURN DISTINCT movie, rated.rating as my_rating
            ''', {'user_id': g.user['id']}
        )
        return [serialize_movie(record['movie'],
        record['my_rating']) for record in result]

...

def serialize_movie(movie, my_rating=None):
    return {
        'id': movie['id'],
        'title': movie['title'],
        'summary': movie['summary'],
        'released': movie['released'],
        'duration': movie['duration'],
        'rated': movie['rated'],
        'tagline': movie['tagline'],
        'poster_image': movie['poster_image'],
        'my_rating': my_rating,
    }
Next Steps
- Fork the repo and hack away! Find directors that work with multiple genres, or find people who happen to work with each other often as writer-director pairs.
- Find a way to improve the template or the Python driver? Create a GitHub Issue and/or submit a pull request.
Resources
Found a Bug? Got Stuck?
- The neo4j-users #help channel will be happy to assist you.
- Make a GitHub issue on the driver or app repos.


