How to configure Neo4j Aura with AWS PrivateLink

Sr. Director, Partner Architecture, Neo4j
7 min read
Neo4j has achieved full compatibility with AWS PrivateLink, earning AWS PrivateLink Service Ready status. This means AWS has validated our technical work and verified that customers are successfully using the Neo4j Aura–PrivateLink integration.
AWS PrivateLink allows organizations to securely access AWS services within a virtual private cloud (VPC), giving them greater control over their data and mitigating the security risks associated with exposing data to the public internet.
In this post, we’ll walk through the setup of AWS PrivateLink with a Neo4j AuraDS Enterprise deployment running on AWS. Note that this integration is offered exclusively on the Enterprise tier of Neo4j Aura — it’s not available on Aura Free or Aura Pro.
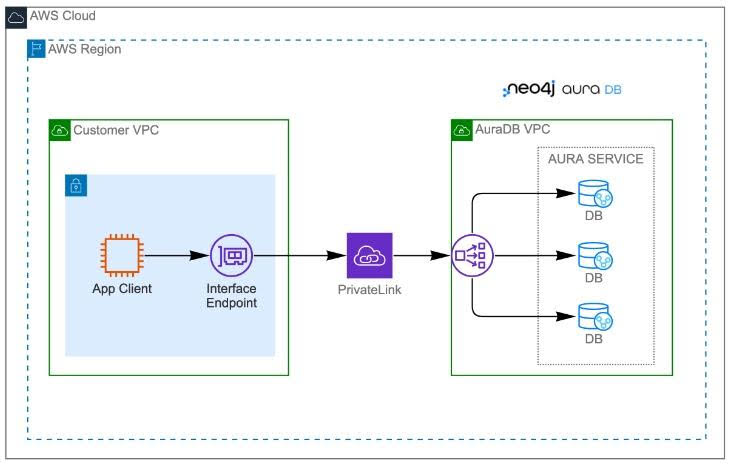
Before we start, here’s a look at the architecture of the deployment:
And here are the six steps we’ll walk through:
- Set Up a Neo4j Aura Instance
- Set Up Neo4j Network Access Configuration and AWS Endpoint
- Test the Network Configuration
- Connect to Neo4j Aura Using the Python API
- Connect to Neo4j Browser
- Connect to Neo4j Bloom
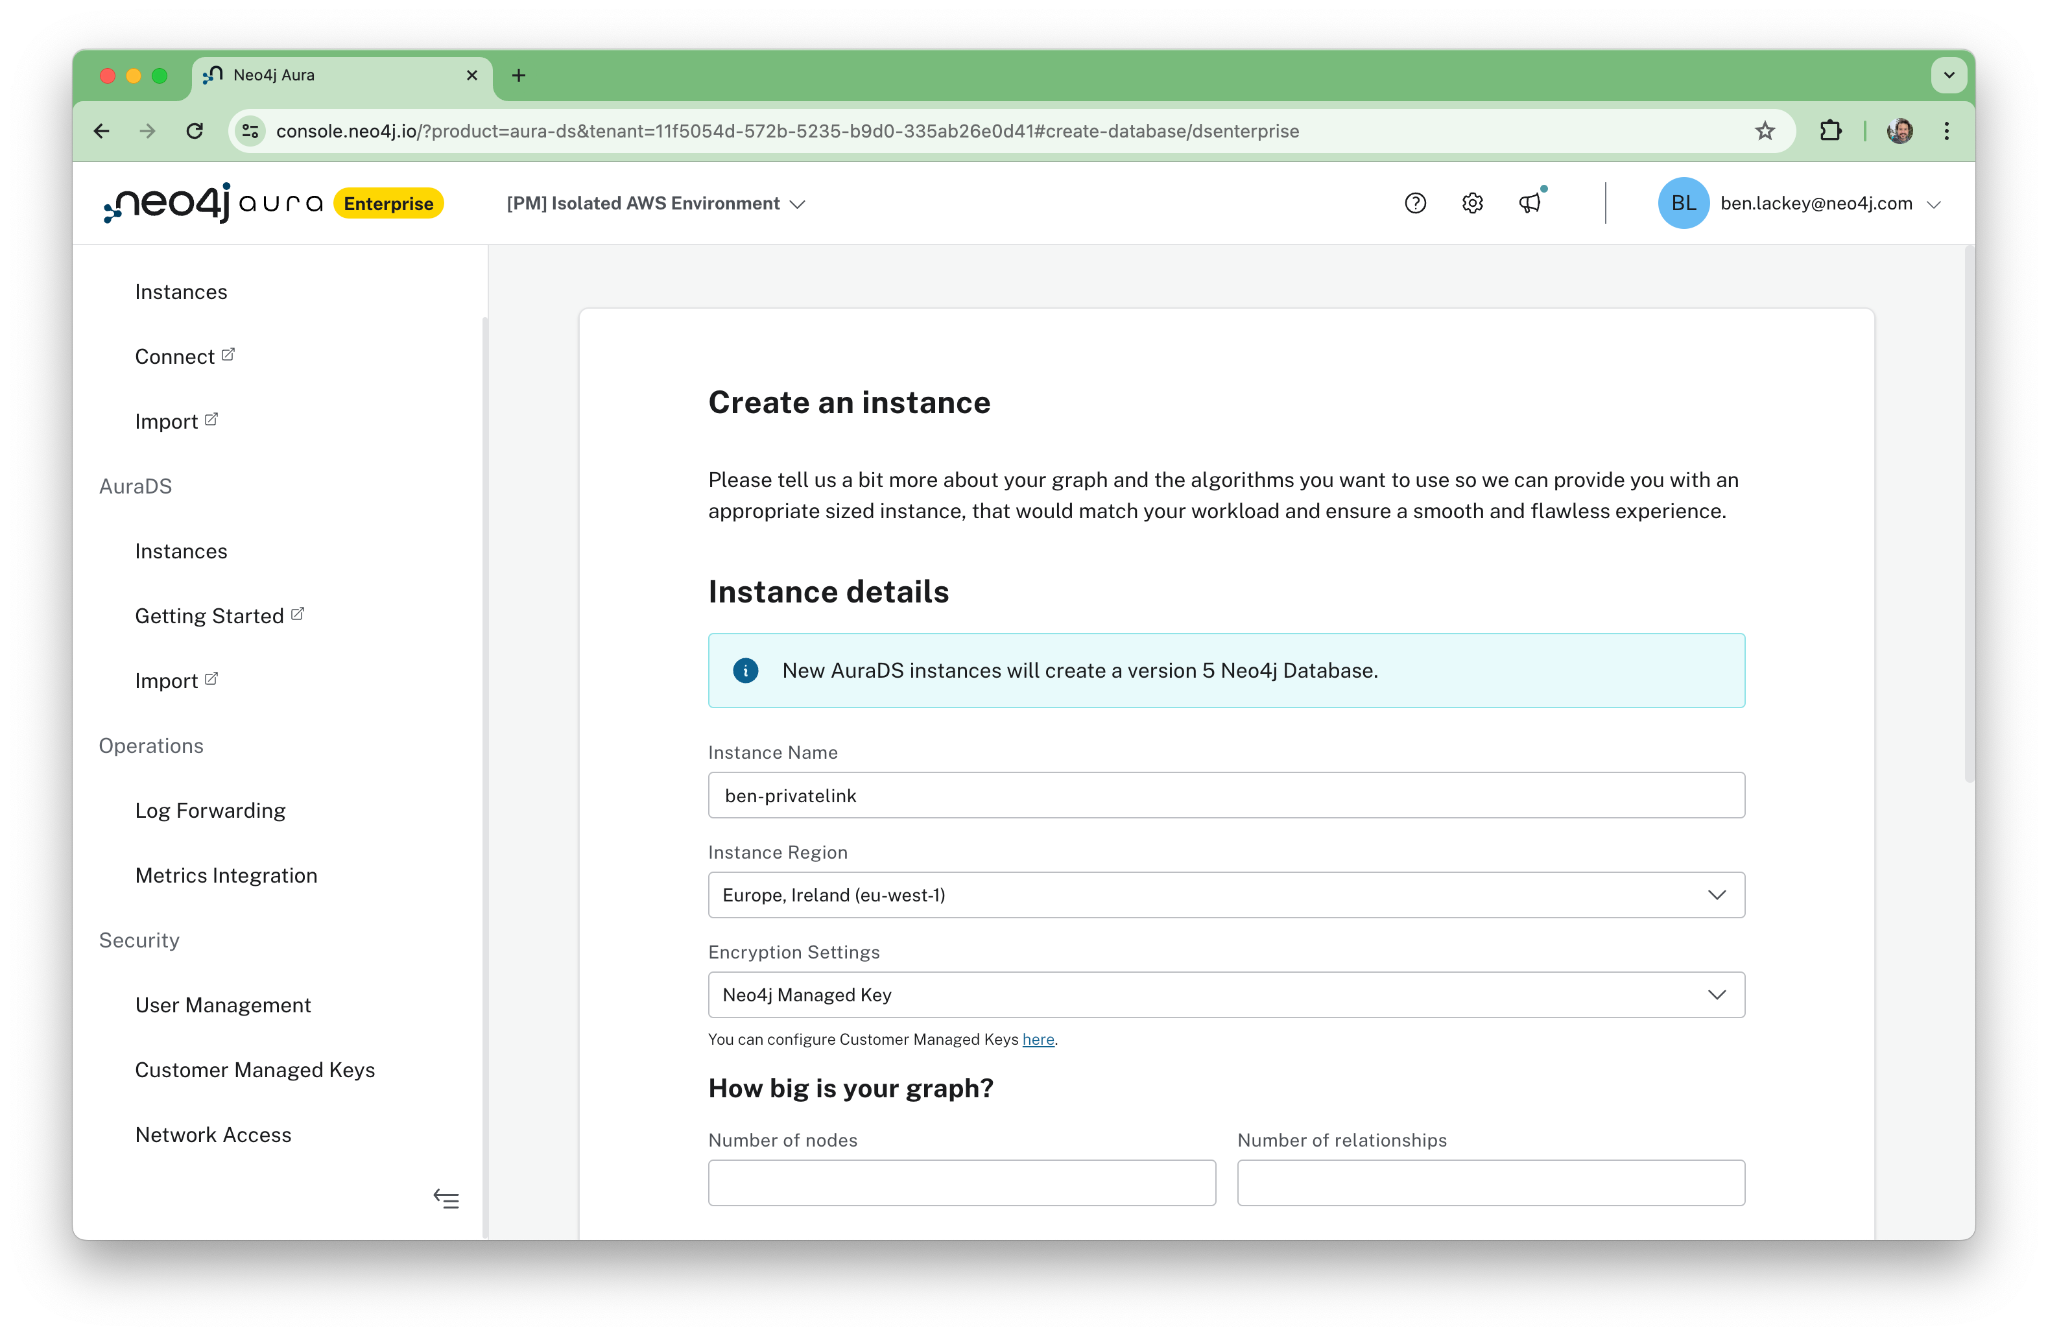
1. Set up a Neo4j Aura instance
OK, let’s get started! First, you’ll need to set up an Aura instance. To do so, log in to the Neo4j Aura Enterprise console. If you don’t have Neo4j Aura Enterprise, you can purchase it through the AWS Marketplace.
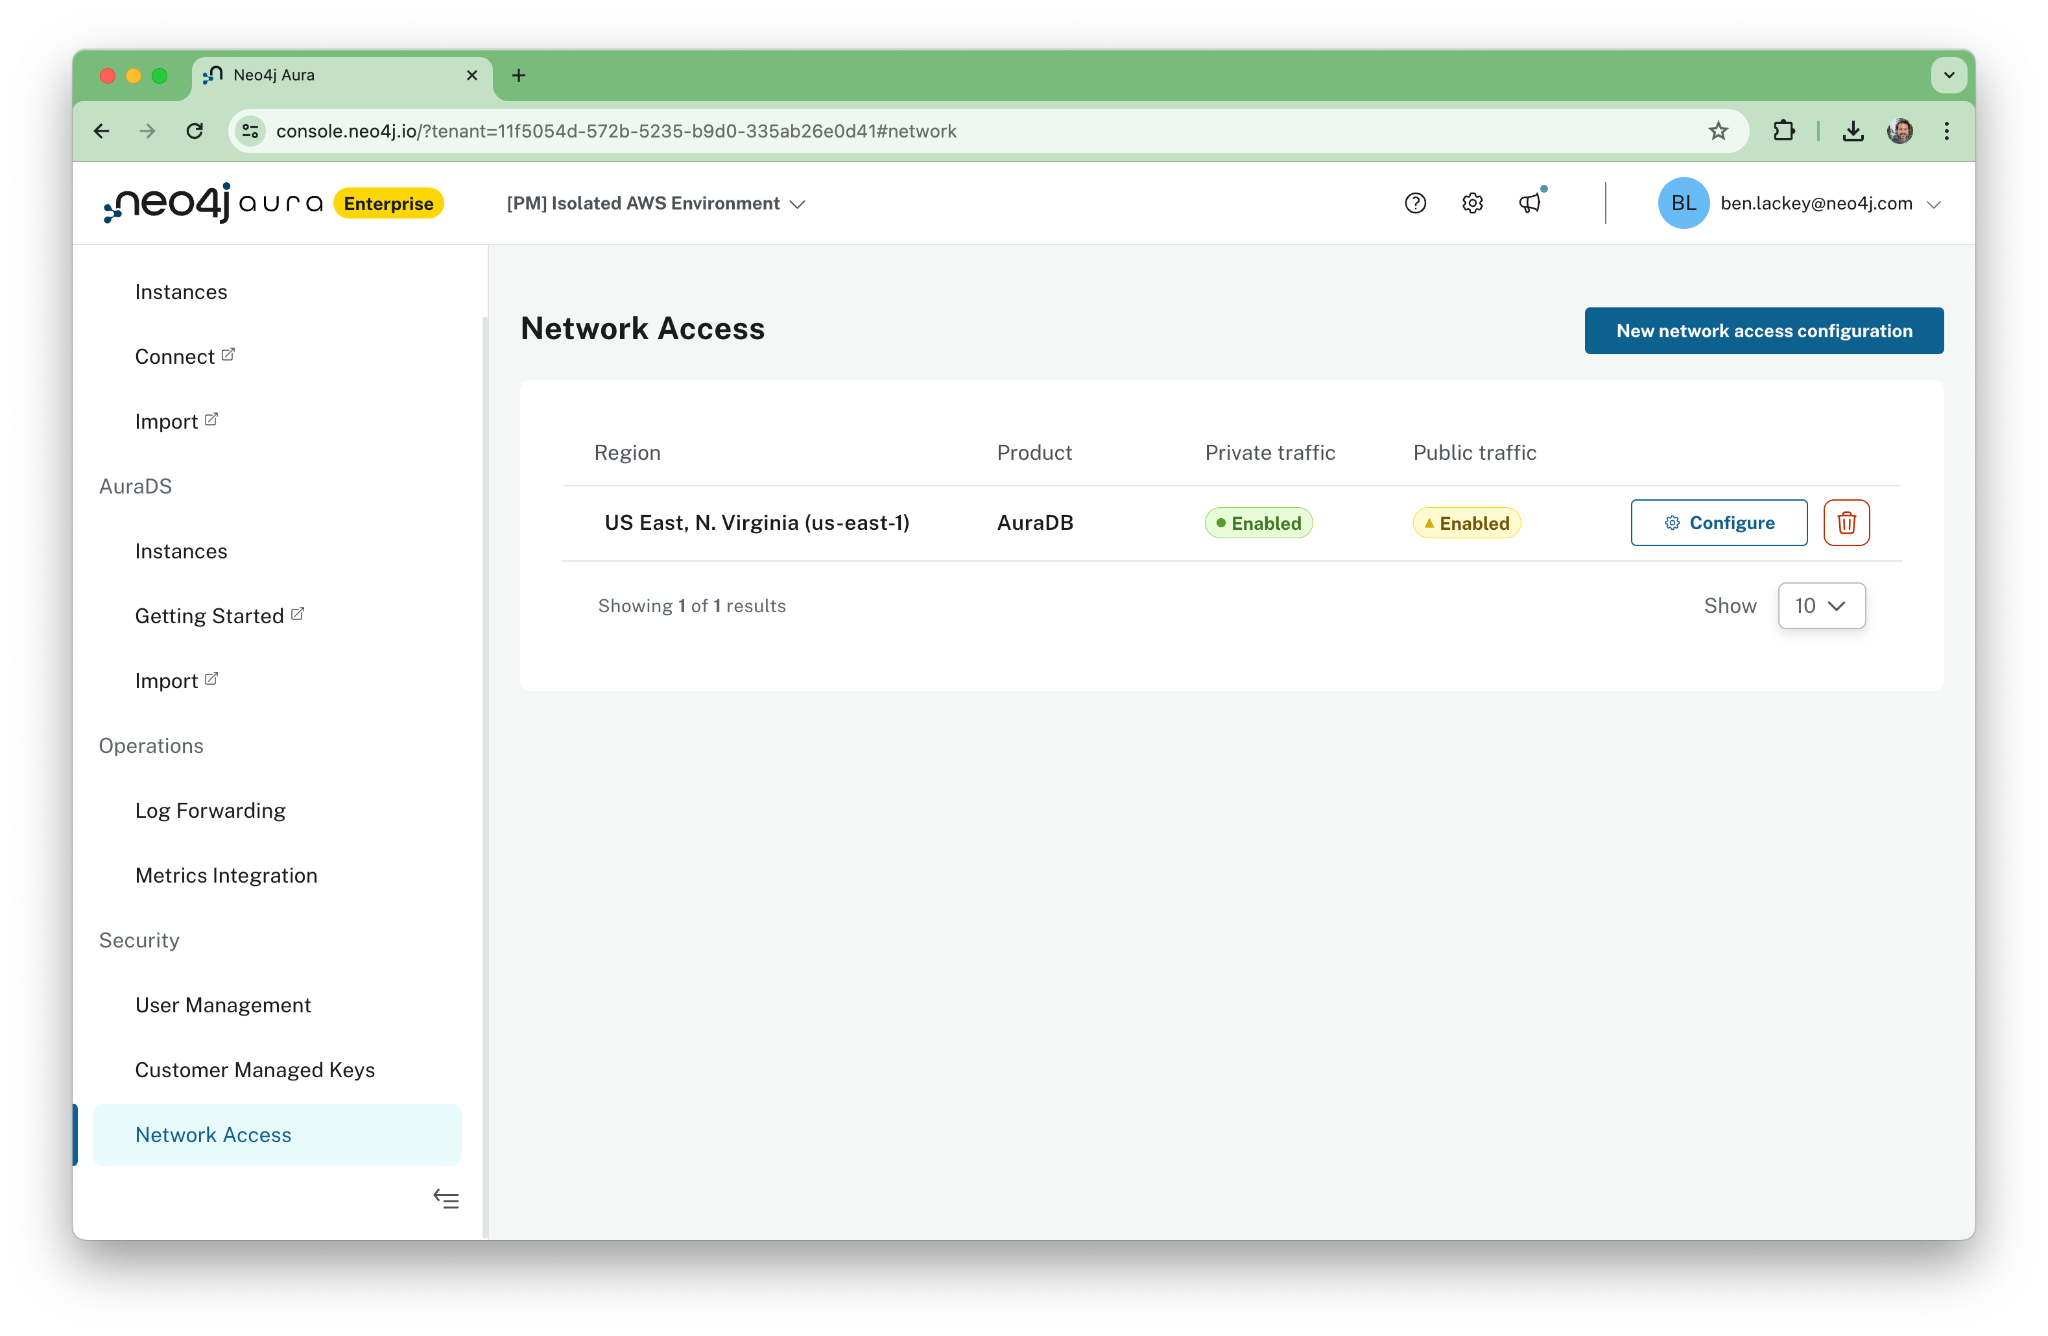
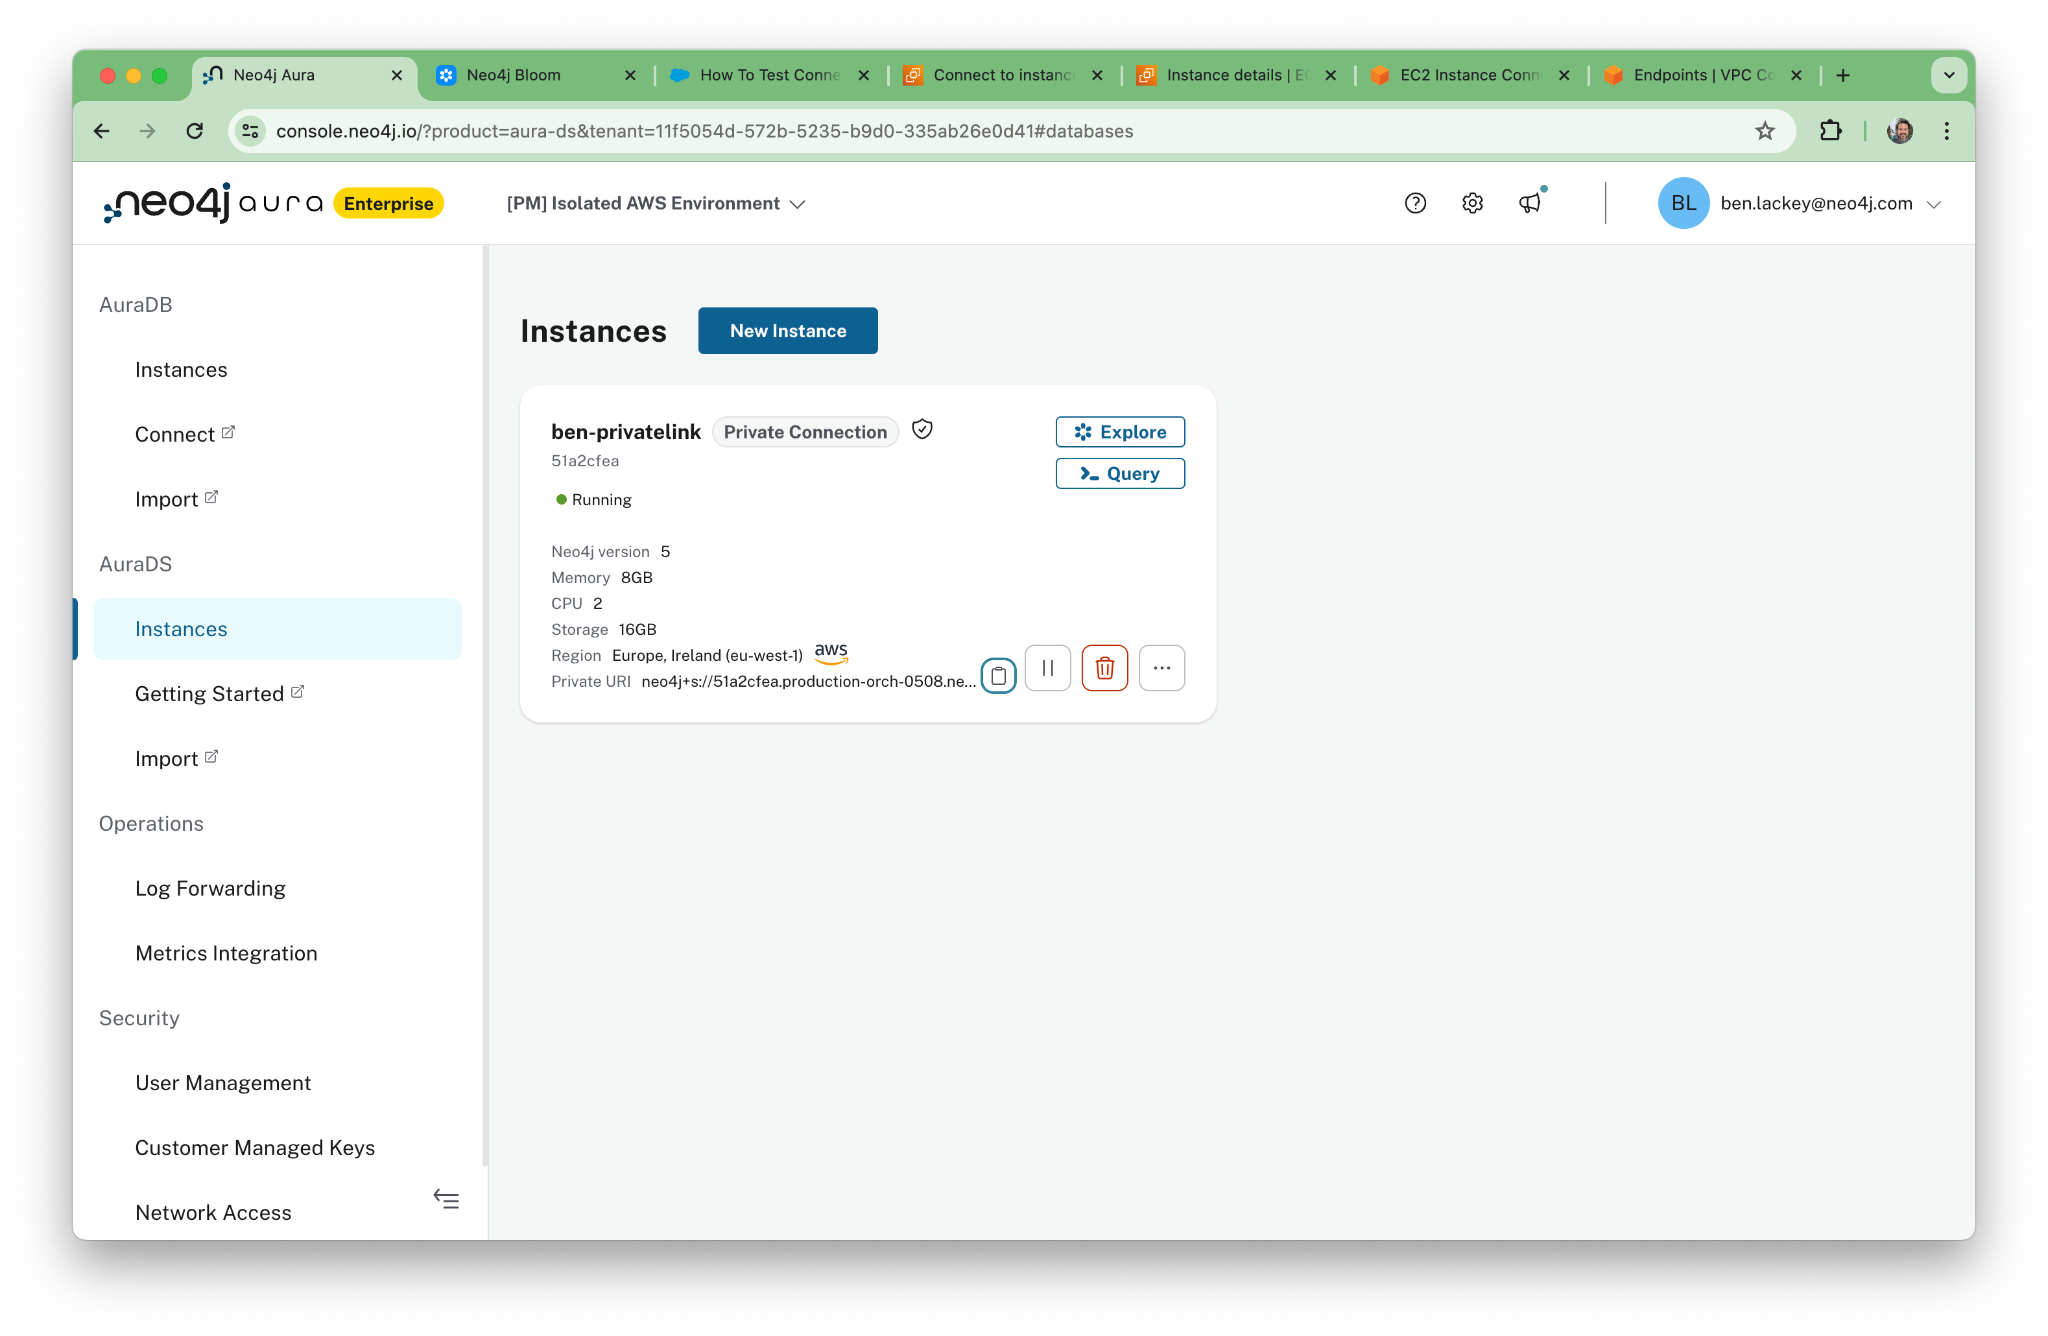
Once the instance is deployed, you will see its status as “Running” in the console. Note that we have deployed an AuraDS instance. This includes the Graph Data Science (GDS) interface. We’ll use that later when we write a brief Python program to interact with the cluster.
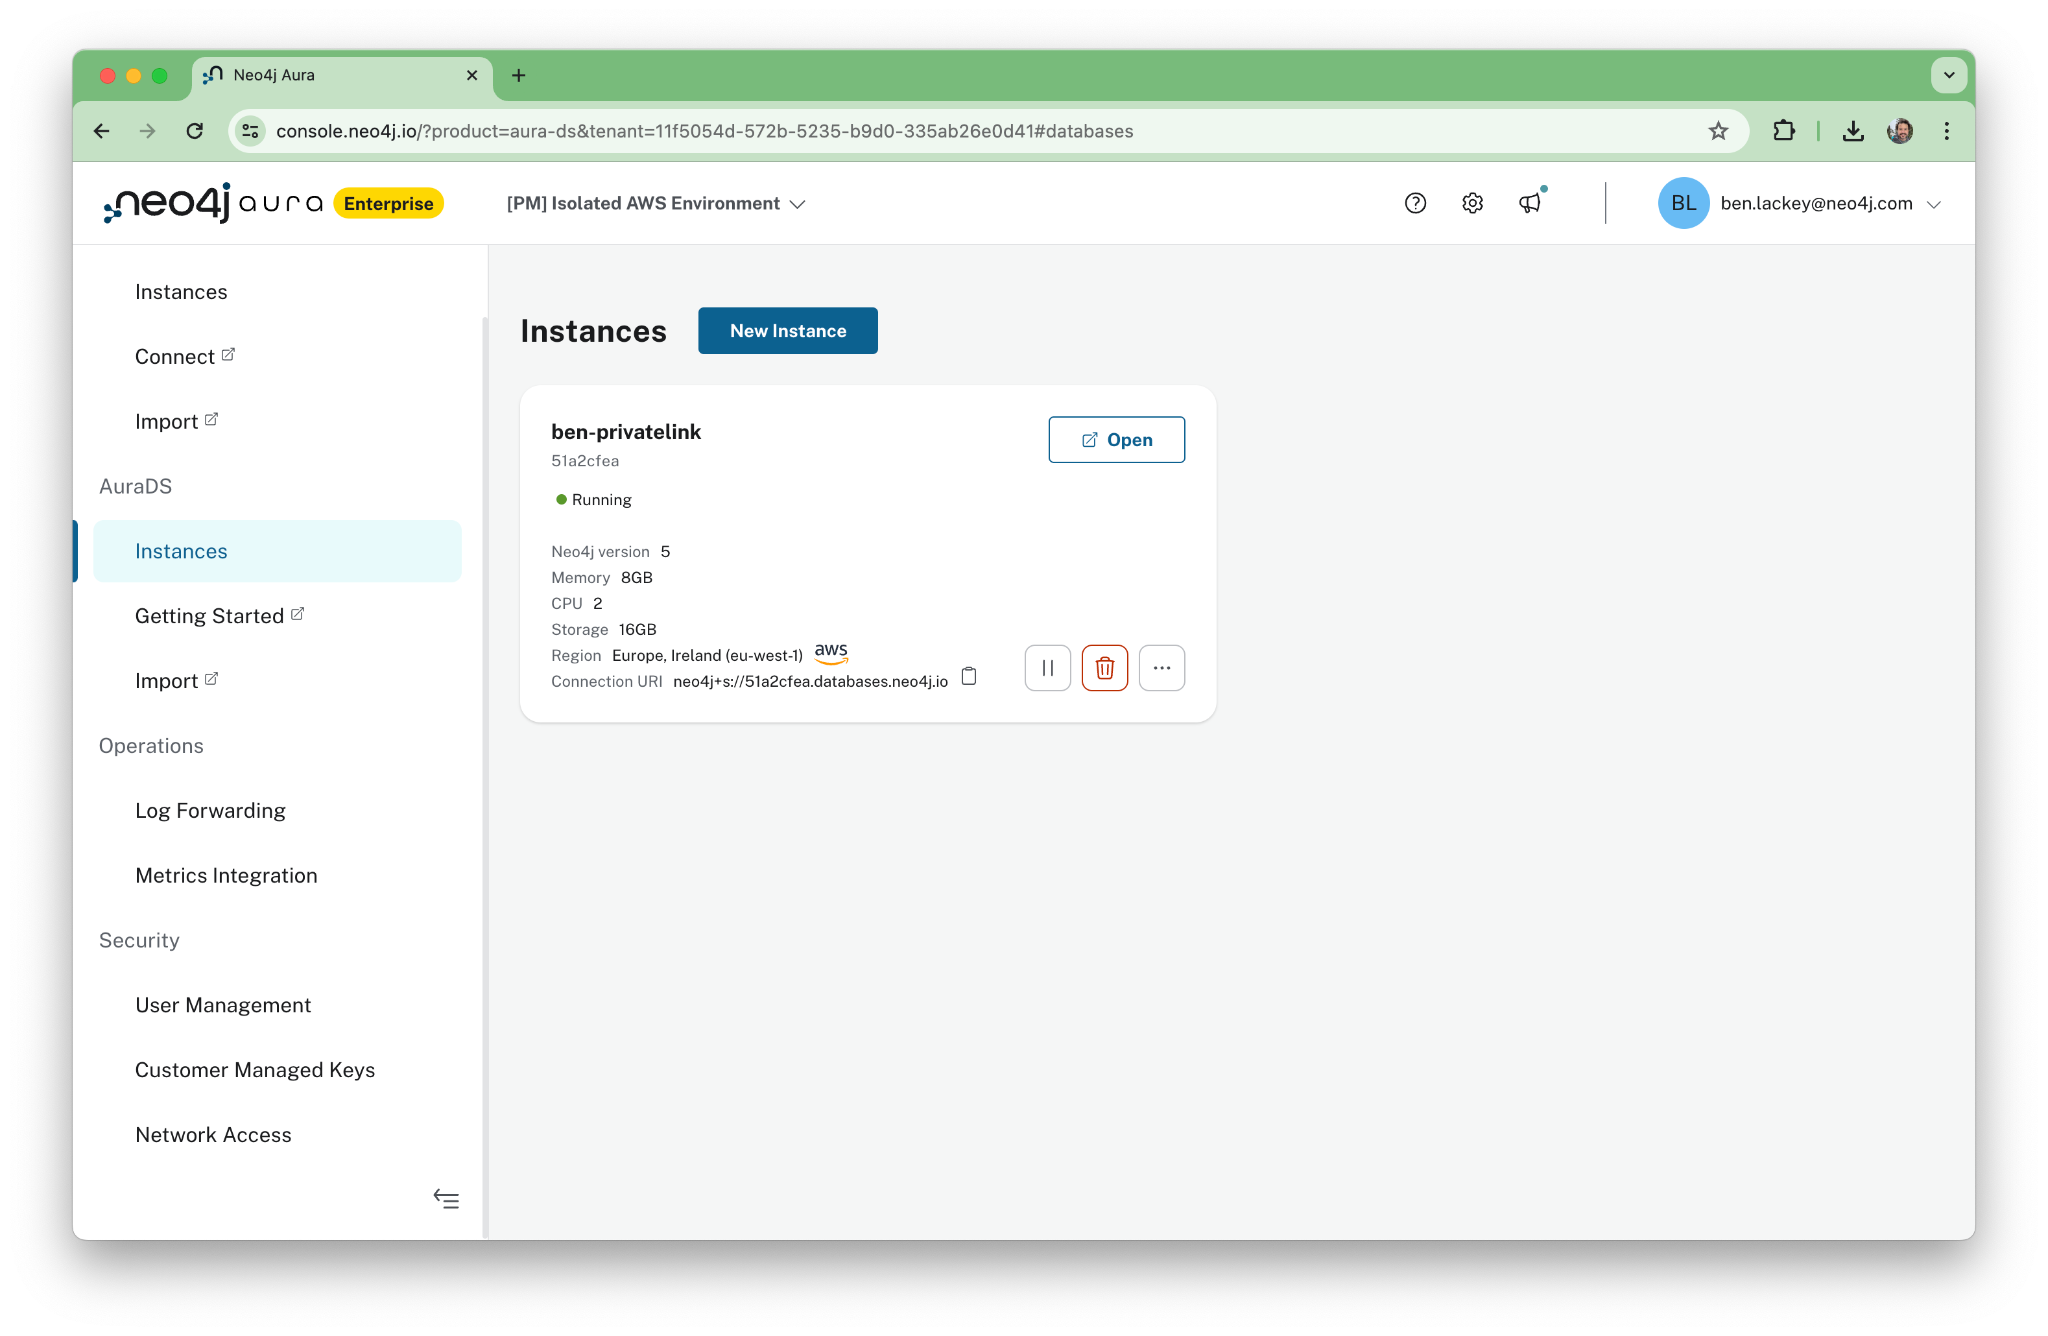
Also, note that the public URL in the password file you download during deployment will not work once PrivateLink is enabled and public access is turned off. You’ll need to use the private URL instead.
2. Set up Neo4j network access configuration and AWS endpoint
Now we can set up a new Network Access Configuration. This is an object in the Aura console. Click on “Network Access” under the security menu. Note that this menu will not be present in lower tiers of Aura or if users do not have admin access.
The configuration is both regional and specific to the product being used. In this case, we’re using AuraDS.
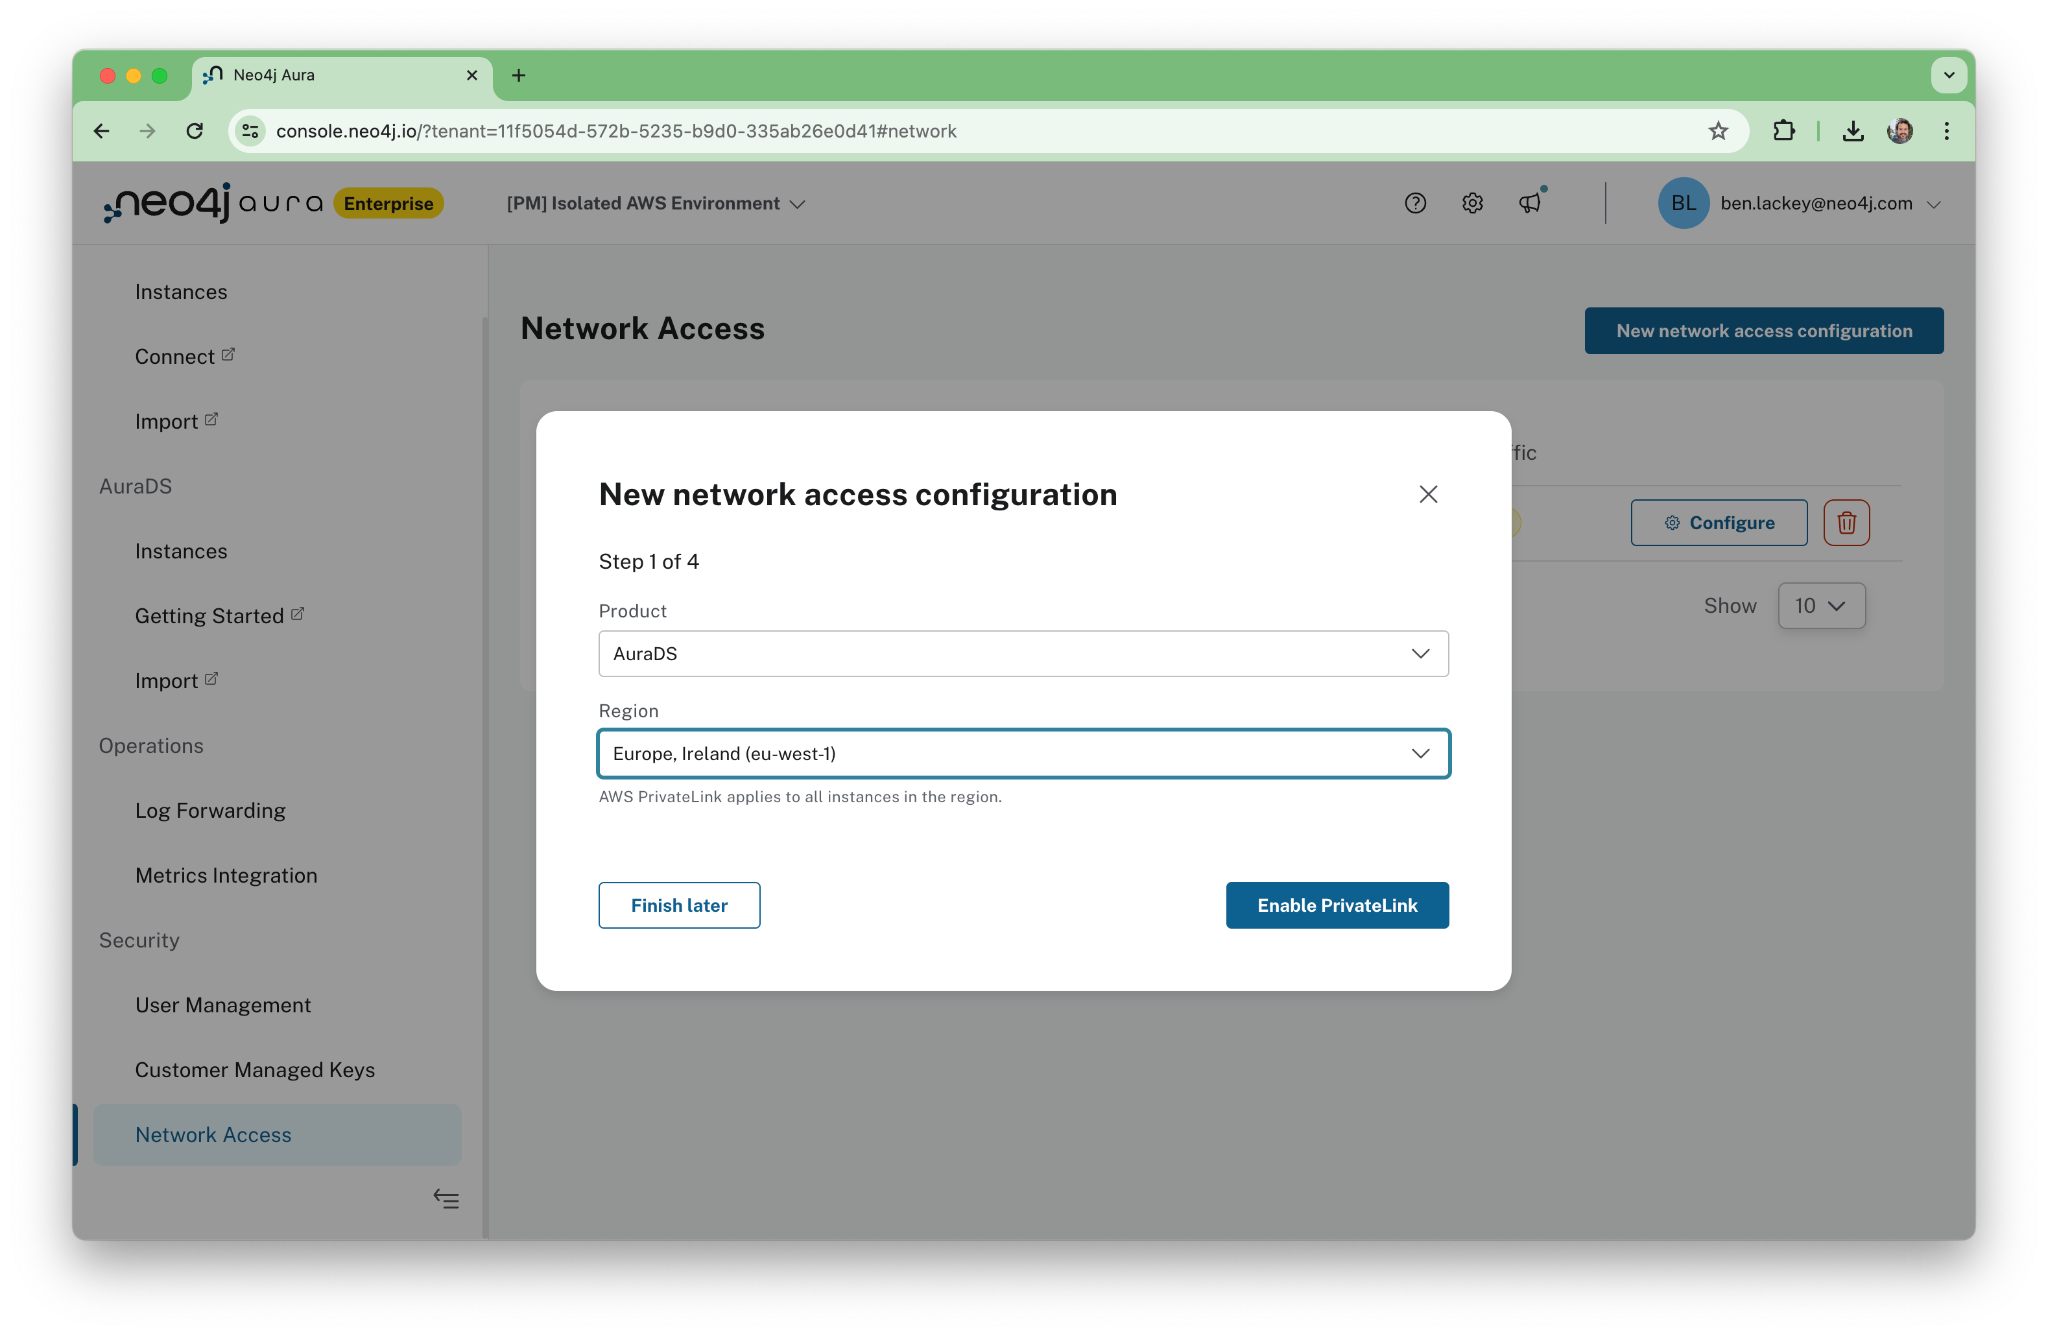
After we click through, the Aura console provides a nice walkthrough for PrivateLink setup. Once the automated configuration is complete, we’ll follow those steps.

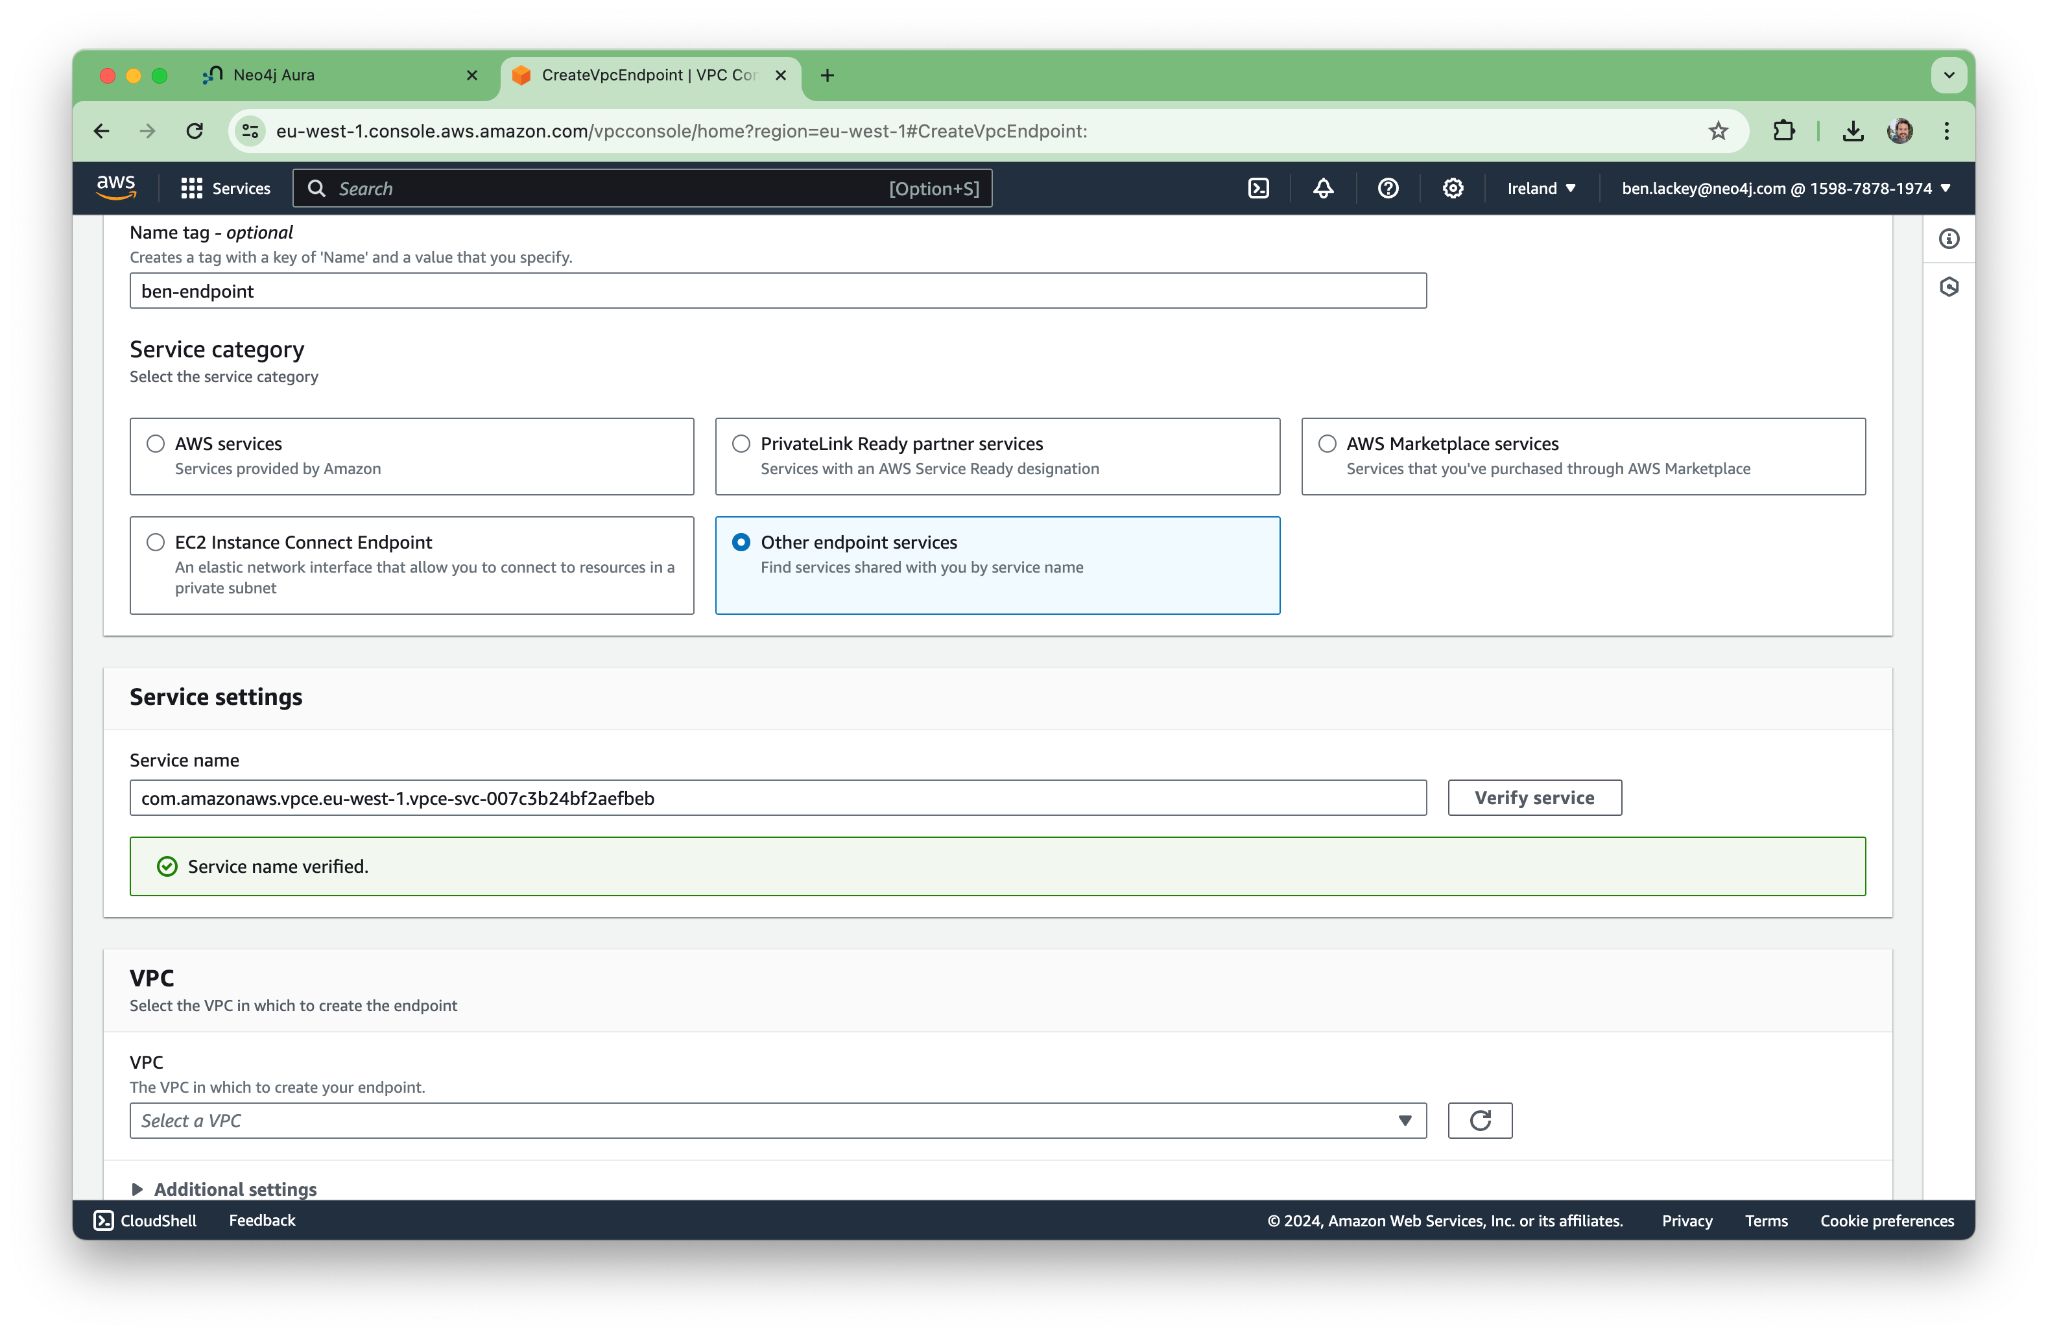
Next, go into the AWS console and create a new endpoint in your VPC. Be sure to enable private DNS for the endpoint! You’ll need it to resolve the names of the Aura endpoints later.
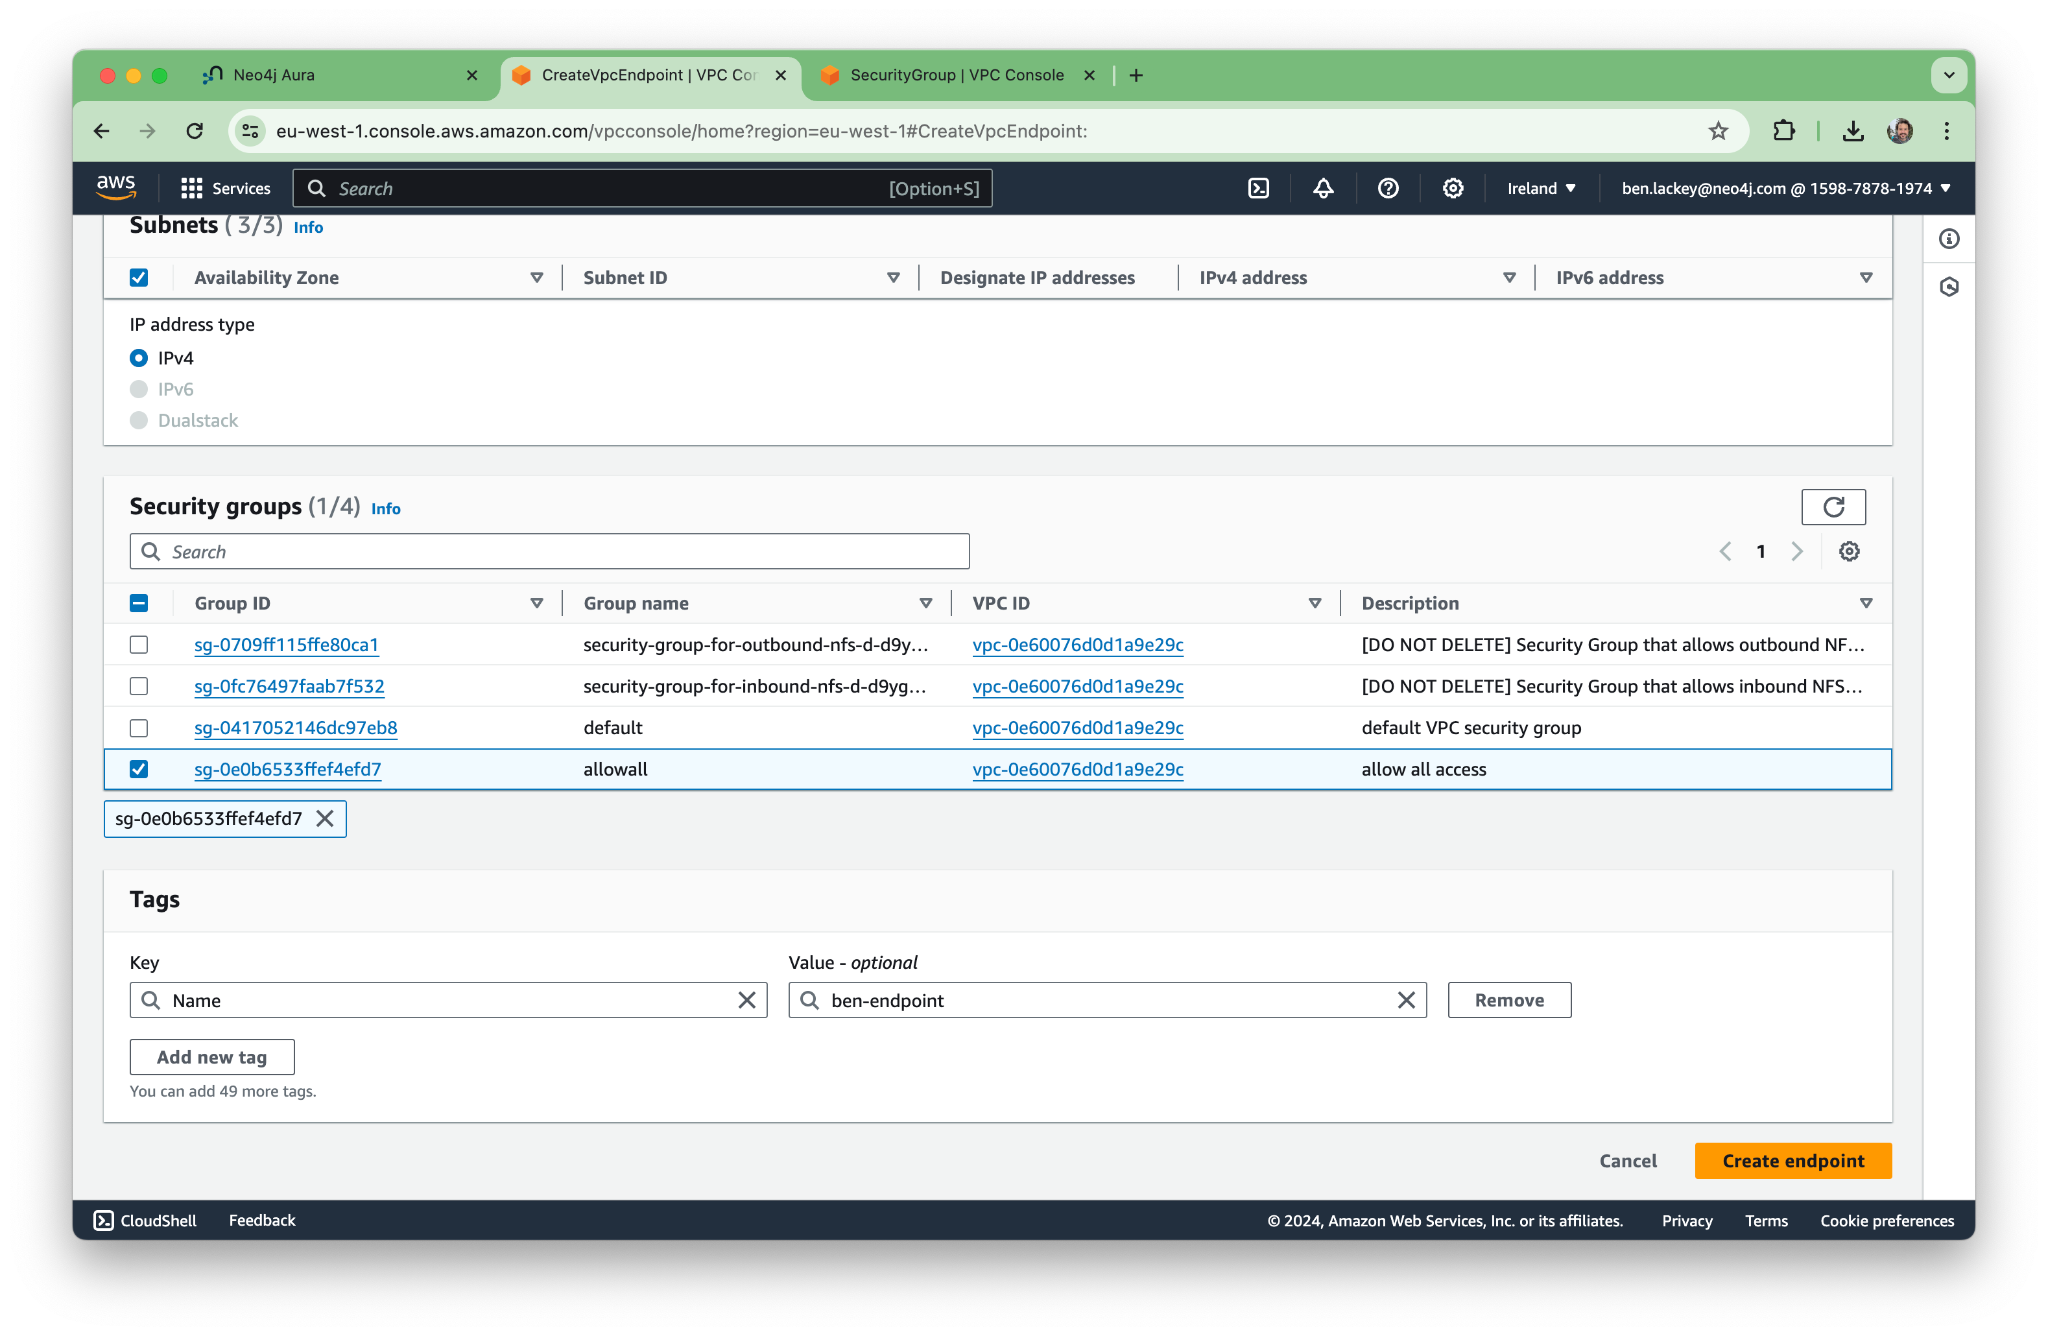
In this case, we’re creating a security group with extremely open permissions. You might want to lock yours down a bit more.
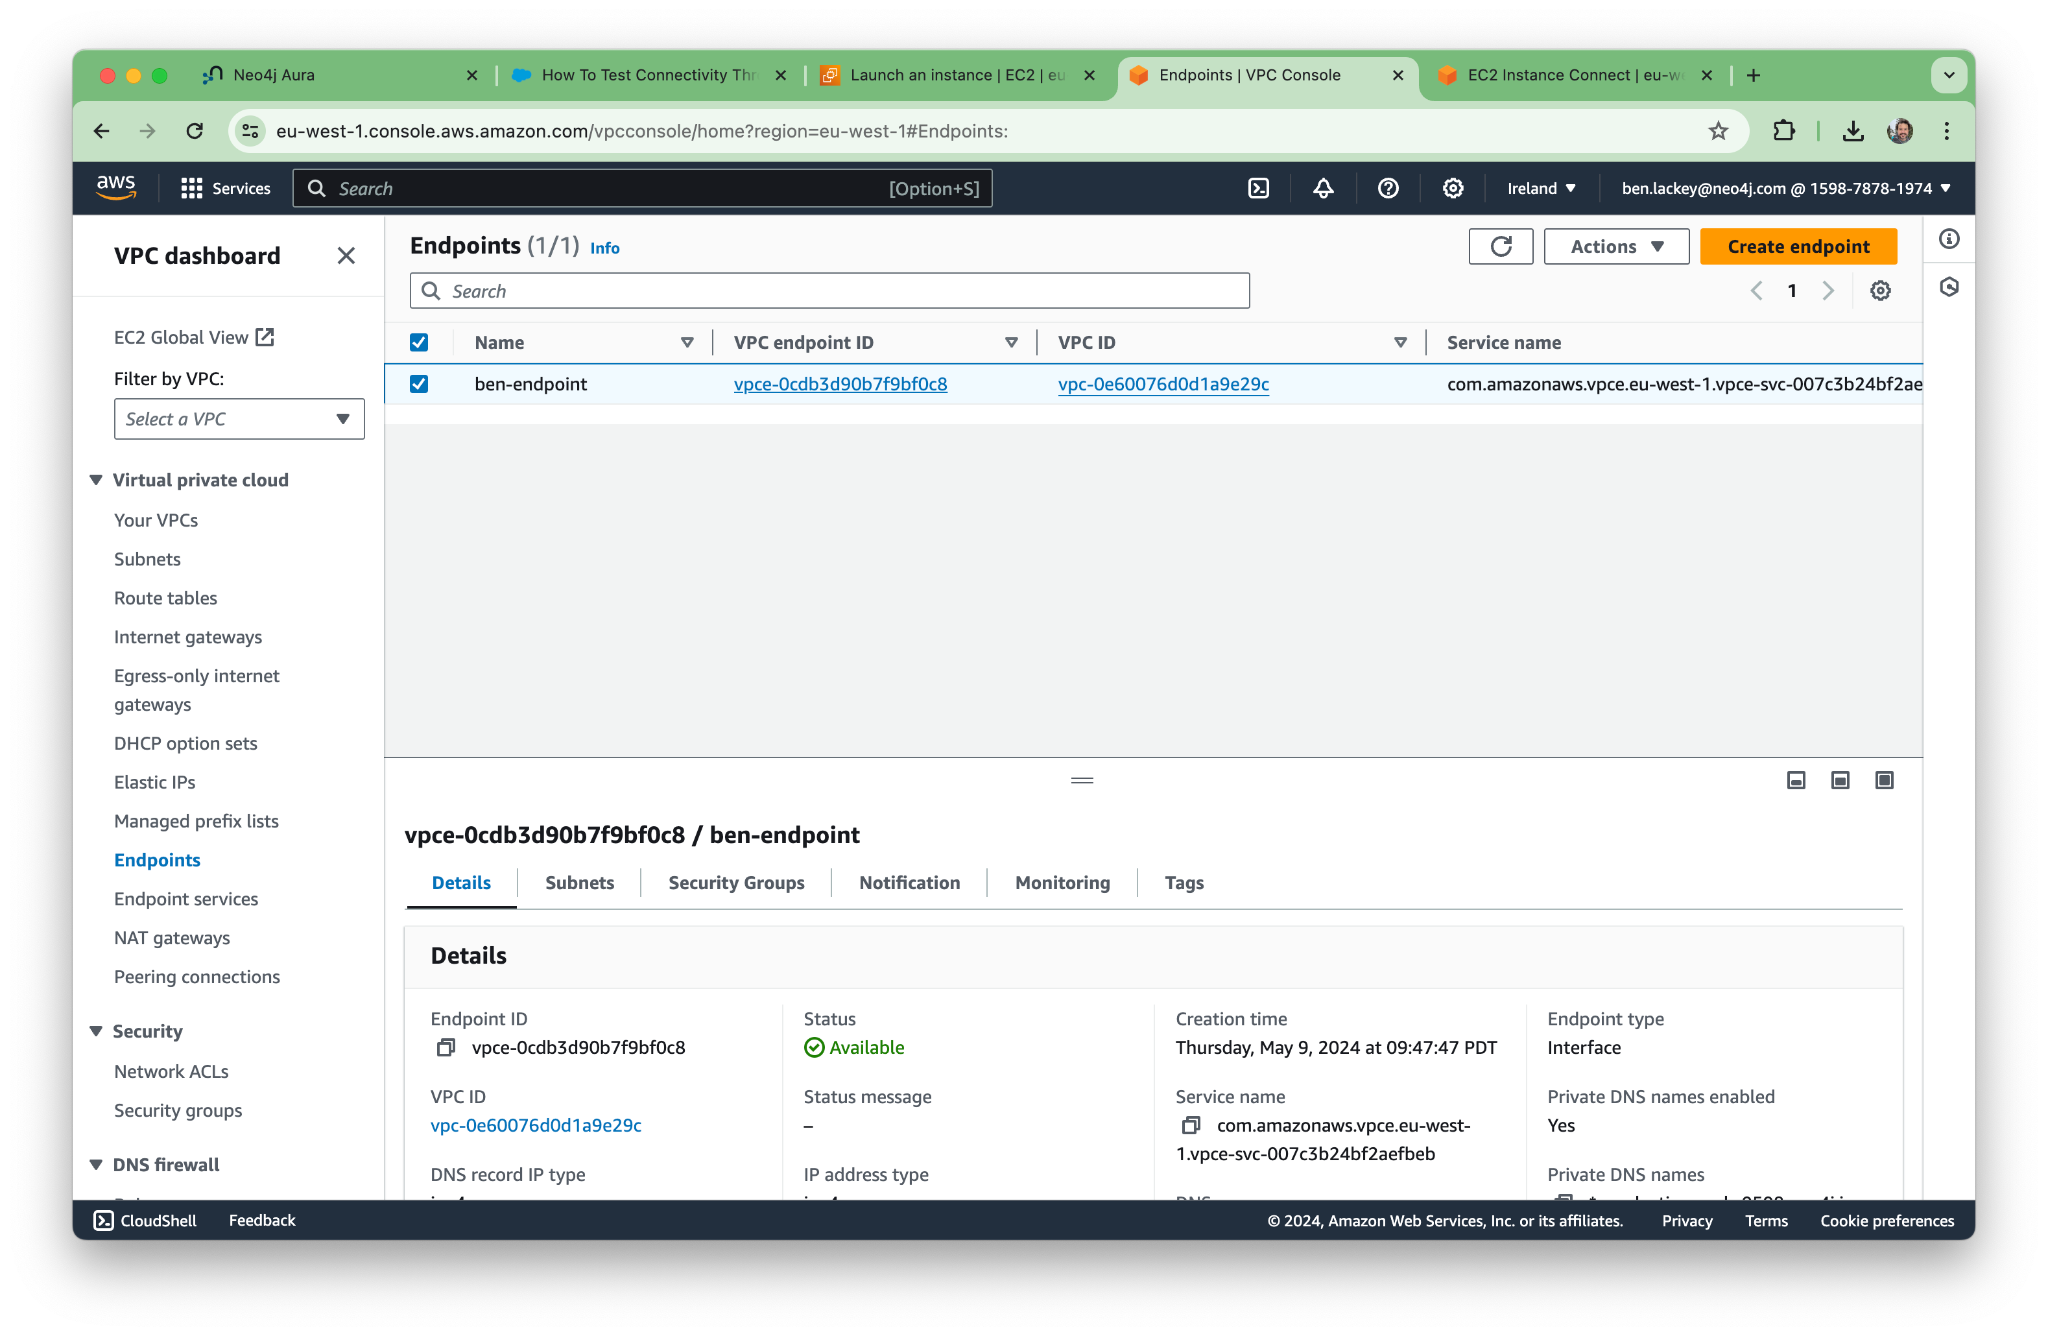
Now the endpoint is up and running! Note that “Private DNS names enabled” says yes.
Now we paste the endpoint into the Aura console, and Aura makes a connection.
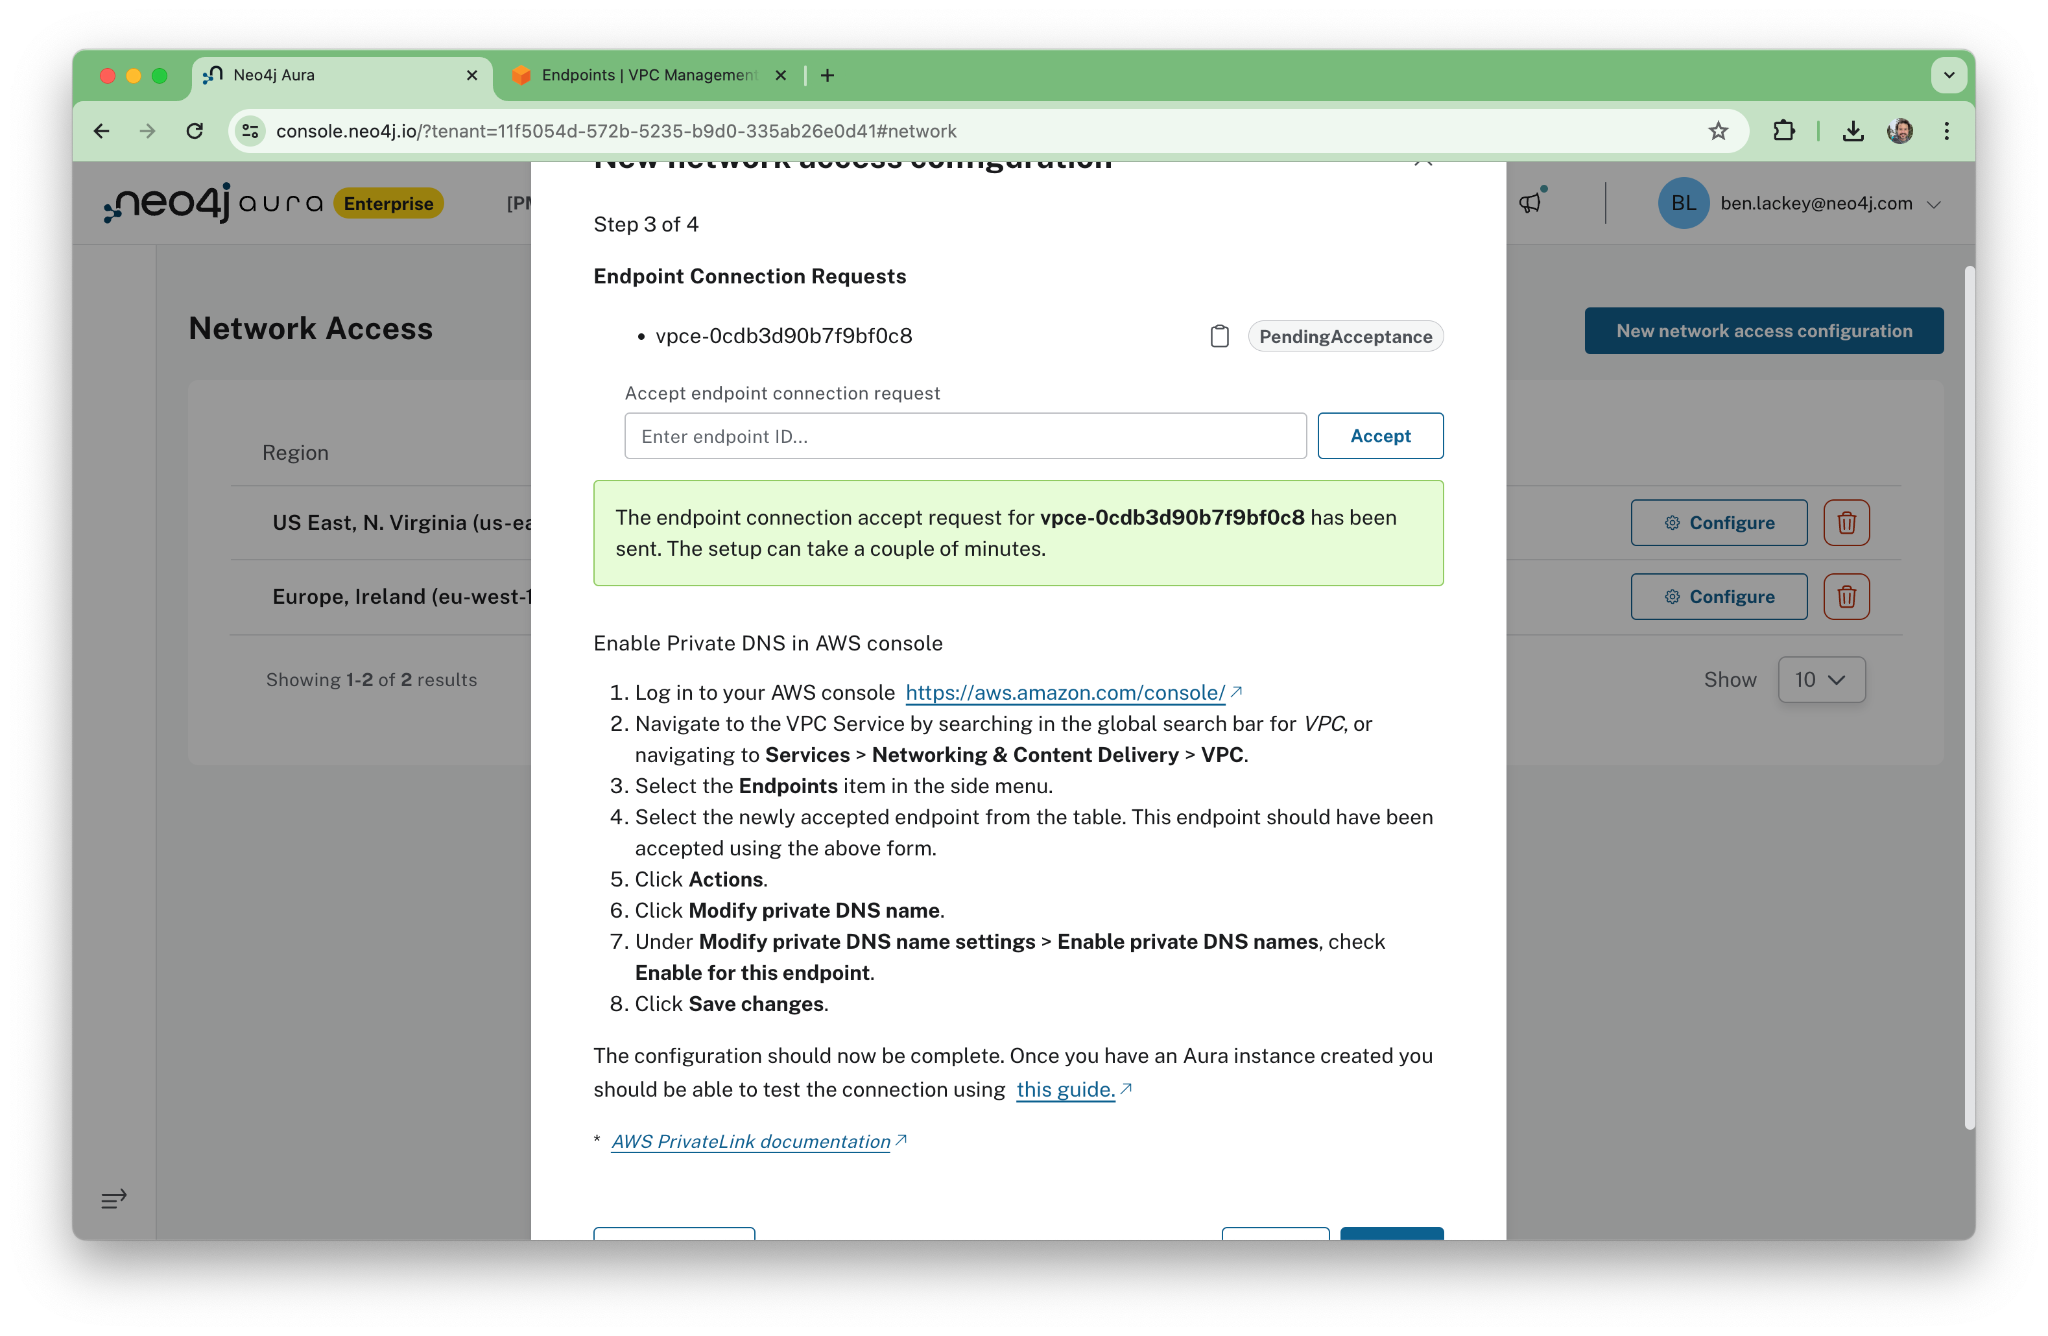
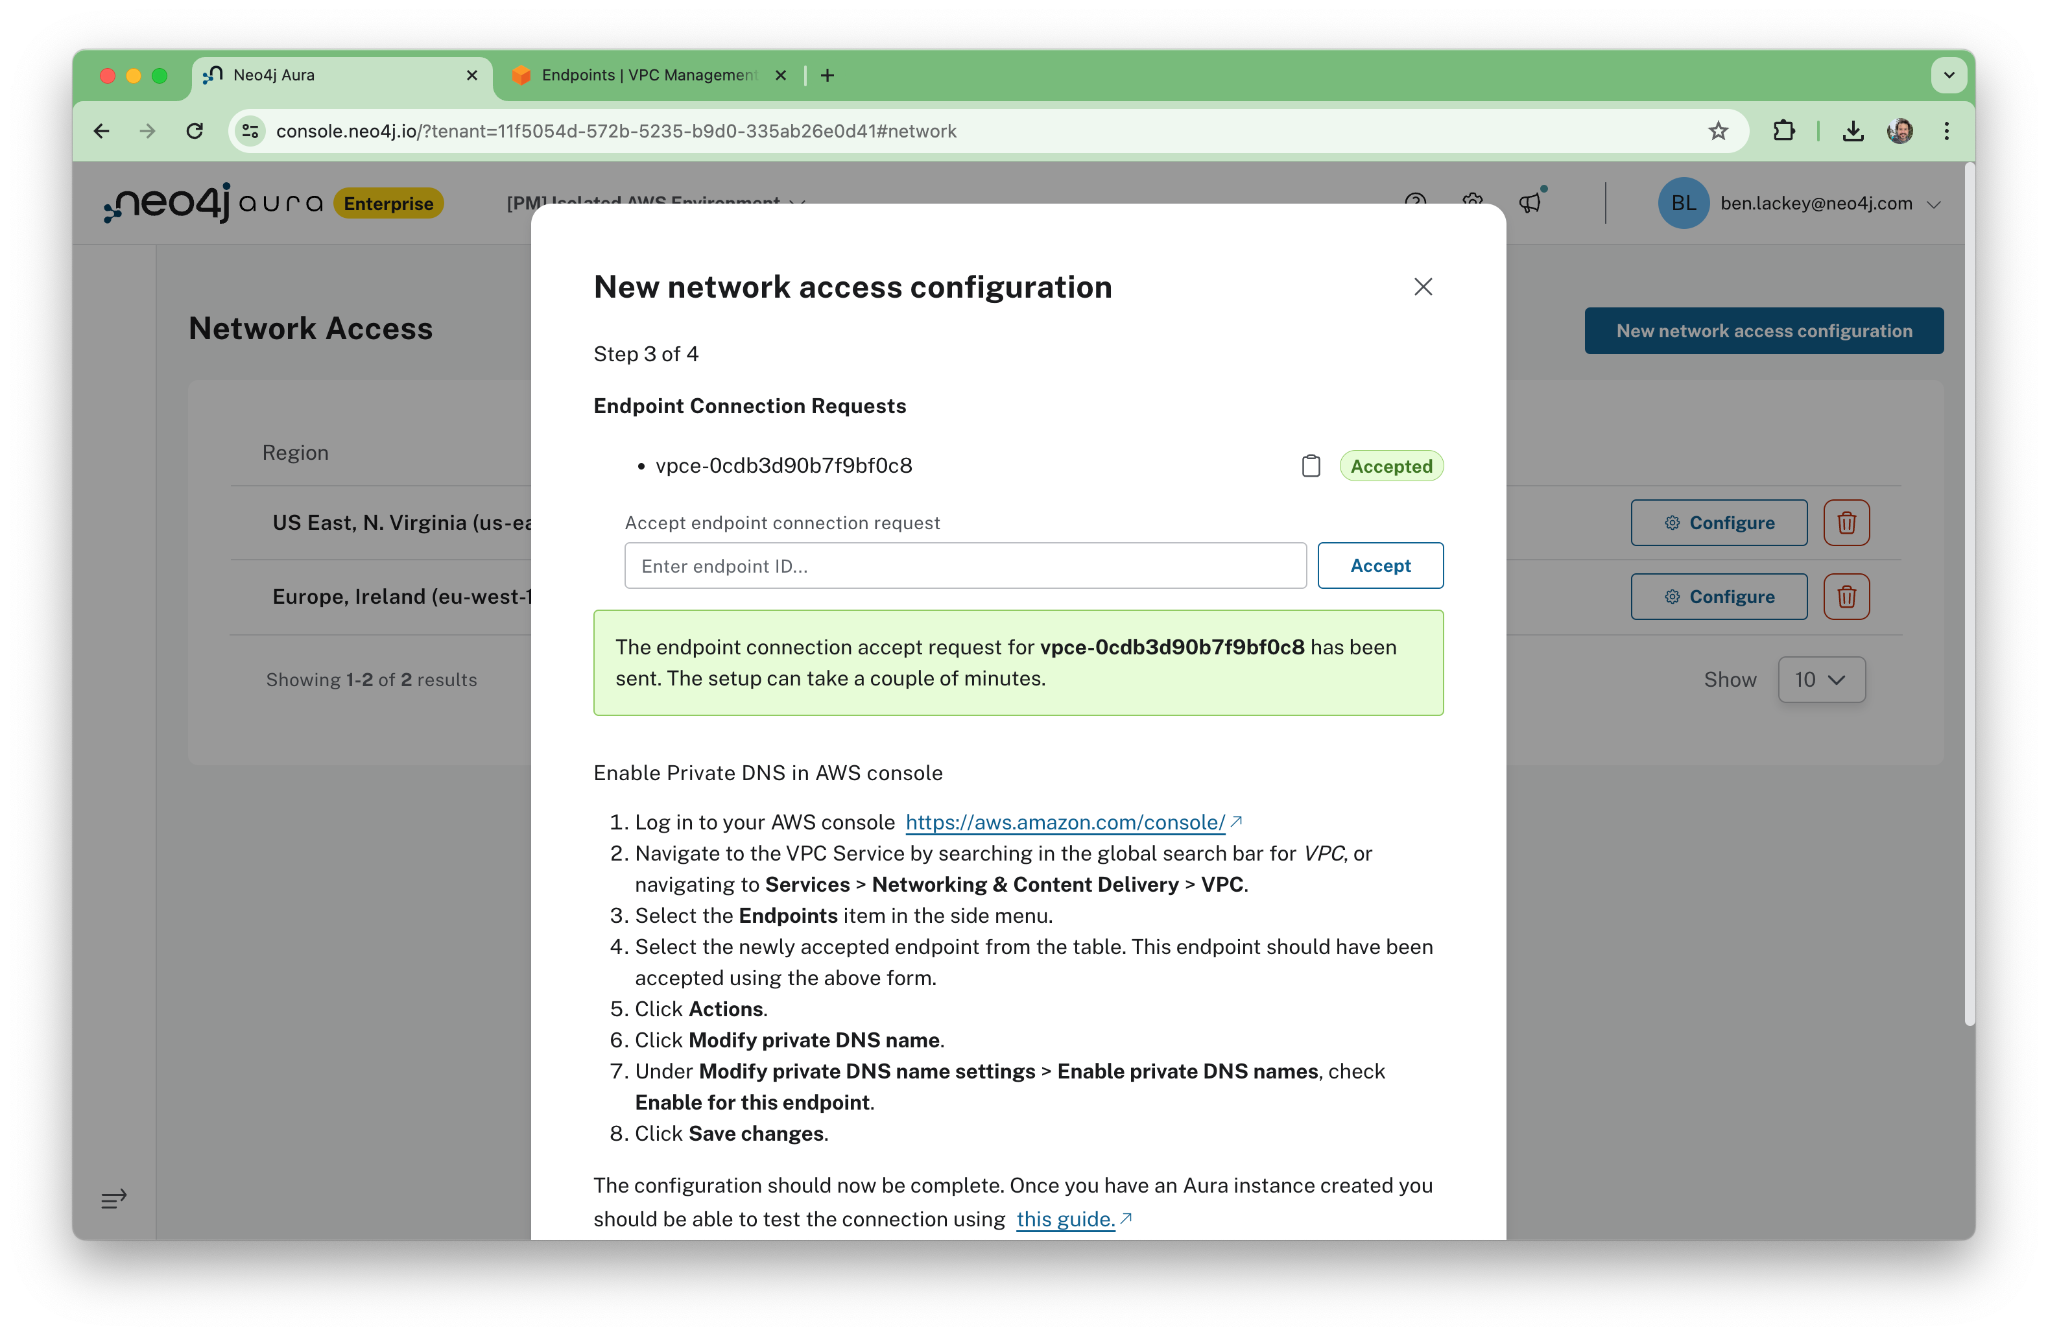
When it’s successful, we’ll see “Accepted.”
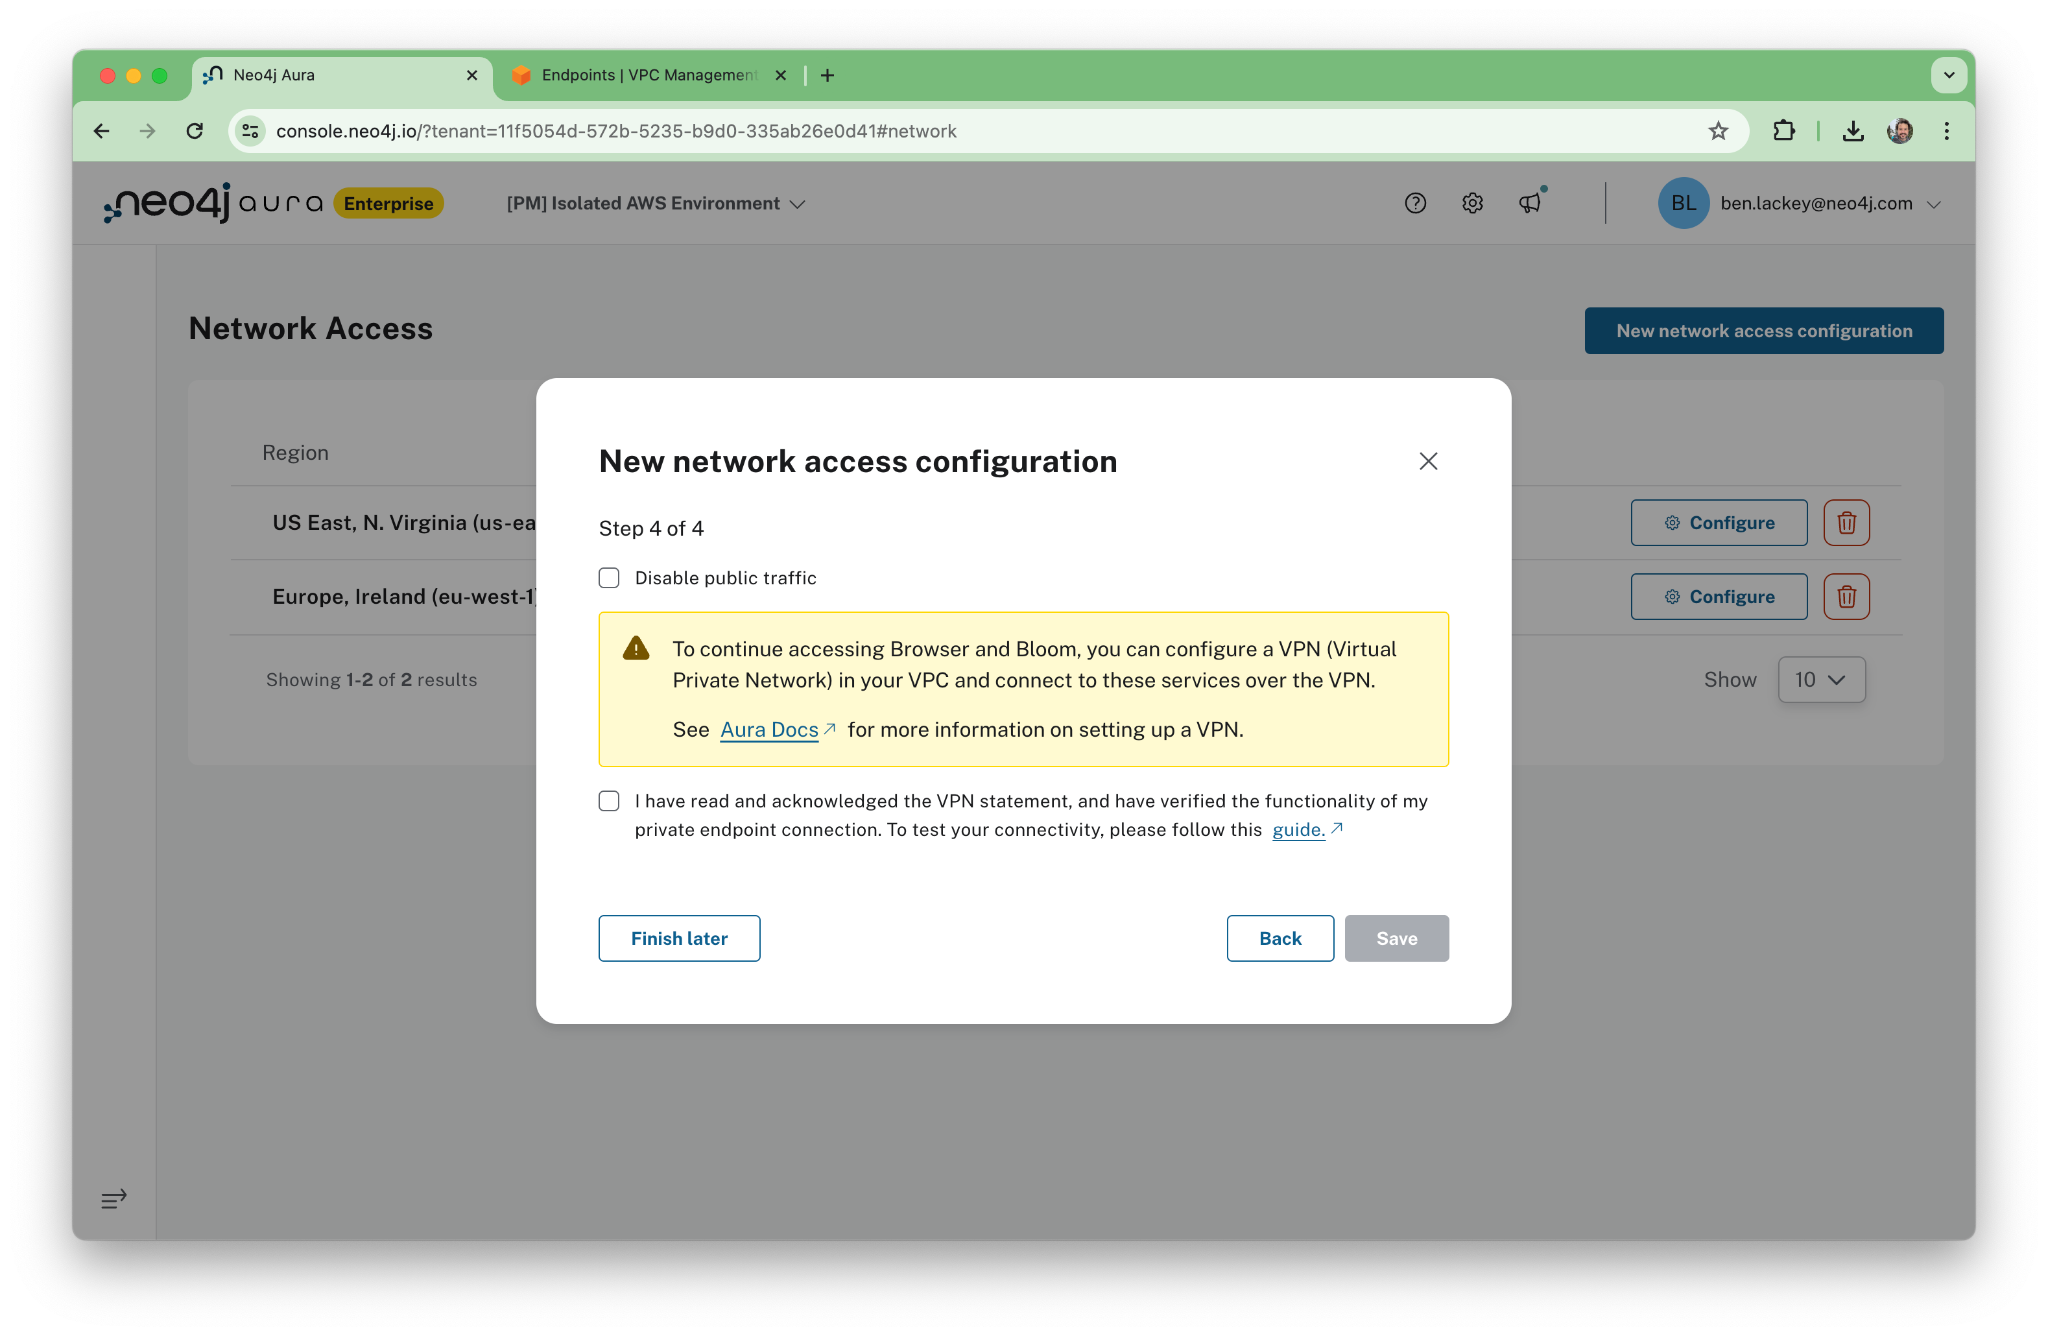
Now, here’s the key part. We’re going to turn off the public network.
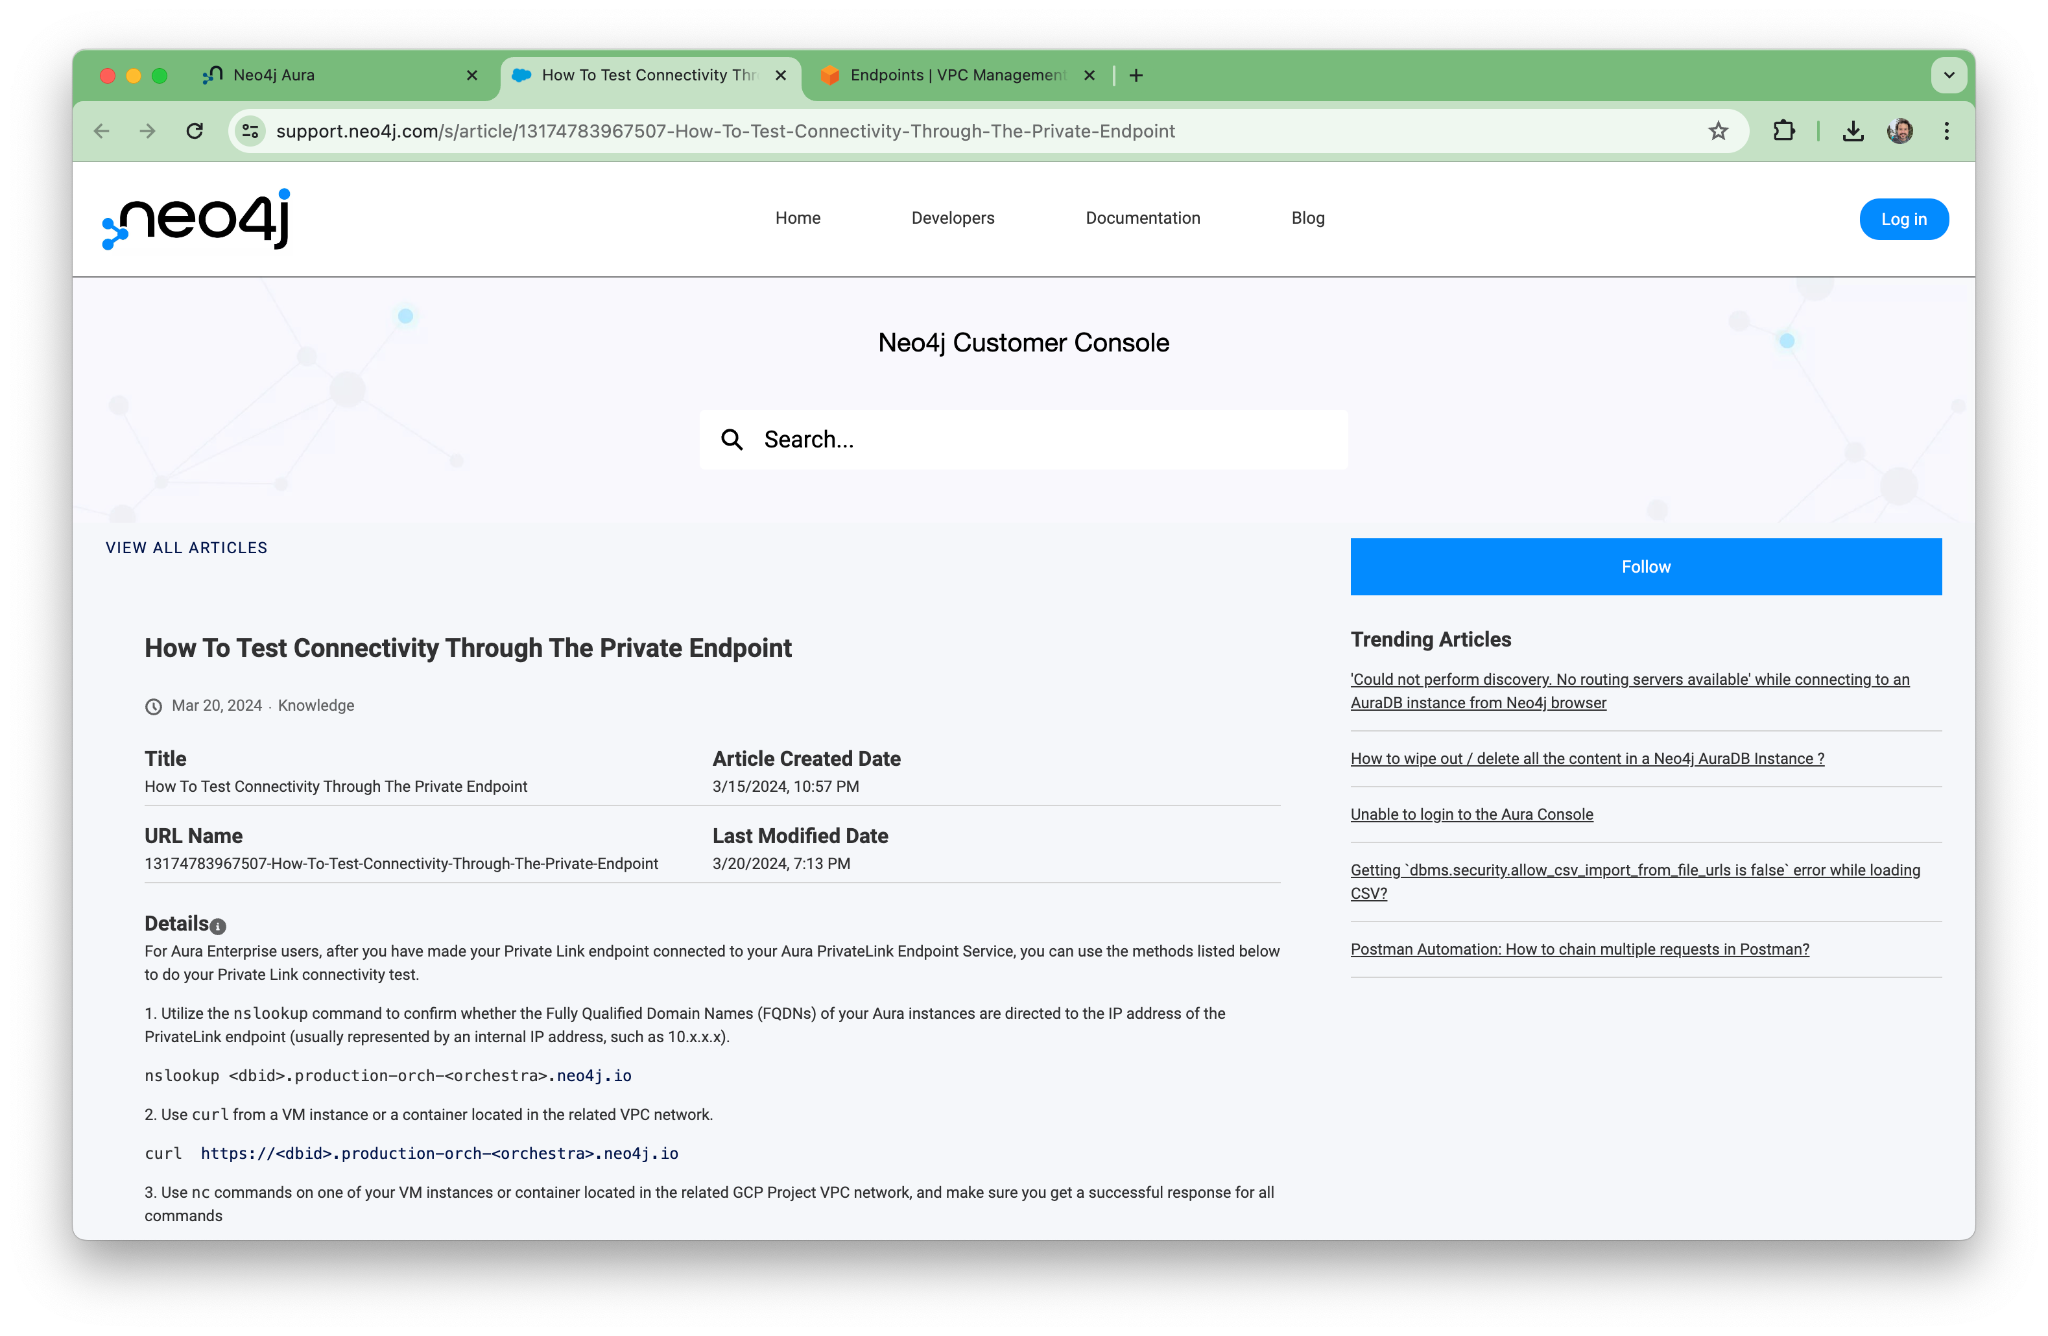
Take note of the Neo4j knowledge base (KB) article on testing connectivity. We’ll come back to that in the next section.
On the Aura console, you’ll see some advice about how to use VPNs. For this walkthrough, we’re going to take a different approach and use a jump box instead.
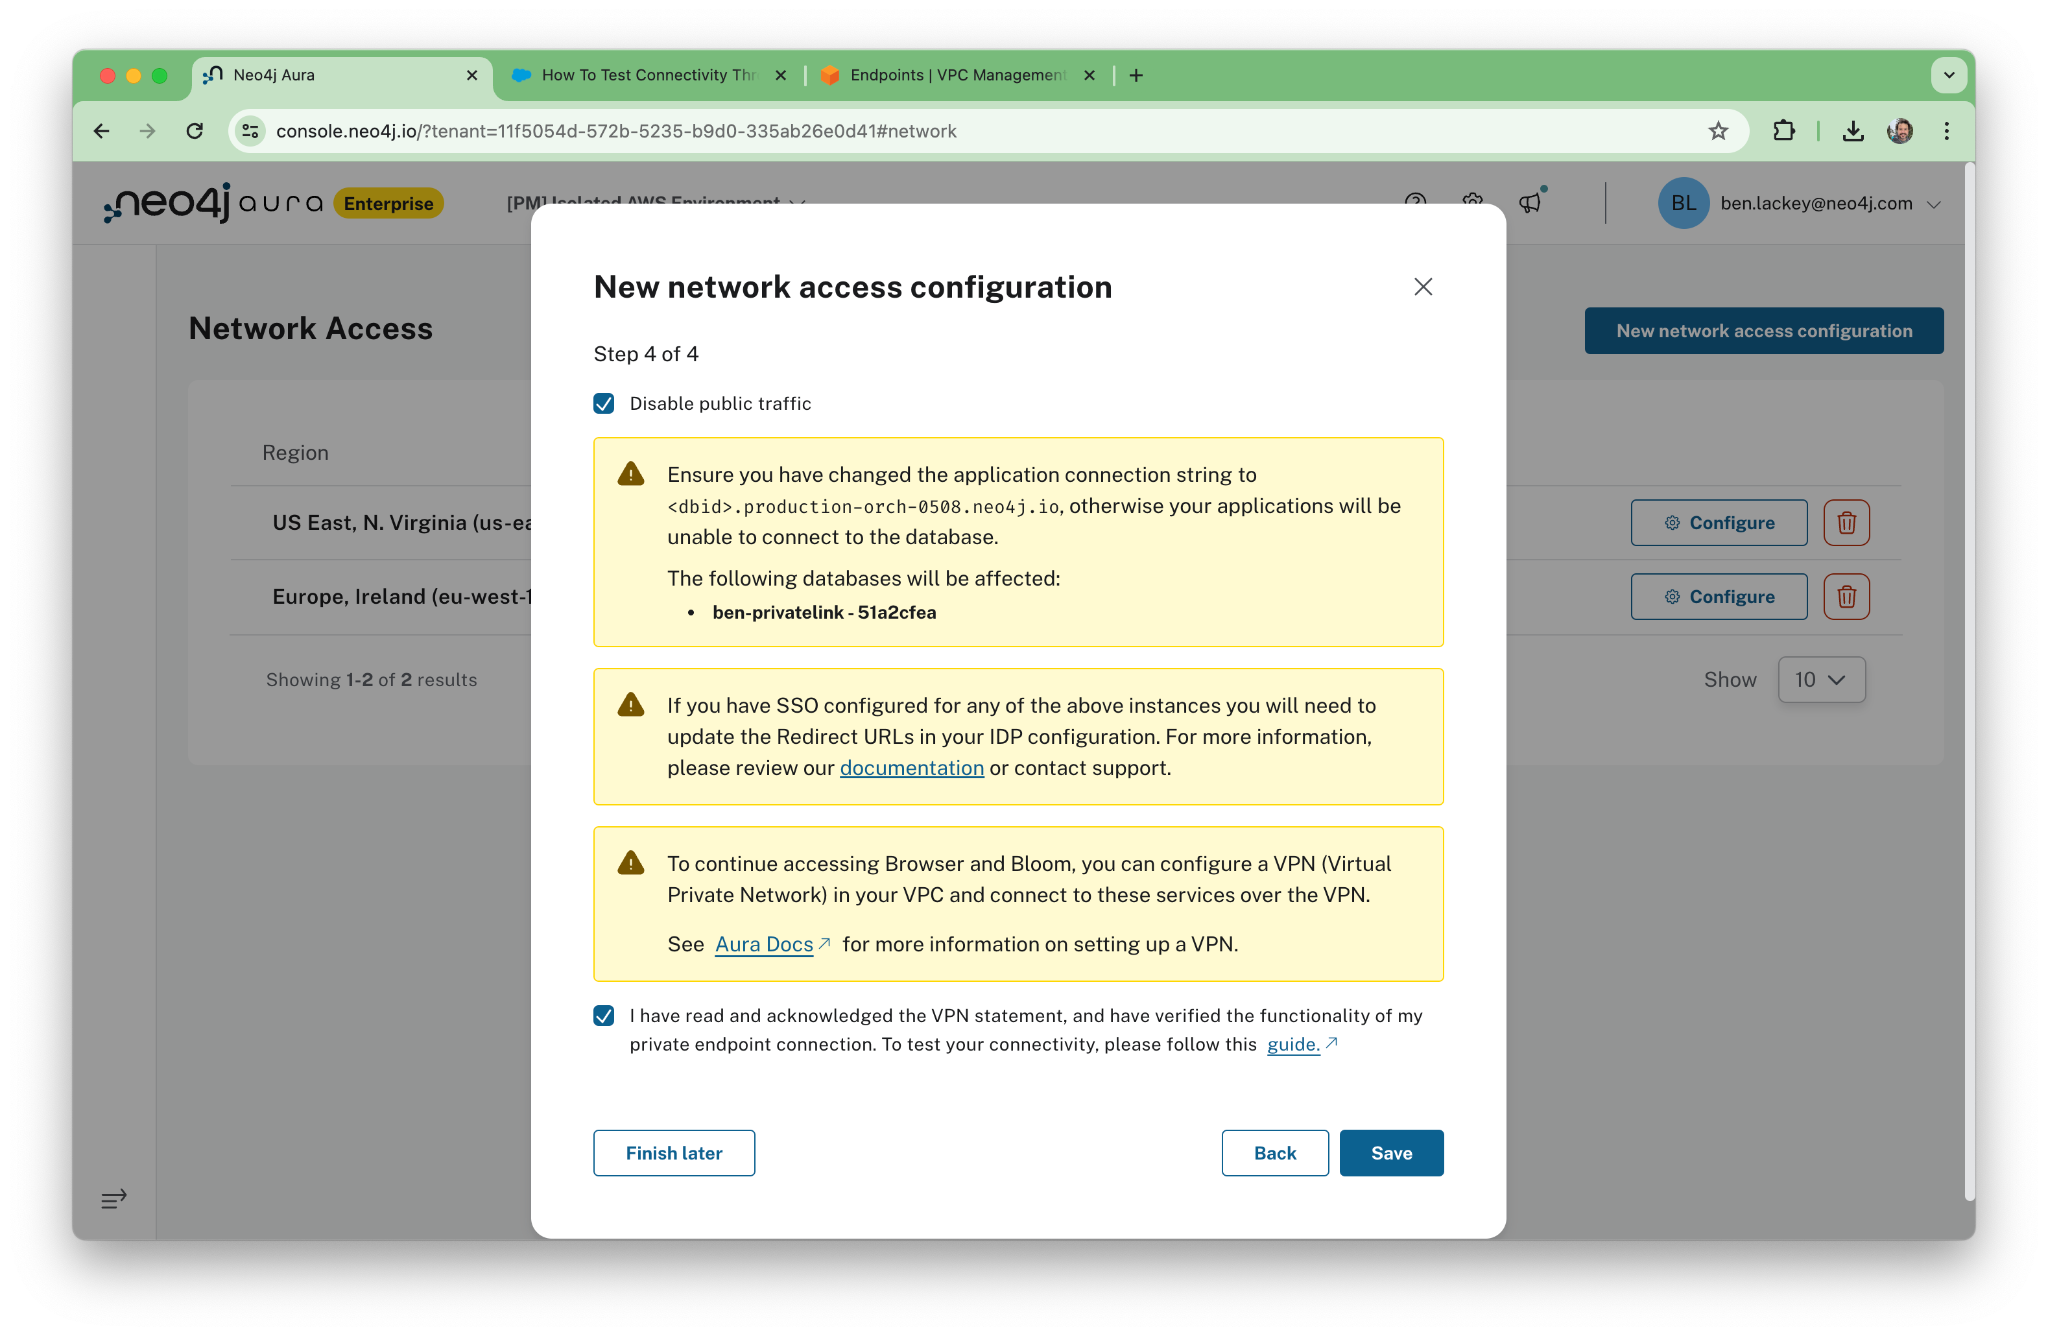
When you dismiss the dialogs, public access might still show as “Enabled.” Give it a minute …
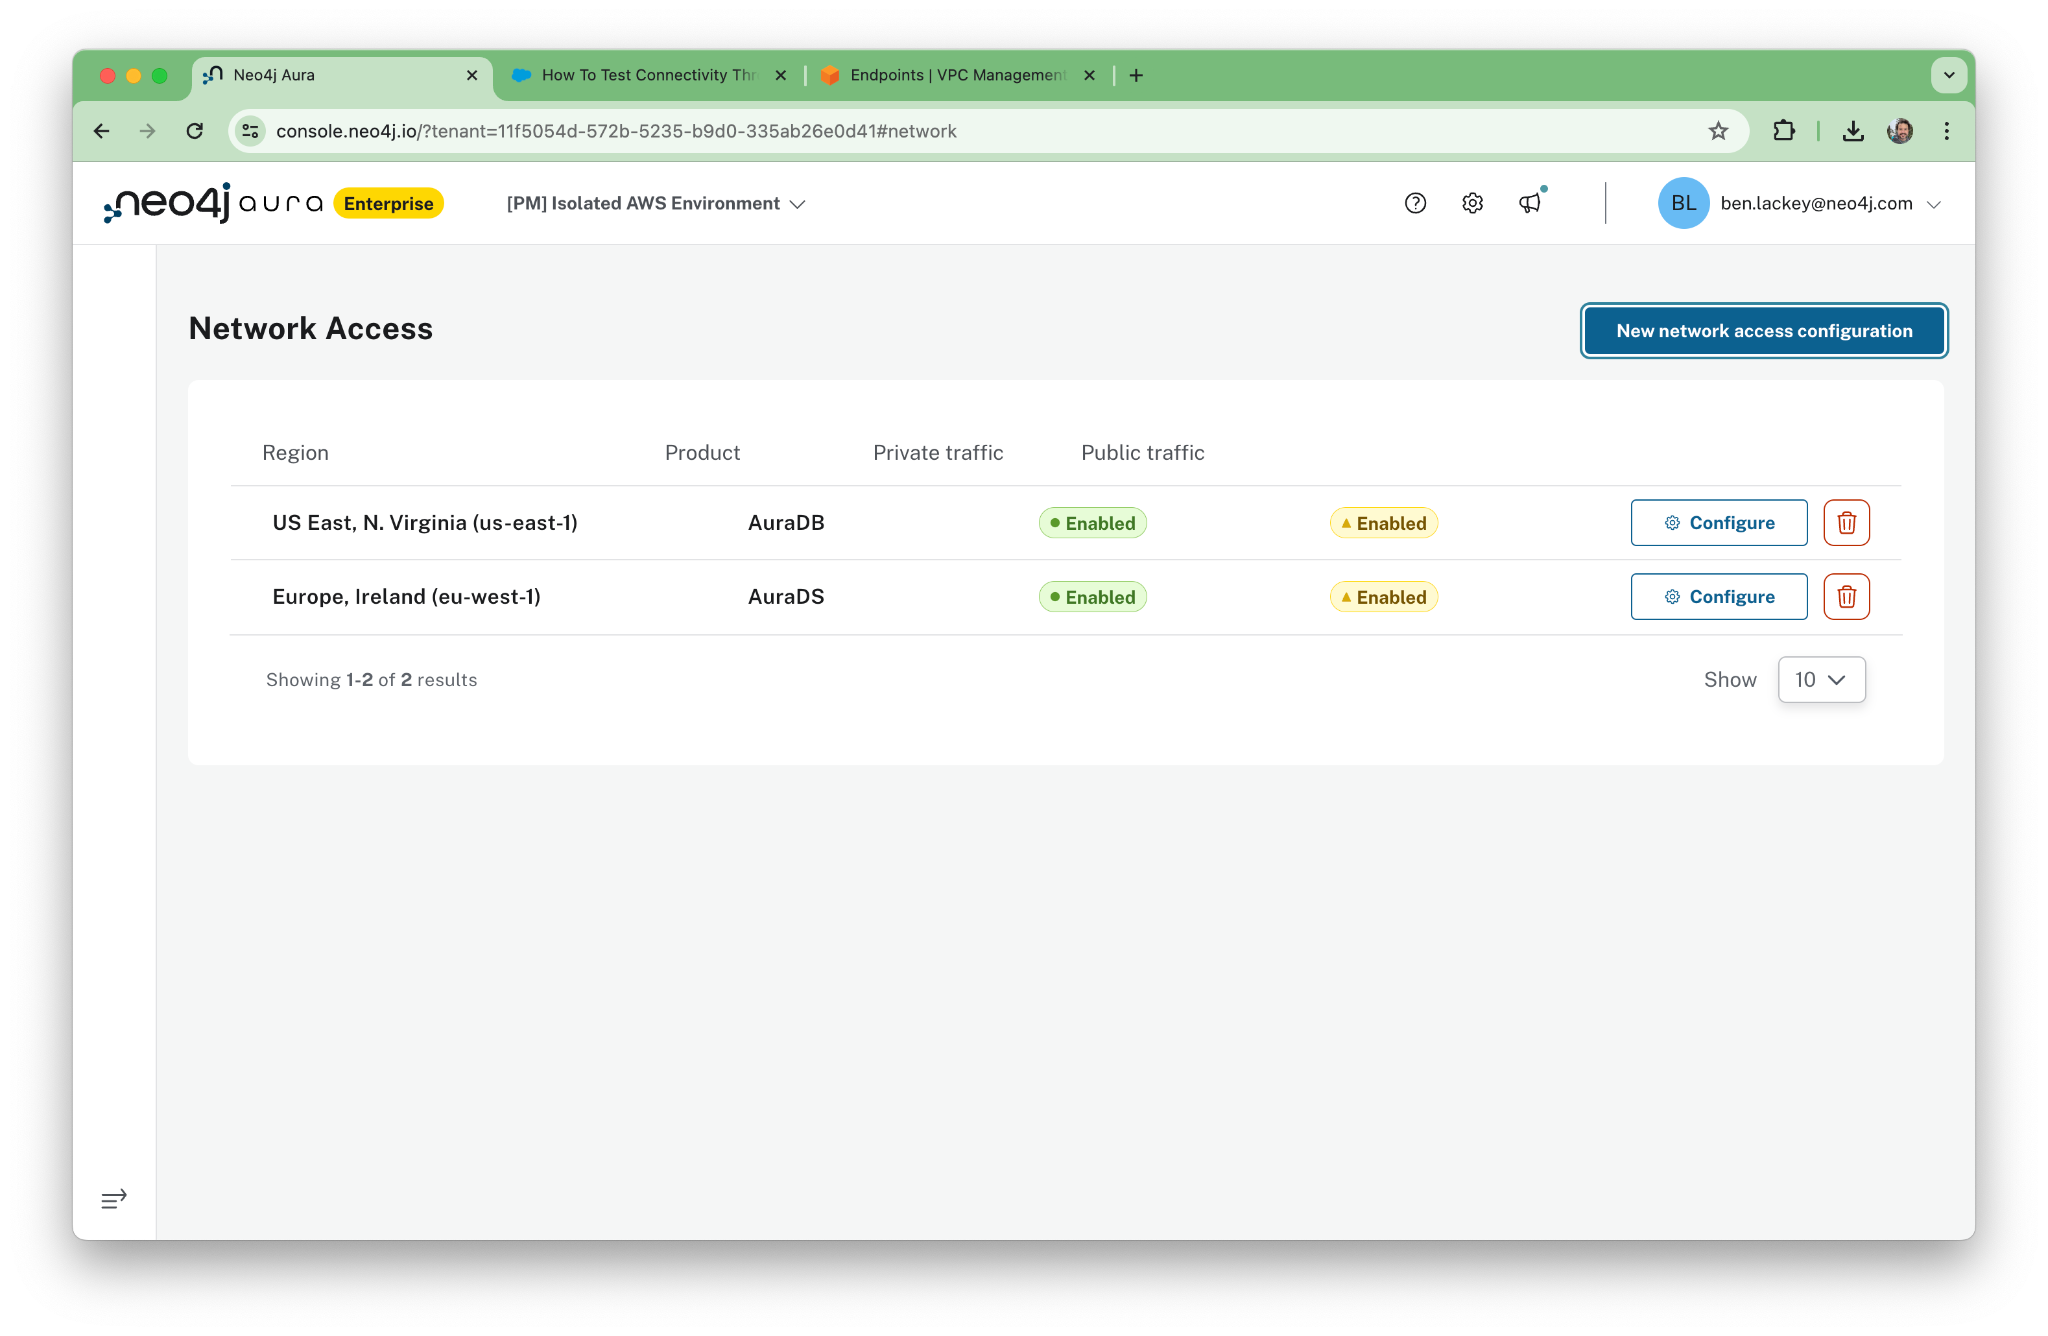
When done, public access will show “Disabled” and private access will show “Enabled.”

That’s it! We’ve set up PrivateLink access. Next, we’ll verify that it’s working properly.
3. Test the network configuration
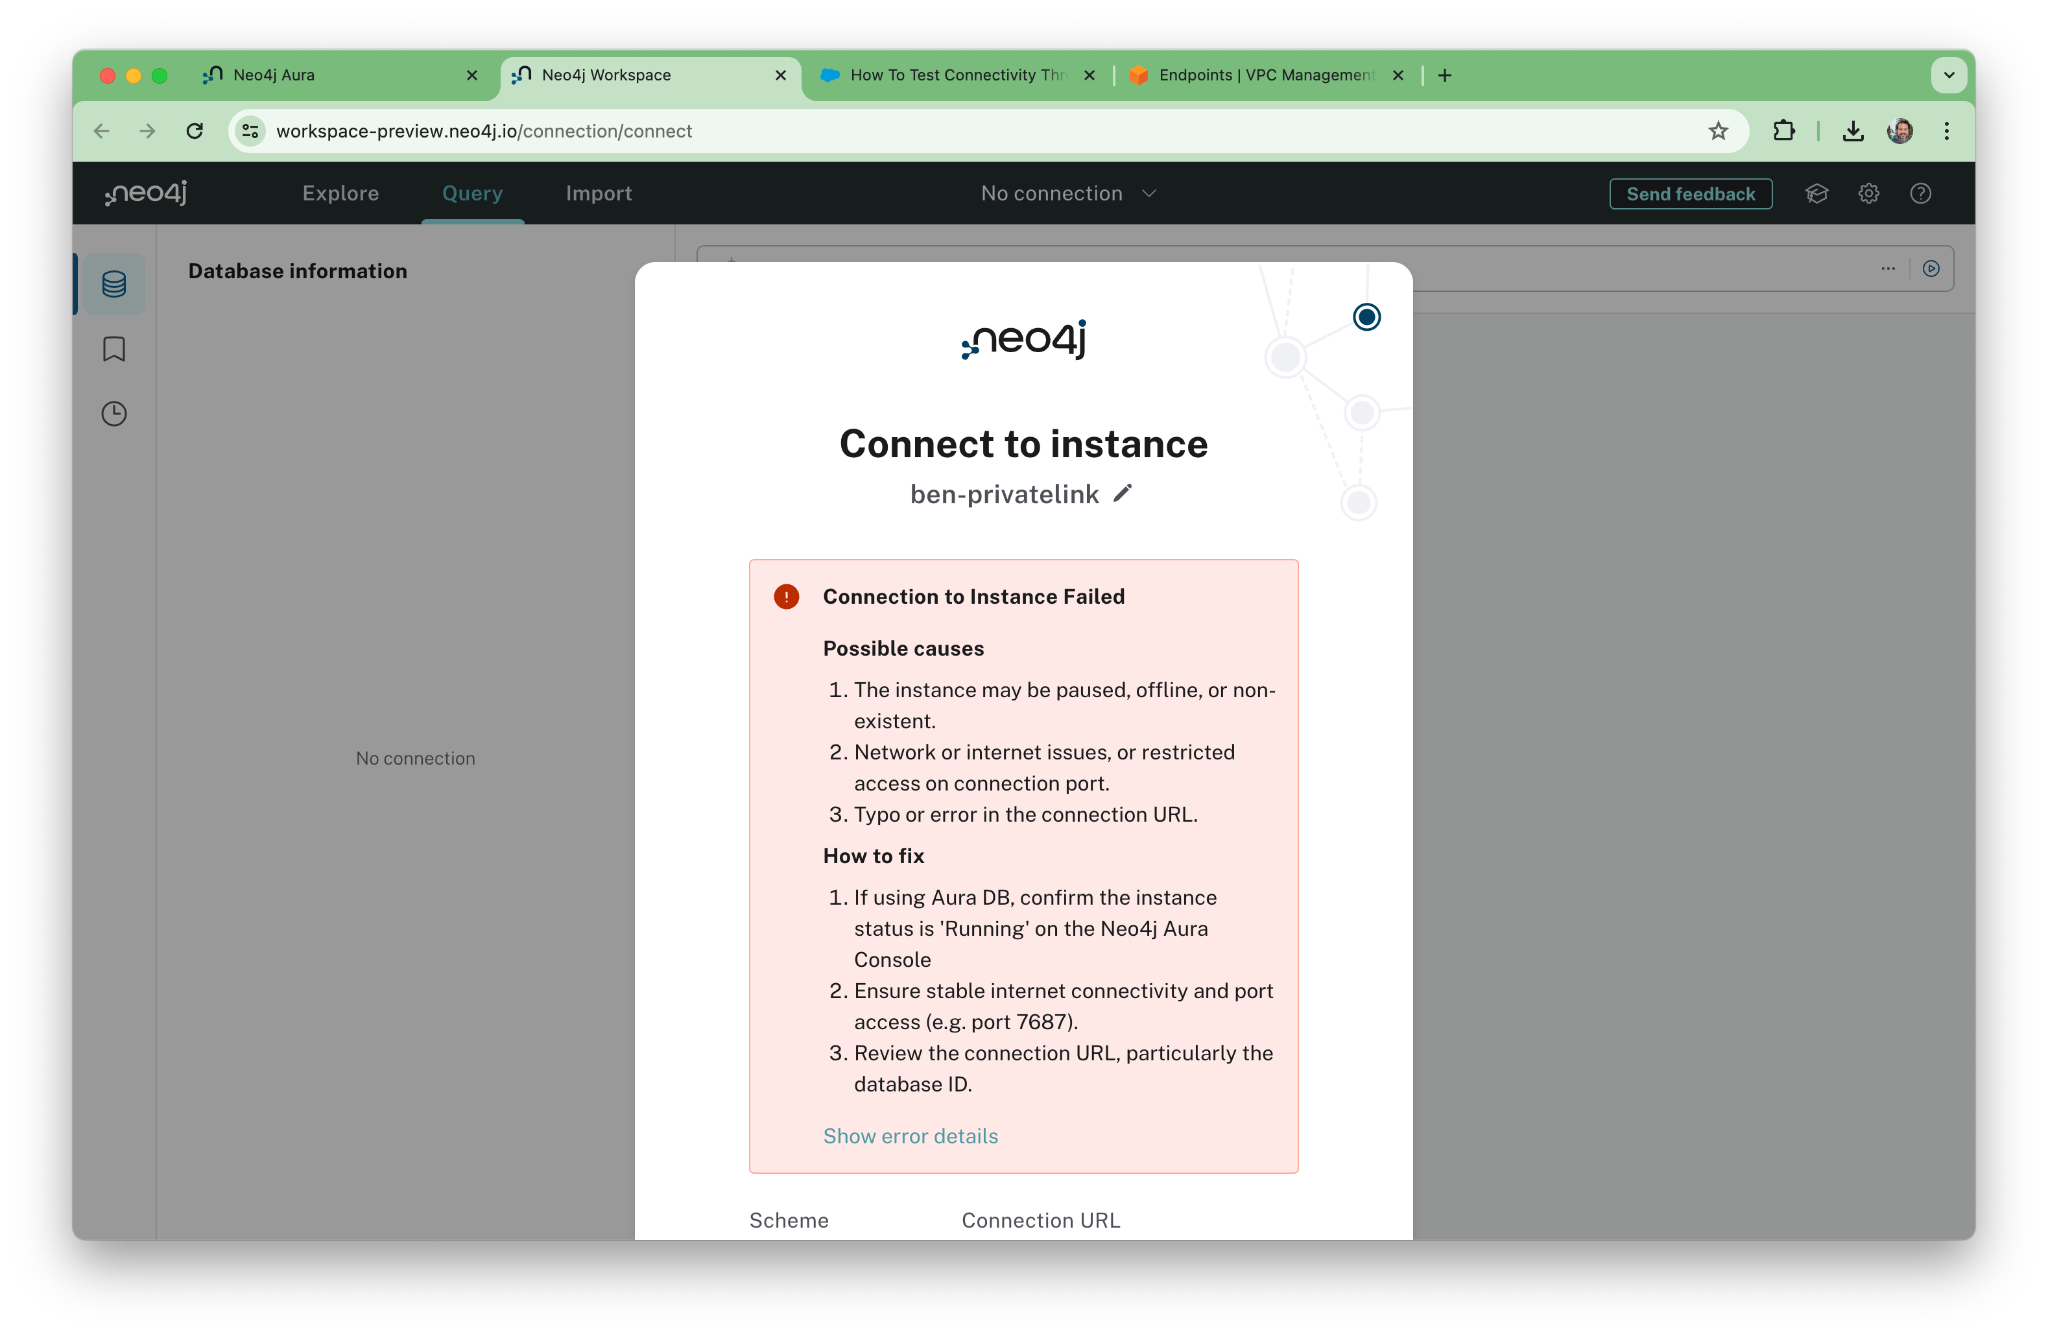
First, let’s confirm that we’ve disabled public access by trying to connect to the old public address of your Aura instance. It should give you an error. This is one time when an error message is actually a good thing!
Now let’s spin up an EC2 and try to connect …
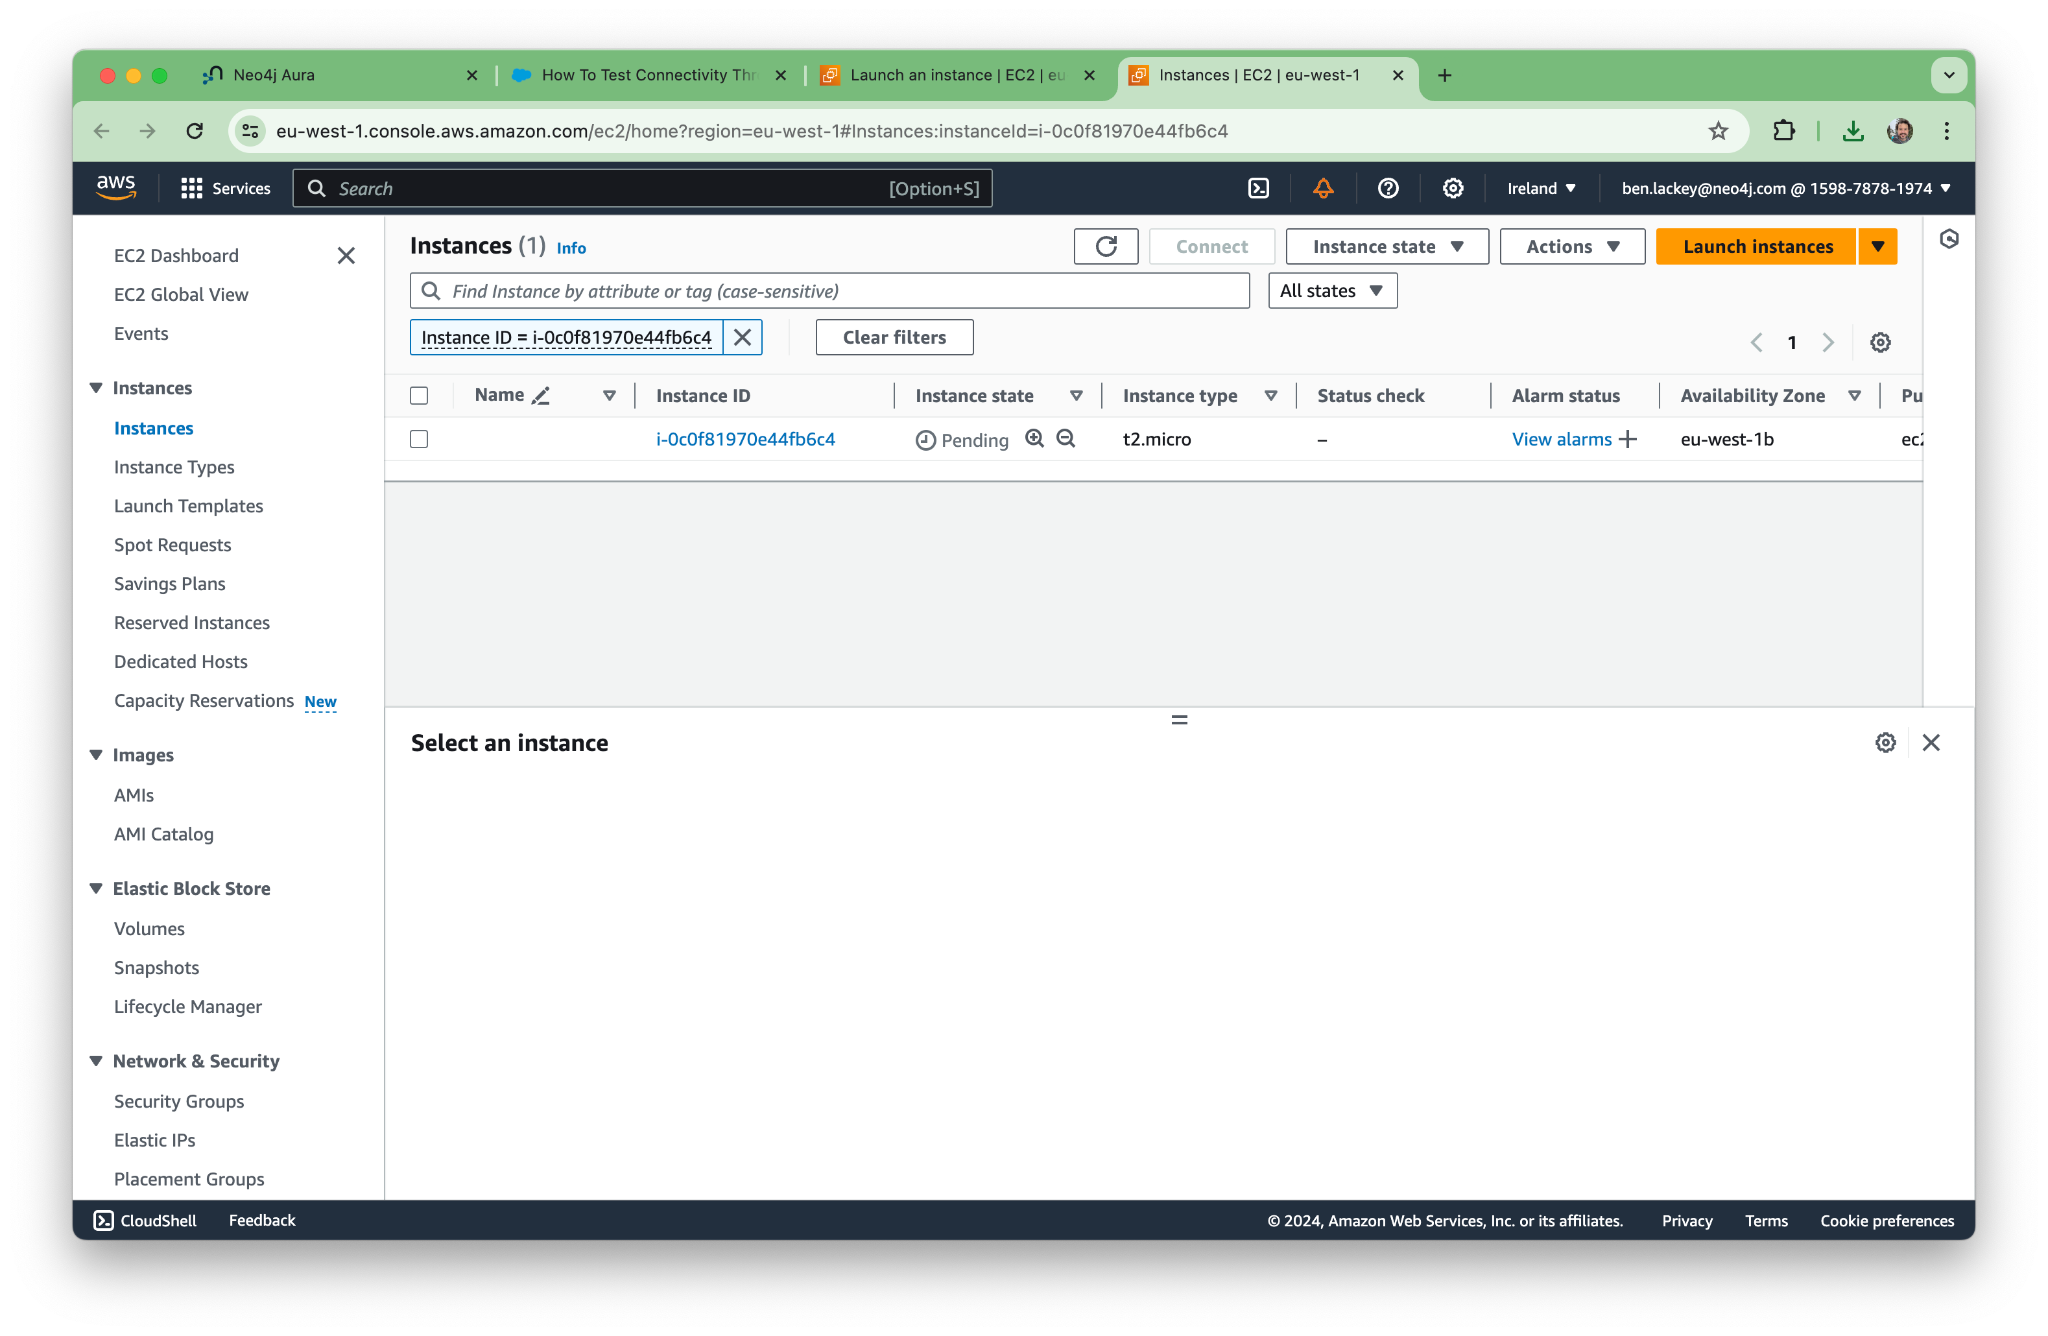
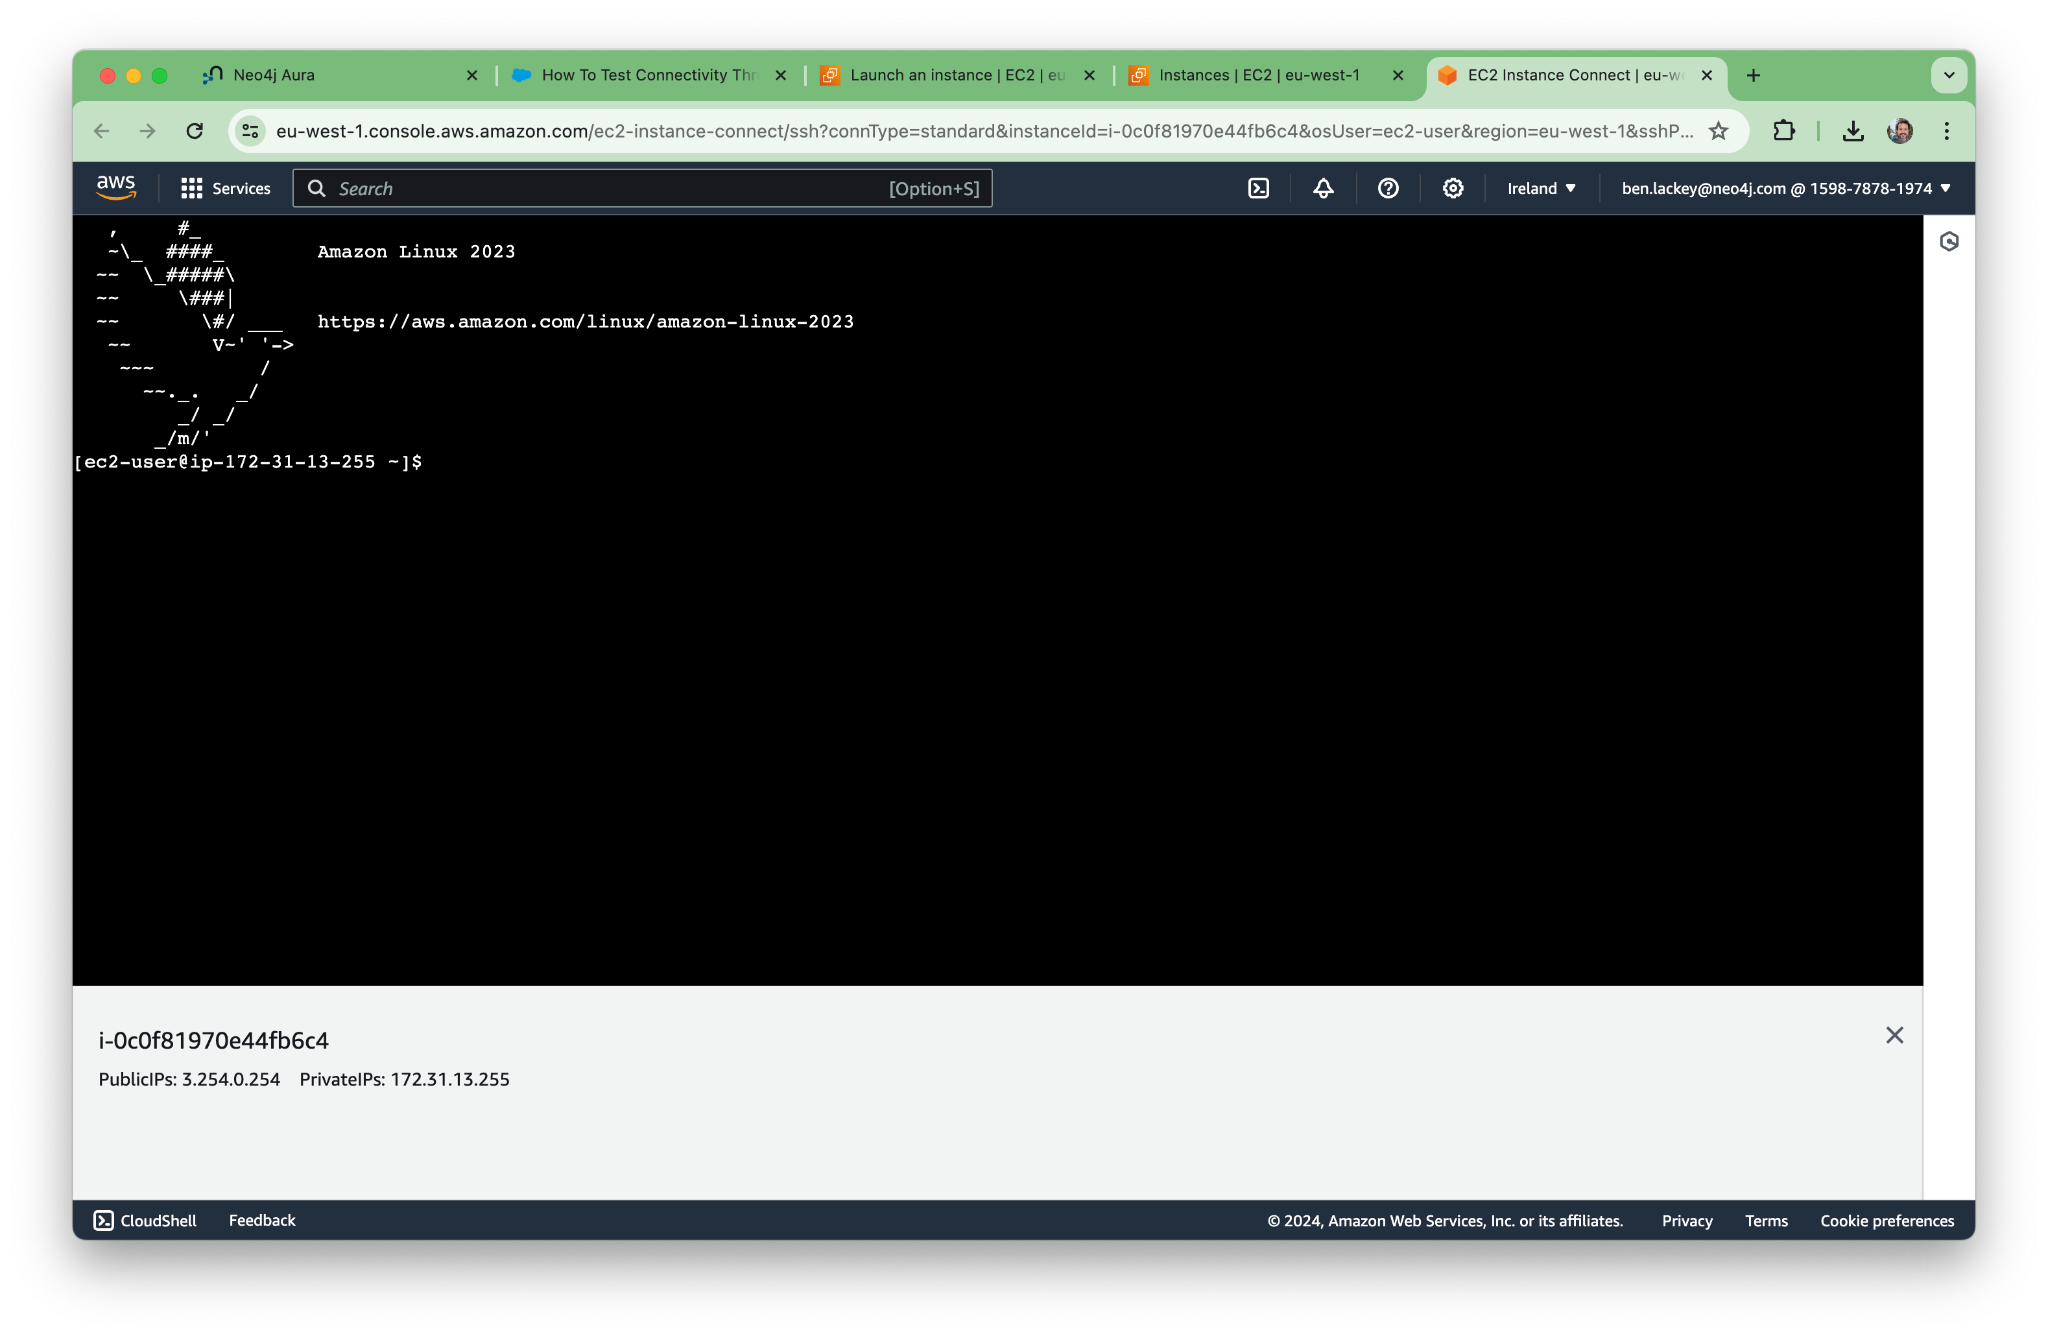
Using EC2 Instance Connect, let’s open a terminal to our new machine.
Per the KB article, let’s try nslookup. The command for our deployment is as follows. (Yours will have a different address.)
nslookup 51a2cfea.production-orch-0508.neo4j.io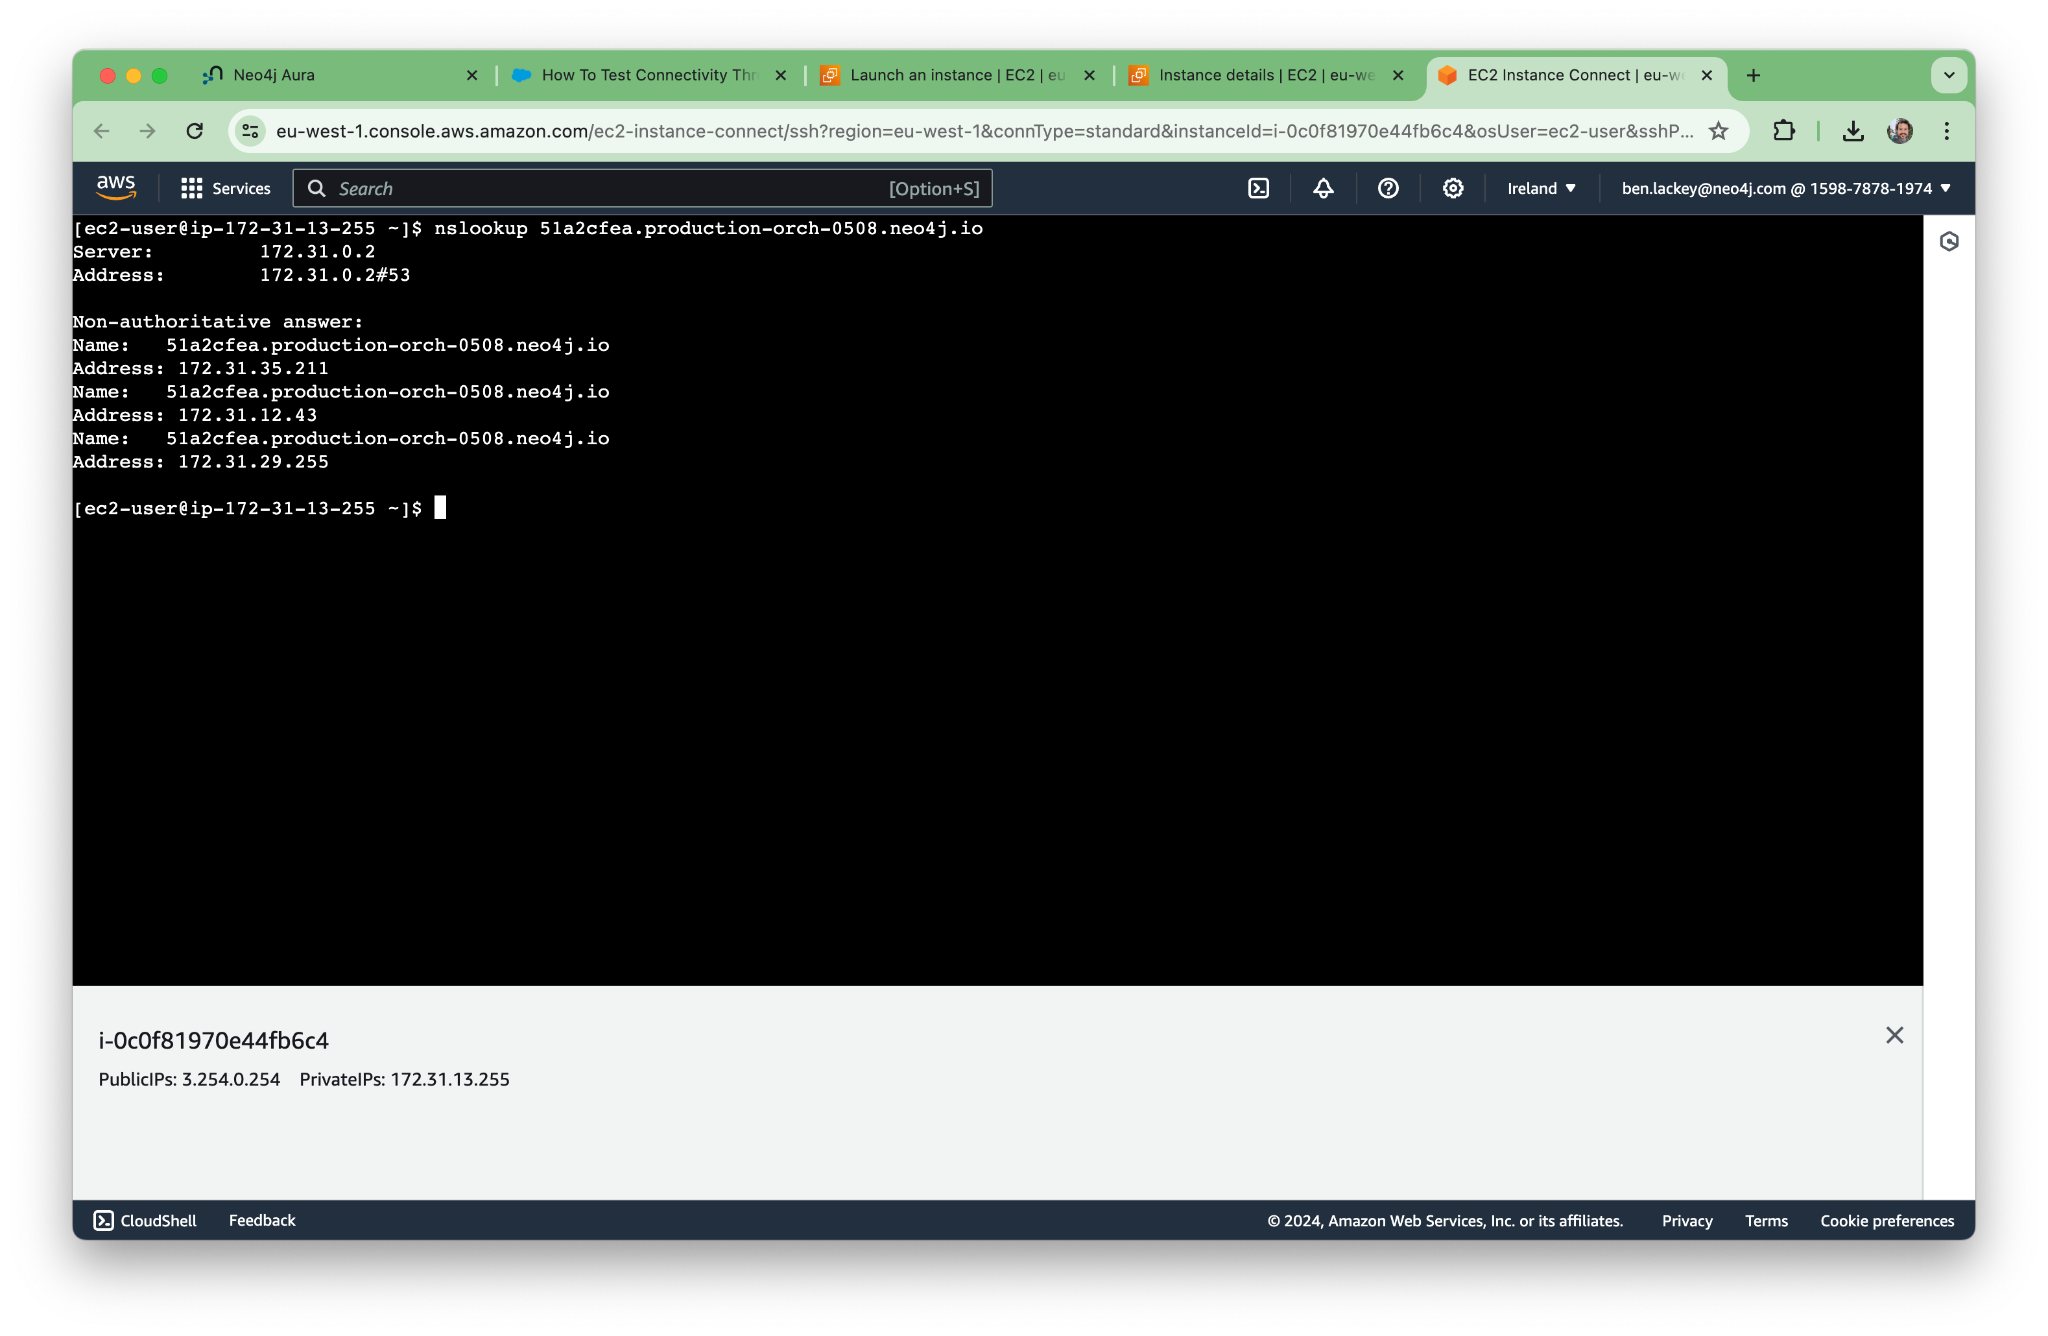
Similarly, we can curl to hit the endpoint:
curl 51a2cfea.production-orch-0508.neo4j.io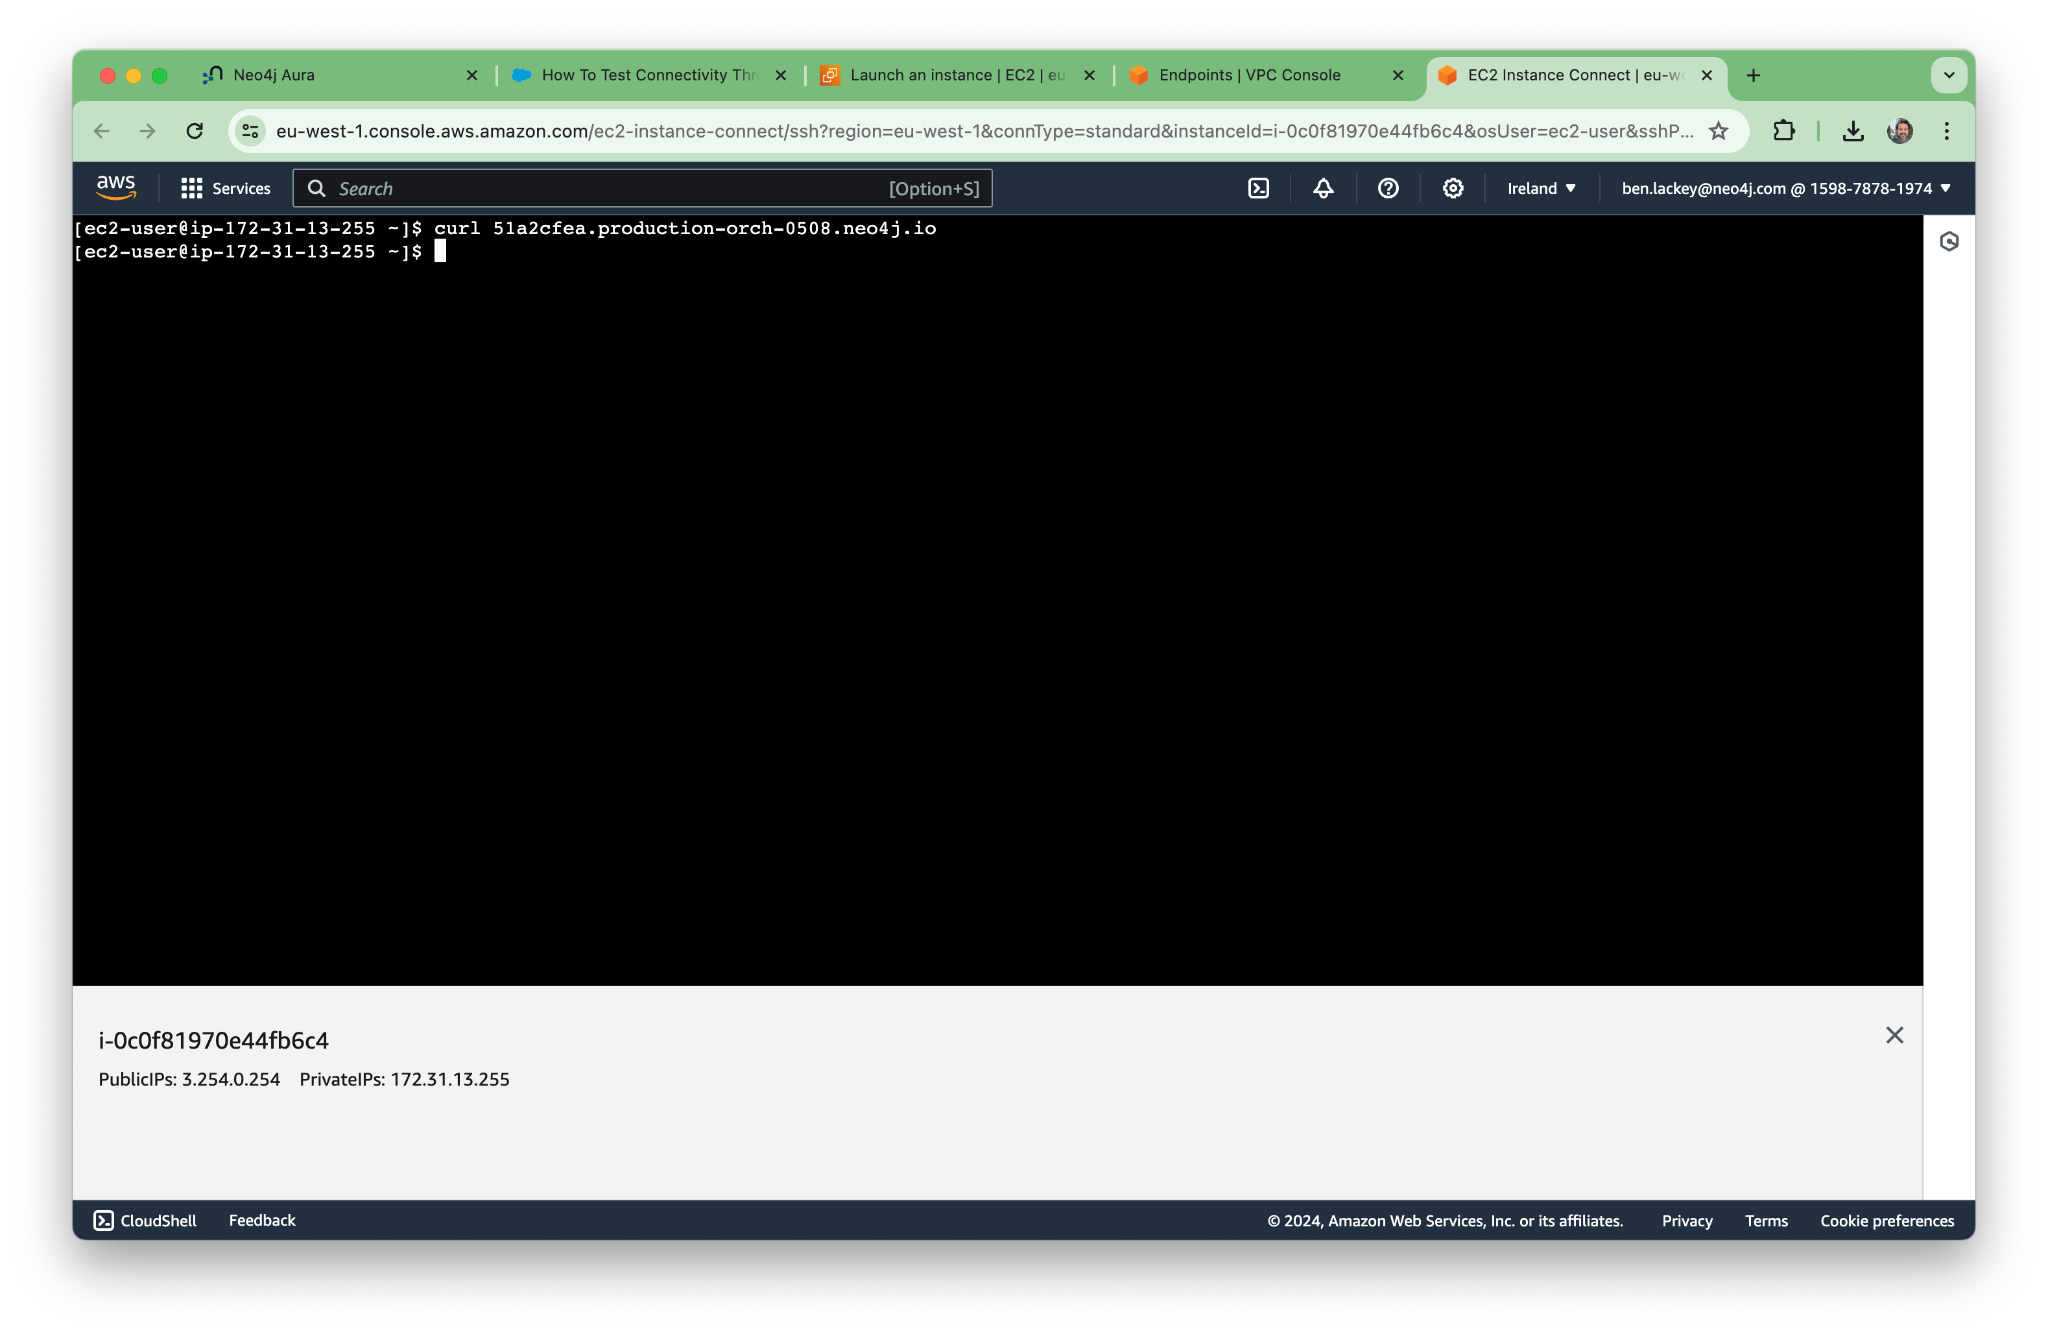
According to the test KB article, we should now run netcat. AWS Linux doesn’t come with it installed, so we need to run the command:
sudo yum install nmap-ncatNow we can run the commands:
nc -vz 51a2cfea.production-orch-0508.neo4j.io 443
nc -vz 51a2cfea.production-orch-0508.neo4j.io 7687
nc -vz 51a2cfea.production-orch-0508.neo4j.io 7474
The DNS seems to be working, and we’re able to resolve all the addresses we need.
4. Connect to Neo4j Aura using the Python API
Now, let’s run a simple Python program to make sure that our EC2 instance can connect to the database.
First, we’ll need to install the driver, which is python-based. Of course, to grab that we need pip3 too. We can get all that with the commands:
sudo yum update && sudo yum install python3-pip
pip3 install --user graphdatascience
With that complete, run the command python3. We can then write a little program:
from graphdatascience import GraphDataScience

# Username is neo4j by default
NEO4J_USERNAME = 'neo4j'

# You will need to change these to match your credentials
NEO4J_URI = 'neo4j+s://51a2cfea.production-orch-0508.neo4j.io'
NEO4J_PASSWORD = 'C1HDzgf_XF78s6P5CSkJIpeVtFzDEnxrVkFH4Fzsl-U'

gds = GraphDataScience(
    NEO4J_URI,
    auth=(NEO4J_USERNAME, NEO4J_PASSWORD),
    aura_ds=True
)
gds.set_database('neo4j')
In our terminal, we should see the following:
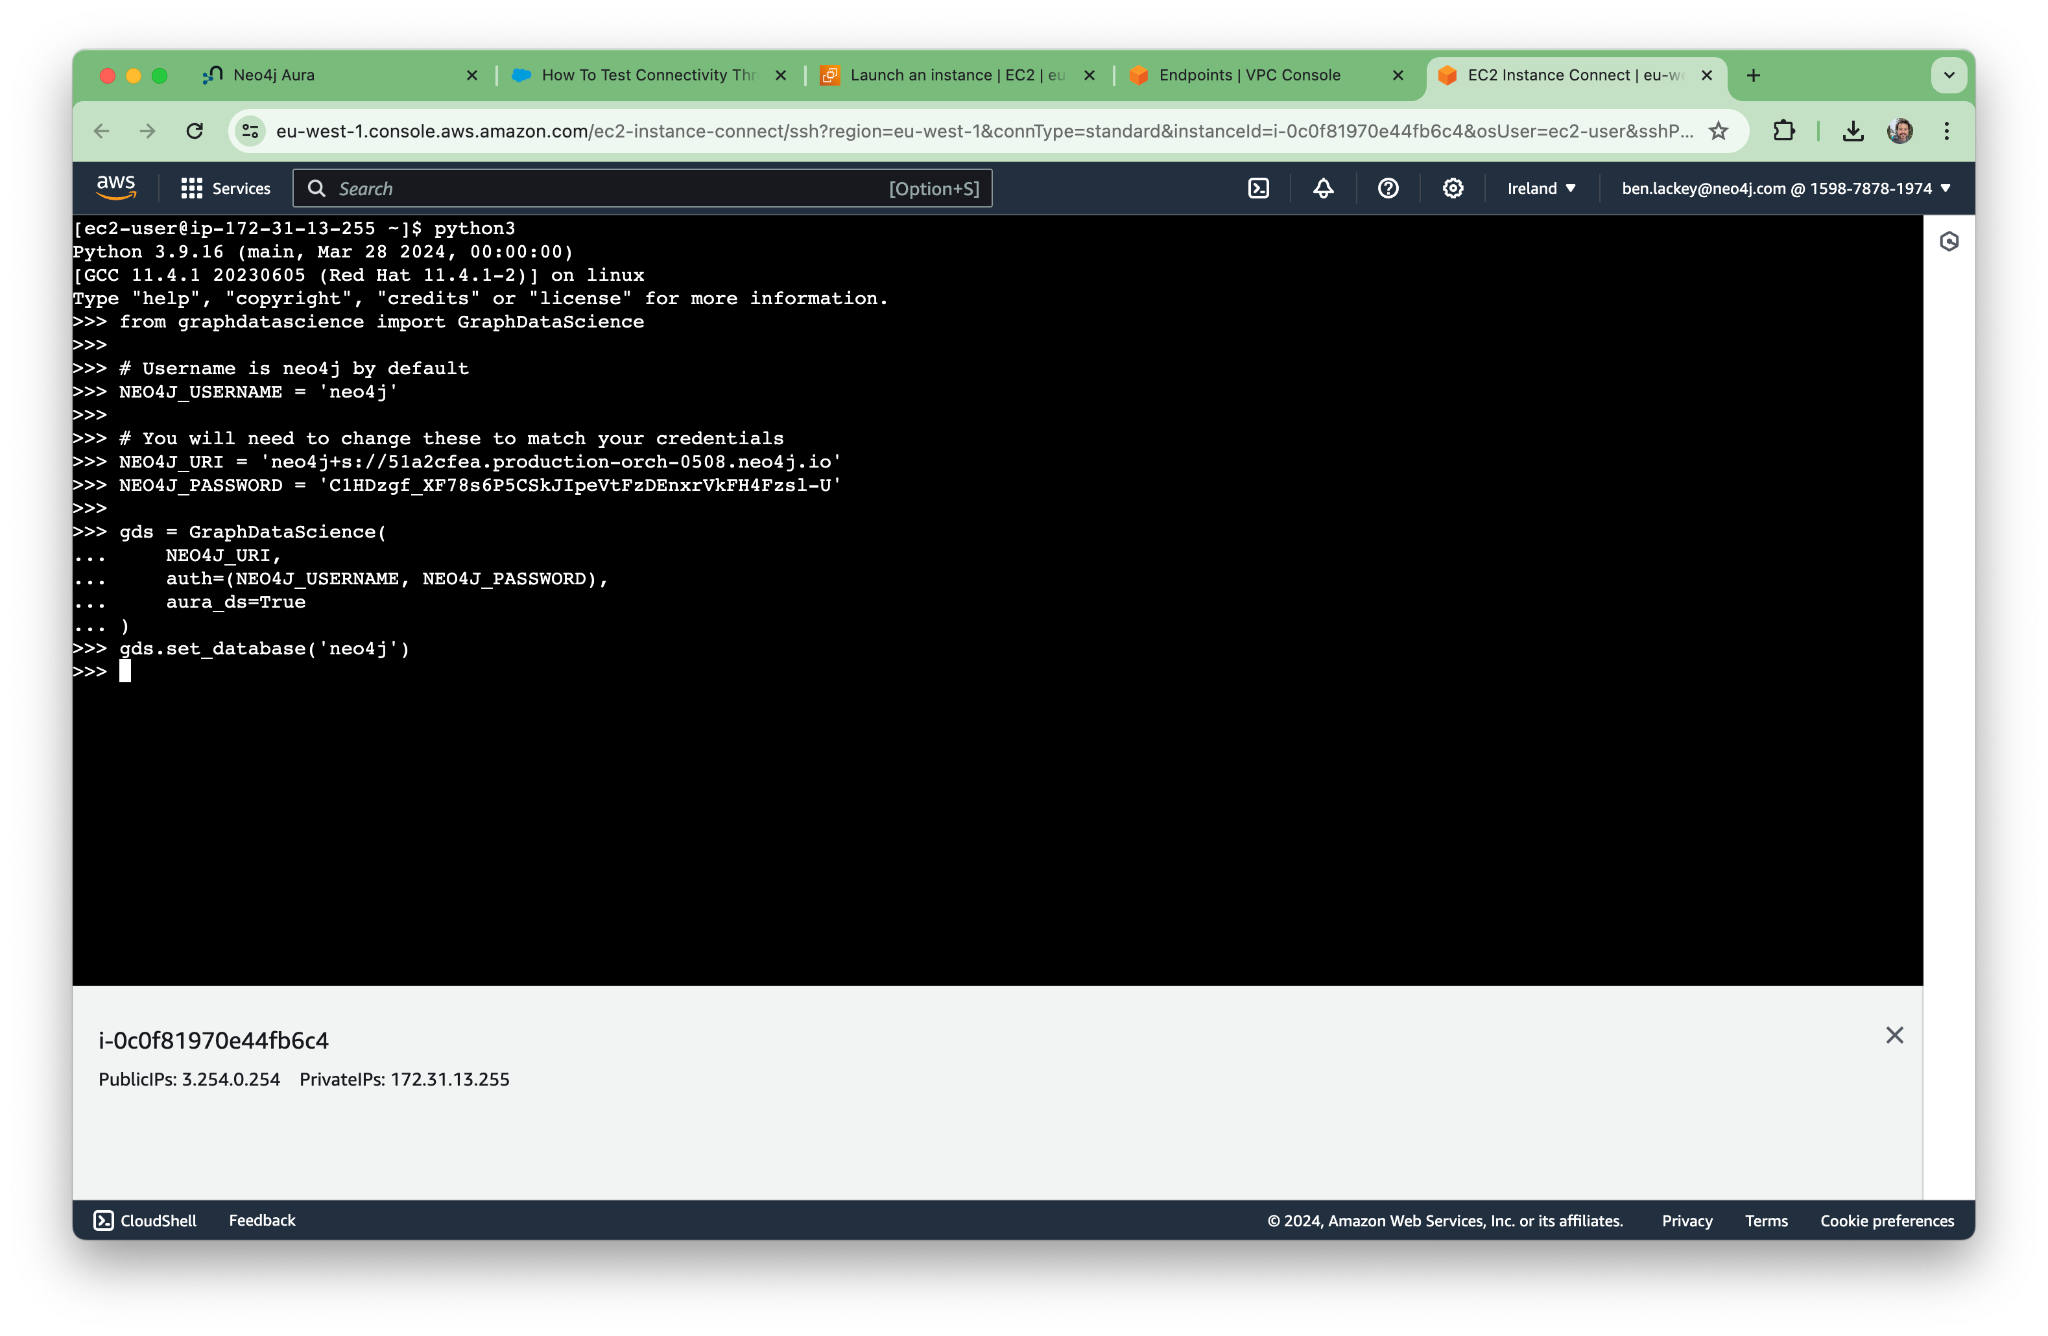
It all works! Next, let’s try the UI.
5. Connect to Neo4j Browser
We can’t publicly connect to the Neo4j UI, Workspace, as we disabled access, but we should be able to connect to Neo4j Browser and Bloom over the private network. Let’s start with Browser.
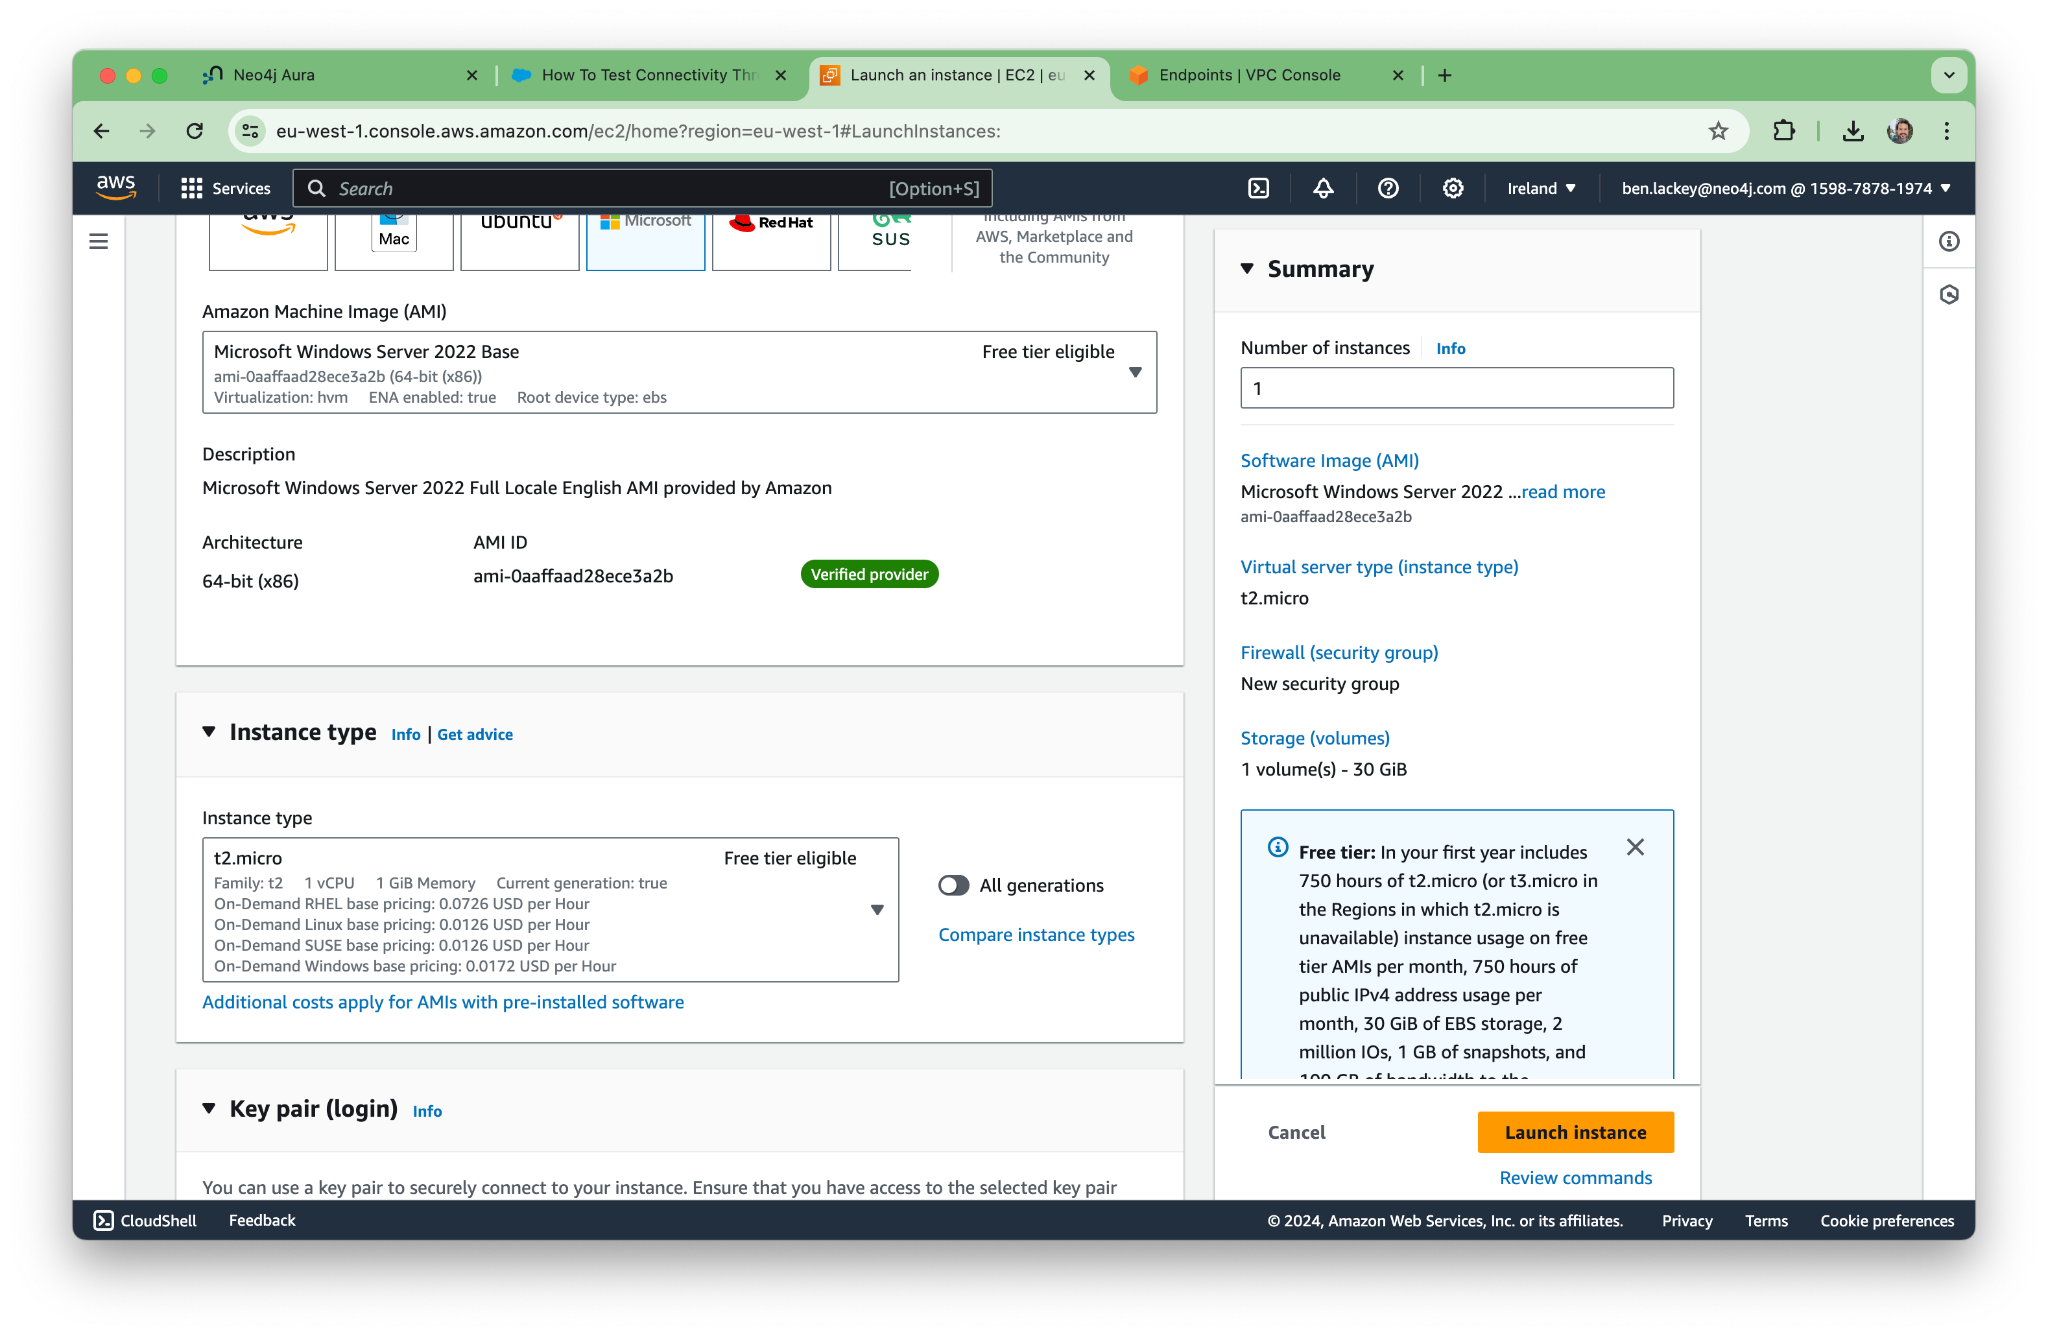
Make a Windows box and then RDP to it and connect from there.
Select a standard Windows box and make sure RDP is enabled.
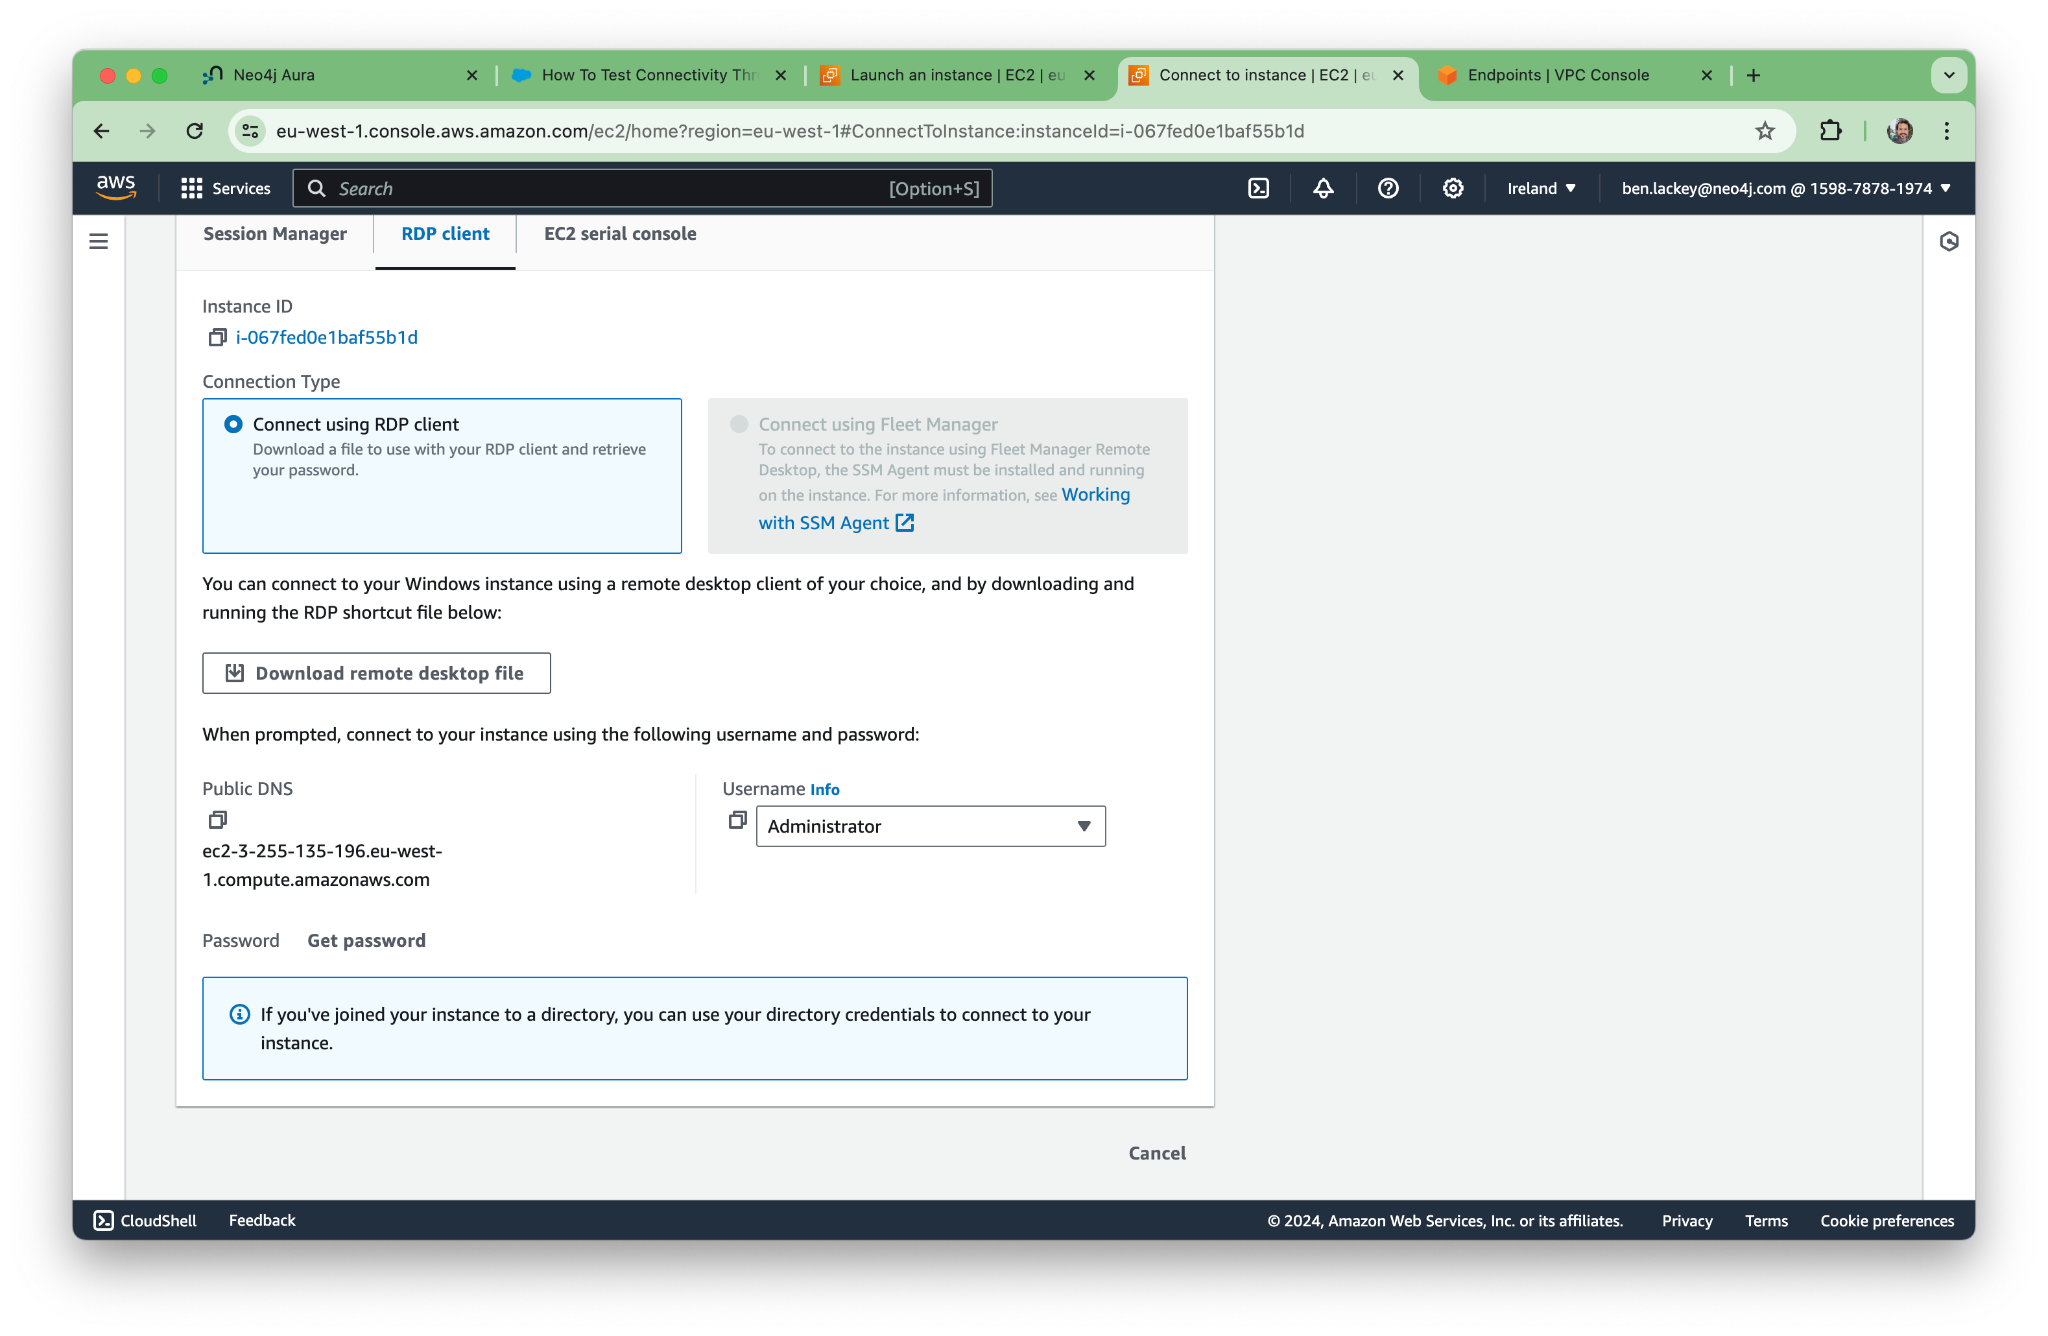
I’m on a Mac and haven’t used Windows in ages, so I needed to install RDP from here: https://apps.apple.com/us/app/microsoft-remote-desktop/id1295203466?mt=12
Grab the RDP file for your new machine.
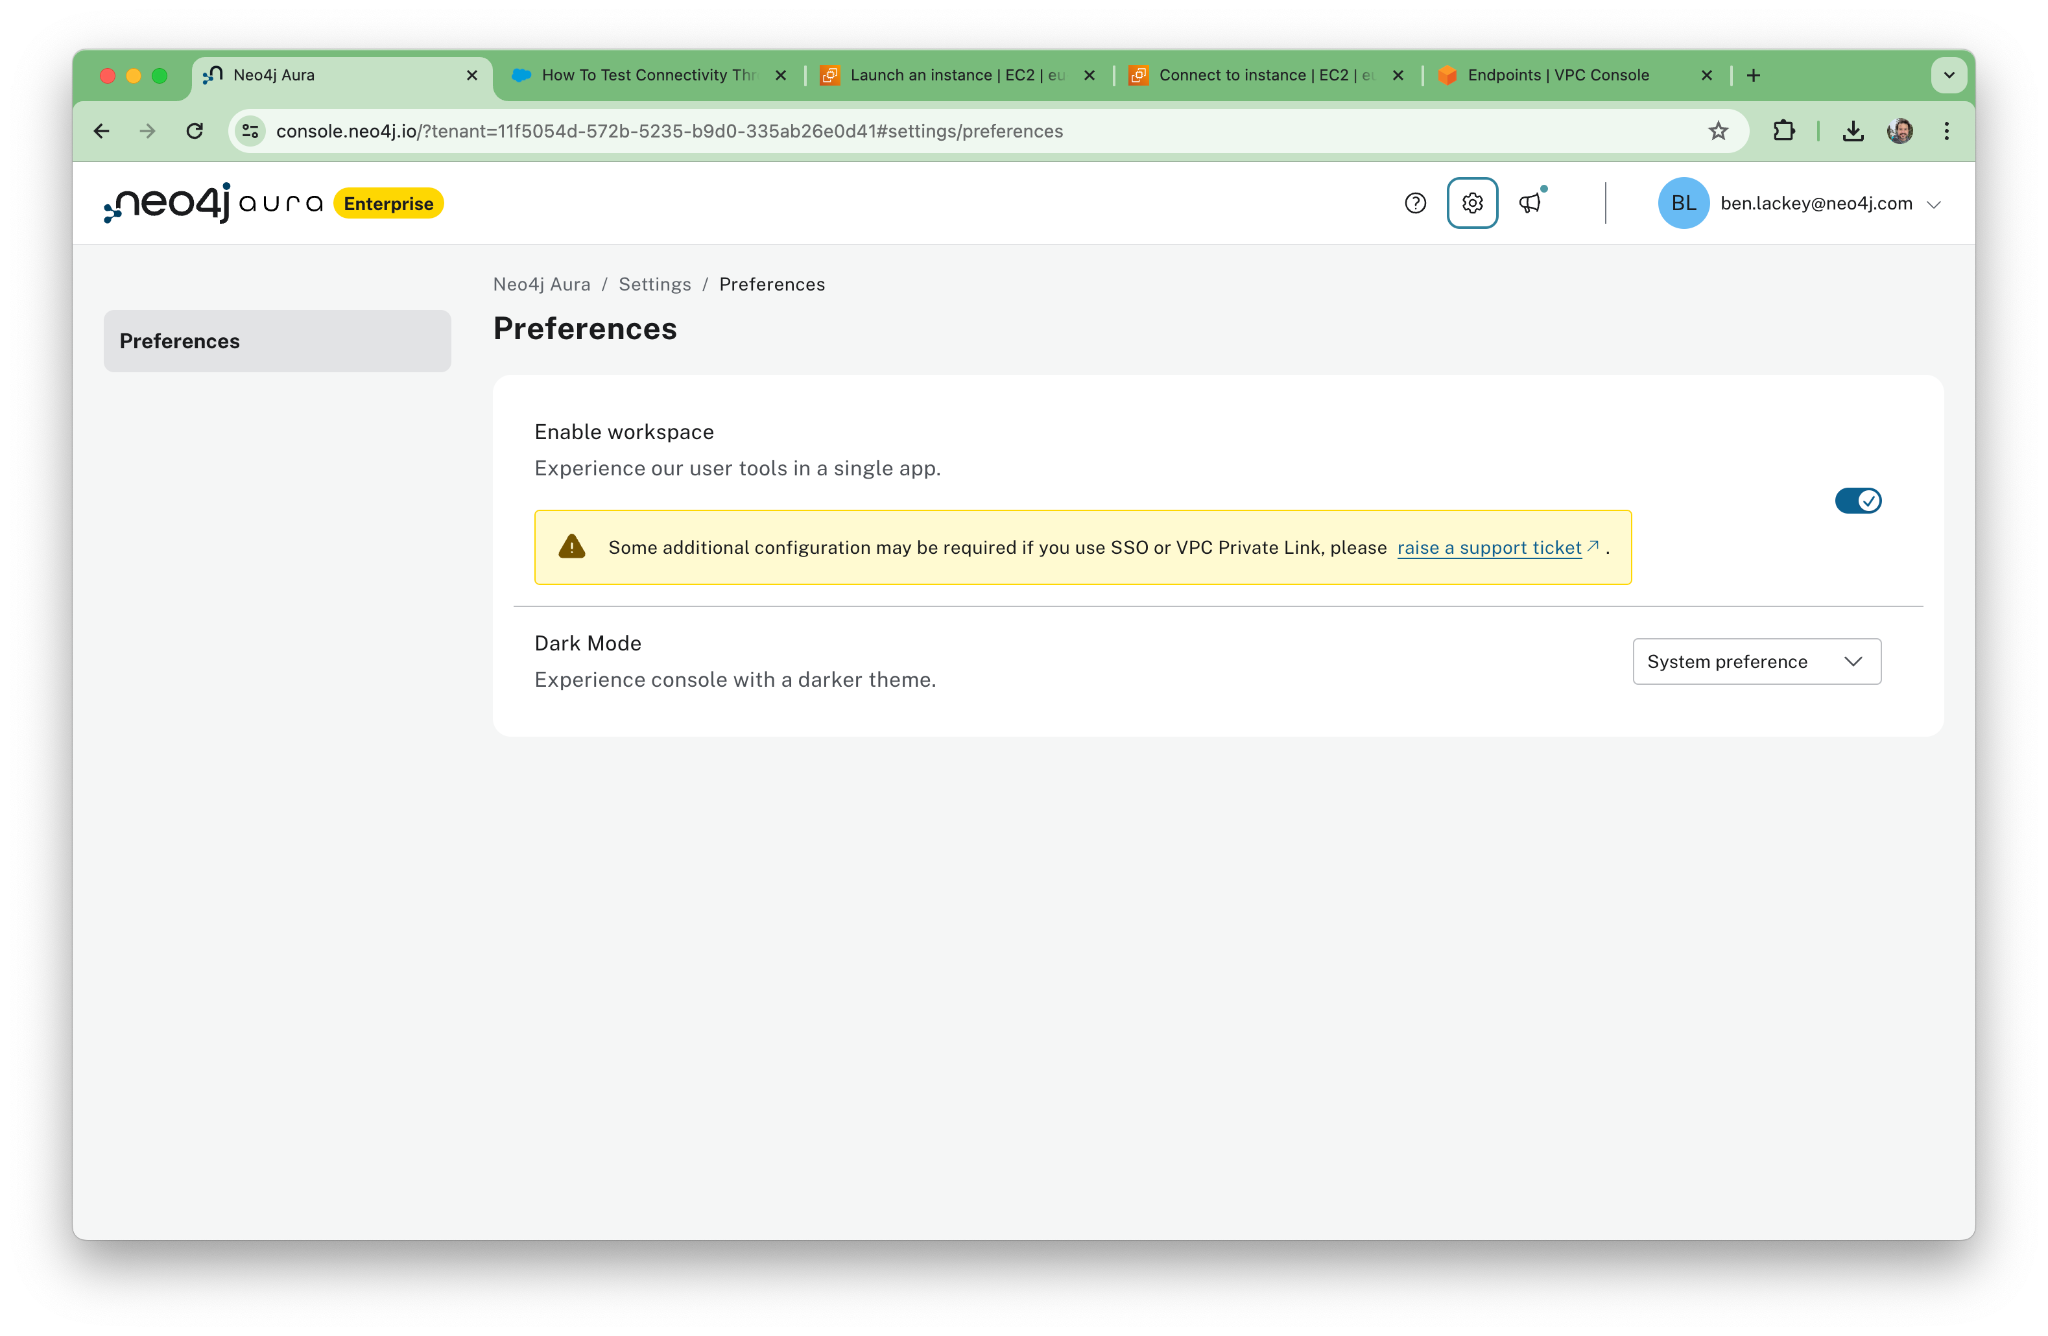
We’ll end up connected directly to Neo4j Browser. You could enable Neo4j Workspace by opening a support ticket, but we’re not going to use Workspace, so make sure it’s disabled.
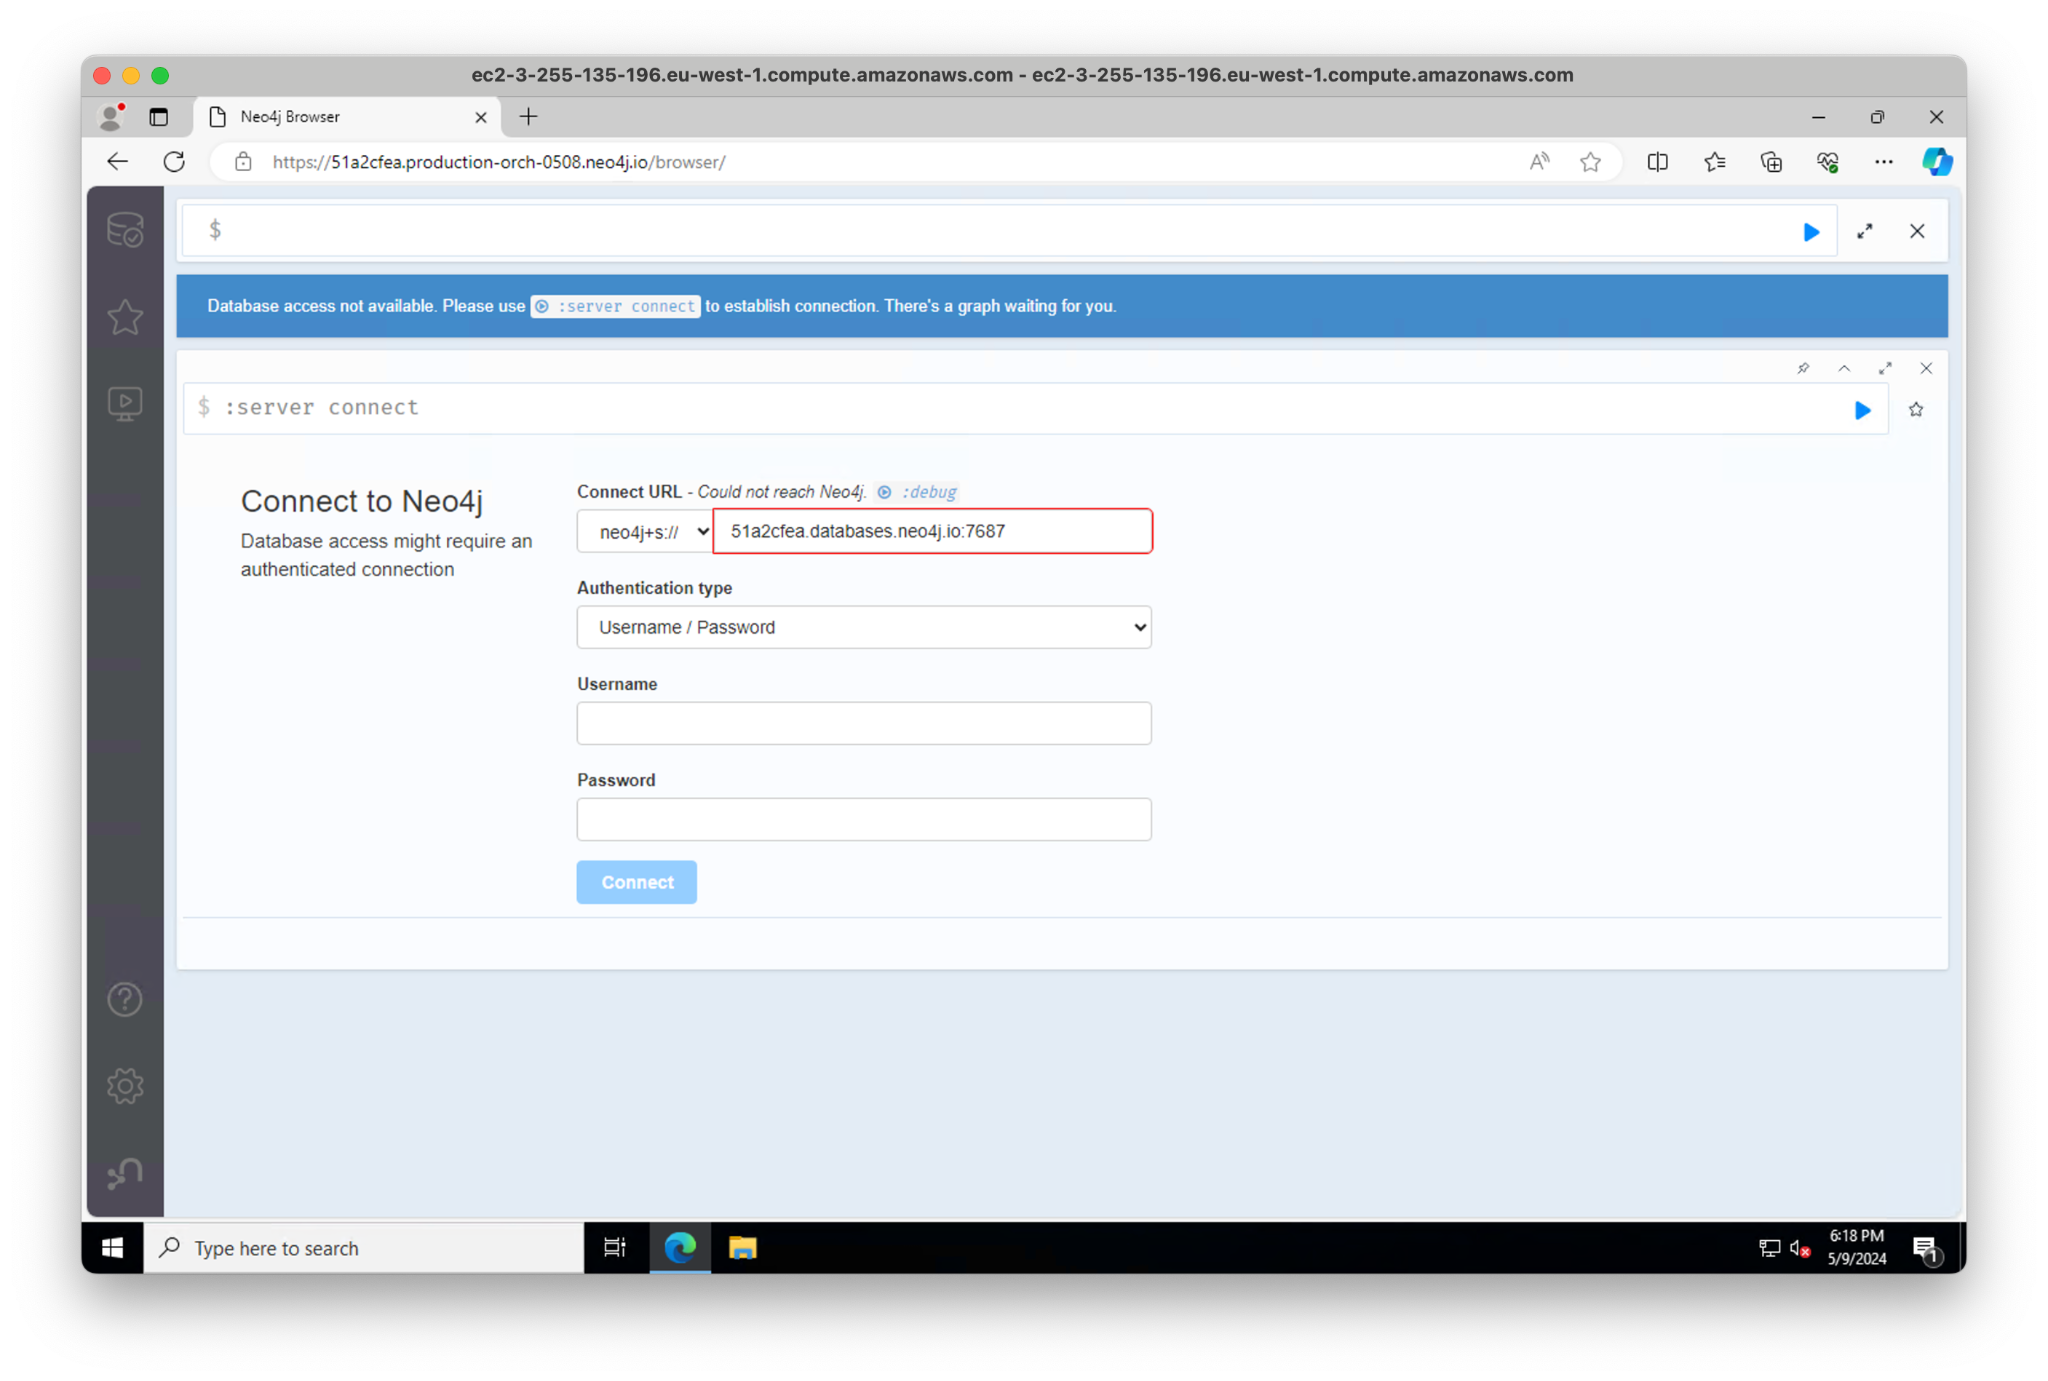
Now fire up the RDP file we downloaded in Remote Desktop. Open a web browser and connect to the database. Note that the private DNS does not populate correctly in the Connect URL. You’ll have to specify it manually yourself.
We can test the connectivity and DNS resolution on our Windows box using these commands:
Test-NetConnection 51a2cfea.production-orch-0508.neo4j.io -Port 7687
Test-NetConnection 51a2cfea.production-orch-0508.neo4j.io -Port 7474
Test-NetConnection 51a2cfea.production-orch-0508.neo4j.io -Port 443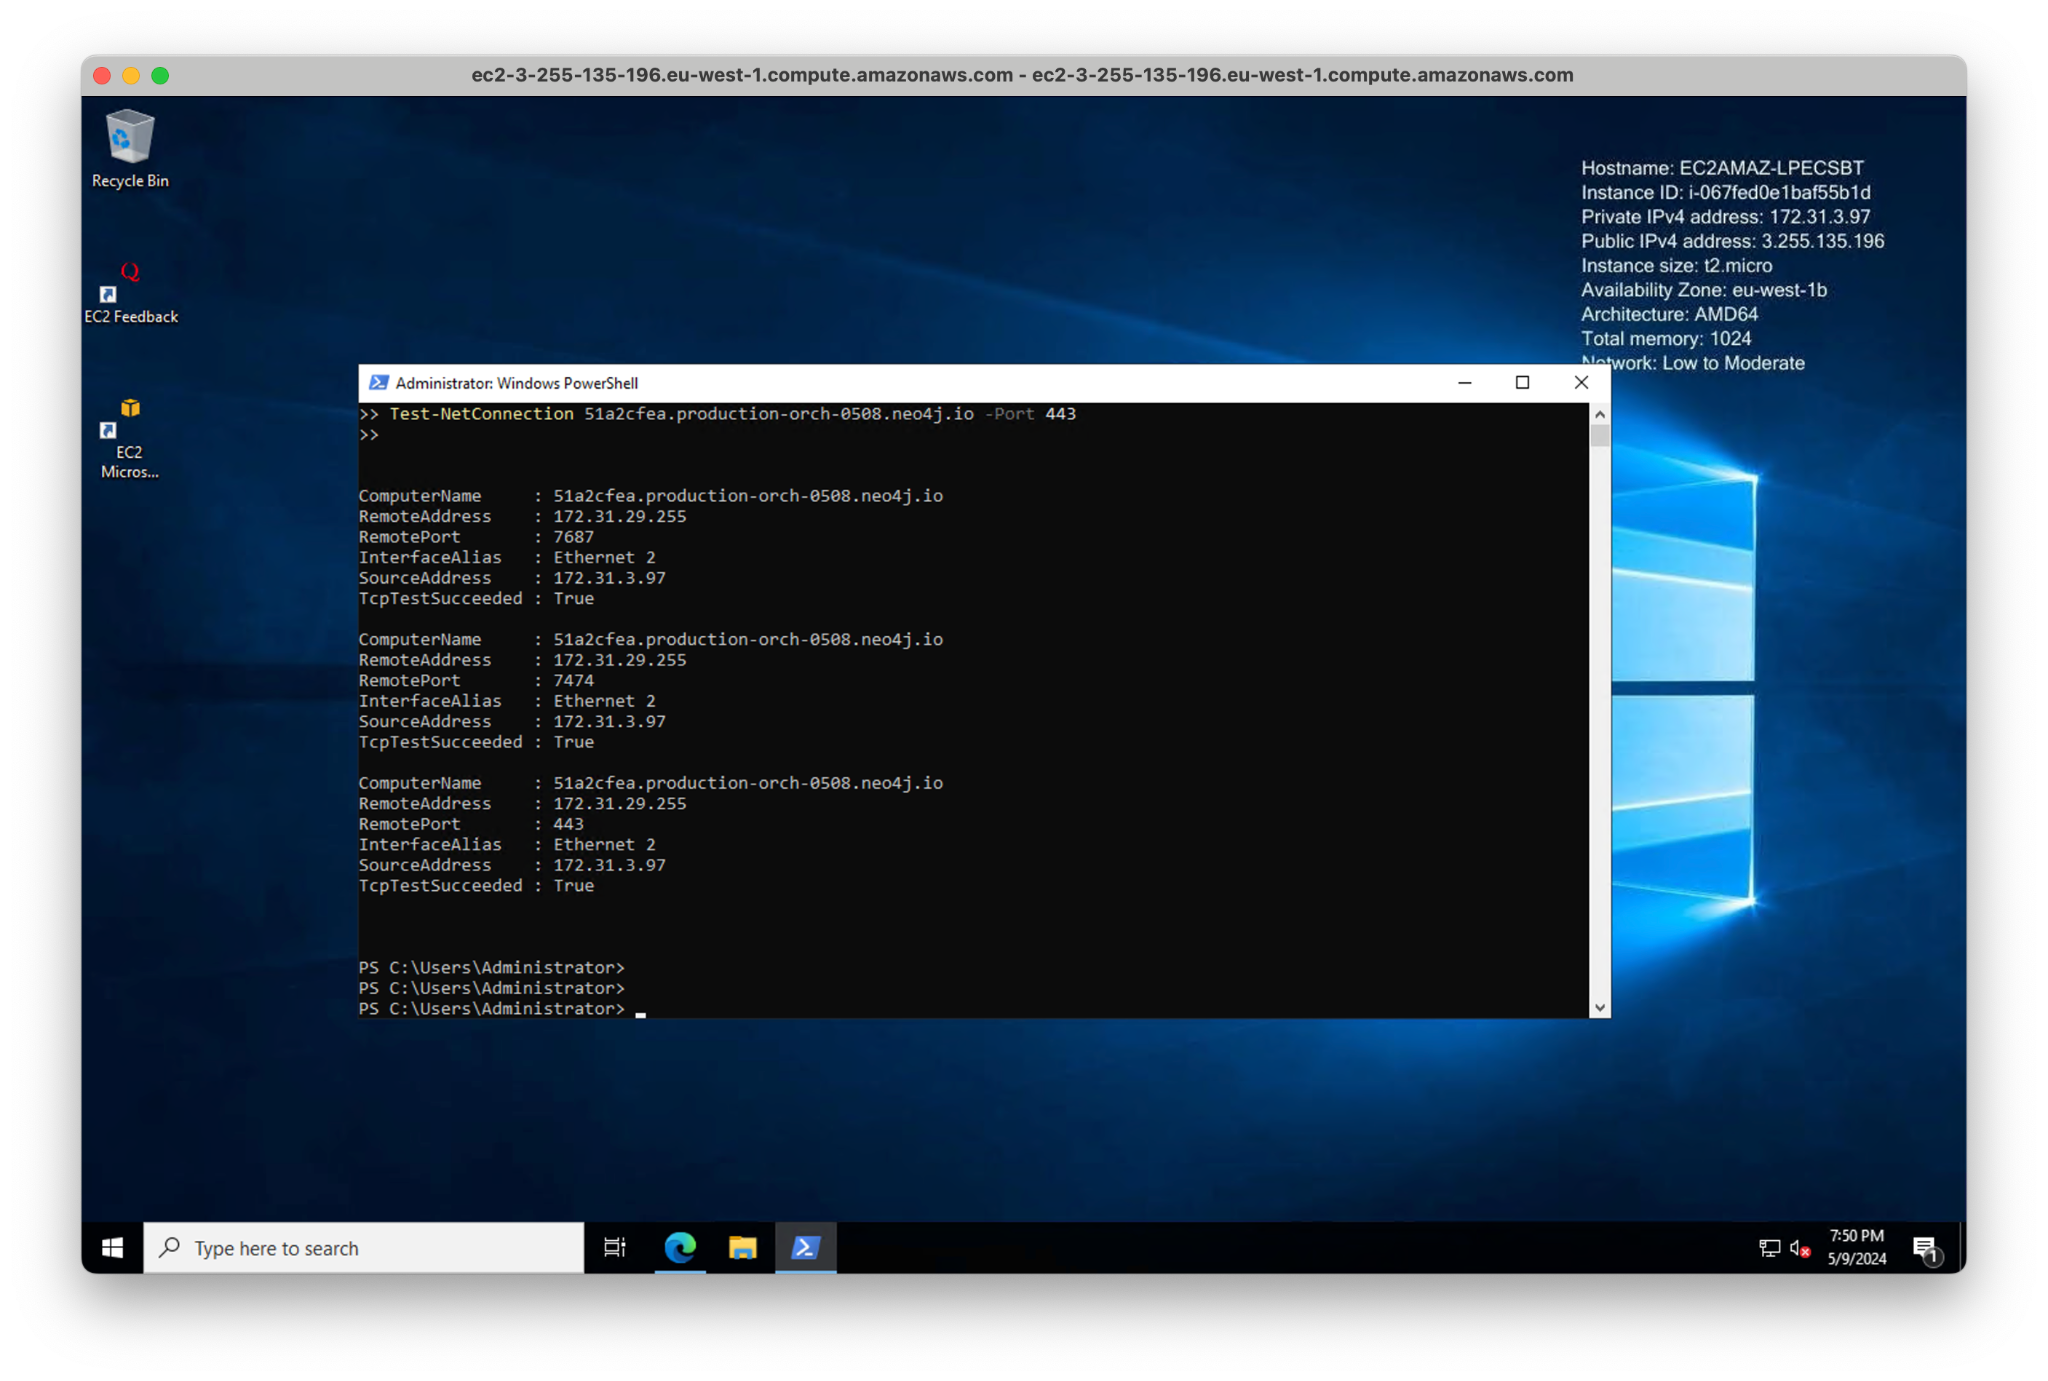
6. Connect to Neo4j Bloom
Neo4j’s BI tool, Bloom, is specifically designed for graphs. To connect to Bloom, go to the Aura console. Because we disabled Workspace, you can see the “Explore” and “Query” buttons. Click “Explore” to open Bloom.
Copy the URL and paste it into your web browser within the RDP session.
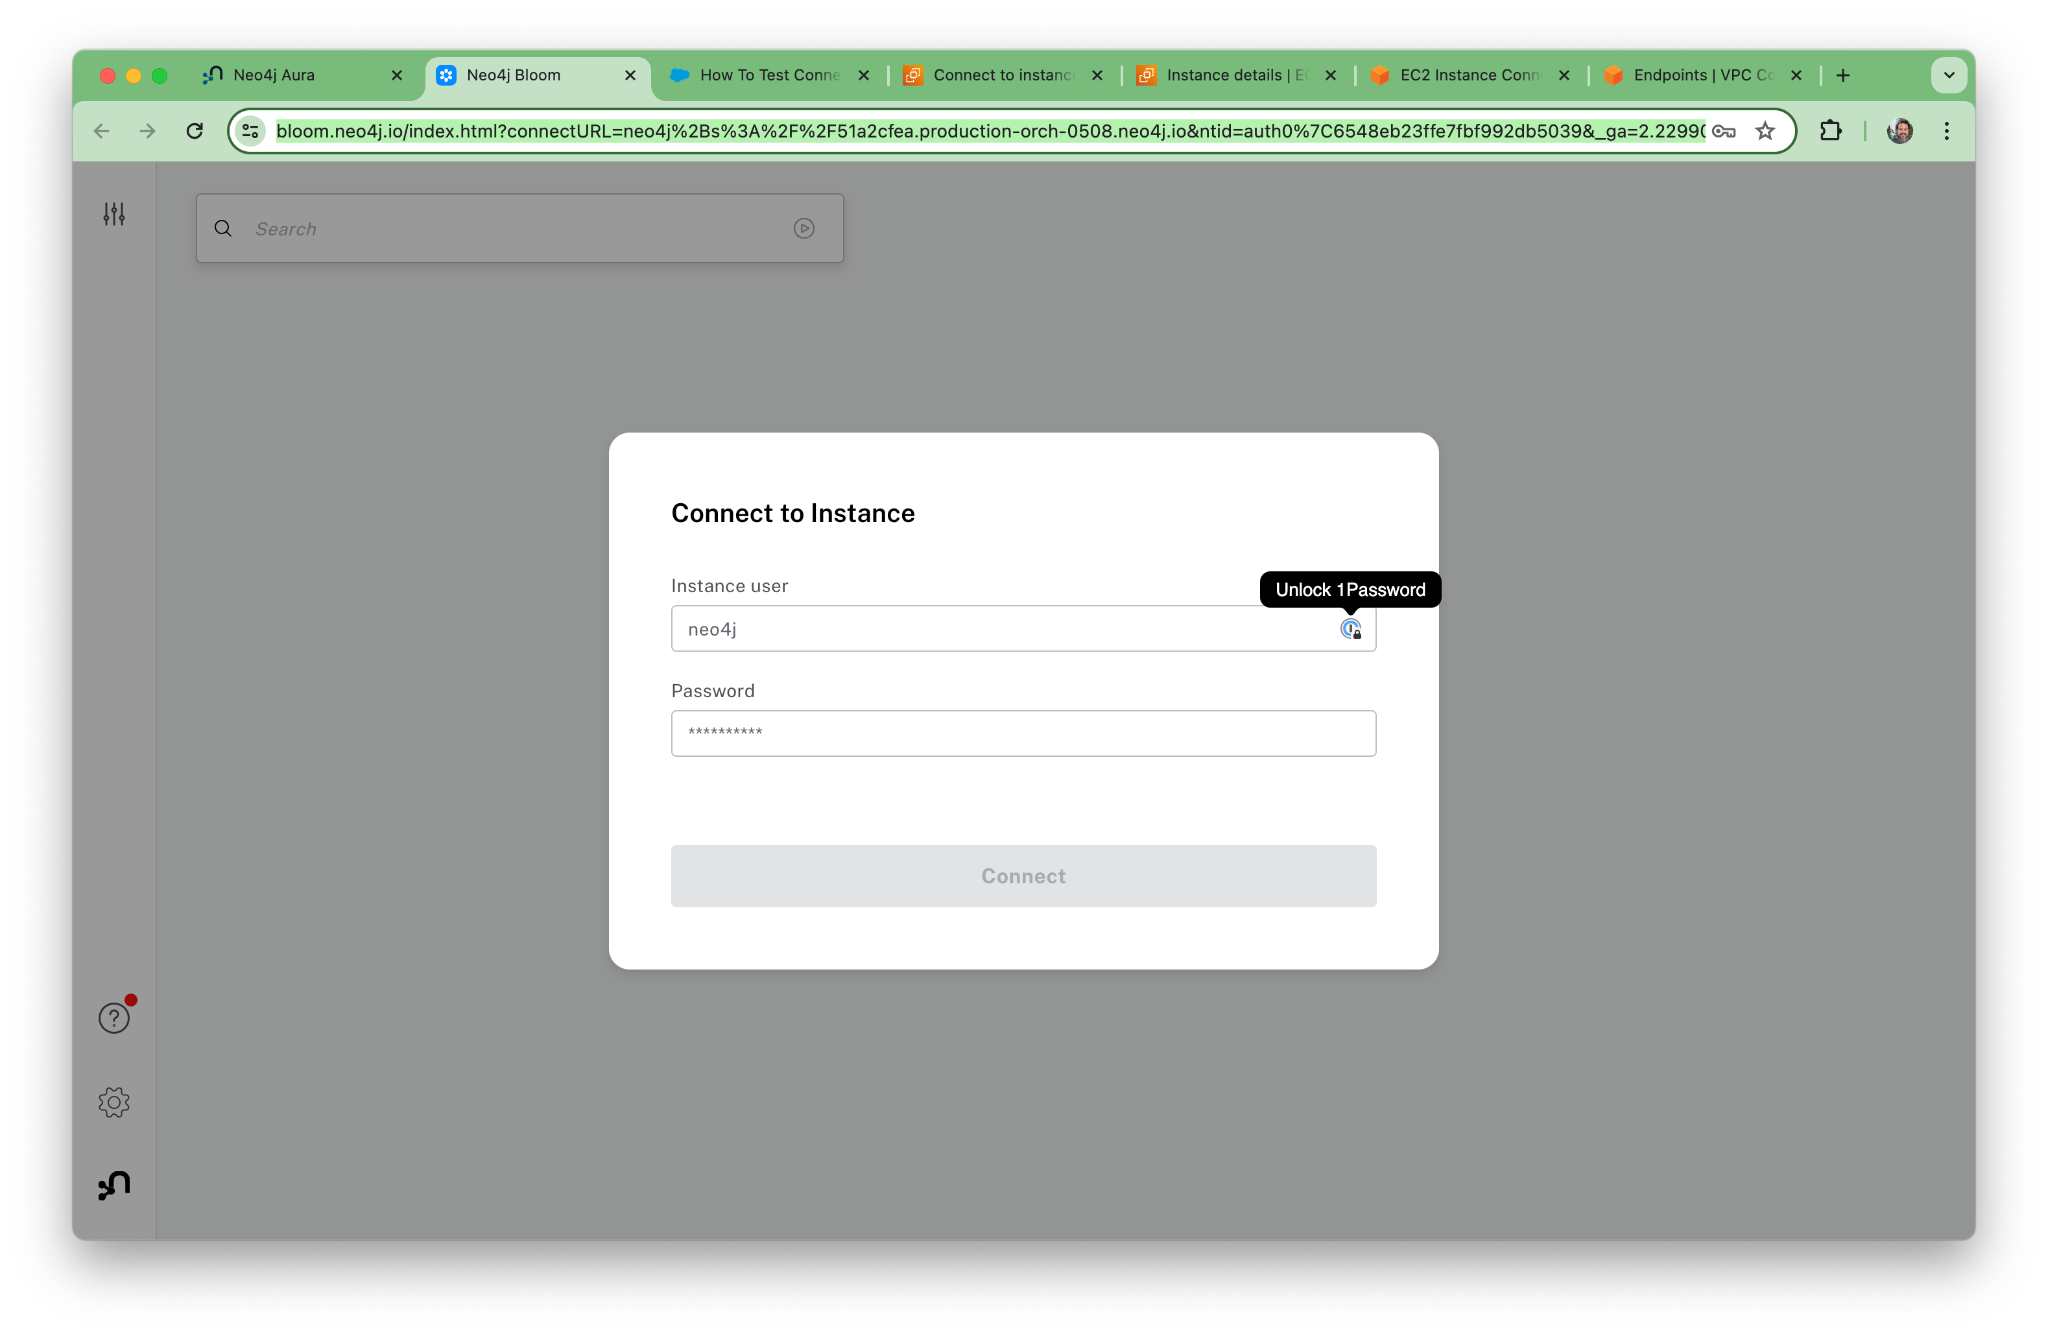
Log in with our credentials.
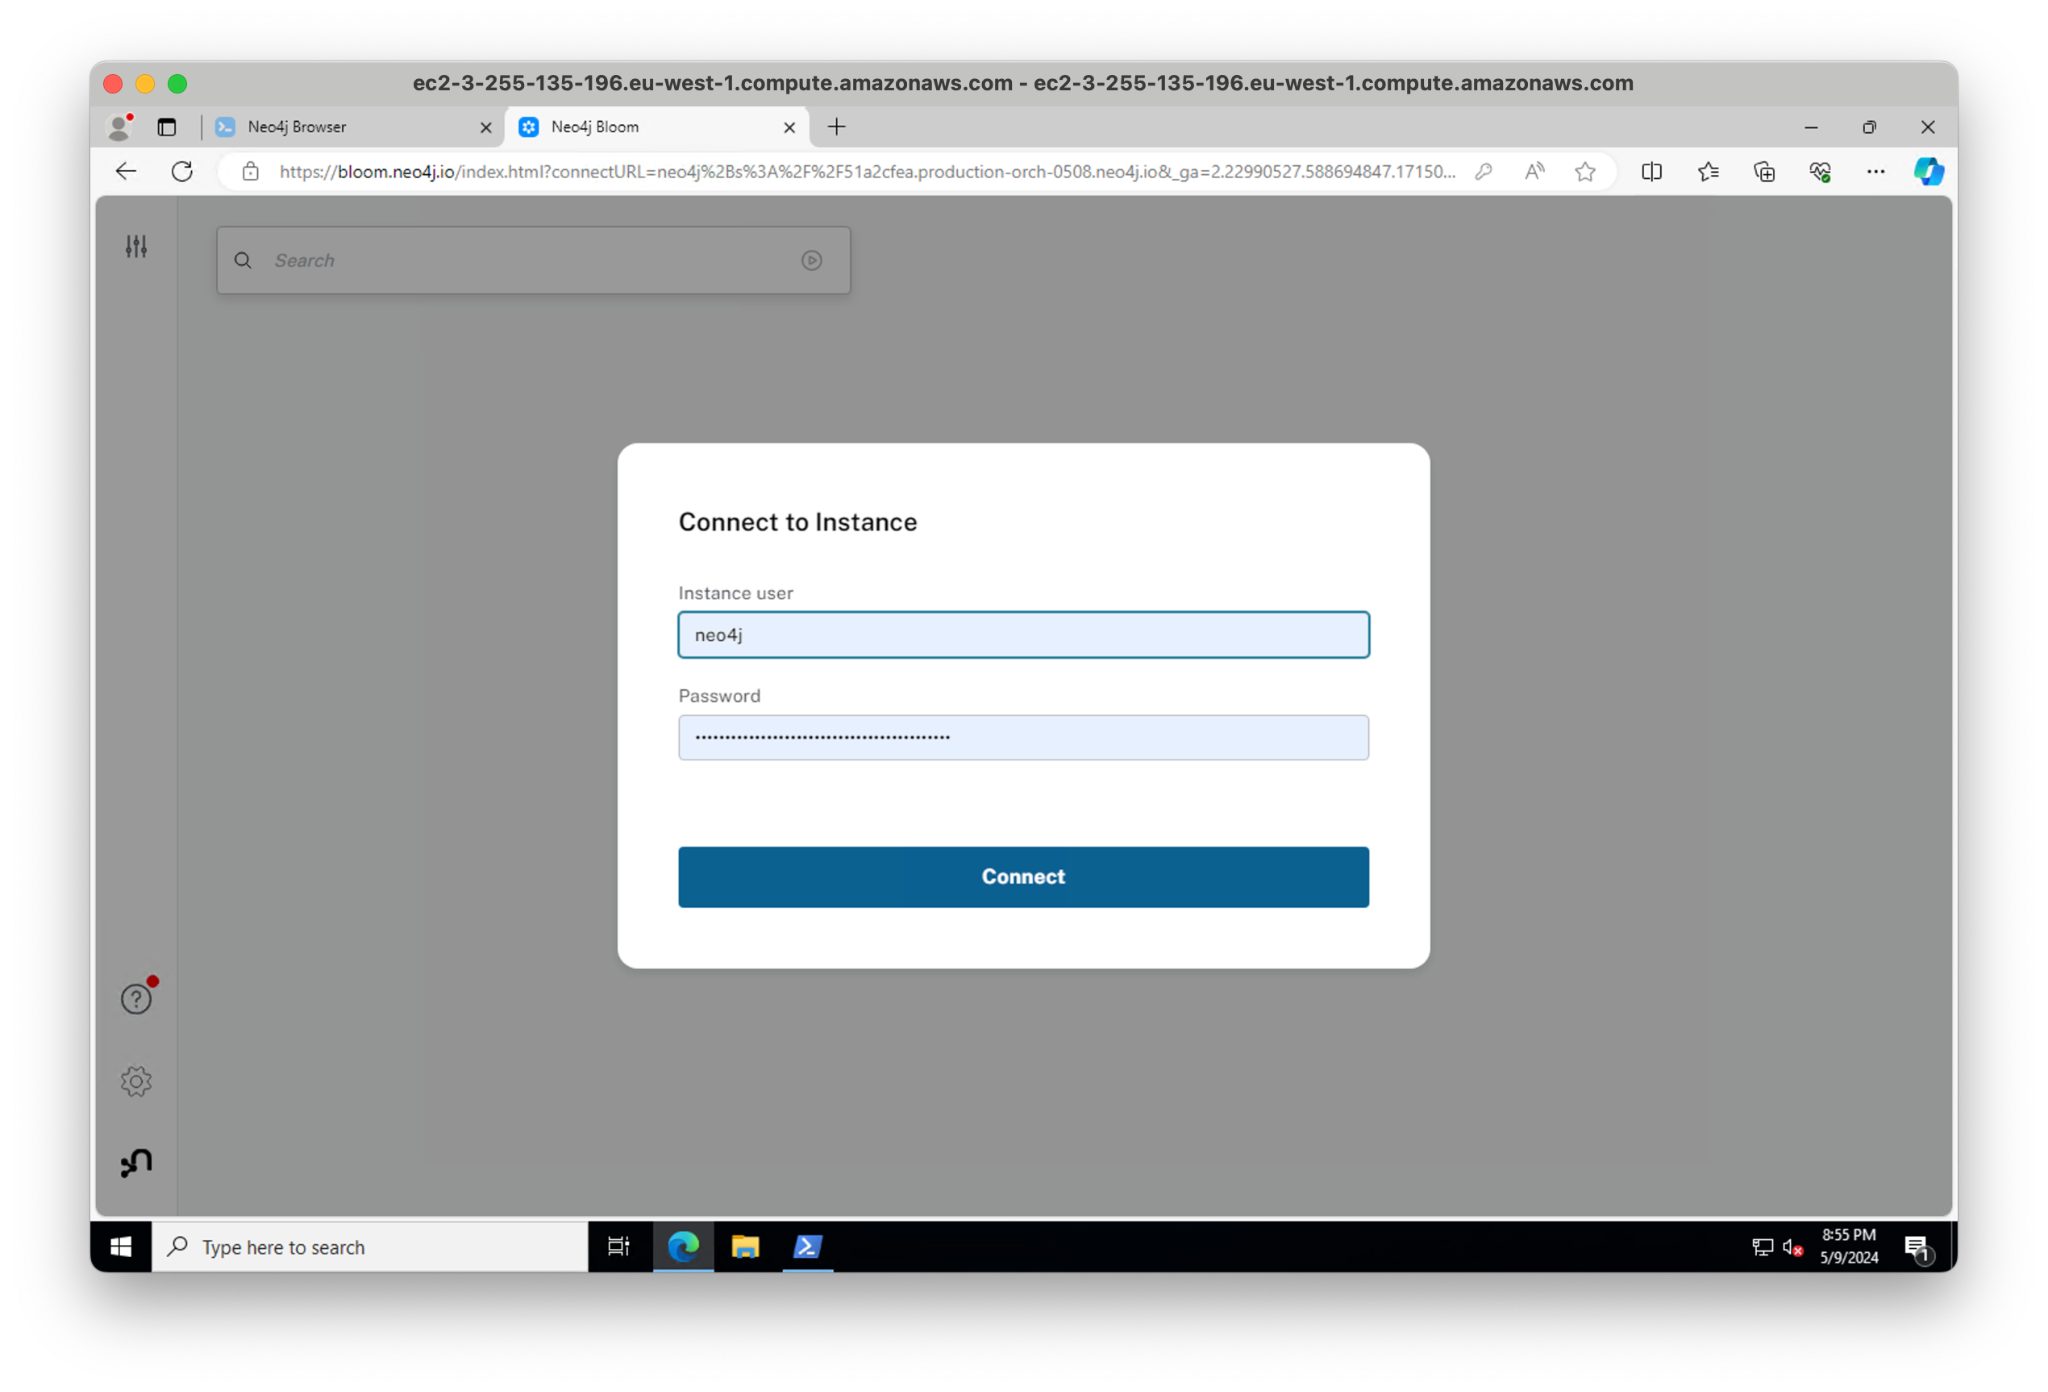
Enter your password and boom — we’re in Bloom, connected securely over RDP and PrivateLink.
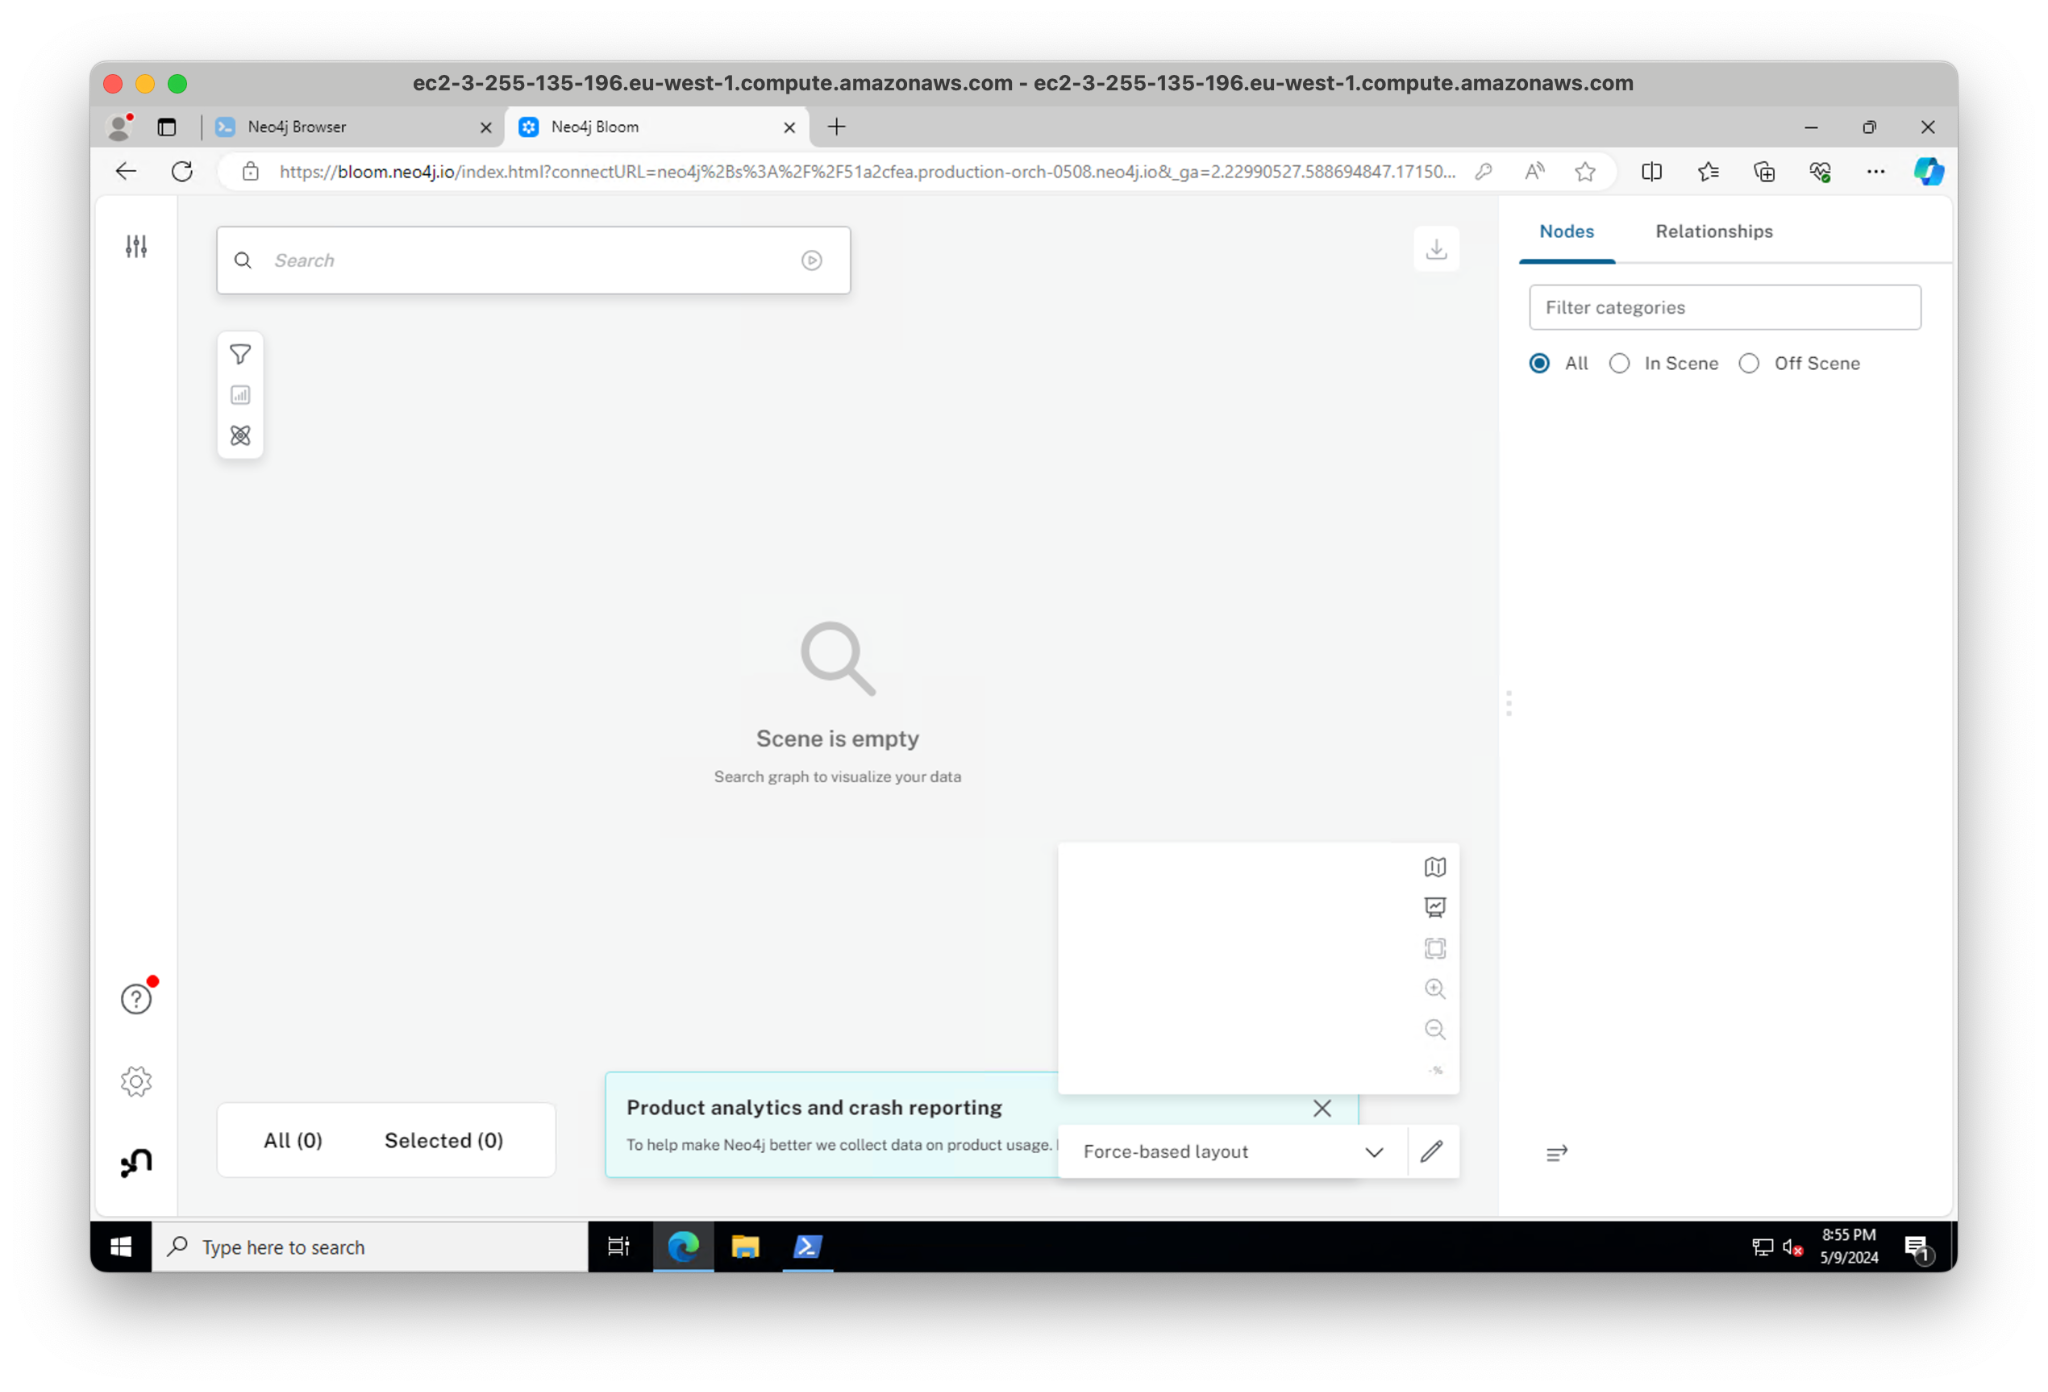
Private deployment
I hope you found this post helpful and the setup straightforward. The deployment with AWS PrivateLink and Neo4j AuraDS Enterprise is entirely private—neither the database, browser, nor Bloom is ever publicly available.
We spent most of the post verifying that the setup was working properly. The approach we tried here with a jumpbox is a great way to get started, but another common approach is using a VPN to access the peered network.
If you have any questions about the setup process, please reach out to us at [email protected].
To learn more about how Neo4j and AWS work together, take a look at our AWS partnership page.
Share Article


Explore
Related Articles

Introducing Document Intelligence: From documents to a knowledge graph, right inside Aura

Getting started with Neo4j Aura: A guide to the leading cloud graph database


Finding hidden bottlenecks in flight networks with Aura graph analytics on Databricks

Find impactful graph-powered insights in Databricks