Convenient Neo4j integration tests in GitHub Actions using the Aura CLI

Developer Experience Engineer at Neo4j
14 min read
Guess what? Adam’s back with another super-niche Neo4j post. This week, I will show you how to integrate Neo4j Aura into Github Actions for automated testing.
I have owed this article to Daniel Ruminski for a few months now. The fact is, up until recently, I’ve not really been a big Neo4j Aura user. Although the GraphAcademy website uses Neo4j Aura, I’ve mostly run integration tests locally.
But since the release of the Aura API in October, one item on my TODO list has been to set up some automated testing.
As GraphAcademy runs on Aura, I can test the code in the exact database environment in which the production servers run. And, of course, I no longer have to run the tests on my machine before release.
Since Daniel has already done the hard work by releasing the Aura CLI in Neo4j Labs, it falls to me to simply write the GitHub Action.
What is the Aura CLI?
The Aura CLI is a command line interface for interacting with Neo4j Aura. Using the CLI, you can manage, create, and delete instances, pause and resume, and even create snapshots of an existing instance.
The CLI is written in Python and hosted on PyPi, so it can be installed by running the pip install aura-cli command. You can verify the installation by running the aura –version command. If you get stuck, you can append the –help argument to any command for instructions and available options.
$ aura --help
Usage: aura [OPTIONS] COMMAND [ARGS]...

Options:
  --version      Show the version and exit.
  -v, --verbose  Print verbose output
  --help         Show this message and exit.

Commands:
  config       Manage configurations and set default values
  credentials  Configure and manage OAuth credentials
  instances    Manage your Aura instances
  snapshots    Manage instance snapshots
  tenants      Get and list tenants
Credentials
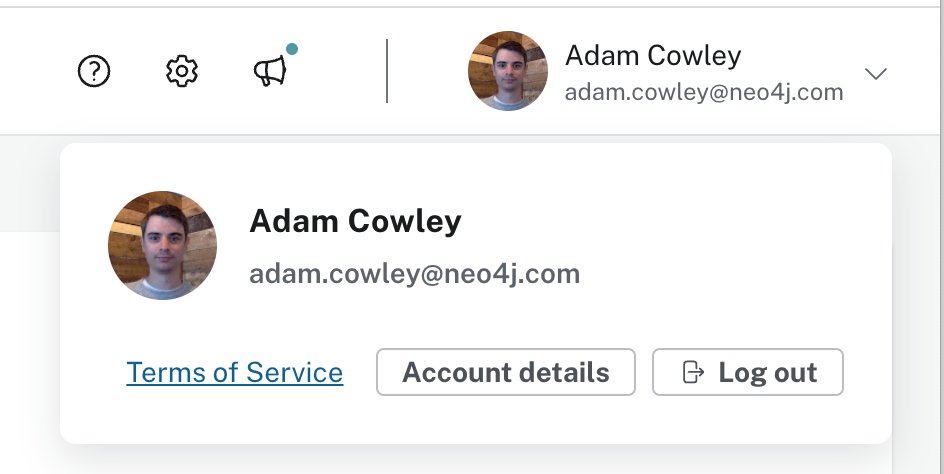
To use the CLI, log into console.neo4j.io, open your Account details, and click the Create button to create a new API key.

Then run the aura credentials add command to add your credentials, name it, and paste your Client ID and Client Secret.
$ aura credentials add --name <NAME> --client-id <YOUR_CLIENT_ID> --client-secret <YOUR_CLIENT_SECRET> --use
Listing instances
Individual Neo4j Aura databases are referred to as Instances. If you already have databases set up, you can run the aura instances list command to list your instances.
$ aura instances list --help
Usage: aura instances list [OPTIONS]

  List all instances in a tenant

Options:
  --output TEXT           Set the output format of a command
  -i, --include           Display Headers of the API response
  --raw                   Display the raw API response body
  --verbose               Print verbose output
  -tid, --tenant-id TEXT  The tenant from which you want to list instances
  --help                  Show this message and exit.

$ aura instances list

[
  {
    "cloud_provider": "aws",
    "id": "41xxxxxx",
    "name": "Chatbot",
    "tenant_id": "xxxxxxxx-xxxx-xxxx-xxxx-xxxxxxxxxxxx"
  },
  {
    "cloud_provider": "gcp",
    "id": "aexxxxxx",
    "name": "GraphAcademy",
    "tenant_id": "xxxxxxxx-xxxx-xxxx-xxxx-xxxxxxxxxxxx"
  }
]
Create a new instance
To create a new instance, run the aura instances create command.
$ aura instances create --help
Usage: aura instances create [OPTIONS]

  Create a new instance

Options:
  --output TEXT               Set the output format of a command
  -i, --include               Display Headers of the API response
  --raw                       Display the raw API response body
  --verbose                   Print verbose output
  -v, --version TEXT          The instance version
  -t, --type TEXT             The instance type
  -cp, --cloud-provider TEXT  The cloud provider for the instance
  -r, --region TEXT           The instance region
  -m, --memory TEXT           The instance memory size
  -n, --name TEXT             The instance name
  -tid, --tenant-id TEXT      The ID of the tenant where you want to create
                              the instance
  --wait                      Wait until instance is created
  --help                      Show this message and exit.
You will need to add some additional options:
- –name — a unique name for your instance
- –type — the type of database to create; professional-db, professsional-ds, enterprise-db, enterprise-ds .
- –memory — the amount of memory required in GB — e.g. 2, 4, or 8 … up to 64GB
- –cloud-provider — the cloud provider you wish to run the instance on: azure, aws or gcp.
- –region — the region to run the instance in, e.g. for aws you can specify us-west-1 , eu-west-2 , etc.
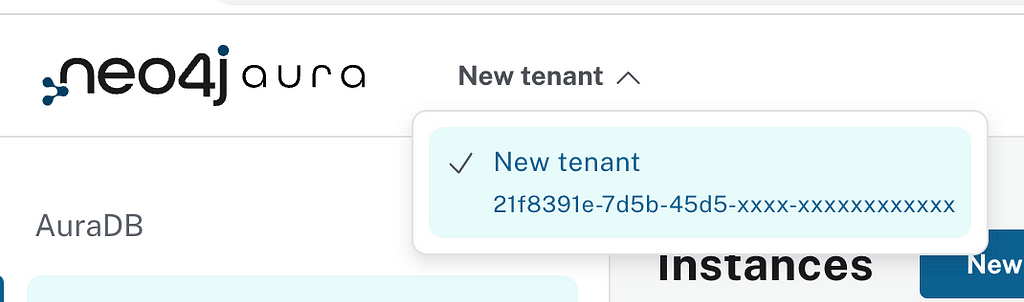
- –tenant-id — the Neo4j Aura tenant to create the database in. Your tenant ID is listed in the header of the Neo4j Aura Console, next to the Neo4j Aura logo.
The command will return a JSON object with information, including the database ID, connection URL, and password, which you should store in a safe place for later.
$ aura instances create --name test database --region eu-west-1 --cloud-provider aws --type professional-db --tenant-id xxxxxxxx-xxxx-xxxx-xxxx-xxxxxxxxxxxx
{
  "cloud_provider": "aws",
  "connection_url": "neo4j+s://d46xxxxx.databases.neo4j.io",
  "id": "d46xxxxx",
  "name": "test database",
  "password": "VNxxxxxx_XXXXXXXXXXXX-xxxx",
  "region": "eu-west-1",
  "tenant_id": "xxxxxxxx-xxxx-xxxx-xxxx-xxxxxxxxxxxx",
  "type": "professional-db",
  "username": "neo4j"
}
You can also append –wait to wait for the database to provision and start before returning the connection details.
To delete an instance, run the aura instances delete command.
$ aura instances delete --instance-id d46xxxxx
Are you sure you want to delete the database? [y/N]: y
Using the CLI in a GitHub Action
The best part is the CLI can be installed and called from a GitHub action. I have created an example repository to demonstrate this, even when combining the Python CLI with another language is possible.
If you want to skip to the final code, view an example Github action here.
The example repository hosted on GitHub contains an example project with a simple set of TypeScript tests that verify the class’s CRUD operations are correctly implemented.
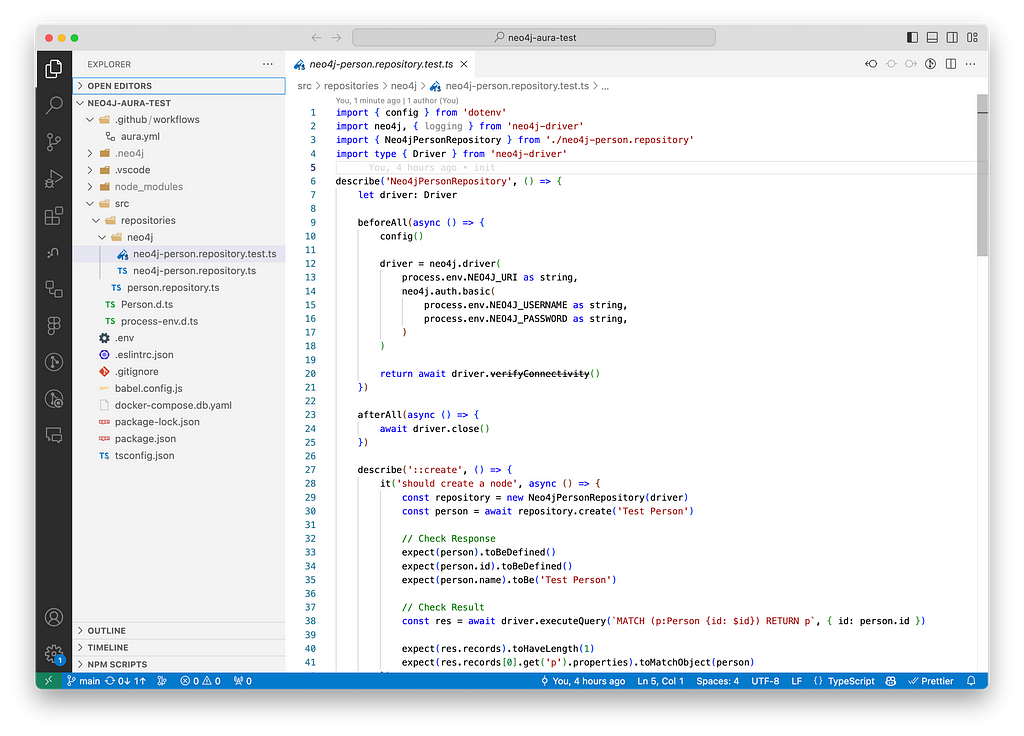
The tests are executed locally with the npm run test command, which kicks off the jest testing framework.
Creating an action
GitHub Actions reside in the .github/workflows folder and can be triggered to run when certain events occur, for example, when a change is pushed to a particular branch or when a commit is tagged with a version number to signify a release.
The aura.yml file defines an action called Aura Integration Testing, which is triggered every time code is pushed to the repository.
name: Aura Integration Testing

on:
  - push
  - workflow_dispatch
The workflow consists of three jobs, each of which relies on the previous job.
- First, the CLI needs to be called to create a new Neo4j Aura DB instance. The CLI needs to be configured, and a new instance needs to be created. The credentials returned by the API should be appended to the $GITHUB_OUTPUTS file so they can be accessed in subsequent steps.
- Next, the npm run test command needs to be run in a Node.js environment, using the Connection URI, Username, and Password of the instance created in the previous step.
- Finally, once the tests have run, conclude by deleting the database so there are no nasty bills at the end of the month.
Jobs 1 and 3 need to be run in a Python environment, and the second needs a Node.js environment.
Let’s break down the workflow into parts.
Job 1: Creating the database
The first job, named setup , produces four outputs that will be required later on: instanceid, host, username and password.
1a. Checkout the Repo and set up Python
The job starts by checking out the repository, setting up Python v3.12, and printing the version.
jobs:
  setup:
    name: Setup
    runs-on: ubuntu-latest
    outputs:
      instanceid: ${{ steps.create.outputs.instanceid }}
      host: ${{ steps.create.outputs.host }}
      username: ${{ steps.create.outputs.username }}
      password: ${{ steps.create.outputs.password }}

    steps:
      - uses: actions/checkout@v4

      - name: Set up Python 3.12
        uses: actions/setup-python@v4
        with:
          python-version: "3.12.1"

      - name: Display Python version
        run: python -c "import sys; print(sys.version)"
1b. Install the Aura CLI
Next, pip install is called to install or upgrade the aura-cli package.
      - name: Install Aura CLI
        run: python -m pip install --upgrade aura-cli
1c. Set your Neo4j Aura API credentials
You will need to register your credentials to connect to the API. Take the credentials created in the Account Details section of the Neo4j Aura Console and add them to your Github Secrets for the repository or organization.
You will need:
- The Client ID — I have called this AURA_CLIENT_ID
- The Client Secret — I have called this AURA_CLIENT_SECRET
You can then refer to these in the YAML file by wrapping them in ${{ and }} and using the secrets variable.
      - name: Apply Credentials
        run: aura credentials add --name aura --client-id ${{ secrets.AURA_CLIENT_ID }} --client-secret ${{ secrets.AURA_CLIENT_SECRET }} --use
The –use flag at the end instructs the CLI to use them right away.
1d. Create a new instance
Now, the CLI should be able to connect to the service and create an API. The following step uses the aura instances create command to create a new database.
This step creates a new instance with the name AuraIntegrationTests . Some new secrets are also applied here, so you can quickly swap out your provider, region, and tenant ID.
      - name: Create Instance
        id: create
        run: |
          json_output=$(aura instances create --name AuraIntegrationTests --cloud-provider ${{ secrets.AURA_CLOUD_PROVIDER }} --region ${{ secrets.AURA_REGION }} --type professional-db --tenant-id ${{ secrets.AURA_TENANT_ID }})
          instanceid=$(echo "$json_output" | jq -r '.id')
          host=$(echo "$json_output" | jq -r '.connection_url')
          username=$(echo "$json_output" | jq -r '.username')
          password=$(echo "$json_output" | jq -r '.password')
          echo $instanceid
          echo "instanceid=$instanceid" >> $GITHUB_OUTPUT
          echo "host=$host" >> $GITHUB_OUTPUT
          echo "username=$username" >> $GITHUB_OUTPUT
          echo "password=$password" >> $GITHUB_OUTPUT
The job’s first line calls the aura instances create command and assigns the output to a new json_output variable. I then use the jq command line tool to extract the Instance ID, Host, Username, and Password of the newly created instance.
These are appended to the $GITHUB_OUTPUT file using the names defined in step 1a. These will be available for use in subsequent steps and jobs.
1e. Does the instance exist?
This step isn’t strictly required, but to check the variables are being correctly passed and the instance has been created, I run the aura instances get command using the output from the previous step. Expect this API call to return a creating status for a minute or so until the instance is ready.
      - name: Exists?
        run: aura instances get --instance-id ${{ steps.create.outputs.instanceid }}
1f. Wait for the instance to start
The instance needs to be running before the tests can run, so this stage waits for the status to equal running before continuing to the next step.
      - name: Wait for instance
        run: |
          while true; do
            dbstatus=$(aura instances get --instance-id ${{ steps.create.outputs.instanceid }} | jq -r '.status')
            if [ "$dbstatus" = "running" ]; then
                echo "Status is running. Continuing..."
                break
            else
                echo "Status is $dbstatus. Waiting..."
                sleep 20
            fi
          done
This is quite verbose, which suited my testing process. You can skip this step by adding the –wait option to the aura instances create step that instructs the command to wait for up to 20 minutes.
Job 2: Running the tests
Following the commands above, you should now have a database running. The next step is to run the tests.
You will not need a separate job if you have a Python codebase. I have included some TypeScript tests here to demonstrate how to mix different languages.
This step requires the previous job to run first. This can be achieved by adding the ID of the job to the needs key.
The first step required is to check out the code (actions/checkout@v4).
tests:
    name: Integration Tests
    runs-on: ubuntu-latest
    needs: setup
    steps:
      - uses: actions/checkout@v4
Next, the tests need to be run in a Node.js environment. I have chosen the current LTS version listed on nodejs.org.
      - name: Use Node.js
        uses: actions/setup-node@v3
        with:
          node-version: "20.9.0"
Then, to run the tests, run npm install and then npn run test to trigger the test. This step needs access to the credentials from the setup job, which can be accessed through needs.setup.outputs . These are set as environment variables for the step using env:.
      - name: Run Tests
        env:
          NEO4J_URI: ${{ needs.setup.outputs.host }}
          NEO4J_USERNAME: ${{ needs.setup.outputs.username }}
          NEO4J_PASSWORD: ${{ needs.setup.outputs.password }}
        run: |
          echo "NEO4J_URI=$NEO4J_URI"
          npm install --include=dev
          npm run test
If all goes well, all tests in the suite should pass.
Job 3: Shutting down the environment
Once the tests are finished, a final command can be run to shut down the instance. This will save you some money…
This job should only be run after the previous step has been completed, so the needs value should be set to the ID of the job; in this casetests .
As with the first job, this needs to perform the steps to set up Python, install the CLI, and then configure the CLI with the credentials.
  teardown:
    name: Teardown
    runs-on: ubuntu-latest
    needs:
      - tests
    steps:
      - uses: actions/checkout@v4

      - name: Set up Python 3.12
        uses: actions/setup-python@v4
        with:
          python-version: "3.12.1"

      - name: Install Aura CLI
        run: python -m pip install --upgrade aura-cli

      - name: Apply Credentials
        run: aura credentials add --name aura --client-id ${{ secrets.AURA_CLIENT_ID }} --client-secret ${{ secrets.AURA_CLIENT_SECRET }} --use
Finally, the aura instances delete command must be run, passing through the Instance ID from the first job.
      - name: Delete Instance
        run: aura instances delete --instance-id ${{ needs.setup.outputs.instanceid }} --yes
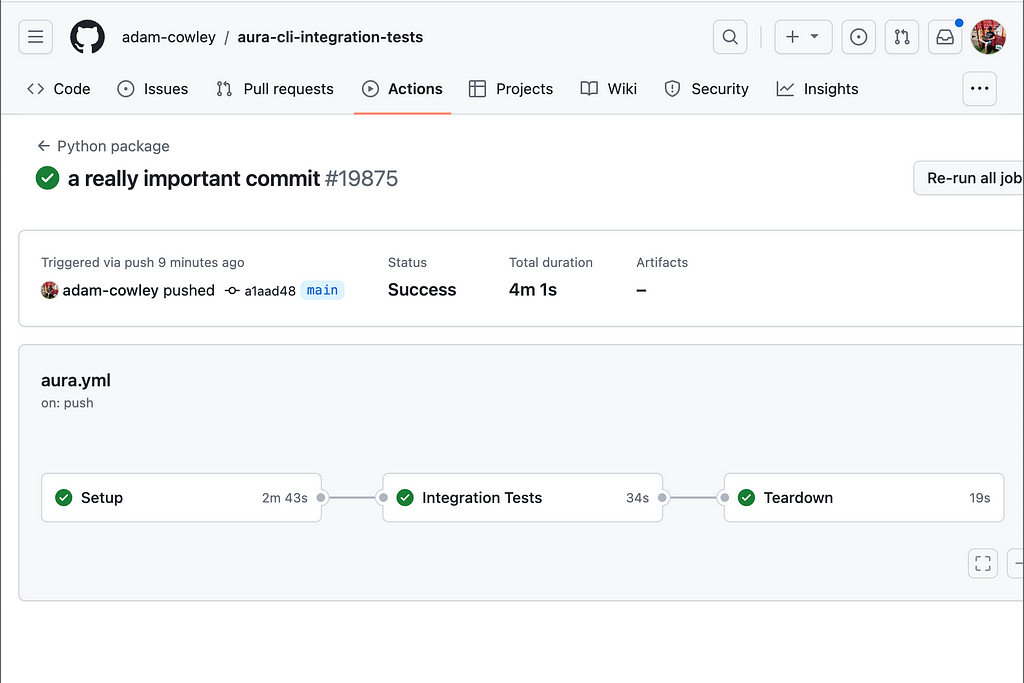
That’s it! If everything has been configured correctly, you should see three complete tasks, executed one after another.
Next steps
As it stands, if any tests fail, the workflow will exit, and the database will remain online. This is useful if you are interested in inspecting the database state at the point of failure, but you will also be billed for the time the database is running.
You could also use the CLI to create a snapshot of the database before shutting it down so you are not charged.
If you have an existing database running on Neo4j Aura, you can use a recent snapshot to seed the database with production-like data.
Set up your own
You can view the full workflow file on Github or view the last successfully completed workflow in the repo.
Feel free to copy the workflow into your project and try it yourself. If you do, let us know on the Neo4j Discord channel or send me a message on LinkedIn.
Resources
- Aura CLI Documentation — Neo4j Labs
- Neo4j Aura API Documentation
- Neo4j Aura API Specification
- Neo4j Aura Console
To learn more about Neo4j, head to Neo4j GraphAcademy for free hands-on, self-paced courses.
Convenient Neo4j Integration Tests in GitHub Actions Using the Aura CLI was originally published in Neo4j Developer Blog on Medium, where people are continuing the conversation by highlighting and responding to this story.
Share Article


Explore
Related Articles


Introducing Document Intelligence: From documents to a knowledge graph, right inside Aura

SumoDB in Neo4j: Chaining Multiple Graph Algorithms in Snowflake — Part 3