Complete the Aura Agents Course Between Apr 15 - May 15 | The First 500 Win Aura Credits
AI Systems
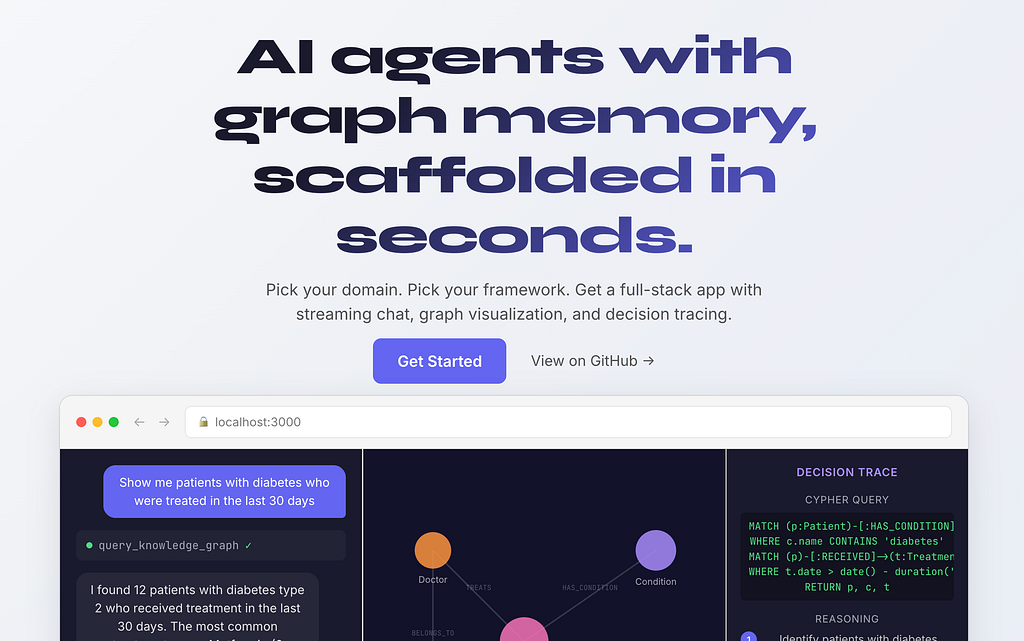
Back your LLMs with a Knowledge Graph for better business AI
Learn More
Industries and Use Cases
Fraud detection, knowledge graphs, financial services, and more
All Use Cases
Customer Success Stories
Case studies, customer videos, proof points, and more
All Customer Stories
Developer Center
Best practices, guides, tutorials, and downloads
GraphAcademy
Free online courses and certifications. Join the 100K+ Neo4j experts.
Graphs + AI: Transform Your Data Into Knowledge
Call for Papers
Virtual Conference: Engineering Better IntelligenceSubmit a session abstract by June 15, 2026