Getting Started with Neo4j Fabric

Associate Sales Engineer, Neo4j
7 min read
Fabric is a new feature introduced in Neo4j 4.0 and is a way to store and retrieve data in multiple databases. This feature makes it easy to query the data in the same DBMS or multiple DBMS using a single Cypher query.
In practical terms, Fabric provides the infrastructure and tooling for:
-
- Data Federation: the ability to access data available in distributed sources in the form of disjointed graphs.
- Data Sharding: the ability to access data available in distributed sources in the form of a common graph partitioned on multiple databases.
With Fabric, a Cypher query can store and retrieve data in multiple federated and sharded graphs.
Some things to remember before starting:
-
- Fabric is a Neo4j 4.x feature, meaning it is not available for Neo4j 3.x versions.
- Fabric is an Enterprise Only feature, meaning it is not available for the Neo4j Community Edition.
We will not go into various deployment architectures in this post. We will learn how to set up a basic Fabric environment and query graphs with Neo4j Desktop.
Setting Up a Neo4j Fabric Environment
1. Setting Up the Environment
If you haven’t already, please download Neo4j Desktop.
Now that you have downloaded Neo4j Desktop, let’s get started by creating a new database.

Click on “Add Database,” input a “Graph Name” and “Password” and be sure to select any version starting with 4.0 or 4.1. Then hit “Start” and wait for the database to start.
Once started, clicking “Open” brings up the Neo4j Browser window.
In the left pane, we can see that the default database is “neo4j.”

We will take a very simple case in the banking domain, where we want to separate personal information of a user from their transactions for data security purposes.
For example, access to data has to be controlled per department where the Support team will have access to everything, but the Verification team will not have access to the transactions of a user.
Here, physical separation of data can also be achieved using Fabric where parts of user data can be located in different geographical locations.
A very important note here, using Fabric is one way of doing this. From a security perspective, this can also be achieved with fine-grained access control. However, physical separation can be achieved with Fabric and not with fine-grained access control.
2. Creating Initial Data
Now, let’s create some very simple data in this database.
CREATE (u:User{uid:1234,name:"Andy"});
CREATE (a:Address{street:"2985 Finwood Dr",city:"Freehold",state:"NJ"});
CREATE (s:SSN{num:"321-7654-098"});
MATCH (u:User),(a:Address)
WHERE u.uid=1234 AND a.street="2985 Finwood Dr"
CREATE (u)-[:HAS_ADDRESS]->(a);
MATCH (u:User),(s:SSN)
WHERE u.uid=1234 AND s.num="321-7654-098"
CREATE (u)-[:HAS_SSN]->(s);
First, let us check out our schema.
Running CALL db.schema.visualization() will display a graph that shows node labels and relationship types in the data.
We can see that our data was created as we wanted it.

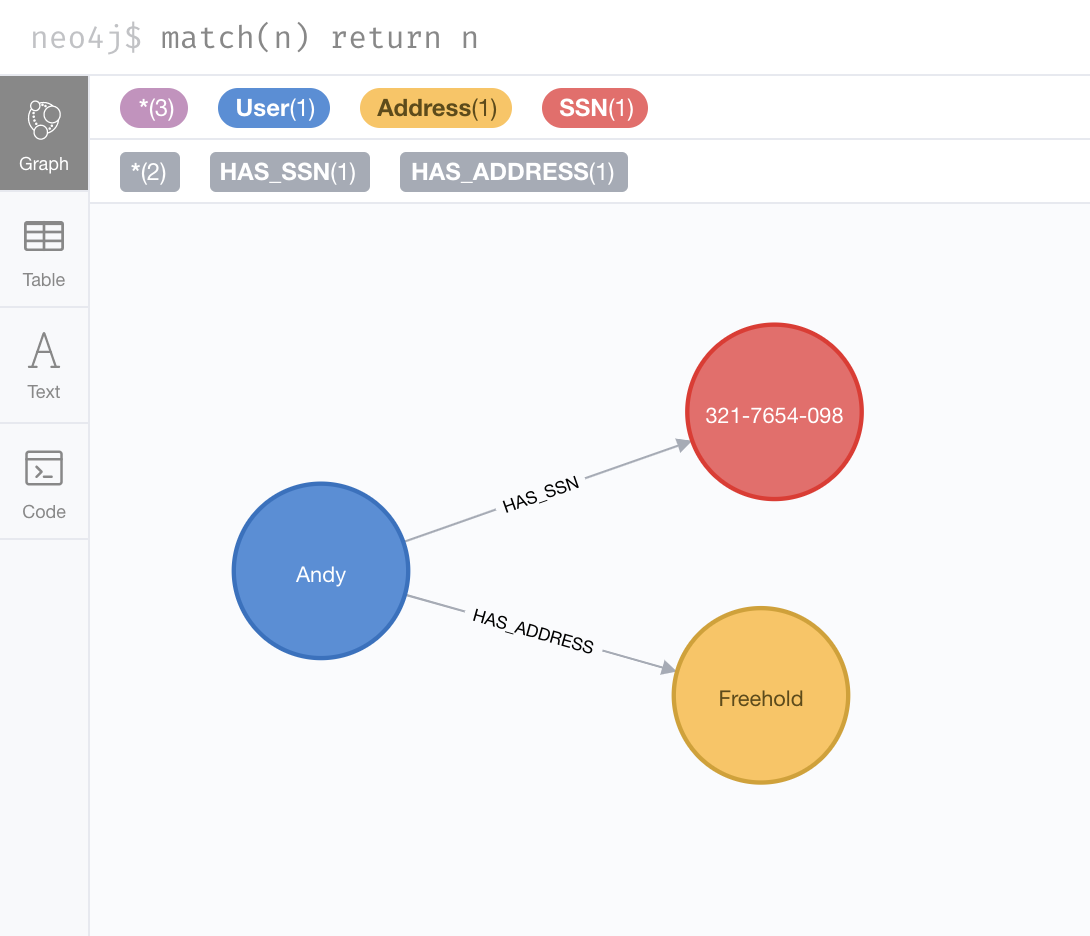
Since it is a very small data set, we can return all of it using:
MATCH (n) RETURN n;
This will show our graph:
Now let’s create another database right here.
This is an administrative function so we will need to switch to the system database.
We do that using :use system command.
To create a new database, CREATE DATABASE payments;
Now we will use this database with :use payments command.
You will notice that the database name in the left pane has changed to “payments.”
Let’s create some data here:
CREATE (u:User{uid:1234});
CREATE (t:Transaction{tid:"t001",amt:10,vendor:"amc"});
CREATE (t:Transaction{tid:"t002",amt:5,currency:"USD",vendor:"strbcks"});
MATCH (u:User),(t:Transaction)
WHERE u.uid=1234
CREATE (u)-[:HAS_TRANSACTION]->(t);
Just like before, we will first check out the schema using CALL db.schema.visualization()

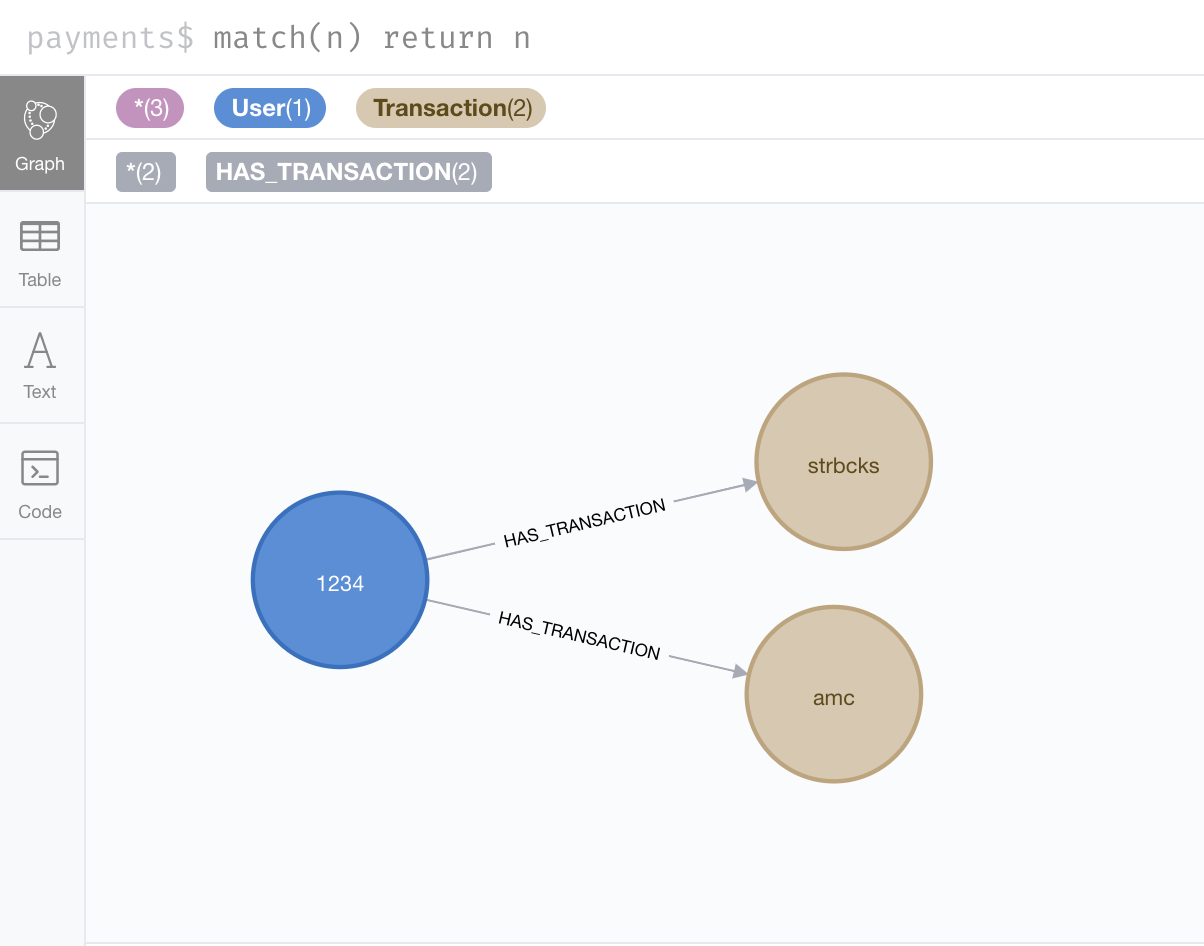
Again, let us see the data we have created:
Great, now let us set up Fabric to query these graphs!
3. Fabric Configuration
We will need to add some settings in the configuration file. In Neo4j Desktop, under Manage section go to the Settings tab, which will show the configuration file below it.
We will add the following lines there:
#Fabric config
fabric.database.name=fabric

fabric.graph.0.uri=neo4j://localhost:7687
fabric.graph.0.database=neo4j
fabric.graph.0.name=neo4j

fabric.graph.1.uri=neo4j://localhost:7687
fabric.graph.1.database=payments
fabric.graph.1.name=payments
First we name our Fabric, this can be anything.
Then we declare details for the first database. These include the URI, database and name. We do the same for our second database. Since both databases are on a local machine, the URI and bolt port is localhost:7687 and our database names, which are “neo4j” and “payments.” More information about configuration settings for the Fabric can be found on the documentation page.
Hit “Apply” and “Restart Now.” The changes we made to the configuration settings will take effect after the restart.
To run, we have to first switch to the Fabric database we have assigned in the configuration settings, called fabric.
We do this with :use fabric command.
You should see that the database name in the left pane has changed to “fabric.”
4. Querying a Single Graph
Let’s run our first Fabric query now!
First let us query a single graph and test that the Fabric is working.
// STEP 1: First, we tell fabric to USE the “neo4j” database for this query
USE fabric.neo4j
// STEP 2: Then we pick the user and their address
MATCH (u:User) -[:HAS_ADDRESS]-> (a:Address)
// STEP 3: Finally, we return the user id, name and a concatenation of the address properties as the address
RETURN u.uid AS userId, u.name as Name, a.street+", "+a.city+", "+a.state as Address
This is going to give us a result like this – our Fabric setup works!

5. Querying Multiple Graphs
Let us try and query both the graphs.
// STEP 1: First, we tell fabric to USE the “neo4j” database for the first part of the query
USE fabric.neo4j
// STEP 2: Pick the User node
MATCH (u:User)
// STEP 3: We return the user id
RETURN u.uid AS userId
// STEP 4: Now, we want to take a union of the result sets of both the queries
UNION
// STEP 5: For second part of the query, we tell the fabric to USE the “payments” database
USE fabric.payments
// STEP 6: Again, pick the user node
MATCH (u:User)
// STEP 7: Finally we return the user id, remember UNION works when both queries return the same column!
RETURN u.uid AS userId
Since we have only one user in our graphs, UNION will yield this user id as the result.

Let’s create some data to see better results for this query.
6. Creating & Updating Data Using Fabric
We can do this by simply creating another user node in the “neo4j” graph.
To create a node using Fabric:
// STEP 1: First, we tell the fabric to USE “neo4j” database
USE fabric.neo4j
// STEP 2: We run a simple CREATE command with just a user id.
CREATE (u:User{uid:7890})
Now that we have more than one user ids, let’s try and run the above UNION query again.
Et voilà ! The UNION of the result set of two different databases has given us both the available user ids.

7. Correlated Subquery
In this type of query, we will get the result from one database in the first query and use it as a condition in the second query. We will also make use of the CALL {} clause.
//STEP 1: In the first subquery, we are using neo4j database to get the personal information of the user.
CALL{
	USE fabric.neo4j
	MATCH (u:User)-[:HAS_SSN]->(s:SSN)
	RETURN u.uid as userId, u.name as uname, s.num as ssn
        }
//STEP 2: In the second subquery, we use payments database to get transactions of a user based on the ‘userId’ returned from the first subquery.
CALL {
	USE fabric.payments
    WITH userId
    MATCH (u:User)-[:HAS_TRANSACTION]->(t:Transaction)
    WHERE u.uid = userId
    RETURN t.tid as transactionID, t.amt as Amount,t.vendor as Vendor
	}
//STEP 3: Finally returning personal and transactions data returned from both the subqueries.
RETURN uname,ssn,transactionID,Amount,Vendor
What do we have here? We have picked a particular user from “neo4j” database and picked all the related transactions to that user from “payments” database and returned name and SSN from “neo4j” database and transaction information from “payments” database.

Conclusion
You are now ready to use Fabric!
In this post, we have taken a look at setting up the Fabric, querying a single graph, querying multiple graphs, creating data and running correlated subqueries – all using Fabric.
Check out the Fabric documentation to read more about architecture, deployments, configuration settings and queries.
Share Article


Explore
Related Articles

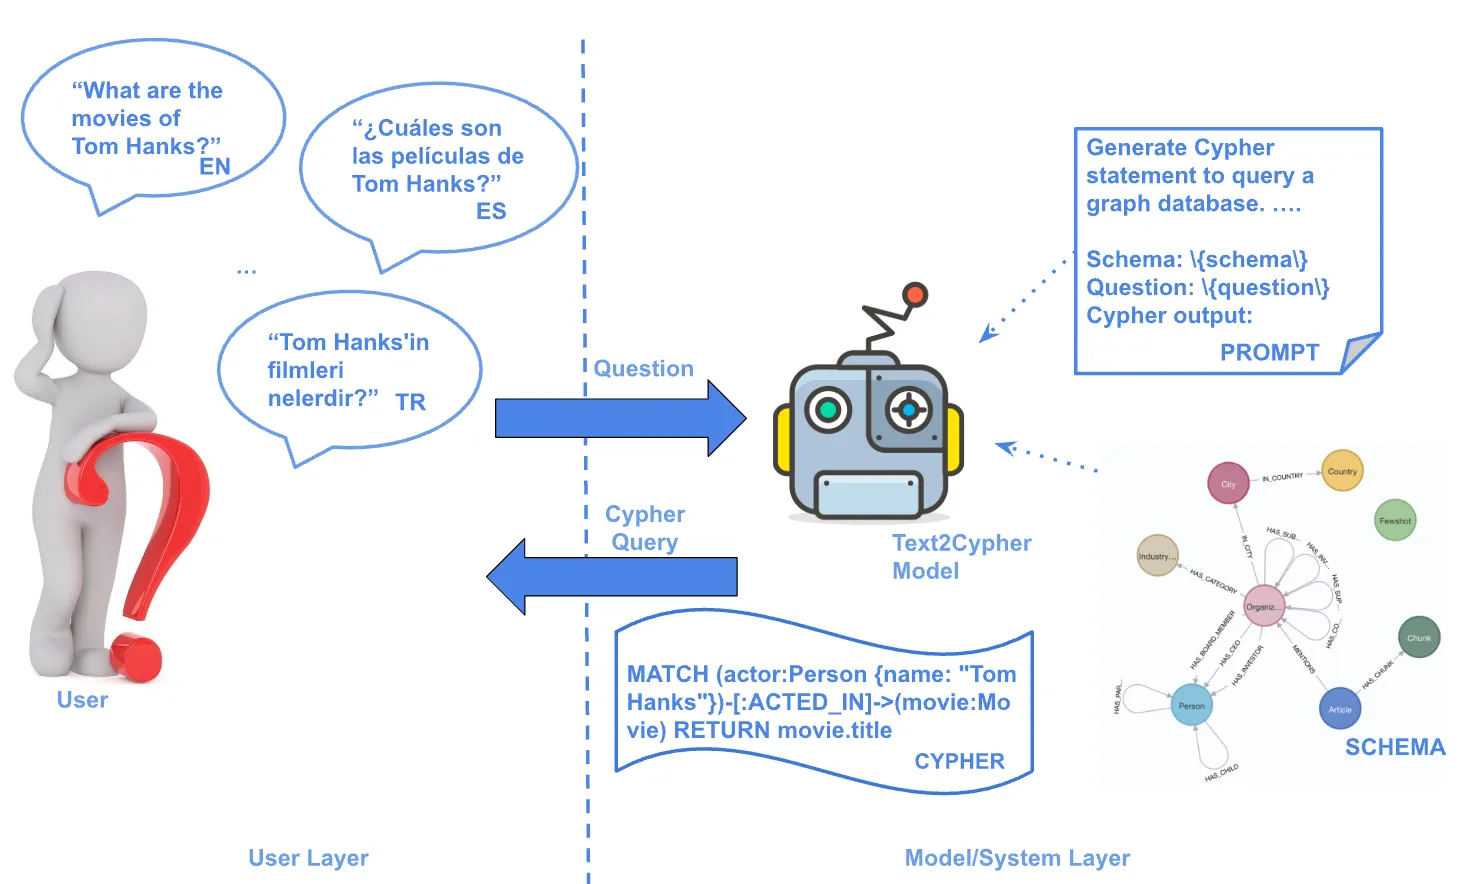
Text2Cypher Across Languages: Evaluating Foundational Models Beyond English