Import
Once the files are provided, the data model complete, and all elements mapped, the import can be run. However, you can preview your data at any time and make sure that everything is mapped the way you expect before you run the actual import.
Preview
The preview button is located next to the Run import button and unlike running the import, the preview does not require an active connection.
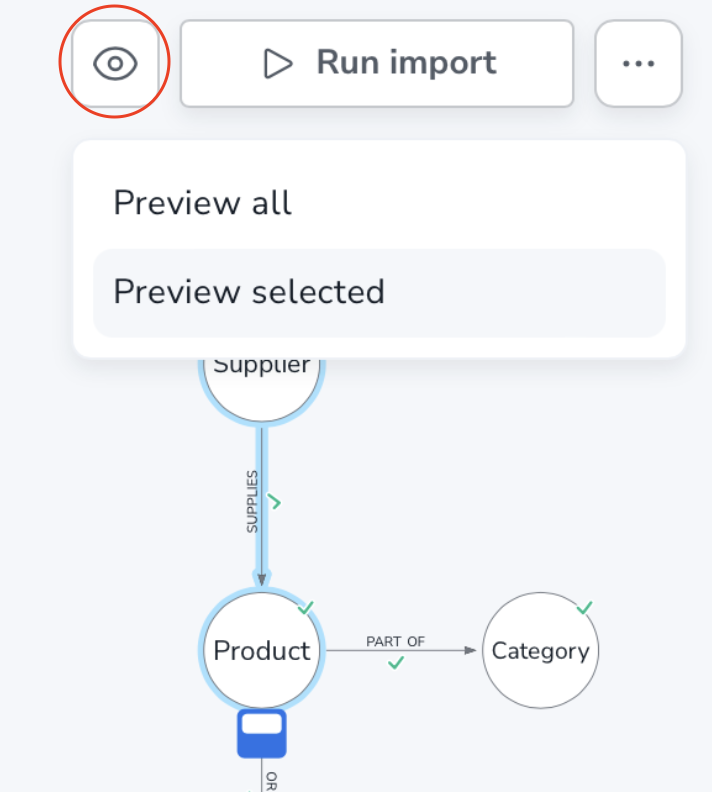
When you run a preview, only a sample of the provided data is scanned. This means that the preview can differ from the final import in terms of connectedness, for example. Even so, the preview can be very useful to get an overview of the data, especially on smaller datasets.
Since the preview does not actually import any data, it can be run iteratively until you are satisfied.
You can preview all or selected elements in your data. If your model is particularly complex, it can be beneficial to preview only parts of the data. To use this feature, select the parts of your model that you want to preview and Preview selected from the dropdown.
The preview shows a sample of either all or selected data that is mapped correctly in the model. Unlike the actual import, the preview can be run regardless of the completeness of the mapping. If any element is missing the green checkmark in the model, it will not be included in the preview, but the preview can still be run.
Run the import
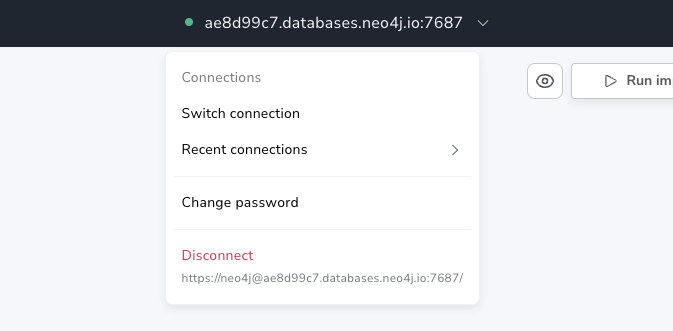
When you are happy with the model and the mapping is complete, the import can begin. But before starting the import, it is important to make sure Data Importer is connected to the database. This is done in the connection dropdown located in the top center of the UI.
The Run import button shows the progress of the import when you press it. The import is done in batches and can be stopped at any time.
When the import stops, whether because it is complete or because it was cancelled, a summary is displayed. The summary contains information about the imported nodes and relationships, including time elapsed, the file size, the number of properties etc. The results summary also allows you to see the Cypher® statement used to load a particular file. It is not advisable to copy and paste these statements, but seeing them can provide valuable insight into how constraints are created and how load statements are constructed.
For nodes, there are two statements, a key statement and a load statement. The key statement is concerned with creating a constraint to ensure the uniqueness of the nodes. The load statement creates nodes for every item in the mapped file and adds the assigned properties from the data model.
For relationships, there is only a load statement. It finds the start (source) and end (target) nodes and creates a relationship between them and sets the assigned (if any) properties to the relationship.
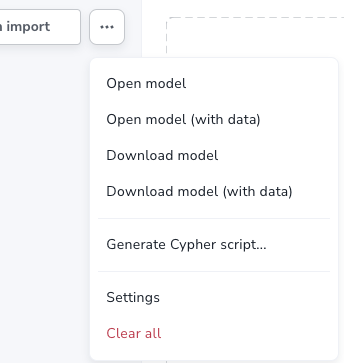
Generate Cypher script
There may be situations where you want use the import logic elsewhere or where you need more complex transformations than Data Importer allows. Once you have added your files and mapped the data, instead of running the import, you can generate the corresponding Cypher script representing the model and mapping.
The script can be used in the Query tab of Workspace, provided that the files are accessible to the DBMS, or on the command line via Cypher shell, for example.
The generated code contains comments that help you understand how the load statement works and what different parts it consists of. This also helps you understand where you need to make changes to adapt it to where you intend to run it.
You can download the script with or without the files.
The Generate Cypher script is available from the more menu.