JMX metrics
This topic describes how to access JMX for Neo4j DBMS to monitor metrics.
Neo4j provides different levels of monitoring facilities to supply a continuous overview of the system’s health. For a description of the monitoring options, see Neo4j Operations Manual → Monitoring. Many of the metrics are exposed through JMX.
|
The available JMX MBeans and their names have been updated in Neo4j 4.0. Beans that duplicate metrics or monitoring options, described in Neo4j Operations Manual → Monitoring, have been removed. |
Adjusting remote JMX access to Neo4j
By default, the Neo4j Enterprise edition does not allow remote JMX connections. To enable this feature, you need to enable JMX Remote Management and also configure JMX for secure remote access, in the conf/neo4j.conf file.
Enable JMX Remote Management
Add the following lines to the conf/neo4j.conf file to enable JMX Remote Management. If you run into issues with automatic hostname discovery, you can uncomment the following configuration line:
server.jvm.additional=-Djava.rmi.server.hostname=$THE_NEO4J_SERVER_HOSTNAME
server.jvm.additional=-Dcom.sun.management.jmxremote.port=3637
server.jvm.additional=-Dcom.sun.management.jmxremote.authenticate=true
server.jvm.additional=-Dcom.sun.management.jmxremote.ssl=false

# Some systems cannot discover the hostname automatically, and need this line configured:
# server.jvm.additional=-Djava.rmi.server.hostname=$THE_NEO4J_SERVER_HOSTNAME|
Although SSL for JMX Remote Management is disabled throughout this document, to configure it based on your requirements, you can follow the instructions in the Java SE 21 Monitoring and Management Guide. |
Configure password authentication
Password authentication is enabled by default in JMX Remote Management. You can find information about setting up authentication with LDAP and file-based approach in the following sections.
Refer to the Java SE 21 Monitoring and Management Guide for more options, including configuration steps for SSL client authentication.
LDAP authentication
You can configure your JAAS login configuration based on your infrastructure and save it in the conf/jmx.ldap configuration file.
Neo4jJMXConfig {
    com.sun.security.auth.module.LdapLoginModule REQUIRED
    userProvider="ldap://127.0.0.1:10389/ou=users,dc=example,dc=net"
    authIdentity="uid={USERNAME},ou=users,dc=example,dc=net"
    userFilter="(&(samaccountname={USERNAME})(objectClass=inetOrgPerson))"
    useSSL=false
    debug=false
    authzIdentity=monitorRole;
};userProvider-
Defines which LDAP server to connect and the node to perform the search against user entries.
authIdentity-
Defines the distinguished name of the user to authenticate to the LDAP server. Note that the token
{USERNAME}is replaced with the provided user name during authentication. userFilter-
Defines the search filter to be used while locating the user. Note that the token
{USERNAME}is replaced with the provided user name during the search. useSSL-
Defines whether to enable SSL for the underlying LDAP connection.
debug-
Defines whether to output debug info about the authentication session.
authzIdentity-
Specifies which access role an authenticated user will be granted.
|
The provided configuration is an example and needs to be updated based on your infrastructure. |
After finishing your JAAS configuration, configure JMX to use it by adding the following configuration items into conf/neo4j.conf file:
server.jvm.additional=-Dcom.sun.management.jmxremote.login.config=Neo4jJMXConfig
server.jvm.additional=-Djava.security.auth.login.config=/absolute/path/to/conf/jmx.ldap
With this setup, you can connect to JMX monitoring of the Neo4j server using <IP-OF-SERVER>:3637, with a valid username and password defined in your LDAP directory.
File-based authentication
|
The file-based password authentication stores the password in clear text and is intended only for development use. |
You can set your password for JMX remote access and save it in the conf/jmx.password (Unix) and c:\jmx.password (Windows) configuration file.
Note that the jmx.password file needs to be owned by the user that runs the server and has permissions set to 0600.
monitorRole password_to_be_changedNext, configure the access level and save it in conf/jmx.access configuration file.
monitorRole readonlyFinally, configure JMX to use the completed password and access files by adding the following configuration items into conf/neo4j.conf file:
server.jvm.additional=-Dcom.sun.management.jmxremote.password.file=/absolute/path/to/conf/jmx.password
server.jvm.additional=-Dcom.sun.management.jmxremote.access.file=/absolute/path/to/conf/jmx.access
On Windows, you need to change / to \:
dbms.jvm.additional=-Dcom.sun.management.jmxremote.password.file=\absolute\path\to\conf\jmx.password
dbms.jvm.additional=-Dcom.sun.management.jmxremote.access.file=\absolute\path\to\conf\jmx.access
With this setup, you can connect to JMX monitoring of the Neo4j server using <IP-OF-SERVER>:3637, with the username monitor, and the password password_to_be_changed.
Connecting to a Neo4j instance using JMX and JConsole
First, start your Neo4j instance, for example using:
$NEO4j_HOME/bin/neo4j startNow, start JConsole with:
$JAVA_HOME/bin/jconsoleConnect to the process running your Neo4j database instance:
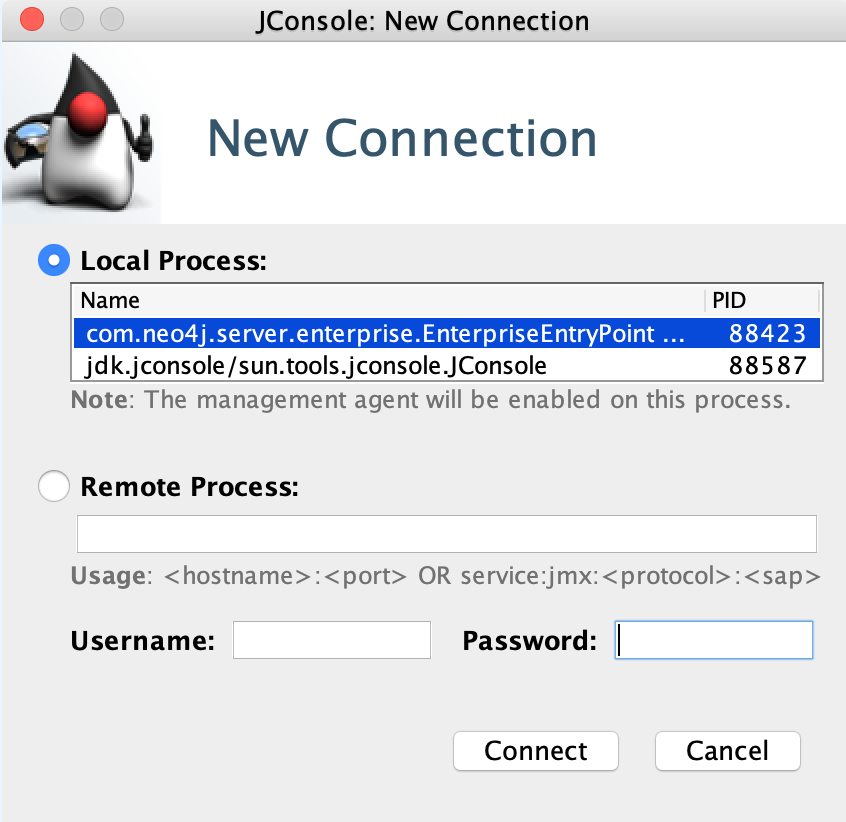
|
When connecting to a remote process or, in some cases, a local process running as a service, you must choose the The |
Besides the MBeans, exposed by the JVM, you also see be default neo4j.metrics section in the MBeans tab.
Under that, you have access to all the monitoring information exposed by Neo4j.
For opening JMX to remote monitoring access, please see Adjusting remote JMX access to Neo4j and the JMX documention.
