The Neo4j GraphQL Library
Lesson Overview
We will spend the rest of the course building a GraphQL API for an online bookstore using the Neo4j GraphQL Library. In this lesson we set up our online development environment using Codesandbox and Neo4j Sandbox. We then see how to use GraphQL type definitions to define a property graph data model in Neo4j and create a GraphQL API using the Neo4j GraphQL Library. We’ll create data using GraphQL mutations and see how to query it using GraphQL.
Setting Up Your Environment
Now it’s time to start using the Neo4j GraphQL Library to build GraphQL APIs! We’ll be using a browser-based service called Codesandbox to run Node.js JavaScript code, which in this case will be a GraphQL API application making use of the Neo4j GraphQL Library. Using Codesandbox means we won’t have to troubleshoot local development environment issues and makes it easier to share code. Each lesson will start with an initial skeleton application that we’ll modify as we explore new concepts. If you get stuck, each lesson also has the solution available as a Codesandbox.
We’ll also be using Neo4j Sandbox to spin up a hosted Neo4j instance in the cloud. We’ll connect to our Neo4j Sandbox instance from the GraphQL API application running in Codesandbox. To do this we’ll use the connection credentials specific to our Neo4j Sandbox instance.
Follow these steps to get your development environment set up using Codesandbox and Neo4j Sandbox:
-
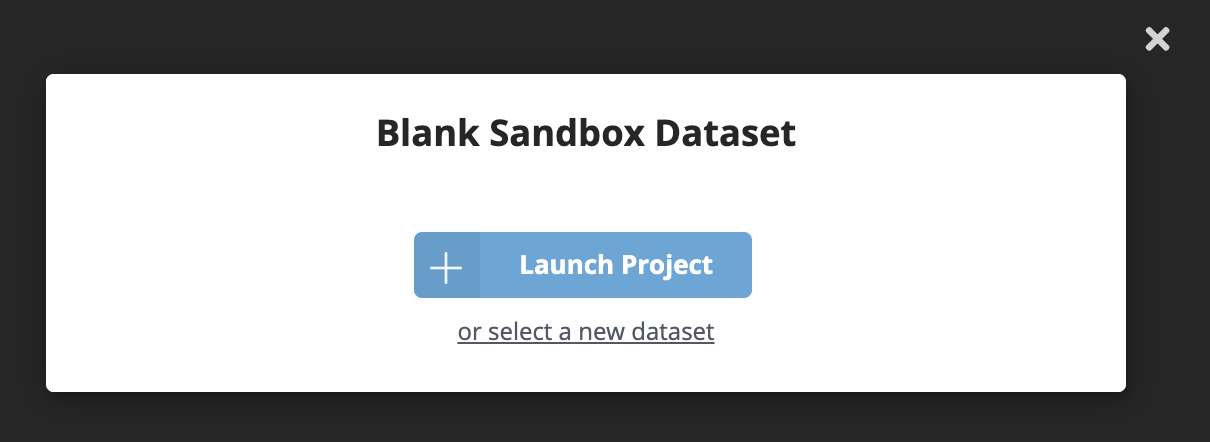
Create a blank Neo4j Sandbox instance using this link. You’ll need to sign in to Neo4j Sandbox if you’re not already authenticated, then click the "Launch Project" button.
-
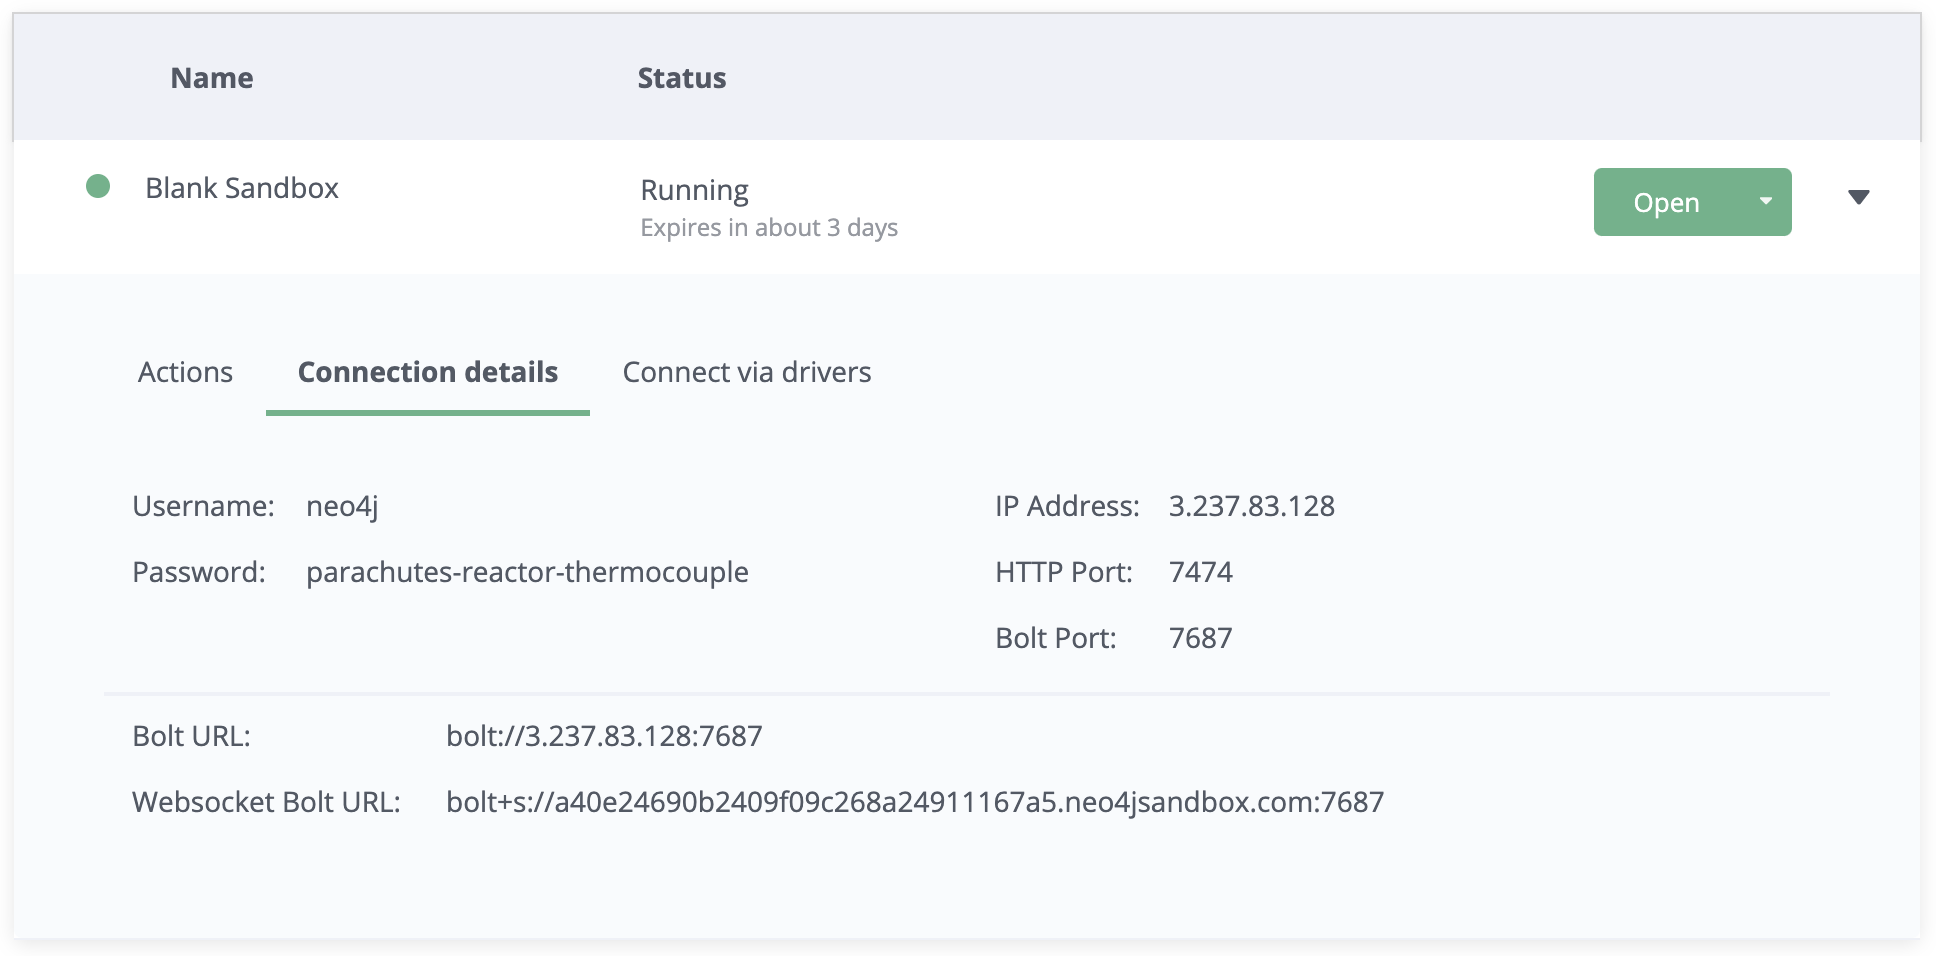
Once your blank Neo4j Sandbox instance is ready, you can go through the guide or close it. Then navigate to the "Connection details" tab for the sandbox instance. Make note of the "Bolt URL", "Username", and "Password" values for your sandbox instance. You’ll need these values in the next step to connect to Neo4j from the GraphQL API application we’ll be building and running in Codesandbox.
-
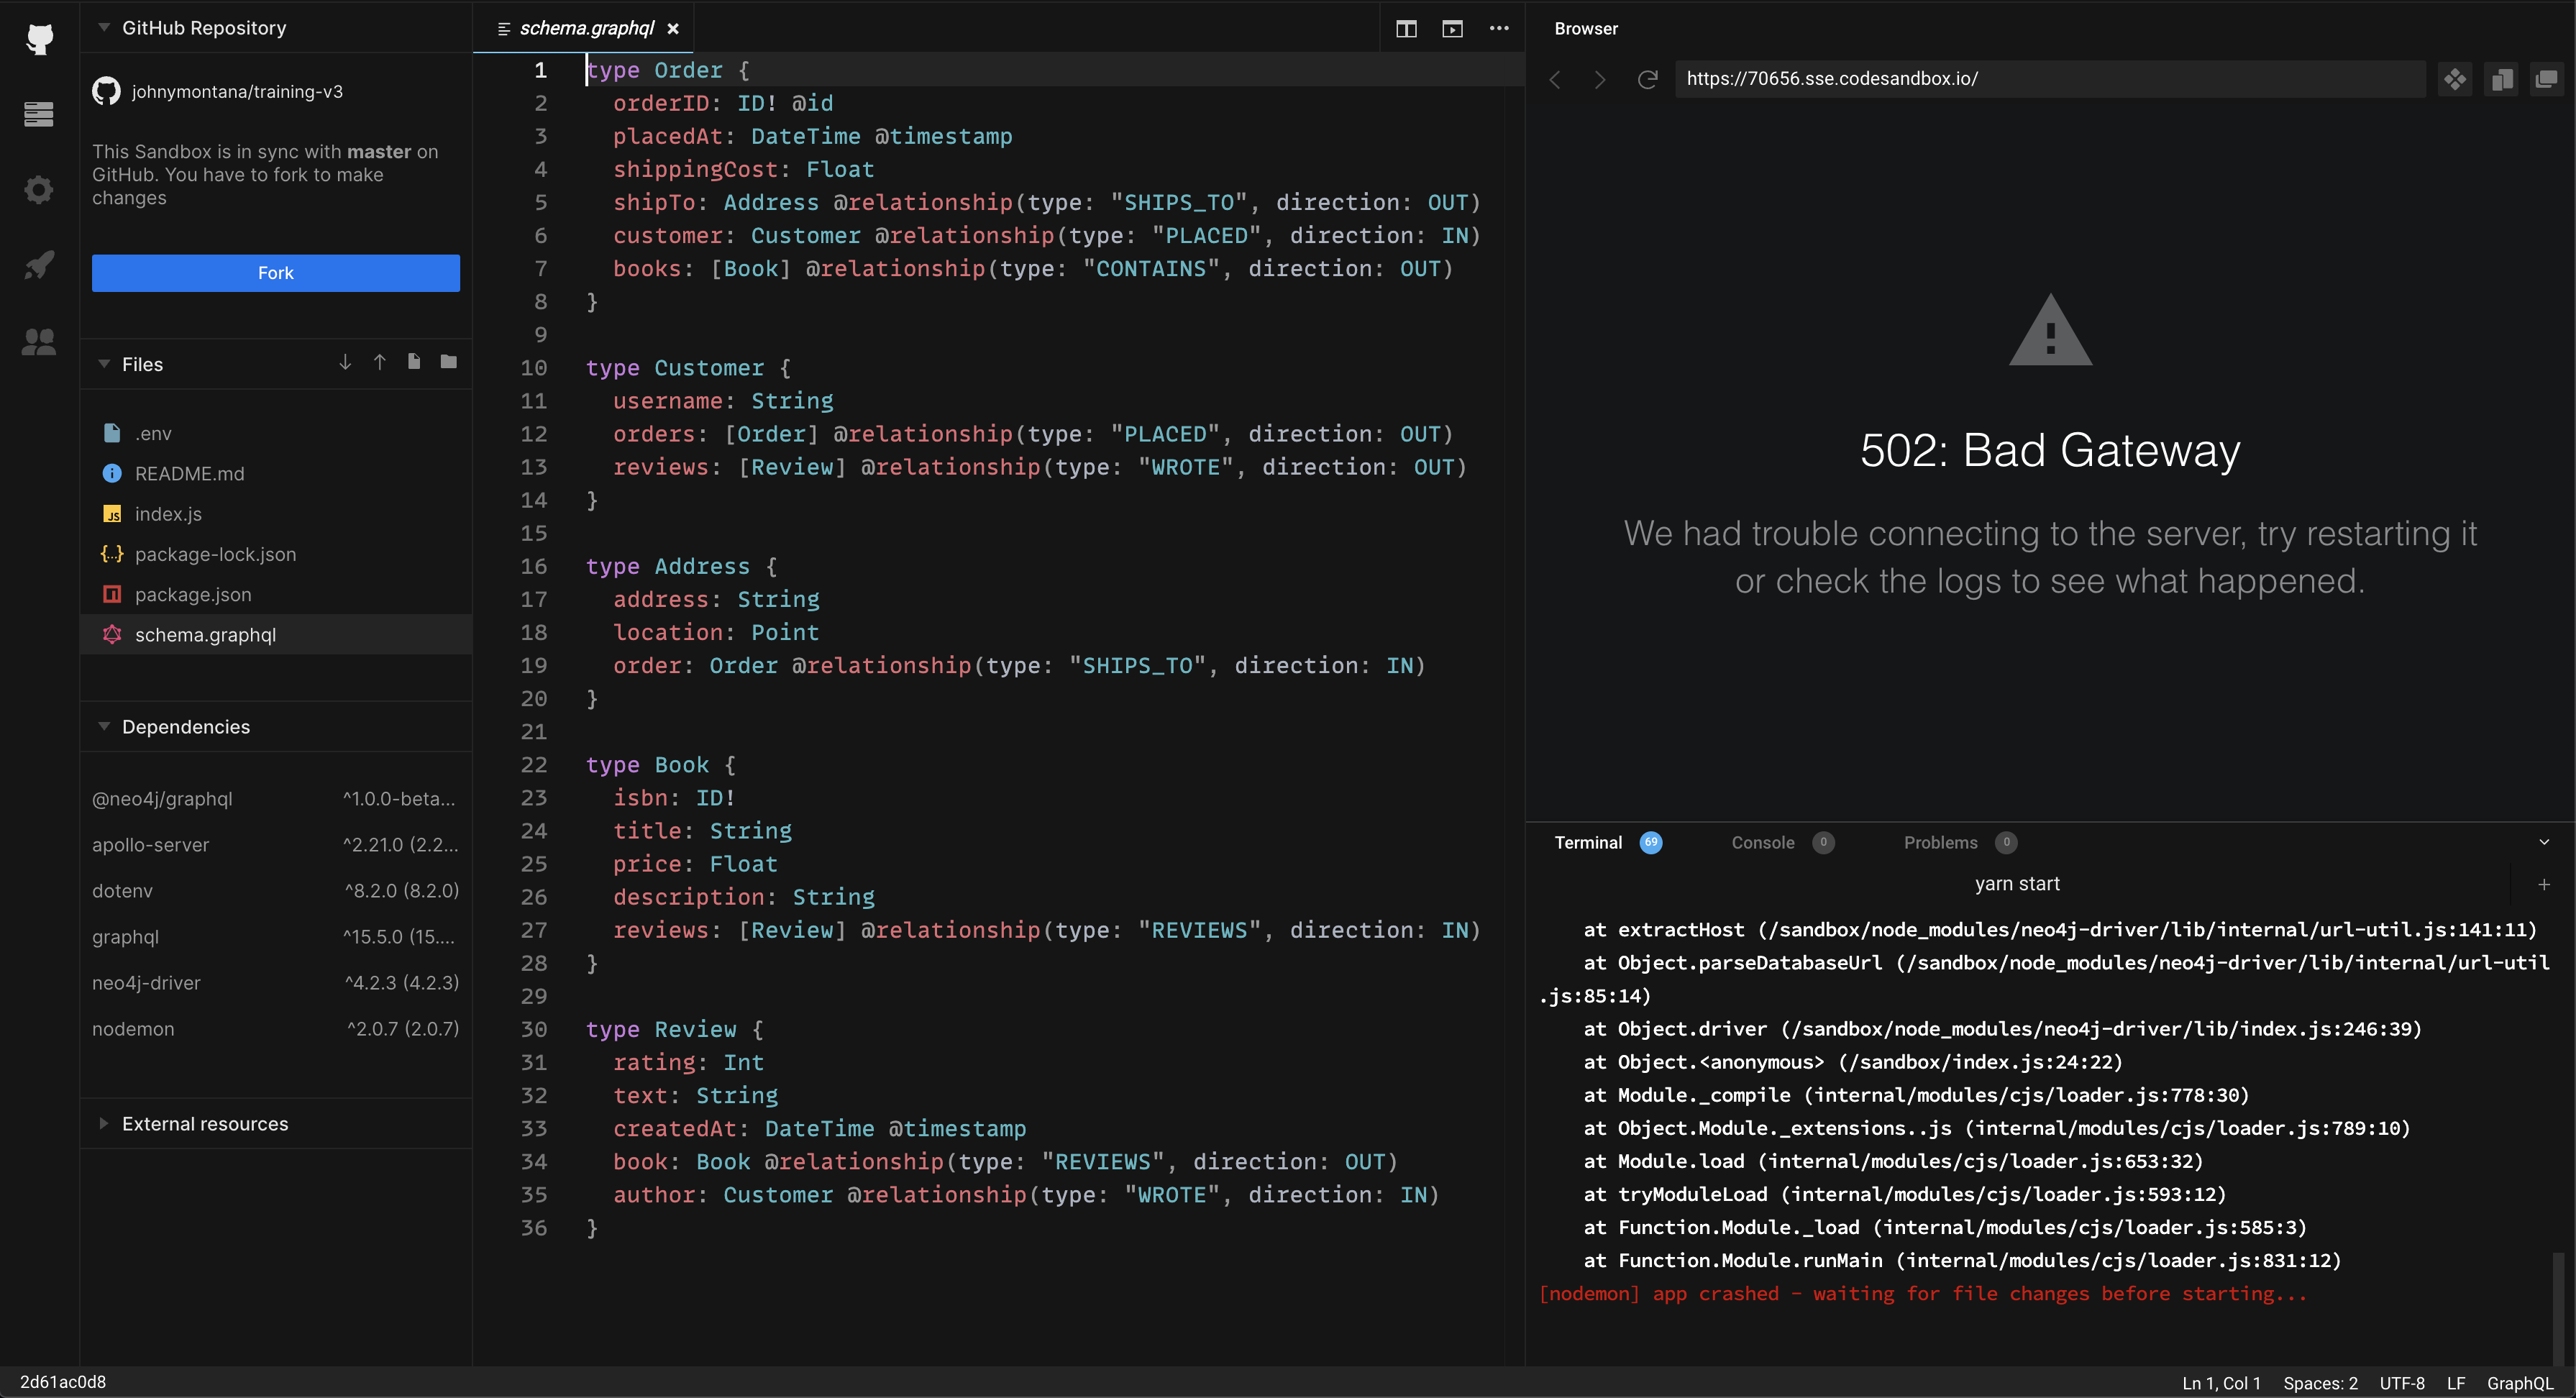
Open the Codesandbox for this lesson using this link. This Codesandbox contains the initial code for a GraphQL API application, however the application is throwing an error because it’s not able to connect to a Neo4j instance. Fix this by adding your Neo4j Sandbox connection credentials.
-
In order to save changes to the Codesandbox you’ll be prompted to sign in to Codesandbox so that the changes are specific to your Codesandbox. Open the
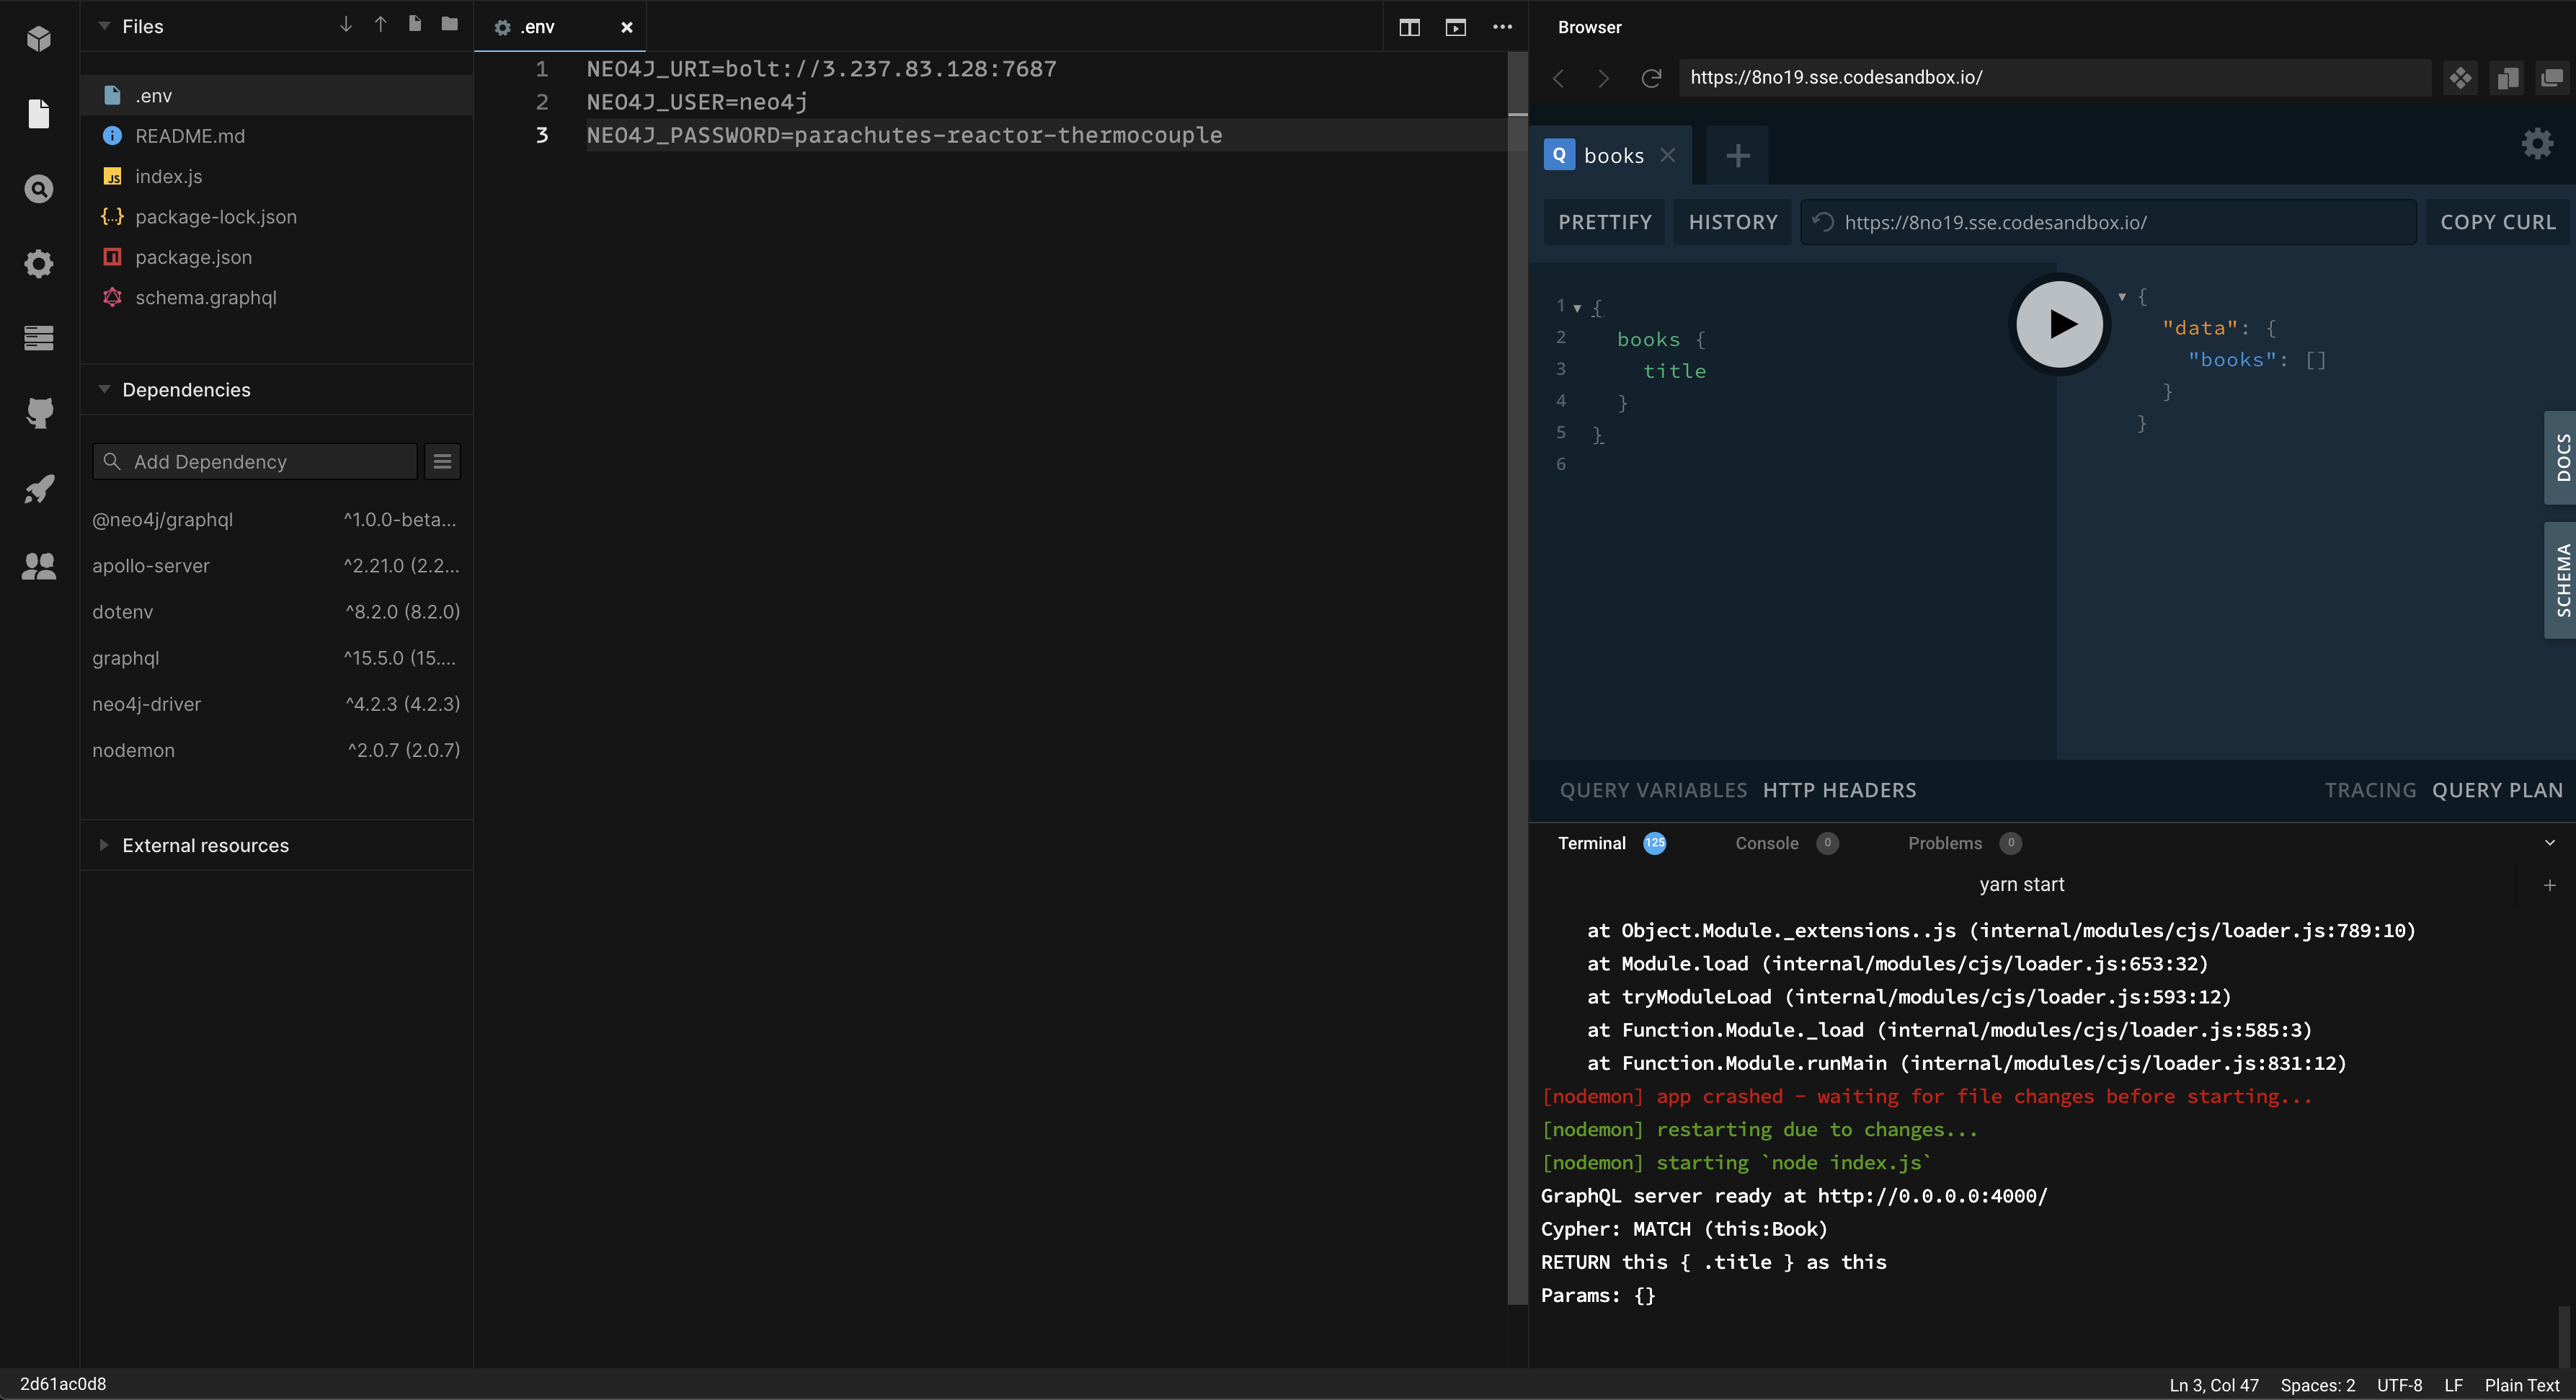
.envfile, adding values forNEO4J_URI,NEO4J_USER, andNEO4J_PASSWORDspecific to your Neo4j Sandbox instance. Save the file and wait for the application to reload. You will now see the GraphQL Playground application running in Codesandbox.
You can test that it’s working by running the following query in the GraphQL Playground window in your Codesandbox (you will get back an empty array without any error messages).
{
  books {
    title
  }
}
You will see a screen like this after updating the values in the .env file, with GraphQL Playground allowing your to execute GraphQL operations against your GraphQL API application connected to Neo4j Sandbox.
GraphQL Type Definitions And The Property Graph Model
Now that your development environment is set up, let’s take a look at what we’ll be building throughout this course. The goal of this course is to build a GraphQL API application for an online bookstore. We’ll need to handle customers searching for books, placing orders, as well as leaving reviews for books they’ve purchased.
We’ll start with the following property graph data model:
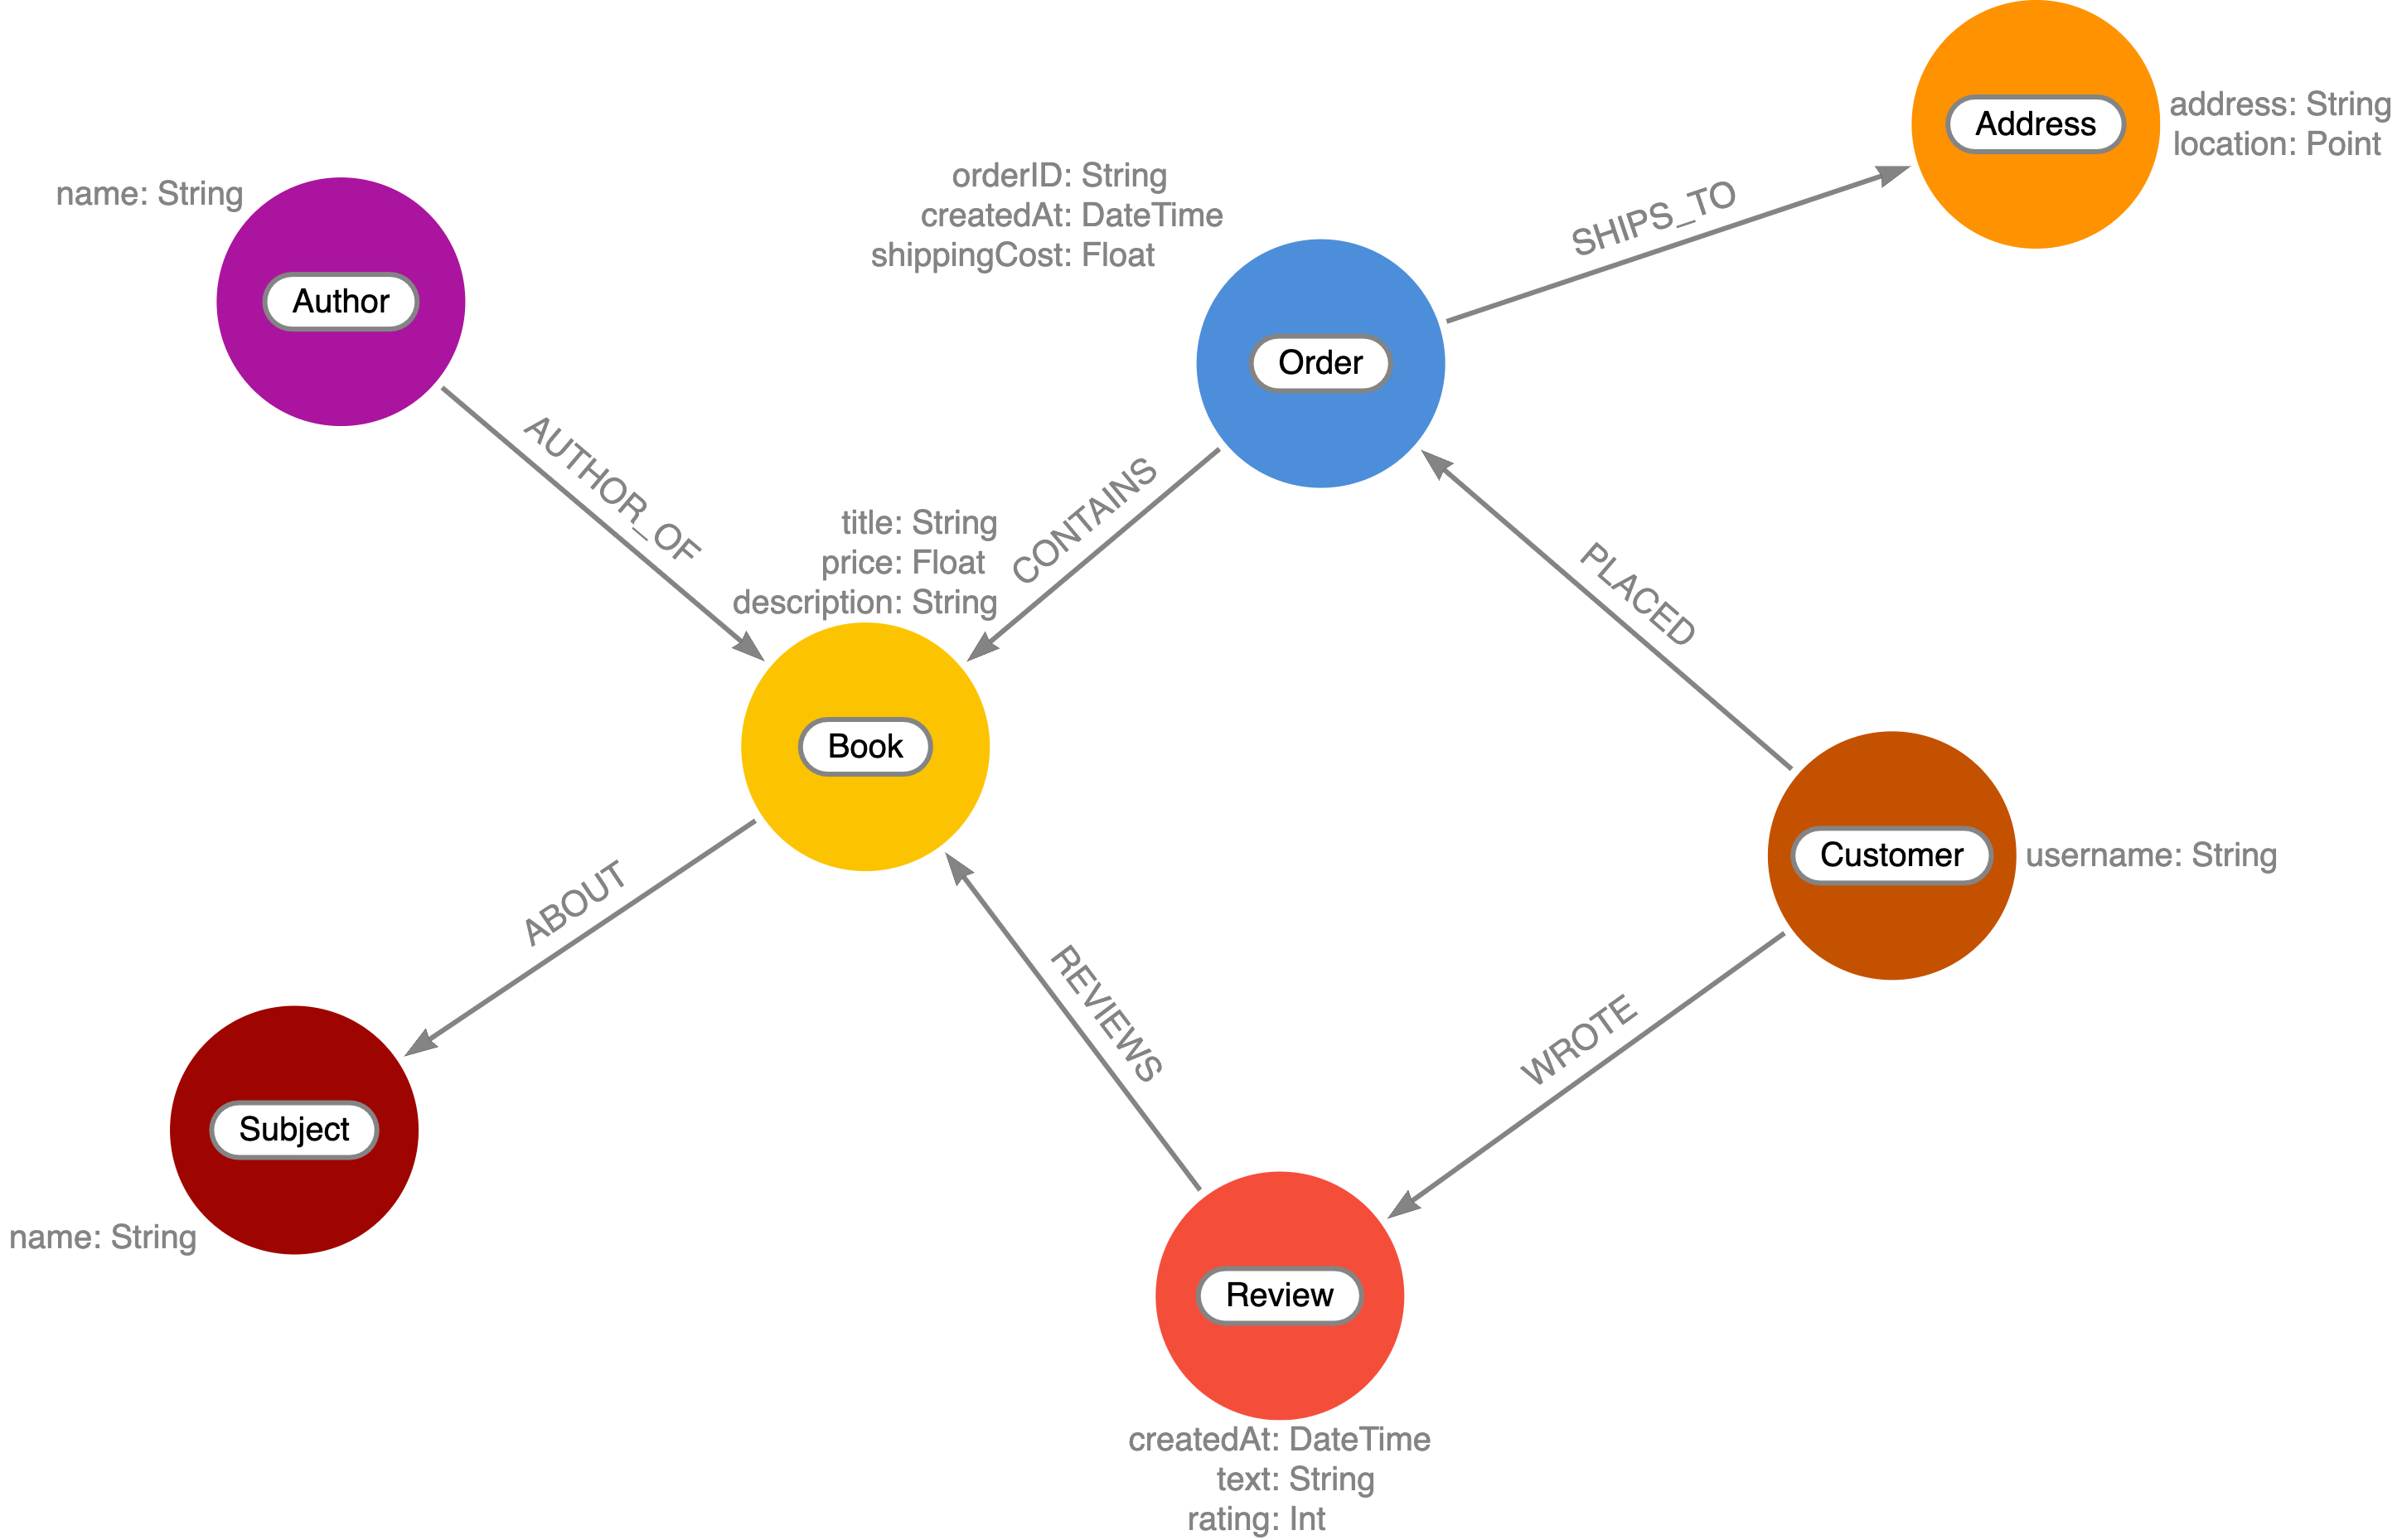
Let’s see how we would define this property graph model using GraphQL type definitions.
Each node label becomes a GraphQL type.
Node properties are defined as GraphQL fields.
Relationships are expressed as GraphQL objects or object array fields and include a special GraphQL schema directive @relationship that is used to capture the direction and relationship type.
Open the schema.graphql file, then make sure types as defined here are in Schema of your Codesandbox.
#schema.graphql

type Order {
  orderID: ID! @id
  placedAt: DateTime @timestamp
  shippingCost: Float
  shipTo: Address @relationship(type: "SHIPS_TO", direction: OUT)
  customer: Customer @relationship(type: "PLACED", direction: IN)
  books: [Book] @relationship(type: "CONTAINS", direction: OUT)
}

type Customer {
  username: String
  orders: [Order] @relationship(type: "PLACED", direction: OUT)
  reviews: [Review] @relationship(type: "WROTE", direction: OUT)
}

type Address {
  address: String
  location: Point
  order: Order @relationship(type: "SHIPS_TO", direction: IN)
}

type Book {
  isbn: ID!
  title: String
  price: Float
  description: String
  reviews: [Review] @relationship(type: "REVIEWS", direction: IN)
}

type Review {
  rating: Int
  text: String
  createdAt: DateTime @timestamp
  book: Book @relationship(type: "REVIEWS", direction: OUT)
  author: Customer @relationship(type: "WROTE", direction: IN)
}
A few important concepts to note:
-
The
@relationshipdirective is used to define relationships. -
DateTimeandPointscalar types are available and map to the equivalent native Neo4j database types. -
The
@timestampdirective is used to indicate the property will be automatically updated when the node is created and updated. -
The
@iddirective marks a field as a unique identifier and enables auto-generation when the node is created.
Read more about using GraphQL type definitions with the Neo4j GraphQL Library in the documentation here. For more information on the GraphQL schema directives available with the Neo4j GraphQL Library refer to this page.
Generated Mutations
The first thing we’ll need to do is add some books to our catalog using the GraphQL API - we wouldn’t have much of a bookstore without any books! We’ll do this using a GraphQL mutation. There are several ways to use mutations generated by the Neo4j GraphQL Library.
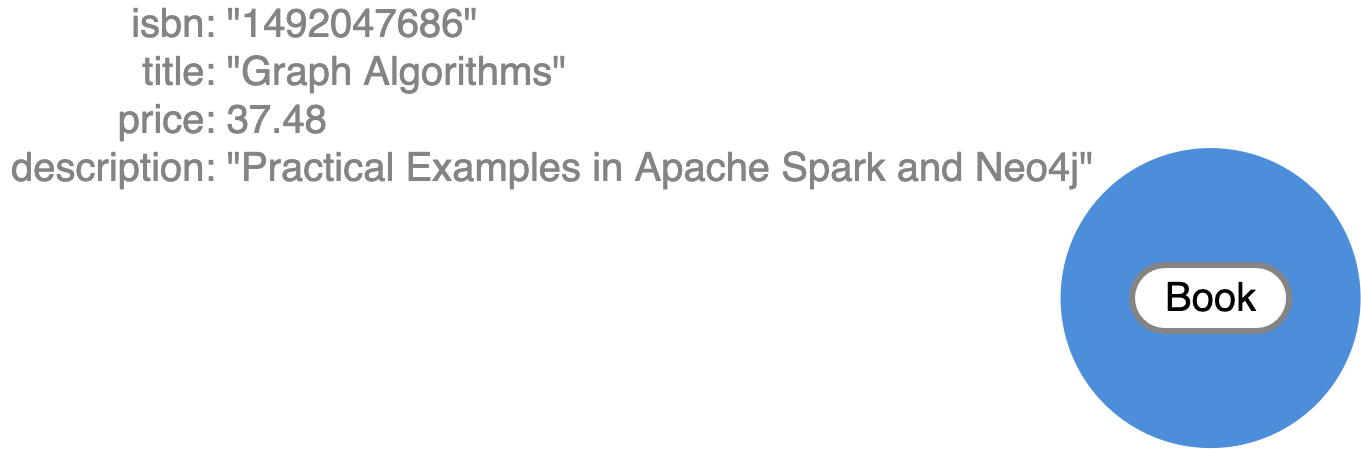
First, let’s add a single book using the createBooks mutation. Copy and paste this mutation to run it in GraphQL Playground running in your Codesandbox:
mutation {
  createBooks(
    input: {
      isbn: "1492047686"
      title: "Graph Algorithms"
      price: 37.48
      description: "Practical Examples in Apache Spark and Neo4j"
    }
  ) {
    books {
      isbn
      title
      price
      description
      __typename
    }
  }
}
This will create a single node in the database with the label Book and properties isbn, title, price, and description.
When executing create GraphQL mutations generated by the Neo4j GraphQL Library we can also "connect" the newly created nodes to other nodes, which will create a relationship in the database. Here we create a Review node and connect it to the Book node we created in the previous mutation. Go ahead and run this mutation as well:
mutation {
  createReviews(
    input: {
      rating: 5
      text: "Best overview of graph data science!"
      book: { connect: { where: { title: "Graph Algorithms" } } }
    }
  ) {
    reviews {
      rating
      text
      createdAt
      book {
        title
      }
    }
  }
}
The data in our database now looks like this:
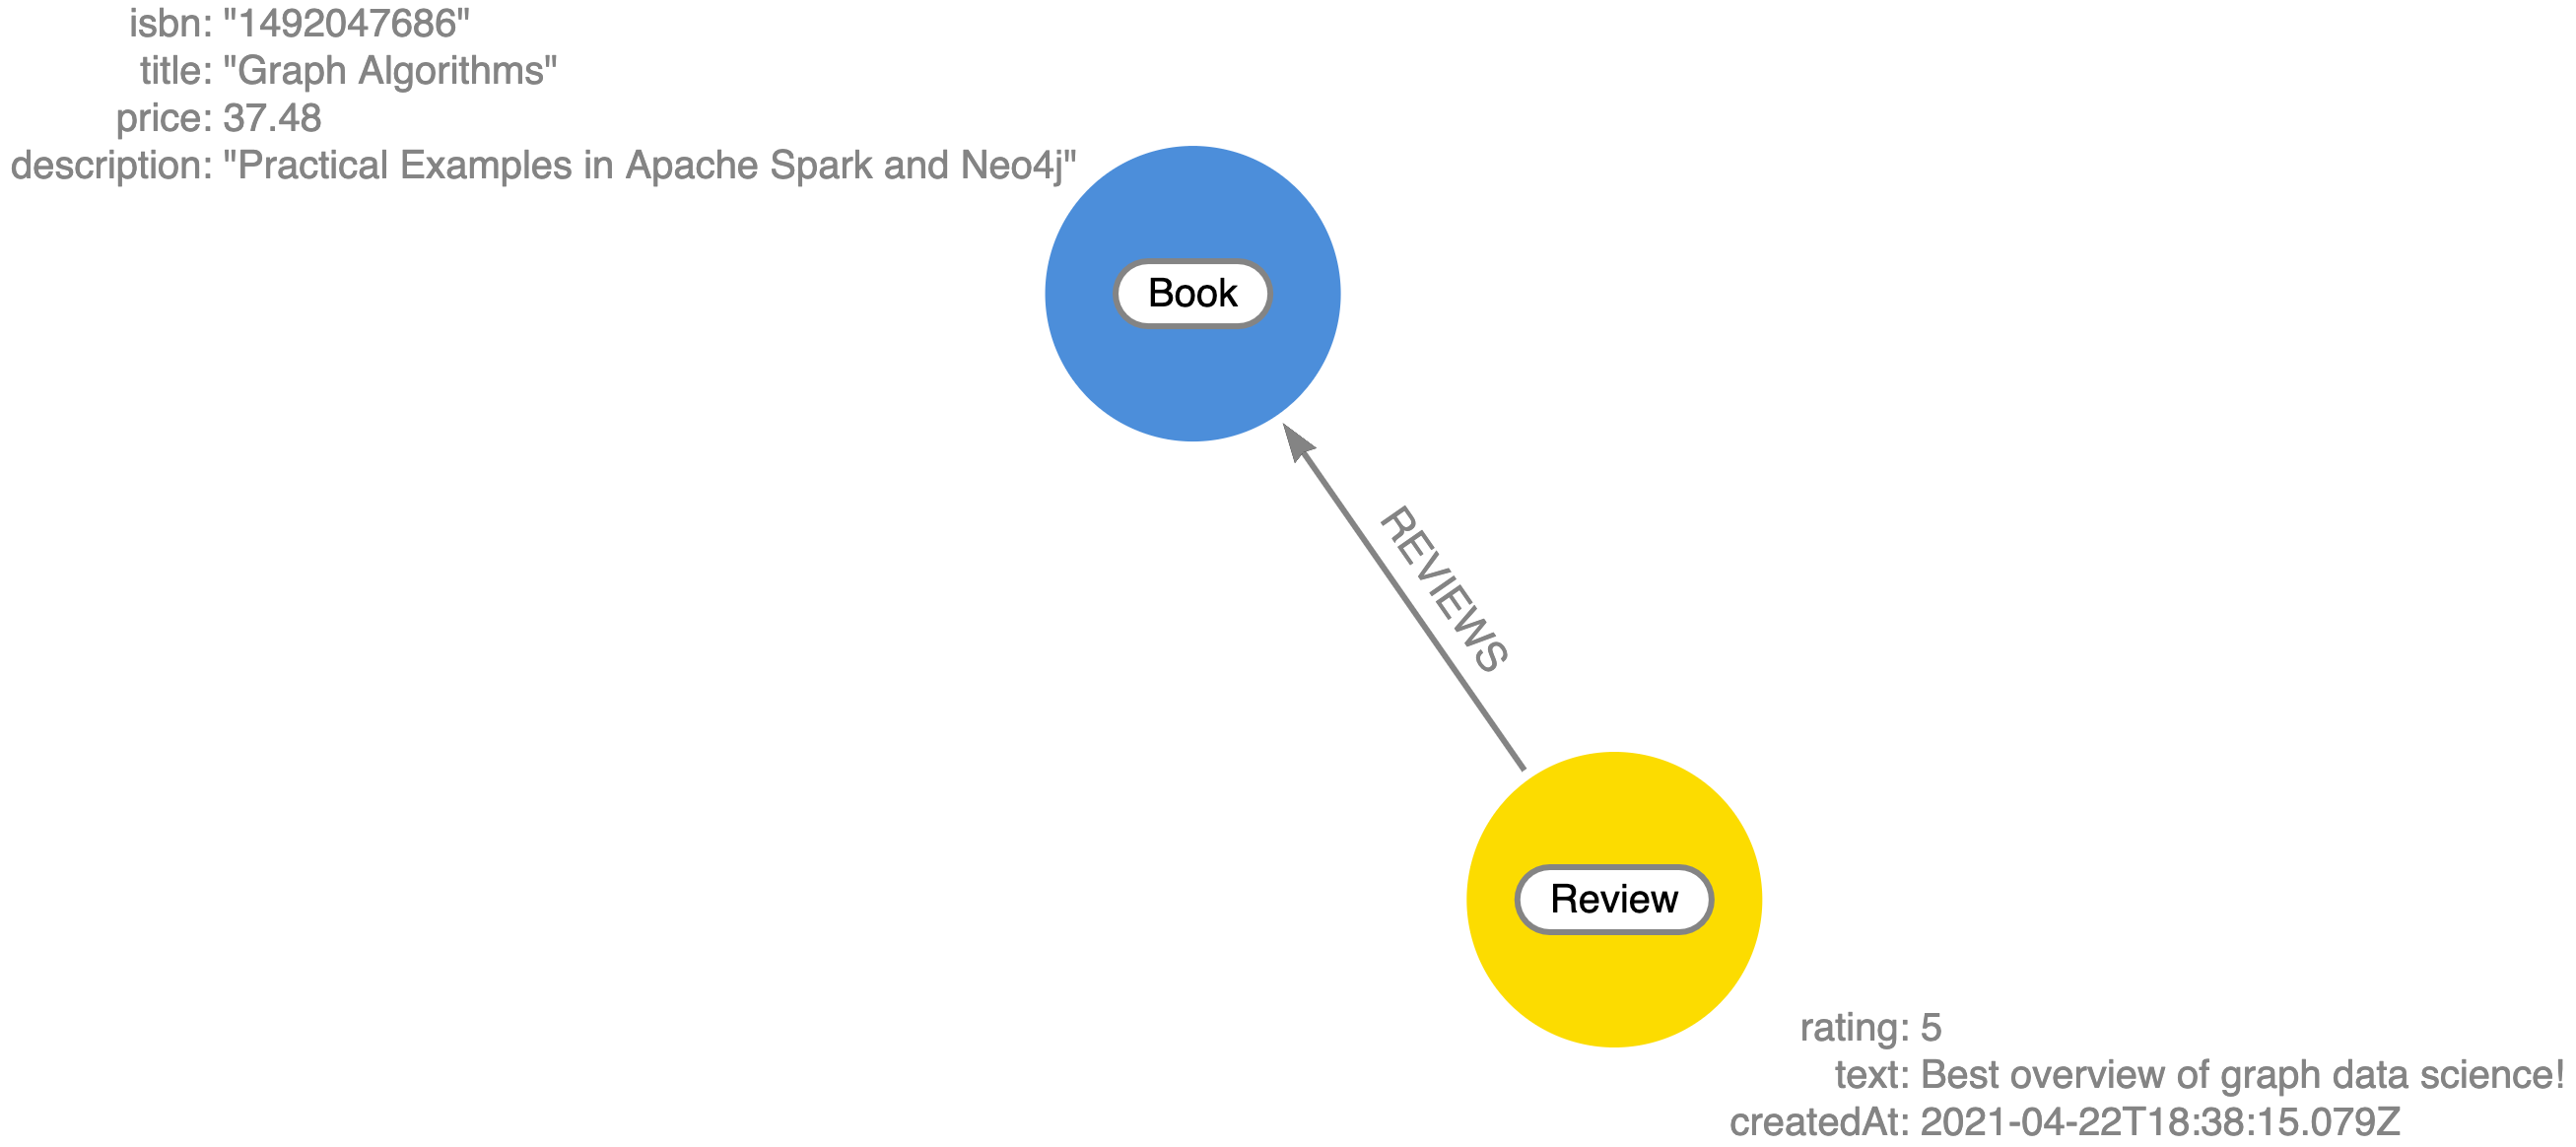
Note that we didn’t need to specify an input value for the
createdAtfield. Since we used the@timestampdirective in our GraphQL type definitions this value was added automatically when the mutation was executed.
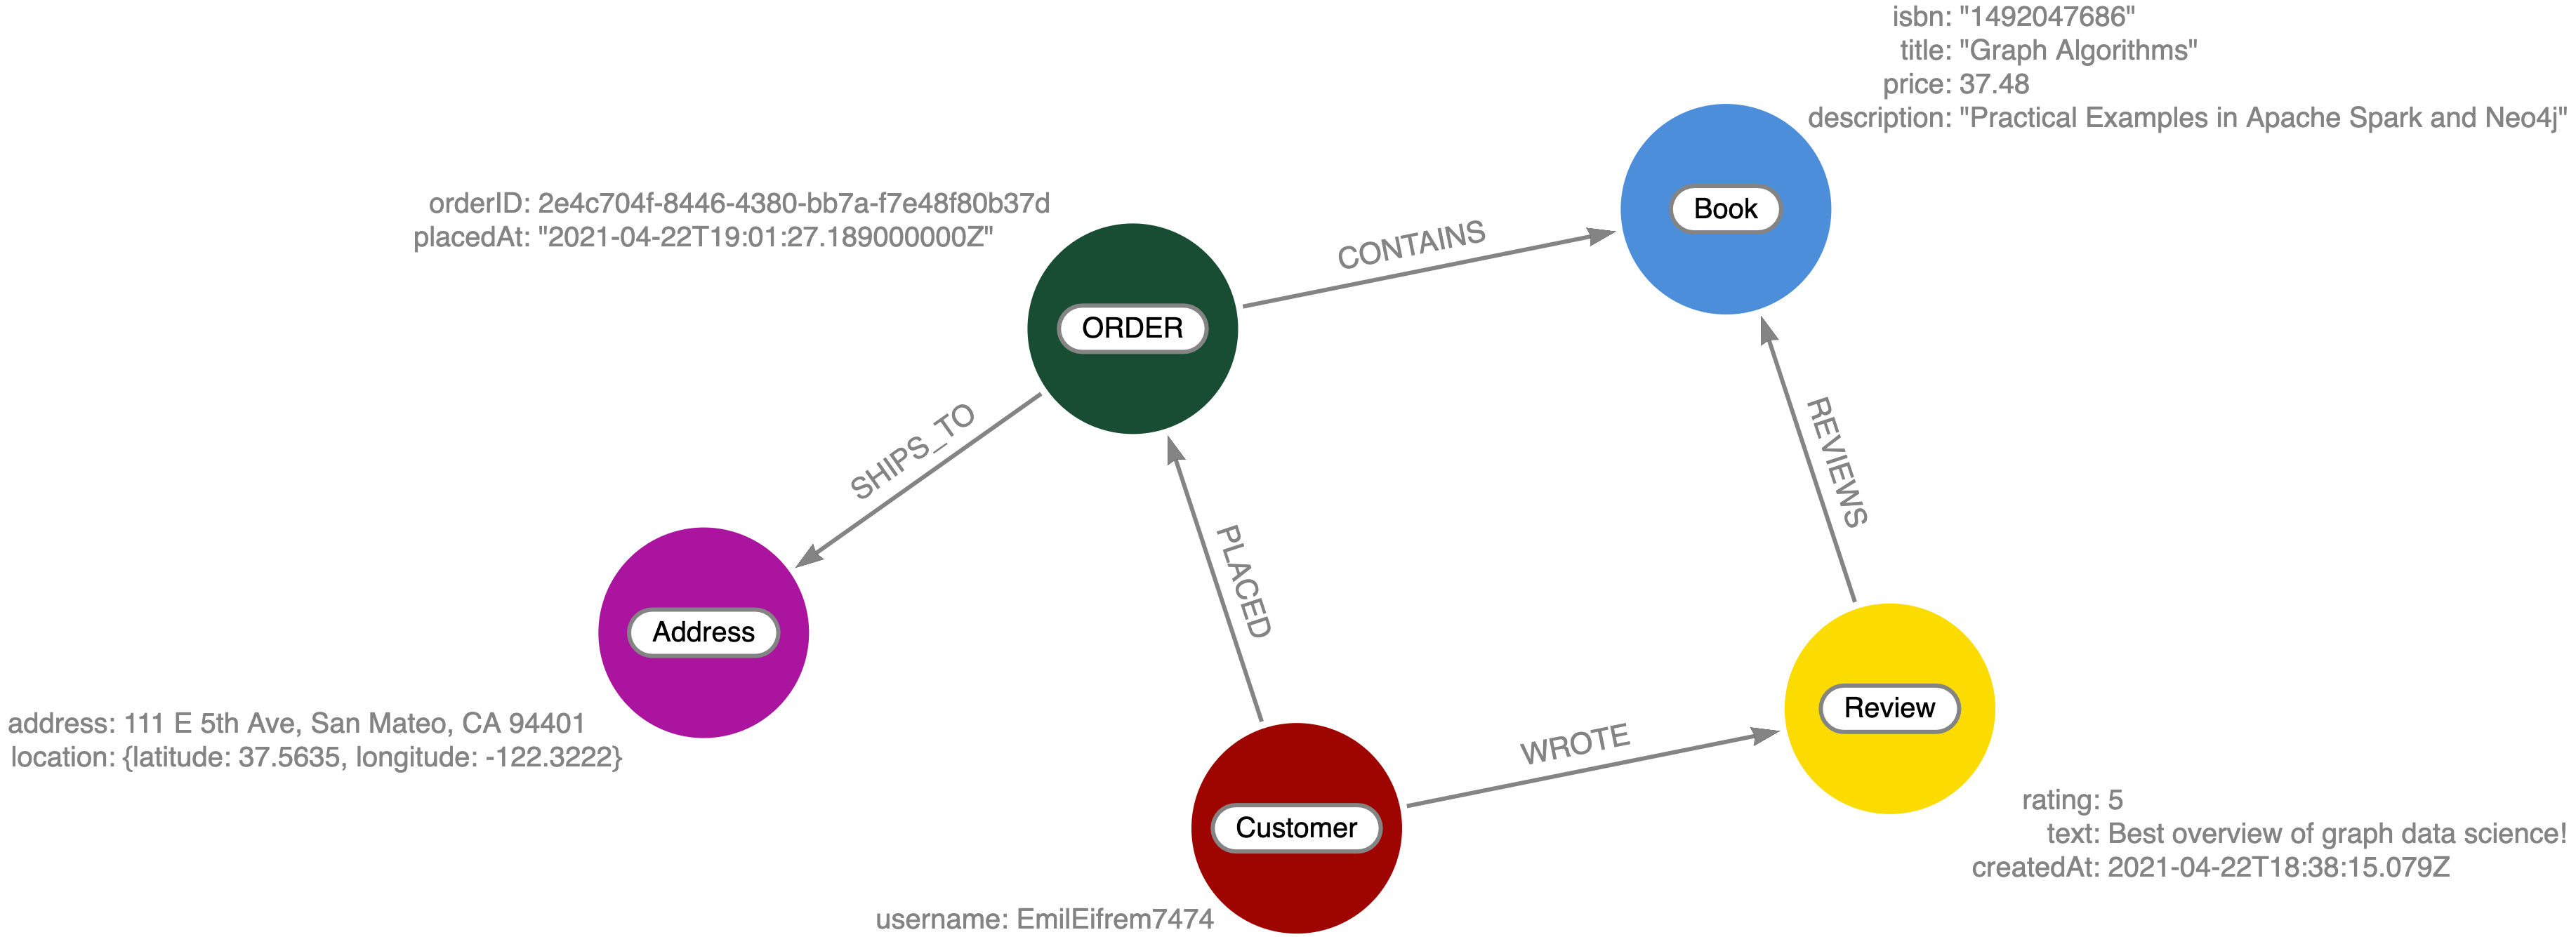
We can even create more complex nested structures using this nested mutation feature of the Neo4j GraphQL Library. Here we’ll create a Customer, Order, and Address nodes and their associated relationships in this single mutation.
mutation {
  createCustomers(
    input: {
      username: "EmilEifrem7474"
      reviews: {
        connect: { where: { text: "Best overview of graph data science!" } }
      }
      orders: {
        create: {
          books: { connect: { where: { title: "Graph Algorithms" } } }
          shipTo: {
            create: {
              address: "111 E 5th Ave, San Mateo, CA 94401"
              location: {
                latitude: 37.5635980790
                longitude: -122.322243272725
              }
            }
          }
        }
      }
    }
  ) {
    customers {
      username
      orders {
        placedAt
        books {
          title
        }
        shipTo {
          address
        }
      }
      reviews {
        text
        rating
        book {
          title
        }
      }
    }
  }
}
The response data from this mutation will match the shape of our selection set. We don’t need to include all the fields we created in the mutation, the data will be created even if not returned. Here’s what the response to the above mutation will look like:
{
  "data": {
    "createCustomers": {
      "customers": [
        {
          "username": "EmilEifrem7474",
          "orders": [
            {
              "placedAt": "2021-04-22T19:01:27.189Z",
              "books": [
                {
                  "title": "Graph Algorithms"
                }
              ],
              "shipTo": {
                "address": "111 E 5th Ave, San Mateo, CA 94401"
              }
            }
          ],
          "reviews": [
            {
              "text": "Best overview of graph data science!",
              "rating": 5,
              "book": {
                "title": "Graph Algorithms"
              }
            }
          ]
        }
      ]
    }
  }
}
And in the database our graph now look like this:
In addition to the create mutations, mutations are also generated for update and delete operations. You can explore the "Docs" tab in GraphQL Playground to see all the mutation operations available and refer to the Mutations section in the documentation for more detail.
Clear The Database
In the next section we will explore how to query our GraphQL API using the generated Query fields, but first let’s clear our database and load some initial sample data.
First, clear your database by running this Cypher statement in Neo4j Browser. You can find the link to open Neo4j Browser in Neo4j Sandbox - look for the green "Open" button.
Be sure you’re running this query in the correct Neo4j instance as this will delete all data in the database!
MATCH (a) DETACH DELETE aNow, in GraphQL Playground running in your Codesandbox, run the following GraphQL mutation to add some sample data:
mutation {
createBooks(
input: [
{
isbn: "1492047686"
title: "Graph Algorithms"
price: 37.48
description: "Practical Examples in Apache Spark and Neo4j"
}
{
isbn: "1119387507"
title: "Inspired"
price: 21.38
description: "How to Create Tech Products Customers Love"
}
{
isbn: "190962151X"
title: "Ross Poldark"
price: 15.52
description: "Ross Poldark is the first novel in Winston Graham's sweeping saga of Cornish life in the eighteenth century."
}
]
) {
books {
title
}
}
createCustomers(
input: [
{
username: "EmilEifrem7474"
reviews: {
create: {
rating: 5
text: "Best overview of graph data science!"
book: { connect: { where: { isbn: "1492047686" } } }
}
}
orders: {
create: {
books: { connect: { where: { title: "Graph Algorithms" } } }
shipTo: {
create: {
address: "111 E 5th Ave, San Mateo, CA 94401"
location: {
latitude: 37.5635980790
longitude: -122.322243272725
}
}
}
}
}
}
{
username: "BookLover123"
reviews: {
create: [
{
rating: 4
text: "Beautiful depiction of Cornwall."
book: { connect: { where: { isbn: "190962151X" } } }
}
]
}
orders: {
create: {
books: {
connect: [
{ where: { title: "Ross Poldark" } }
{ where: { isbn: "1119387507" } }
{ where: { isbn: "1492047686" } }
]
}
shipTo: {
create: {
address: "Nordenskiöldsgatan 24, 211 19 Malmö, Sweden"
location: { latitude: 55.6122270502, longitude: 12.99481772774 }
}
}
}
}
}
]
) {
customers {
username
}
}
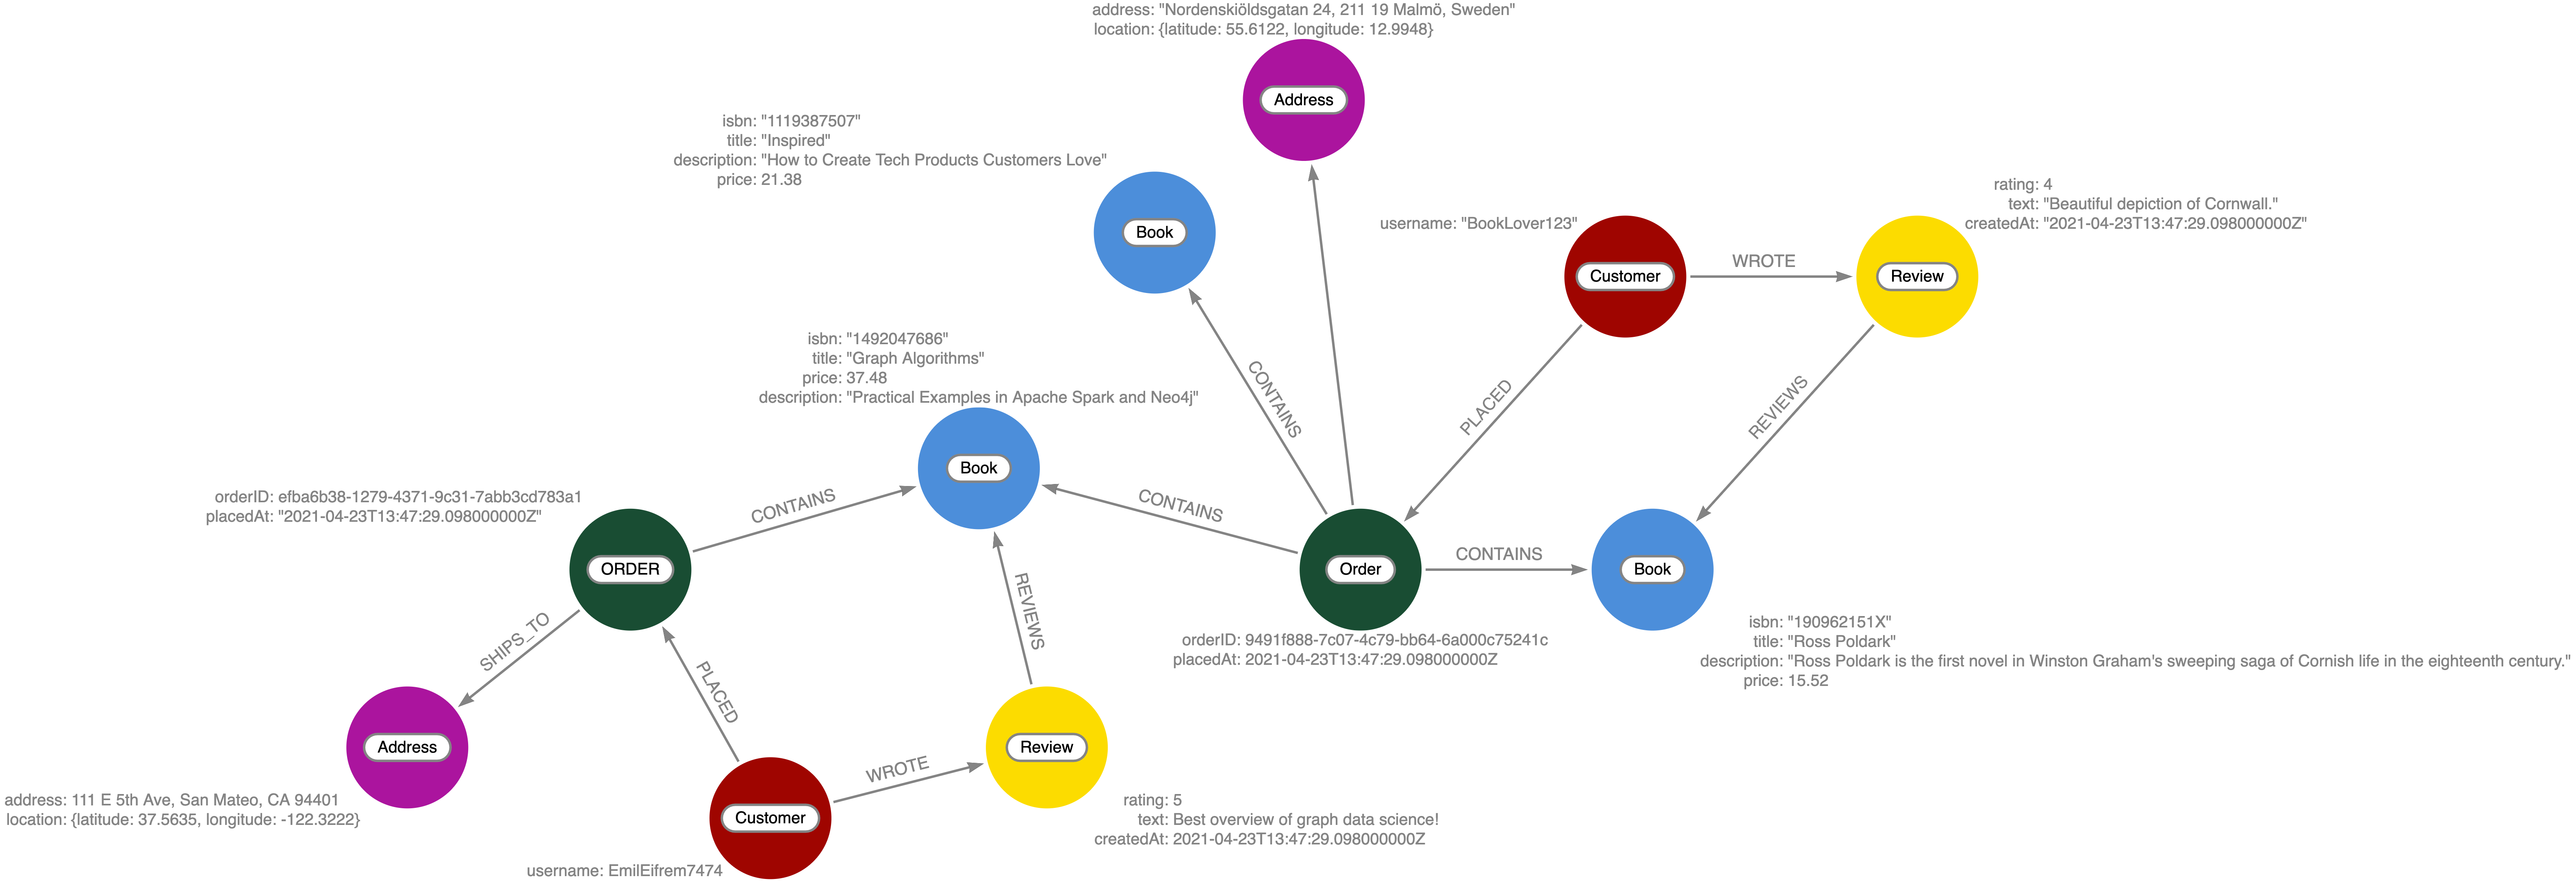
}Now, the data in our database will look something like this:
Now that we have some data loaded and we’ve reviewed how to add data using GraphQL mutations and the Neo4j GraphQL Library, let’s see how we can query that data using GraphQL.
Querying Data With GraphQL
We will review some examples now using the data we just loaded above, refer to the Neo4j GraphQL Library documentation for more information and examples.
GraphQL Query Fields
By default, each type defined in the GraphQL type definitions will have a GraphQL Query field generated and added to the Query type as the pluralized name of the type (for example the type Movie becomes a Query field movies). Each query field is an entry point into the GraphQL API. Since GraphQL types are mapped to node labels in Neo4j, you can think of the Query field as the starting point for a traversal through the graph.
Let’s start with an example, querying for all books and their titles.
{
  books {
    title
  }
}
If we loaded our sample data correctly we will see the follow result:
{
  "data": {
    "books": [
      {
        "title": "Graph Algorithms"
      },
      {
        "title": "Inspired"
      },
      {
        "title": "Ross Poldark"
      }
    ]
  }
}
The response data matches the shape of our GraphQL query - as we add more fields to the GraphQL selection set those fields are included in the response object. This query:
{
  books {
    title
    description
    price
  }
}
produces the following result:
{
  "data": {
    "books": [
      {
        "title": "Graph Algorithms",
        "description": "Practical Examples in Apache Spark and Neo4j",
        "price": 37.48
      },
      {
        "title": "Inspired",
        "description": "How to Create Tech Products Customers Love",
        "price": 21.38
      },
      {
        "title": "Ross Poldark",
        "description": "Ross Poldark is the first novel in Winston Graham's sweeping saga of Cornish life in the eighteenth century.",
        "price": 15.52
      }
    ]
  }
}
Traversals through the graph are expressed by adding nested fields to the GraphQL selection set.
{
  books {
    title
    reviews {
      rating
      text
      author {
        username
      }
    }
  }
}
{
"data": {
"books": [
{
"title": "Graph Algorithms",
"reviews": [
{
"rating": 5,
"text": "Best overview of graph data science!",
"author": {
"username": "EmilEifrem7474"
}
}
]
},
{
"title": "Inspired",
"reviews": []
},
{
"title": "Ross Poldark",
"reviews": [
{
"rating": 4,
"text": "Beautiful depiction of Cornwall.",
"author": {
"username": "BookLover123"
}
}
]
}
]
}
}Each generated Query field accepts two arguments where and options. The where argument is used to specify filtering arguments while options is used for sorting and pagination.
Let’s cover sorting and pagination first.
Sorting and Pagination
A sorting input type is generated for each type in the GraphQL type definitions, allowing for Query results to be sorted by each field using the options field argument.
{
  books(options: { sort: { price: DESC } }) {
    title
    price
  }
}
{
"data": {
"books": [
{
"title": "Graph Algorithms",
"price": 37.48
},
{
"title": "Inspired",
"price": 21.38
},
{
"title": "Ross Poldark",
"price": 15.52
}
]
}
}We can also sort in ascending order and pass multiple sort input objects to order by multiple fields. See the documentation for more information.
Page-based pagination is available by passing skip and limit values as part of the options argument. For example:
{
  books(options: { sort: { price: DESC }, limit: 1, skip: 0 }) {
    title
    price
  }
}
See the documentation for more information.
Filtering
Query results can be filtered using the where argument. Filter inputs are generated for each field and expose comparison operators specific to the type of the field. For example, for numeric fields filter input operators include equality, greater than (_GT), less than (_LT), etc. String fields expose the common string comparison operators such as _STARTS_WITH, _CONTAINS, _ENDS_WITH, etc.
Let’s search for all books where the price is less than 20.00:
{
  books(where: { price_LT: 20.00 }) {
    title
    price
  }
}
{
"data": {
"books": [
{
"title": "Ross Poldark",
"price": 15.52
}
]
}
}For Point fields we can filter results by the distance to another point. Here we search for addresses within 1km of a specified point:
{
  addresses(
    where: {
      location_LT: {
        distance: 1000
        point: { latitude: 37.56169133066, longitude: -122.3232480481 }
      }
    }
  ) {
    address
  }
}
We can also use the where argument in nested selections to filter relationships. Here we are filtering for reviews created after Jan 1, 2021 using the createdAt_GT filter input on the createdAt DateTime type, specifying the date using the ISO format.
{
  books(where: { price_LT: 20.00 }) {
    title
    price
    reviews(where: { createdAt_GT: "2021-01-01" }) {
      text
      rating
    }
  }
}
Note that the filters are applied at the level of the selection where the filter is used. So in the above example, all books with a price less than 20.00 will be returned, regardless of the reviews connected to the book.
Let’s look at an example that applies filtering at the root of our query, but using a relationship. Let’s say we want to search for all orders where the shipTo address is within 1km of a certain point. To do that we’ll use the where argument at the root of the query (in the orders Query field), but use a nested input to specify we want to filter using the shipTo relationship and the corresponding Address node.
{
  orders(
    where: {
      shipTo: {
        location_LT: {
          distance: 1000
          point: { latitude: 37.56169133066, longitude: -122.3232480481 }
        }
      }
    }
  ) {
    orderID
    customer {
      username
    }
    books {
      title
    }
  }
}
For more information and examples see the filtering section in the Neo4j GraphQL Library documentation.
Exercise: Updating The GraphQL Schema
To successfully perform the steps in this exercise, you will have executed all of the GraphQL code after you cleared the database above and loaded the sample books data.
If we refer back to our original graph data model we see that we’re missing the Author and Subject nodes! In this exercise you will update the GraphQL schema adding the Author and Subject types including relationships.
-
Update
schema.graphqlto add these two types to the GraphQL schema.
-
Execute a GraphQL mutation to add authors to the graph according to the following table.
Try to do this in a single nested mutation operation and be sure to connect the authors to their books.
Title |
Author(s) |
Inspired |
Marty Cagan |
Ross Poldark |
Winston Graham |
Graph Algorithms |
Mark Needham, Amy E. Hodler |
-
Execute a GraphQL mutation to add the book subjects and connect them to the books according to this table.
Title |
Subject(s) |
Inspired |
Product management, Design |
Ross Poldark |
Historical fiction, Cornwall |
Graph Algorithms |
Graph theory, Neo4j |
If you get stuck you can find the solutions in the README.md file in this Codesandbox.
Be sure to add your sandbox credentials to the .env file after loading the Codesandbox.
Check Your Understanding
Question 1
When creating GraphQL type definitions using the Neo4j GraphQL Library the @relationship directive is used to define relationships.
Is the above statement true or false?
-
True
-
False
Question 2
For the GraphQL schema we created in this lesson, which of the follow GraphQL mutations would create an address for an already existing order?
Select the correct answer.
-
mutation { createAddresses( input: { address: "111 E 5th Ave, San Mateo, CA 94401" order: { connect: { where: { orderID: "123" } } } } ) { addresses { address } } } -
mutation { createAddresses( input: { address: "111 E 5th Ave, San Mateo, CA 94401" order: { create: { books: { connect: { where: { title: "Graph Algorithms" } } } } } } ) { addresses { address } } } -
CREATE (a:Address {address: "111 E 5th Ave, San Mateo, CA 94401"}) MATCH (o:Order {orderID: "123"}) CREATE (a)←[:SHIPS_TO]-(o)
Summary
In this lesson, we saw how to use GraphQL type definitions to generate a GraphQL API using the Neo4j GraphQL Library. In the next lesson we explore adding custom logic to our GraphQL API using the Cypher query language.
Need help? Ask in the Neo4j Community