Integrating Graph Data Visualizations into No-Code Workflows with Bloom 2.0

Product Manager at Neo4j
8 min read
This month sees the release of Neo4j Bloom 2.0, with a number of useful new features. For Enterprise users, this includes the ability to save and share scenes.
Of course, Bloom’s other useful features remain – such as sharing perspectives, search phrases, and deep linking.
In this article, I’ll discuss how to leverage Bloom’s out-of-the-box utility to easily empower domain experts in your organization with the power of no-code graph data visualization & exploration.
When finished, we’ll have created some perspectives to offer different business views of the same retail dataset, added some search phrases that will enable analysts to conduct useful queries without writing Cypher, and used deep links as a simple entry point into Bloom for those same users. All of this can be done without the need to build and maintain a custom visualization solution.
Creating, Managing, and Sharing Perspectives
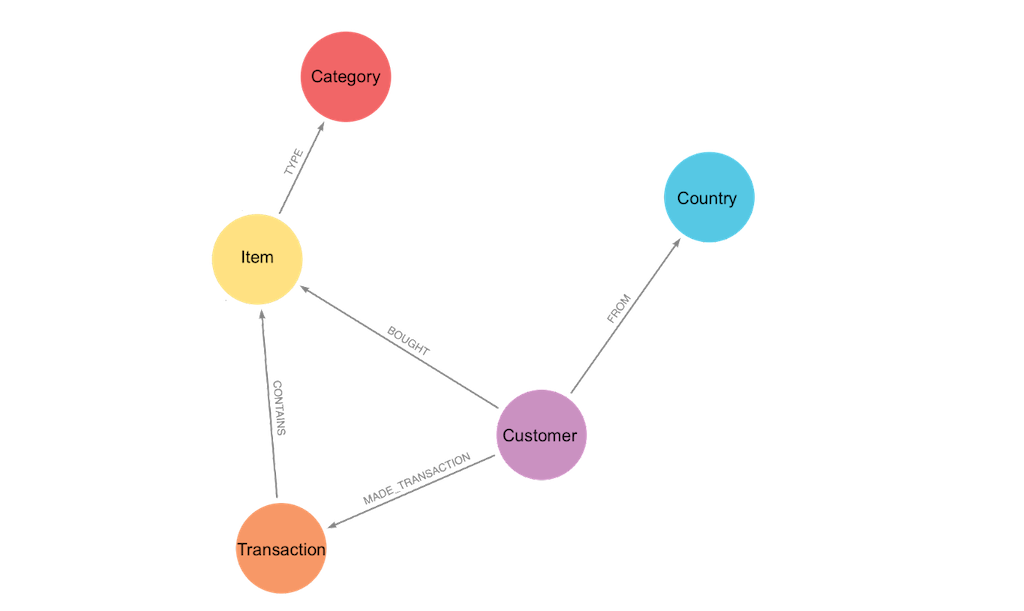
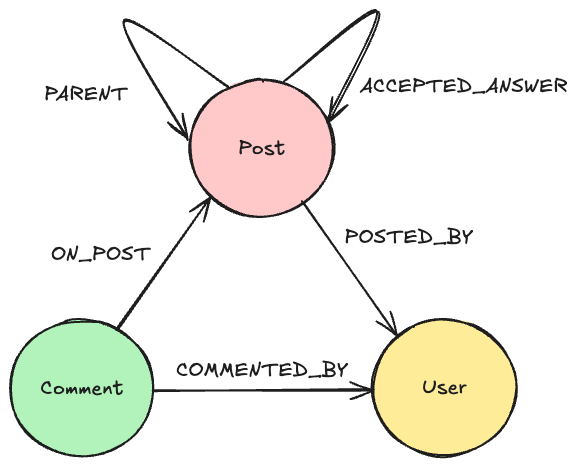
Our sample dataset contains a variety of retail products and transactions with a schema that looks like this:
Thinking about how domain specialists in our imaginary organization might want to use this data, we could imagine that there will be analysts concerned with customers, and others concerned with products. Of course, there might be other requirements, but let’s focus on these two for now.
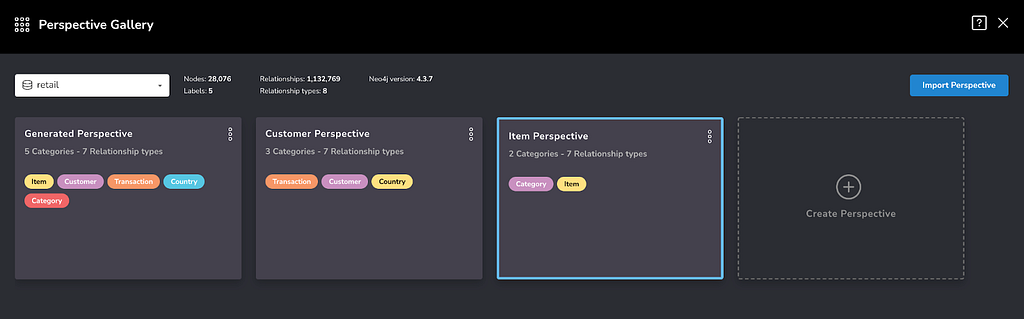
I’ll create two perspectives from the Perspective Gallery:
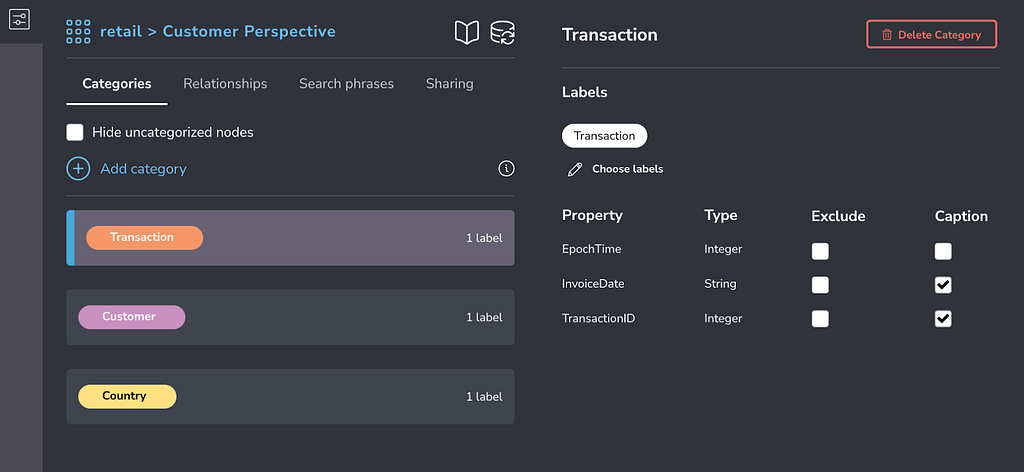
- Customer Perspective: includes the Country, Customer, and Transaction labels, each with their own Category in Bloom.
- Item Perspective: includes the Category and Item labels, each with their own Category in Bloom.
Note that in a Bloom perspective, you can assign more than one label to a Category. In this example, we’re using a 1:1 assignment, which suits our needs and is quite common.
To do this, we can select an empty “Create Perspective” box, choose “Blank Perspective” and rename it using the three dot dropdown. Then we can select each perspective in turn, choose “Use Perspective” to load it into Bloom, and modify it to suit our needs. We can always return to the Gallery using the nine-dot icon in the perspective drawer, at the top left corner of Bloom.
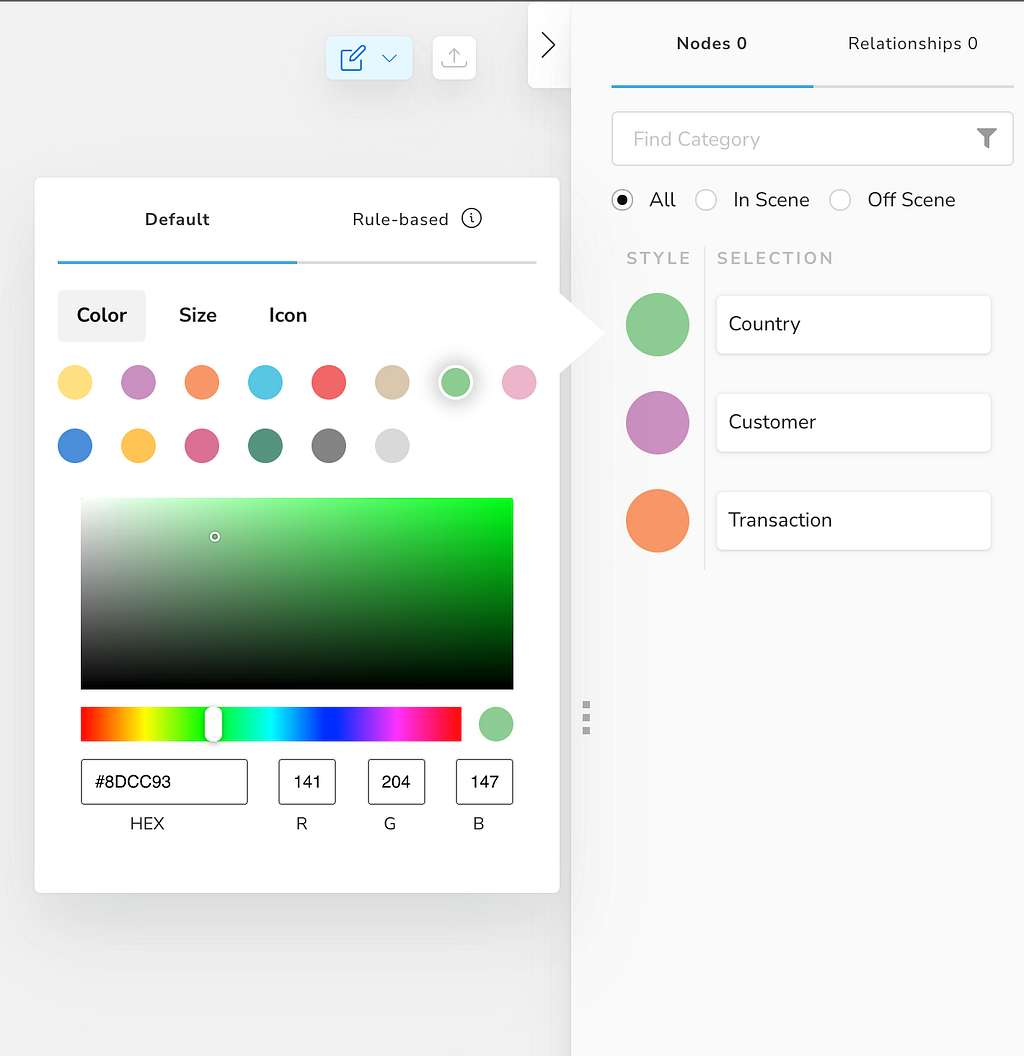
This is also a good time to consider the captions you’d like to see on nodes and in tooltips, and default styling including node coloring (and any rule-based styling). These can be set up in the perspective designer at the left, and the legend panel at the right, respectively.
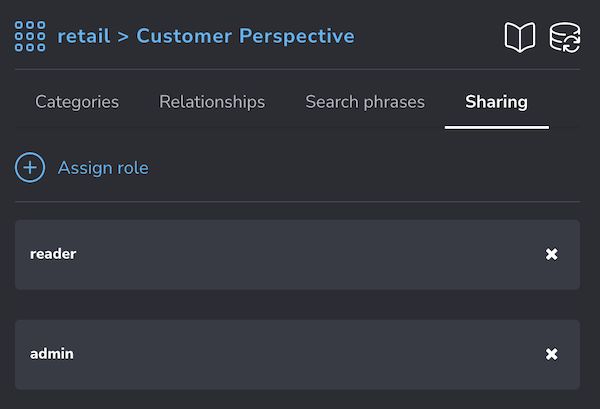
If we have the full access version of Bloom running on an Enterprise instance of Neo4j with the Bloom plugin, we can now also share these perspectives with users that have specific roles.
In this case, I’ve added the reader role to the Customer Perspective, so that any user with that role will have read access to the perspective and the underlying data per the role’s permissions (as configured in Neo4j).
More on these topics can be found in the Bloom Manual (Perspectives).
Search Phrases
Now that we’ve created a couple of perspectives, assigned roles, and configured captions and styling, we can move on to considering any search phrases our business users might need.
While domain specialists or analysts in your organization may not be well versed in the Cypher query language, developers can provide easy to use searches for specific purposes using Bloom’s search phrases.
Note that search phrases are attached to the perspectives, and users will be limited by the permissions of their assigned roles when attempting to run search phrases.
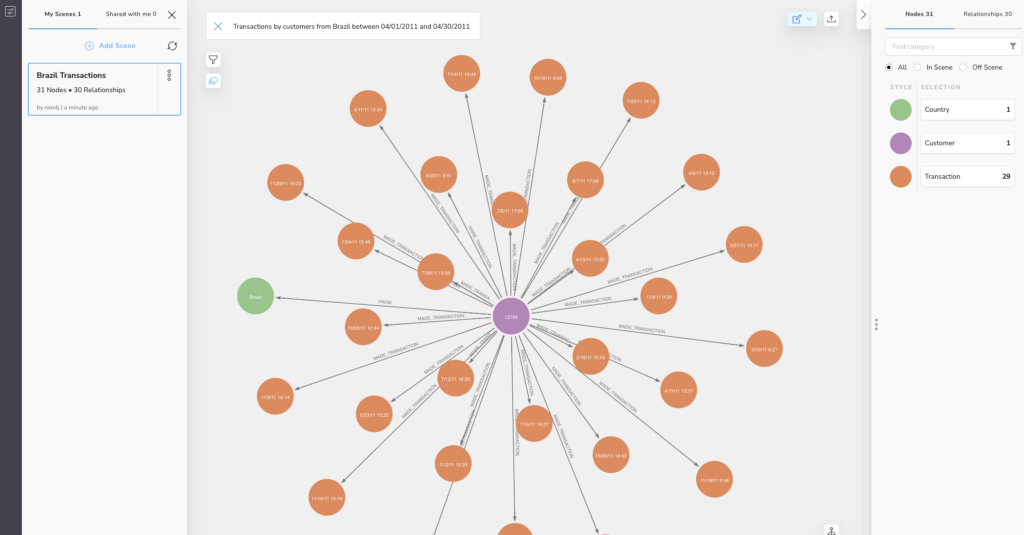
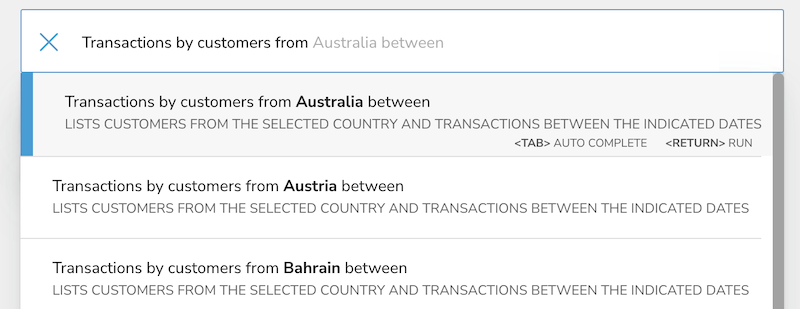
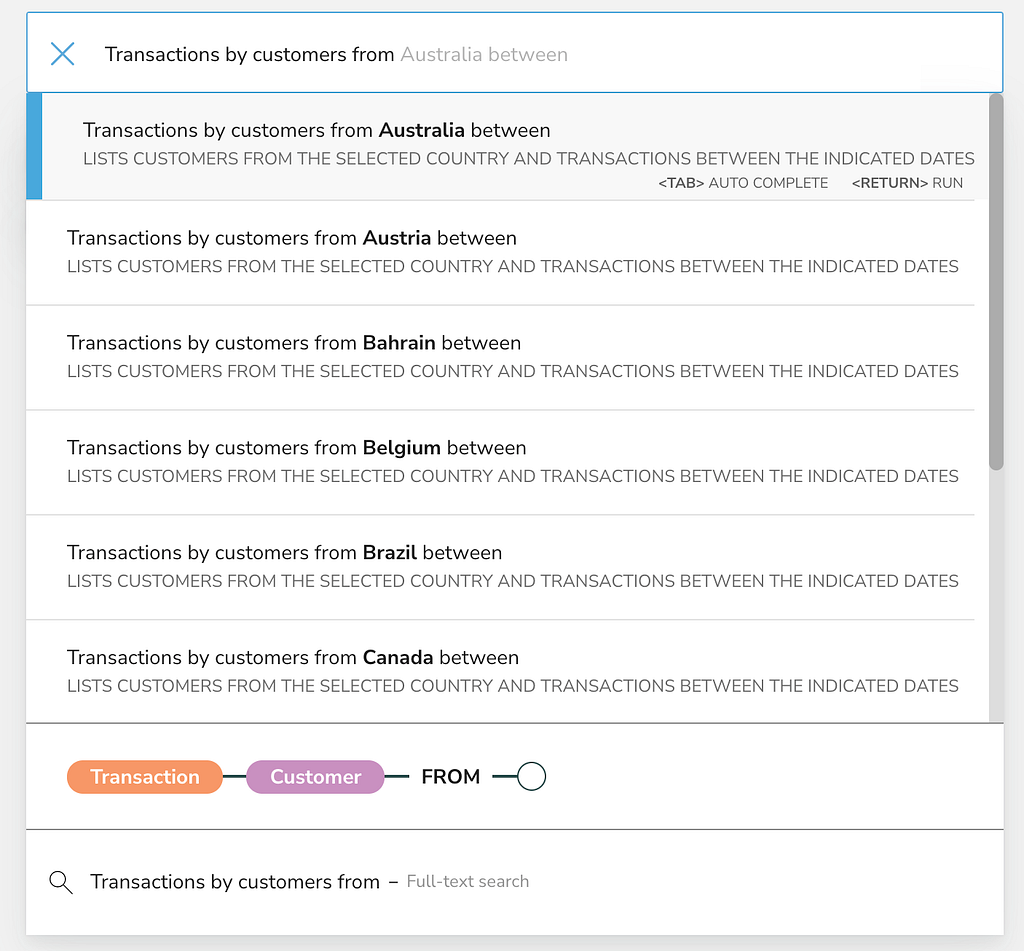
Continuing with the Customer Perspective, let’s create a search phrase that lets users of the perspective identify transactions between certain dates for customers from a specific country.
When we’re done it can be used like this:
We’ll need four things:
- The search phrase itself that users will type into the search bar, along with any parameters we specify (preceded by a $): Transactions by customers from $country between $from and $to
- A description for the search phrase. This will appear in all caps under the suggestion when the user starts typing the phrase in the search box: Lists customers from the selected country and transactions between the indicated dates
- The Cypher query that will be executed when the search phrase is run. We’re looking for a graph pattern where a Country node is connected via a FROM relationship to a Customer node, which in turn is connected via a MADE_TRANSACTION relationship to a Transaction node. We then use an apoc.date.parse function to normalize date inputs with the database InvoiceDate parameter on Transaction nodes (which happens to be stored as a String value), so that we can use less than and greater than operators. Care should be taken writing certain search phrase queries to ensure they’ll be performant in the context of your underlying database.
MATCH (c:Country)<-[f:FROM]-(cu:Customer)-[m:MADE_TRANSACTION]->(t:Transaction)
WHERE c.Name = $country
AND
apoc.date.parse($from, “ms”, “mm/dd/yyyy”) <= apoc.date.parse(t.InvoiceDate, “ms”, “mm/dd/yy hh:mm”) <= apoc.date.parse($to, “ms”, “mm/dd/yyyy”)
RETURN c, cu, t, f, m
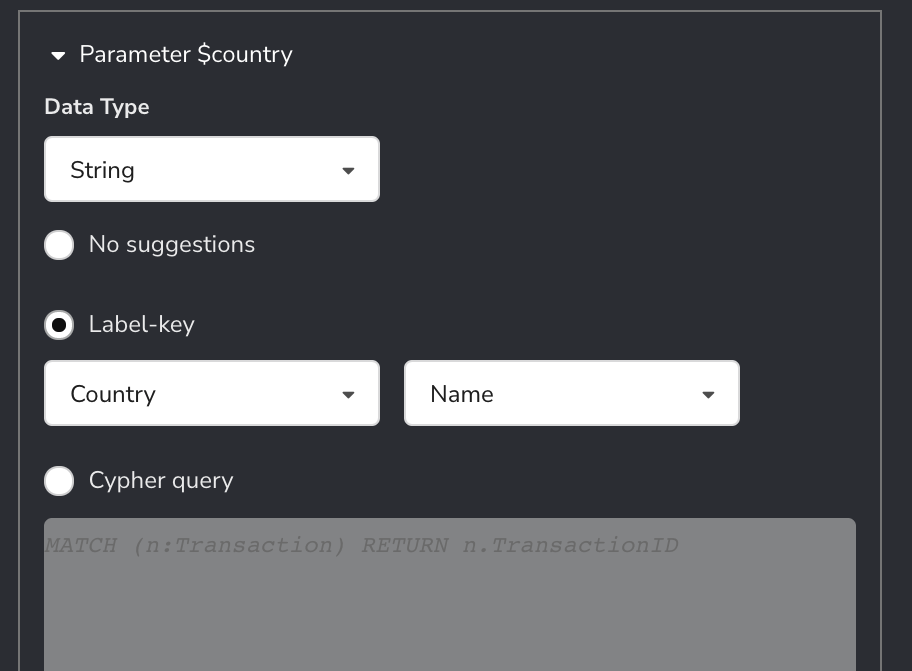
4. Optionally, any suggestions we want to display when the user is about to enter parameters. This can be done using a label-key combination, or by writing another custom Cypher query. In our case, we’ll use the Country label and Name property for suggestions when the user is typing the $country parameter, and the Transaction label’s InvoiceDate property when entering the $to and $from parameters.
Here is the Cypher Phrase in the input field about to be selected, parameterized, and run.
It’s possible to add multiple search phrases to each perspective. Now let’s switch to the Item Perspective though, and add a search phrase to it, too.
This time we’ll add a simple search phrase, to return item nodes where the description contains the specified string value:
Search phrase: Items where description contains $param
Cypher query:
MATCH (i:Item)
WHERE toLower(i.Description) CONTAINS toLower($param)
RETURN i
In this query, we’re normalizing user input and the parameter values to lowercase, since we want results to be case insensitive. We’re also taking advantage of the CONTAINS operator to find the value searched anywhere in the Description property of Item nodes.
More details about this feature are again in the Bloom Manual (Search Phrases)
Deep Links
At this stage, we’ve set up a couple of perspectives, customized their styling, shared one with users with the reader role, and created search phrases for our domain specialists to use. Next, let’s talk about how we can make all of this easy for users to access.
Deep links allow developers to build parameterized links to Bloom, and these can be shared in any number of ways, including via existing applications from which users may want to open a specific graph visualization.
Of course, you can generate these links programmatically, and used in conjunction with search phrases this can be very powerful.
Here are the parameters you can configure in a Bloom deep link:
perspective: the name of a Bloom perspectivesearch: any search that you can run in the search bar, including a search phraserun: an optional boolean parameter, when set to true, Bloom will run the search as soon as it opens and display any results
There are also a couple of different protocols you can use to launch a search phrase:
neo4j://graphapps/neo4j-bloom/?perspective=Item%20Perspective&search=Items%20where%20description%20contains%20mysearchterm
– this approach will launch Bloom via Neo4j Desktop, if it’s installed on the local machine
https://myServer:port/bloom/index.html?perspective=Item%20Perspective&search=Items%20where%20description%20contains%20mysearchterm
– this approach will launch Bloom in a web browser, whether hosted
- via the Bloom plugin on a Neo4j database,
- on Aura, or
- a standalone webserver hosting Bloom in your organization.
More details on Bloom’s different installation options can be found in the Bloom docs.
Putting it all together, we can easily integrate links to specific search results in Bloom, styled by preconfigured perspectives with access to specific search phrases. You may want to generate alert emails with deep links, create spreadsheets with links to Bloom, or even integrate Bloom links into existing corporate applications.
Customizing & Editing
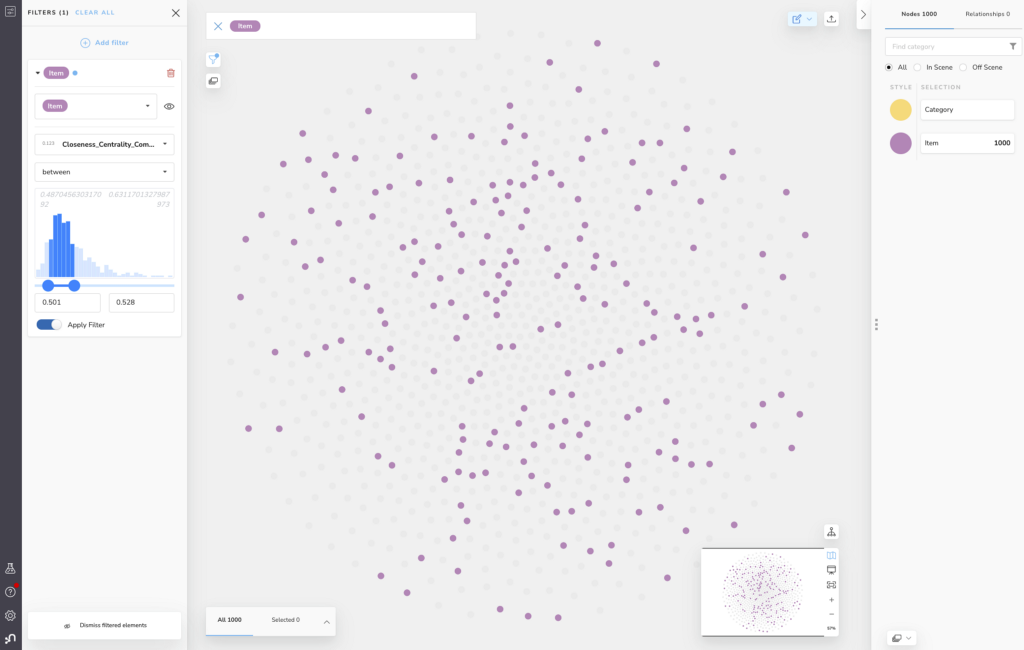
Once looking at some data of interest, for example in the Item Perspective, analysts can continue to make use of Bloom’s multitude of exploration and analysis features including applying node expansions, revealing relationships, rule-based styling, and so on. Two improvements of note in Bloom 2.0 include histograms for certain data types (found in filters as well as rule-based styling), and improved editing capabilities.
Let’s look briefly at histograms – in this data set, some Neo4j Graph Data Science Library (GDSL) algorithms have already been applied and noted as node properties. If we want to filter Items on scene by looking only at those with the highest closeness centrality, we can now easily see how that measure is distributed and interactively select the range of interest per the image below.
Version 2.0 also has enhancements to the editing features in Bloom. You can directly edit properties in the Inspector, as before. Additionally, Bloom can handle creating nodes when existence, uniqueness, or node key constraints exist. The ability to delete nodes and relationships is also new.
Save & Share a Scene
Wrapping things up, let’s look at how users of perspectives, search phrases, and deep links can save and share their findings with others.
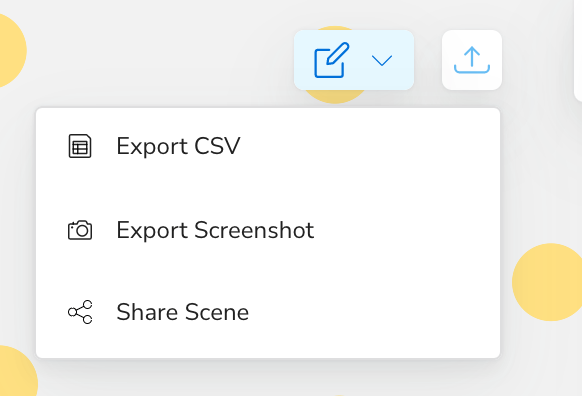
Two of the most common ways available in all versions of Neo4j Bloom are exporting screenshots or CSVs.
These options are found in the Export menu in the top right corner of Bloom.
- Exporting a screenshot exports a high quality PNG image of the current scene with a transparent background, free of any UI elements or other artifacts.
- Exporting to CSV generates a ZIP file with two CSVs, one containing all nodes on scene and their properties (except properties ‘excluded’ in the perspective designer), as well as one containing all relationships. If these files don’t meet your needs, they can always be transformed by your own tooling or procedures.
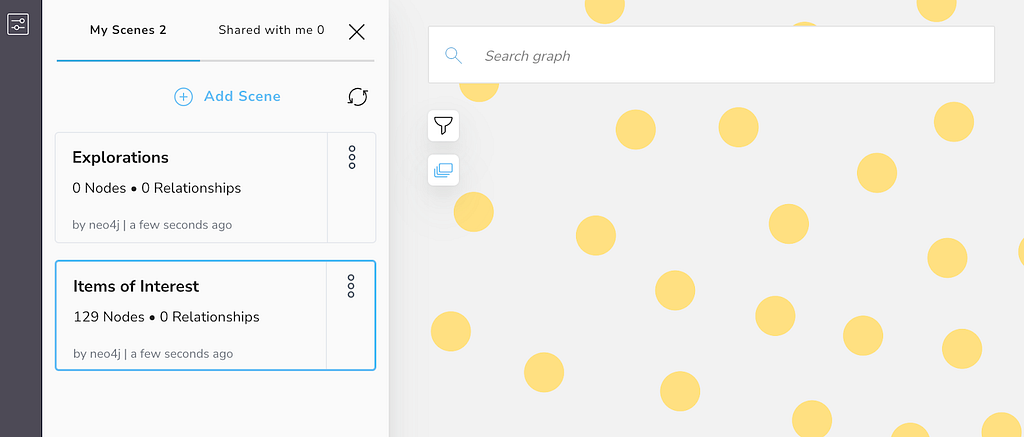
Starting with Bloom 2.0, Full Access Enterprise users with the Bloom plugin installed on their Neo4j database can also start taking advantage of the new Scene Saving and Sharing features.
Users with write access to the database can create, save, and modify multiple scenes. Furthermore, they can choose to share them via the same export menu with users who have access to the perspective.
Users viewing a scene shared with them won’t be able to save changes, but they will be able to make a copy of the scene (duplicate) and make changes to their own copy (as long as they have write access to the database).
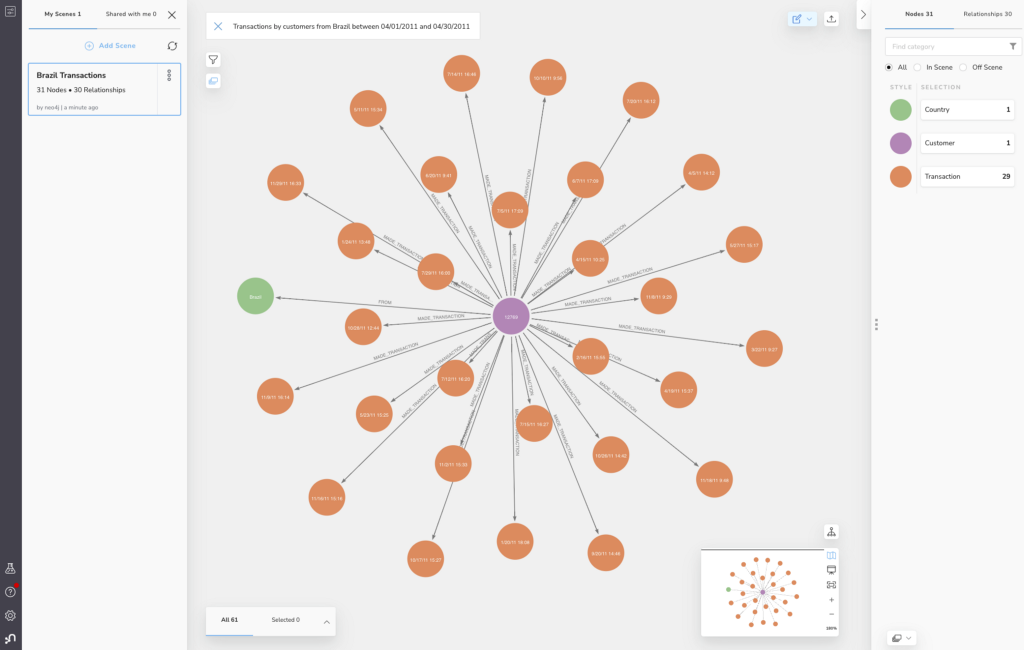
For Full Access installations, scenes can be accessed via the new Scenes icon below the Filter icon on the upper left of the screen.
Conclusion
We’ve made use of a number of simple yet highly flexible Bloom features to demonstrate how developers can leverage Bloom as an out-of-the-box graph visualization solution working seamlessly with their Neo4j database.
In many cases these techniques can save a lot of time and effort building and maintaining custom solutions. You can also check out our explainer video for Developers for a recap of these features and get started with Neo4j Bloom on the product page.
If you have feedback for Neo4j Bloom, please share it here.
Integrating Graph Data Visualizations into No-Code Workflows with Bloom 2.0 was originally published in Neo4j Developer Blog on Medium, where people are continuing the conversation by highlighting and responding to this story.
Share Article


Explore
Related Articles


How to Improve Multi-Hop Reasoning With Knowledge Graphs and LLMs