Integrate Neo4j With Symfony: Handling Multiple Connections

CEO of Nagels IT Consulting
6 min read

Discover how effortless it can be to configure multiple Neo4j drivers within Symfony using the Neo4j bundle
Welcome back to our guide on integrating Symfony with Neo4j! The first blog provides initial setup instructions for your Symfony project and Neo4j environment.
In this post, we’ll demonstrate how effortless it can be to configure multiple Neo4j drivers within Symfony using the Neo4j bundle. With configuration and dependency injection mainly handled behind the scenes, you can seamlessly switch between databases and connections.
We’ll use the Symfony CLI for our PHP environment, Neo4j Desktop for a local database, and Neo4j Aura for a cloud-hosted database to prove our point. Follow along and see how straightforward integrating multiple Neo4j connections in your Symfony application is!
Prerequisites
Before you begin, make sure you have:
- Symfony installed: If you haven’t already, download Symfony to run the environment with all necessary services.
- A Symfony project set up: This guide assumes you already have a basic Symfony setup. If not, refer to the first blog for instructions on setting up a Symfony project.
Set Up Neo4j Desktop
1. Download Neo4j Desktop
Download the Neo4j Desktop tool and install it.
2. Initial Setup
Once installed, launch Neo4j Desktop. The setup process might take a while, so be patient.
3. Default Movies Database
Neo4j Desktop often comes with a pre-configured Movies database. We won’t use this, but we’ll create a new database instead.
4. Create a New Project
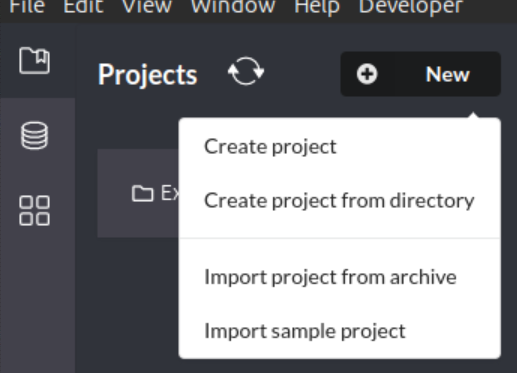
Click the New button in the top-left corner.
Select Create Project to create a new project. The default name will be “Project.”
Click on the project name to open it. You should see a screen similar to the image above.
5. Add a Local Database:
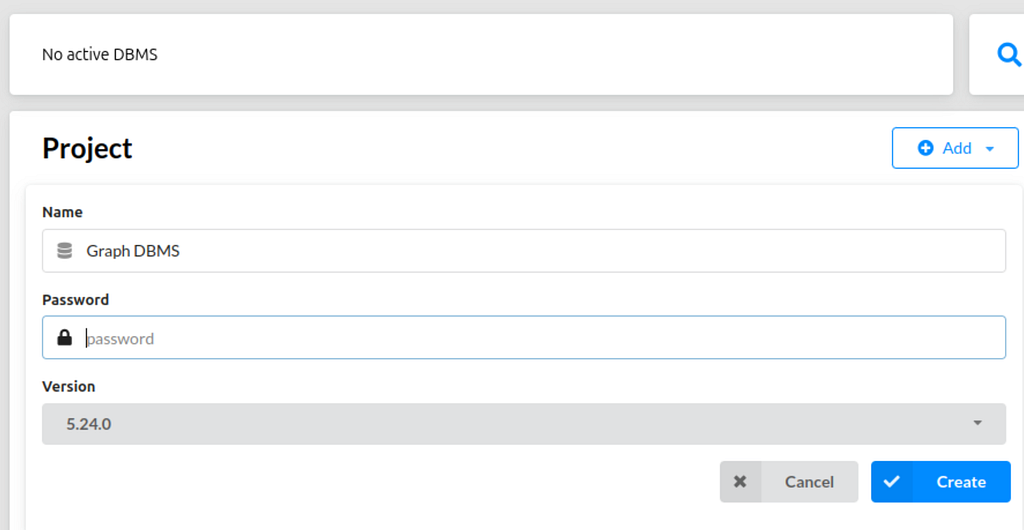
On the right-hand side, click Add > Local Database.
Enter a name and password for your new database.
6. Database Creation
Wait for the database to be created. After the process, your project should look like the image above.
7. Start the Database

Click Open to launch the database in the Neo4j Browser.
You’re now ready to interact with your database!
This setup ensures you have a running Neo4j environment, laying the groundwork for setting up multiple Neo4j connections with your Symfony application moving ahead.
Connecting Our Symfony Application With Neo4j Desktop and AuraDB
Step 1: Install Required Packages
Install the required Neo4j bundle to manage connections between Symfony and Neo4j.
Run this Composer command in your project directory:
composer require neo4j/neo4j-bundle:^1.1.0Accept the Symfony recipe if prompted. It will automatically drop the config files in your project.
This will allow you to use the Neo4j client within Symfony.
Step 2: Configure Services for Multiple Neo4j Connections
Let’s configure Symfony to connect to your local Neo4j Desktop instance and the Neo4j AuraDB. Open the config/packages/neo4j.yaml file and add the following code:
neo4j:
    drivers:
        - alias: local
          dsn: '%env(NEO4J_LOCAL_DSN)%'
        - alias: aura
          dsn: '%env(NEO4J_AURA_DSN)%'
    # Default driver to use (optional; uses the first driver if not specified)
    default_driver: aura
    # Default session configuration
    default_session_config:
        fetch_size: 1000                # Number of rows fetched per query
        access_mode: read               # Default session mode: read or write
        database: 'neo4j'               # Name of the default database
    # Default transaction configuration
    default_transaction_config:
        timeout: 120                    # Transaction timeout in seconds
What’s Happening Here
- Drivers: Define two Neo4j connections — one for the local instance (local) and one for AuraDB (aura).
- Default driver: Specifies that AuraDB will be used by default.
- Session configuration: Sets default session parameters (e.g., fetch size, access mode, and database name).
- Transaction configuration: Sets the default timeout for transactions.
This configuration allows you to switch between local and AuraDB connections seamlessly by specifying the driver alias (local or aura).
Step 3: Update the .env File With Connection Details
Add the following lines to your .env file to configure your database credentials securely:
###> neo4j/neo4j-bundle ### # Neo4j Local Database connection
NEO4J_LOCAL_DSN="bolt://<your_neo4j_desktop_username>:<your_neo4j_desktop_password>@database:7687"
# Neo4j AuraDB connection
NEO4J_AURA_DSN="neo4j+s://<your_auradb_username>:<your_auradb_password>@<your_auradb_uri>"
###< neo4j/neo4j-bundle ###
These DSN strings configure the local Neo4j instance and the cloud-based AuraDB connection.
Step 4: Using Symfony Commands to Explore Configuration
Once you’ve configured everything, you can use Symfony’s built-in commands to inspect and interact with your configuration.
Viewing configuration documentation: You can dump the complete reference of the Neo4j configuration to see available options using the following command:
php bin/console config:dump-reference neo4jThis will display a complete list of available options for Neo4j, including configuration settings you may want to adjust for your project.
Inspecting dependency injection (DI): Symfony’s DI system allows you to access the services defined in your application. To see the list of services related to Neo4j and how they’re injected, run the following command:
php bin/console debug:container neo4jThis command will show all services associated with Neo4j, including those for local and AuraDB connections. Understanding how the alias (local, aura) maps to the underlying DI container is helpful.
For instance, you will see an output indicating that neo4j.session.local corresponds to the local Neo4j connection and neo4j.session.aura corresponds to the AuraDB connection. This mapping is essential for understanding how Symfony injects the correct database session into your controllers and services.
Step 5: Create a Controller to Test Connections
Next, create a controller in Symfony to verify that both connections work correctly. Here’s an example controller to test the connections:
<?php

namespace AppController;

use LaudisNeo4jContractsSessionInterface;
use SymfonyBundleFrameworkBundleControllerAbstractController;
use SymfonyComponentDependencyInjectionAttributeAutowire;
use SymfonyComponentHttpFoundationResponse;
use SymfonyComponentHttpFoundationJsonResponse;
use SymfonyComponentRoutingAnnotationRoute;

final class TestController extends AbstractController
{
    public function __construct(
        #[Autowire(service: 'neo4j.session.local')]
        private readonly SessionInterface $localSession,
        #[Autowire(service: 'neo4j.session.aura')]
        private readonly SessionInterface $auraSession
    ) {}

    #[Route('/check-local-connection', name: 'app_check_local_connection')]
    public function checkLocalConnection(): JsonResponse
    {
        $result = $this->localSession->run('RETURN 1 AS result');
        return new JsonResponse([
            'message' => 'Connection established with Neo4j Desktop',
            'result' => $result->first()->get('result')
        ]);

    }

    #[Route('/check-auradb-connection', name: 'app_check_auradb_connection')]
    public function checkAuraDbConnection(): JsonResponse
    {
        $result = $this->auraSession->run('RETURN 1 AS result');
        return new JsonResponse([
            'message' => 'Connection established with AuraDB',
            'result' => $result->first()->get('result')
        ]);
    }
}
Step 6: Configure Local Development
In your project directory, start the server using:
symfony server:startStep 7: Verify Connections
Once the Symfony CLI is running, you can test both connections:
- Local Neo4j connection: Visit http://localhost:8000/check-local-connection to check the connection to your local Neo4j database.
- AuraDB connection: Visit http://localhost:8000/check-auradb-connection to test the connection to your AuraDB instance.
Summary
You just gained some powerful capabilities for your Symfony project! By combining Symfony with theneo4j-bundle, you set up multiple Neo4j drivers (local Desktop and remote AuraDB), secured your credentials in a.env file,and tested both connections through a custom controller.
This seamless setup lets you effortlessly switch between databases and instances, giving you the flexibility and scalability your application needs. Happy coding!
Integrate Neo4j With Symfony: Handling Multiple Connections was originally published in Neo4j Developer Blog on Medium, where people are continuing the conversation by highlighting and responding to this story.


