Creating a GraphQL API
|
This is the documentation of the GraphQL Library version 7. For the long-term support (LTS) version 5, refer to GraphQL Library version 5 LTS. |
Before you start
Make sure that you have:
-
The ID for the AuraDB.
-
Your type definitions.
-
If you intend to use JWKS for authentication, the URL from your identity provider that will be used to verify JWKS tokens.
If you intend to use the Aura CLI, follow the guidance provided in Configuring the Aura CLI before proceeding.
Console
-
In the Aura Console, select Data APIs from the left side navigation.
-
Ensure you are connected to the Neo4j AuraDB instance with which you want to use the GraphQL API. The Instance drop-down at the top left shows your current connection.
-
Select Define my own to write your own type definitions or Fetch from instance to generate type definitions based on the existing data in your AuraDB.
-
Type definitions
This is where you describe the graph database in the AuraDB that the GraphQL API will be used with. The type definitions follow the rules of the Neo4j GraphQL Library with the exception that custom resolvers cannot be used.
If you already have data in the AuraDB, a quick way to obtain type definitions is to use the Neo4j GraphQL Toolbox. The Neo4j GraphQL Toolbox has the ability to connect to an AuraDB, automatically create type definitions and allow GraphQL operations.
Alternatively you can write your own type definitions from scratch by following the guidance provided in Neo4j GraphQL Library documentation.
If you are using GraphQL Federation then make sure to select Enable GraphQL subgraph.
-
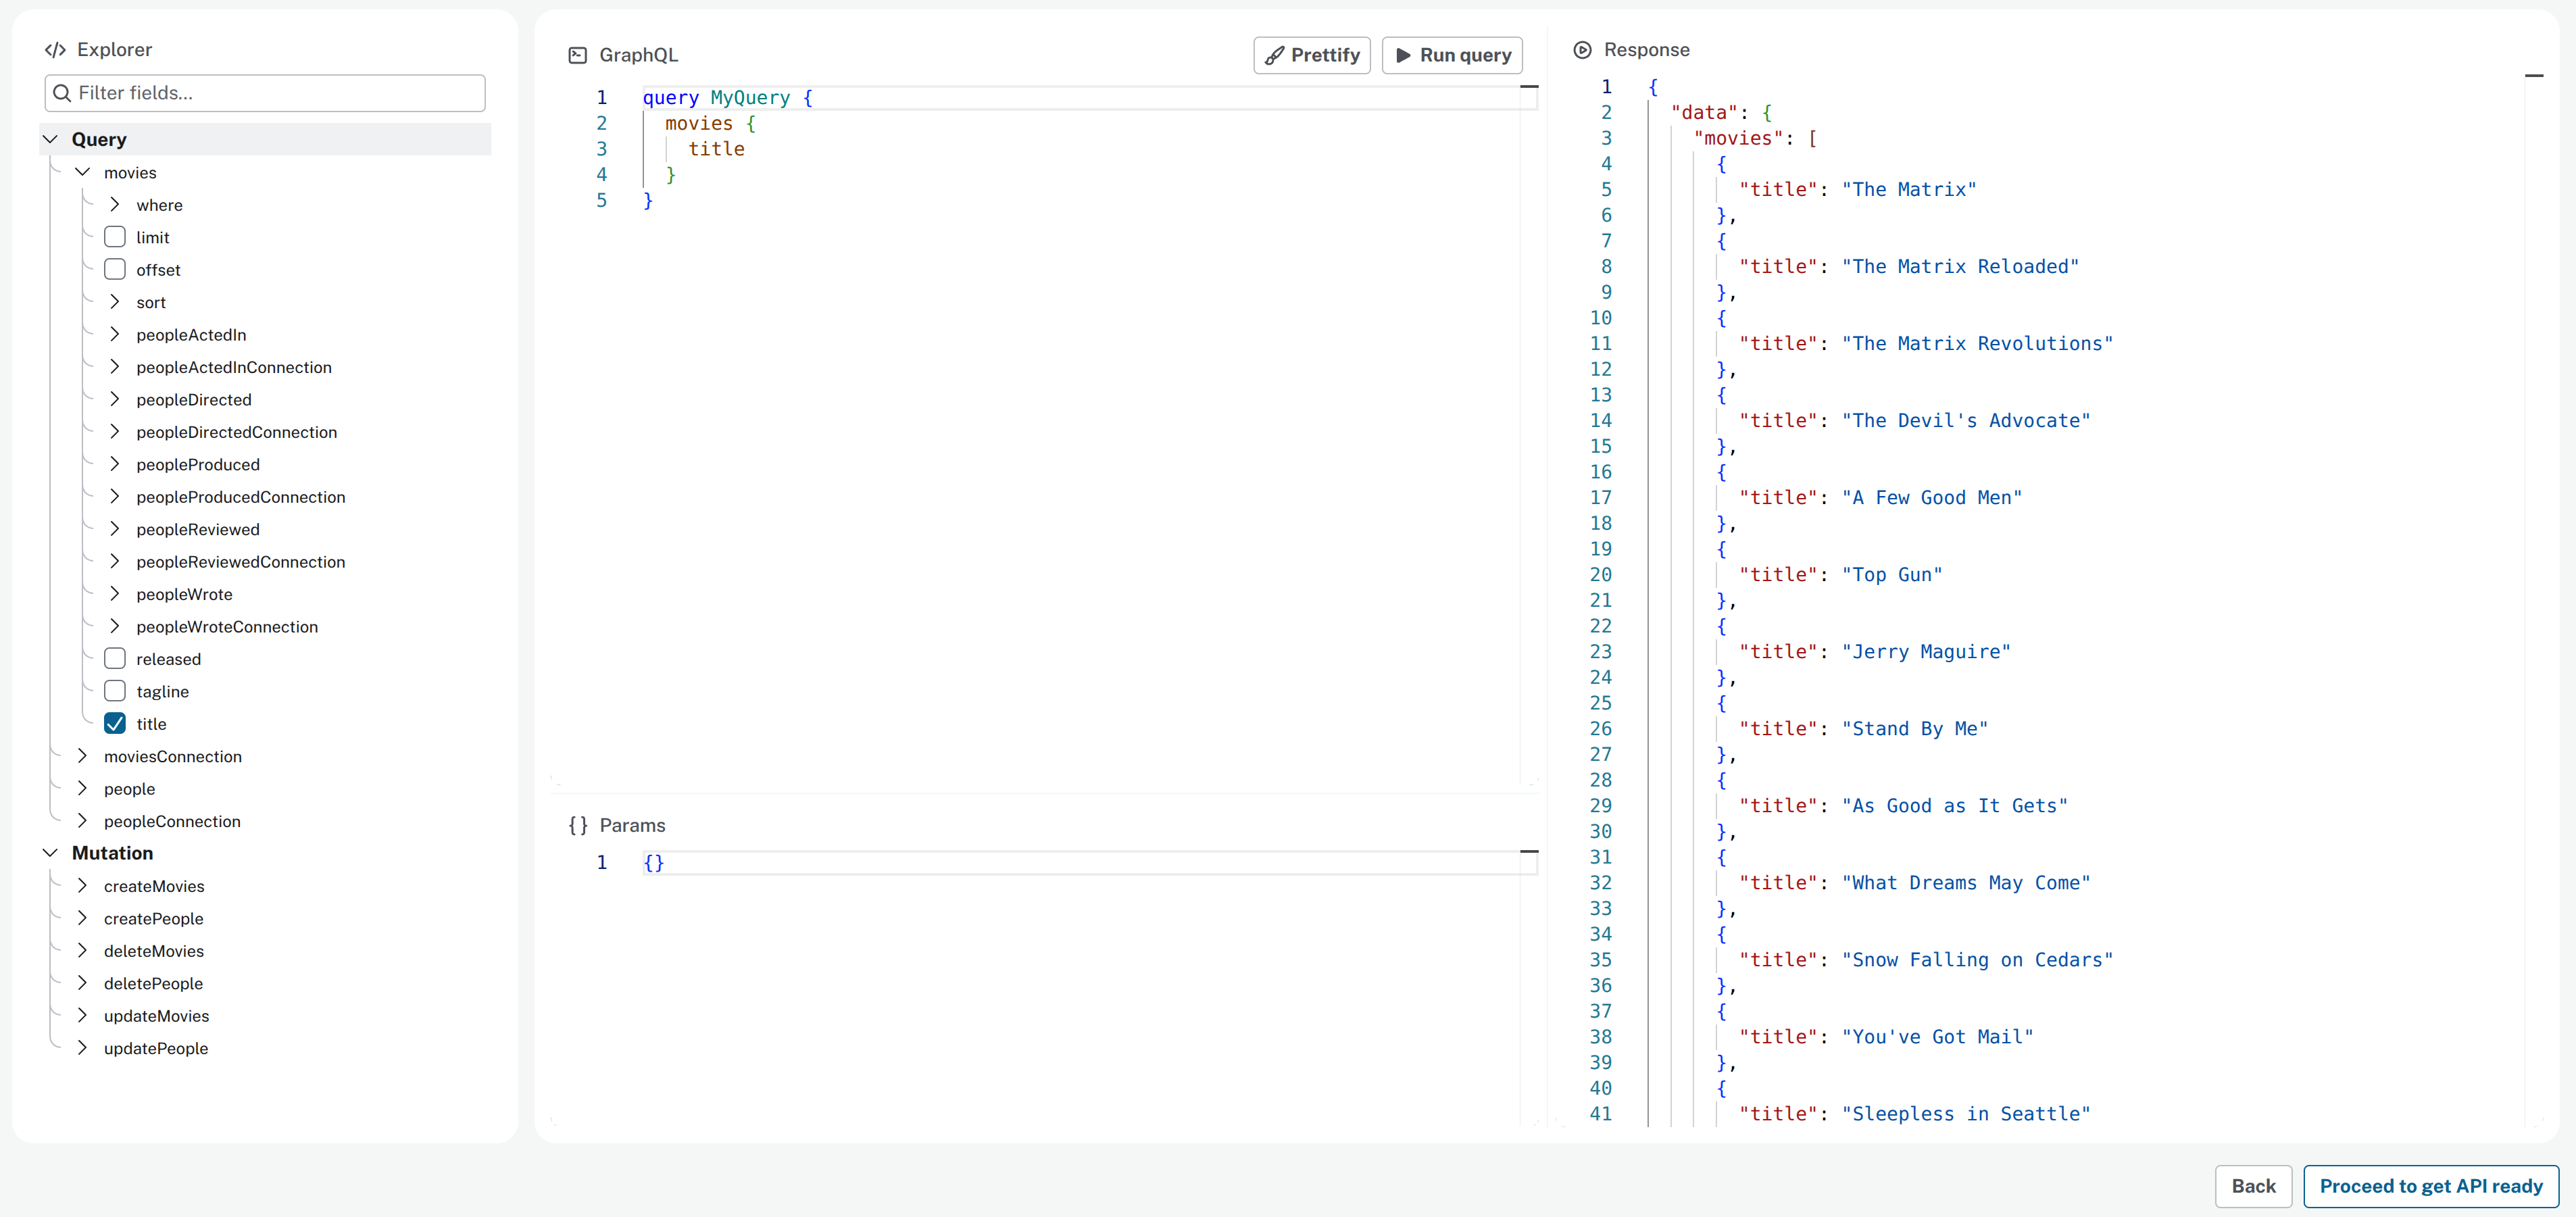
Once you are satisfied with the type definitions, select Try out the API to proceed. The next step lets you simulate GraphQL queries and mutations against the type definitions you have provided. Note that while this does run against your database, it does not create a GraphQL API that can be used by applications until you have completed the final step of the creation process.
-
Proceed to get the API ready and fill in the details in the final step.
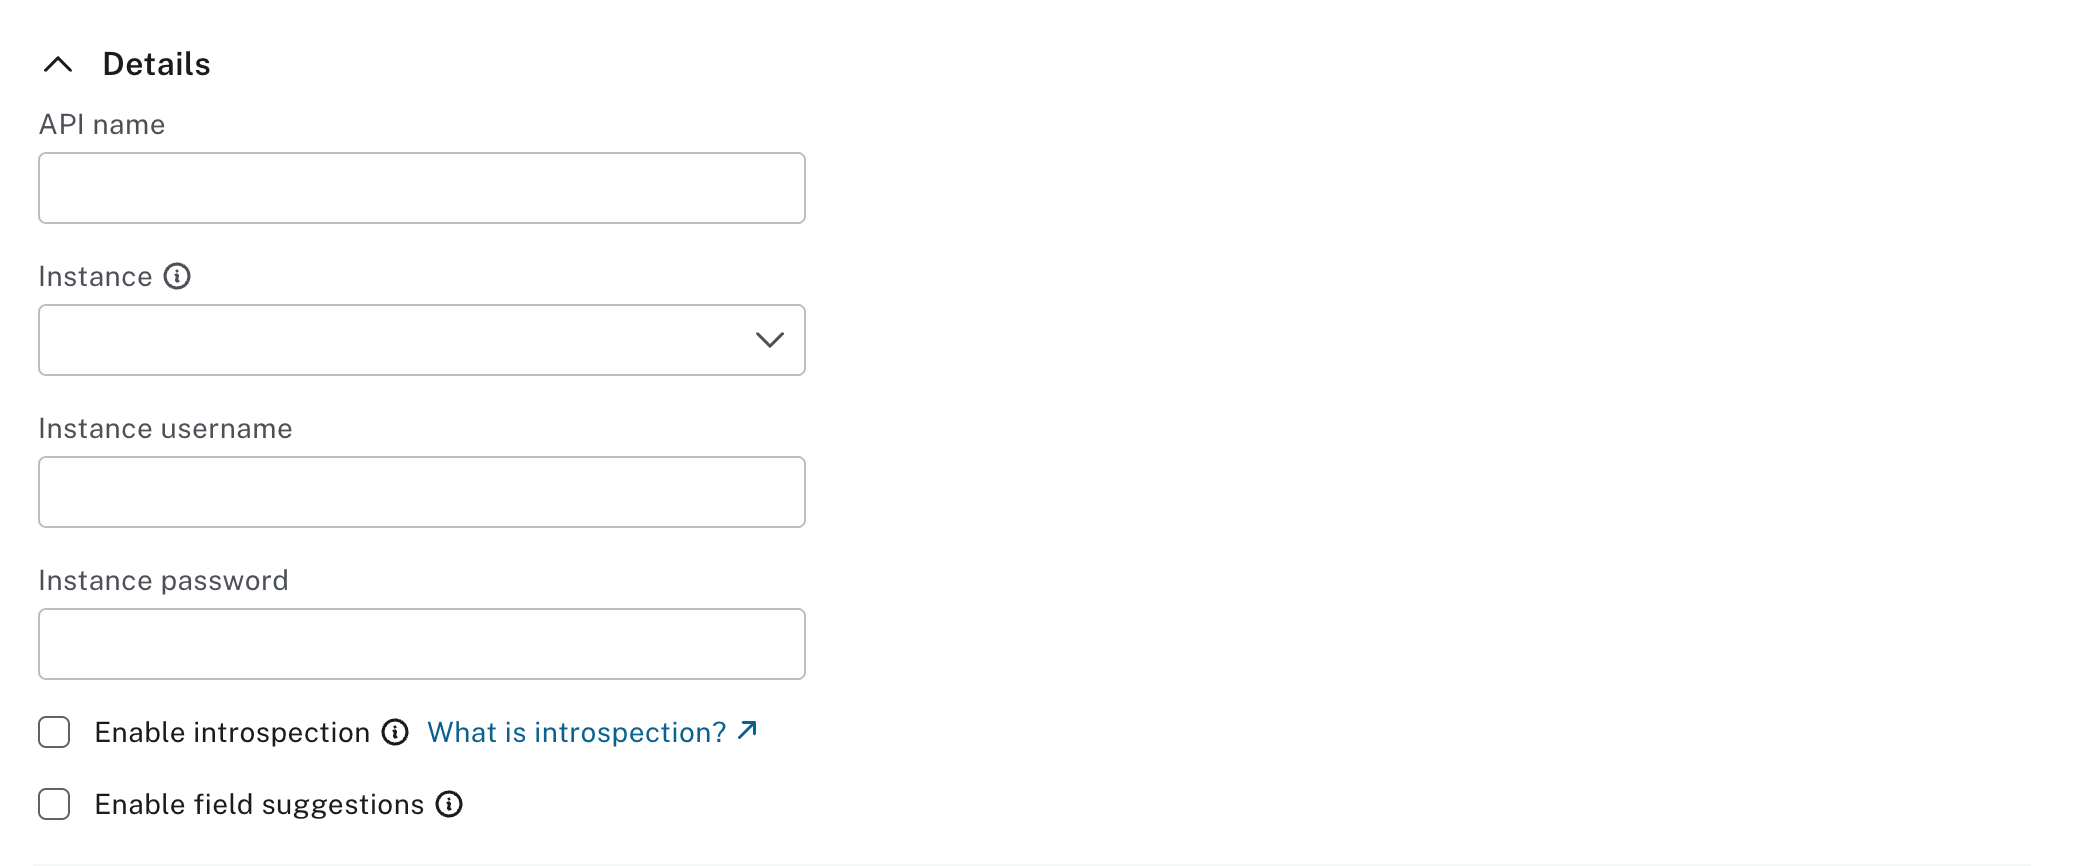
Instance permission defaults to "Read & Write", alternative values are "Read Only" and "Custom Credentials". If you select the latter, also fill in the credentials.
Instance permission controls the type of access the GraphQL API has to your database instance. If you select "Read Only" but your API requires more permissions, this could cause runtime errors for users of your API.
If you set Enable introspection and Enable field suggestions for production systems the information they provide can be used by malicious actors to reverse-engineer your GraphQL schema and execute arbitrary operations.
Enable introspection allows you to query the schema and discover the available queries, mutations, subscriptions, types and fields in the GraphQL API.
Enable field suggestions provides suggestions that hint towards GraphQL typos. Even with just field suggestions enabled, it is possible for a malicious actor to discover your entire schema.
-
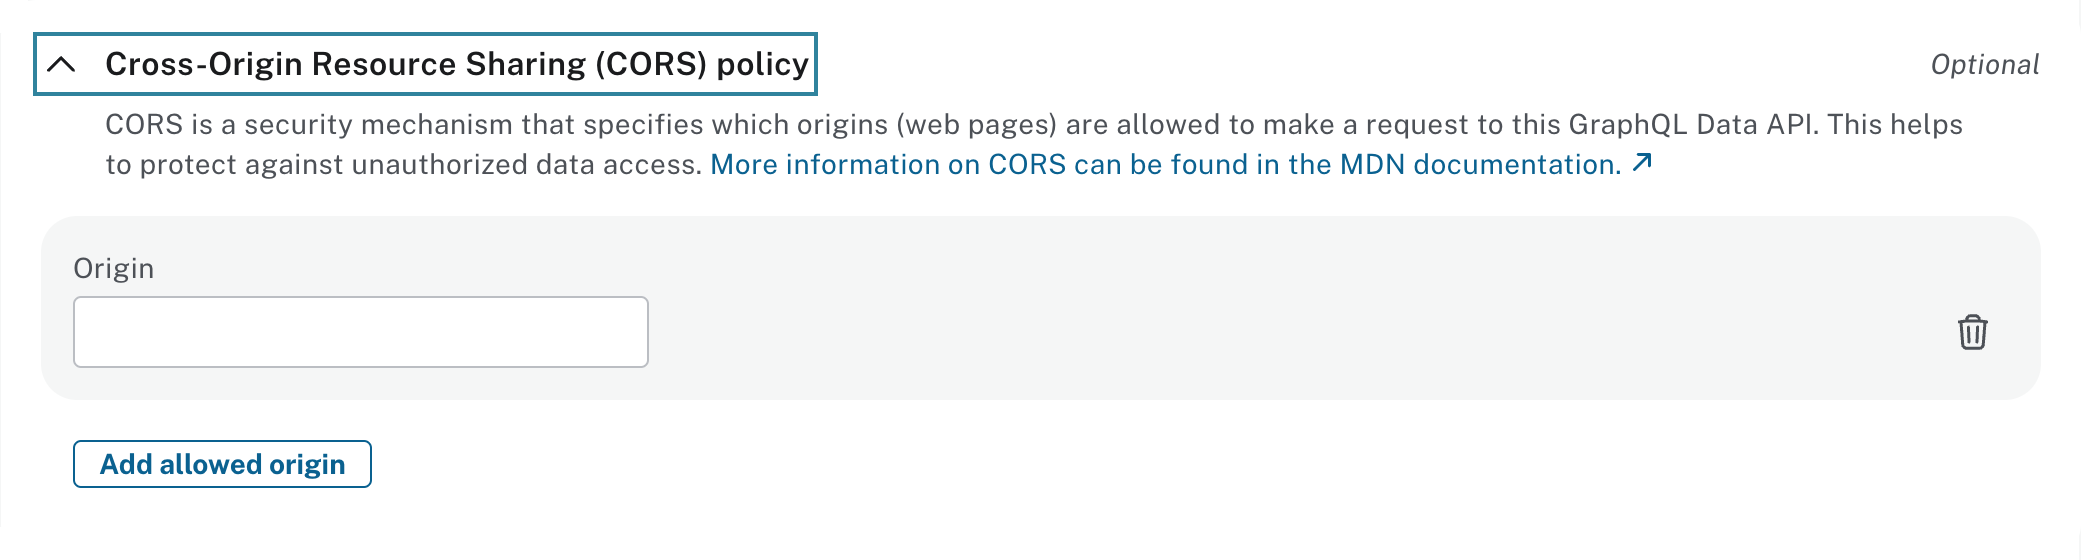
Cross-Origin Resource Sharing (CORS) policy
If a browser based application will be using this GraphQL API, add an entry in your Cross-Origin Resource Sharing (CORS) policy. CORS is a browser-based security mechanism that prevents web pages from accessing resources from a server with a different origin. Allow the URL that serves the browser application by adding it to the CORS policy. This includes development environments such as node.js, which serves content on your localhost or similar. This also holds for using web-based tooling for GraphQL APIs such as Apollo Studio.
This is not needed if a non-browser-based application is using the GraphQL API as CORS does not apply to those. For example, if you are trying out GraphQL operations using cURL.
The URL entered in the CORS policy must be an exact match. For example, http://localhost is not the same as http://localhost:3000/. Wildcards are not supported.
To add a CORS policy entry, enter the exact URL, including HTTP/S and any port number, in the Origin box. If you need multiple entries, select Add allowed origin.
-
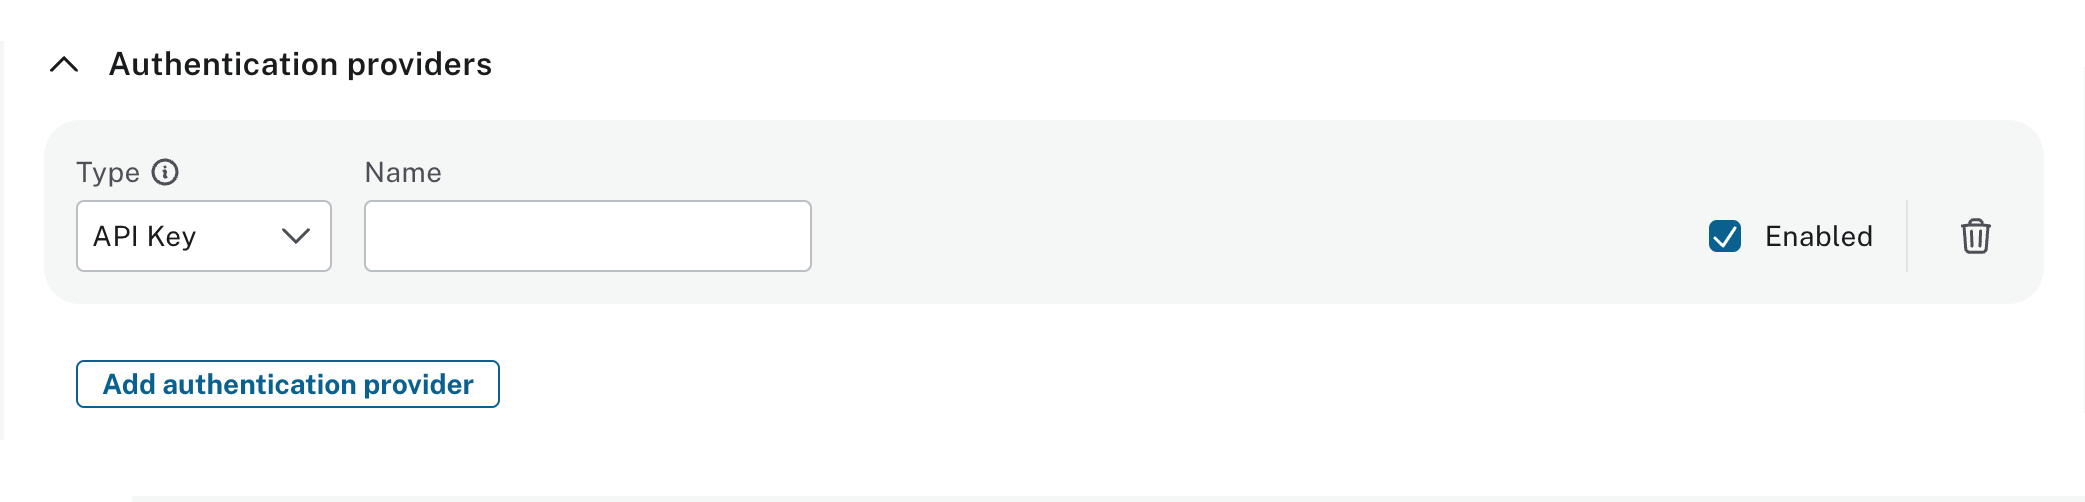
Authentication providers
All requests to the GraphQL API are authenticated and there are two options for the type of authentication: API key or JSON Web Key Set (JWKS). It is possible to use these in combination and have multiples of each.
After choosing the authentication provider from the dropdown list, either use the pre-filled name or enter your own friendly name. This is all that is needed when using API key. The API key will be shown after the GraphQL API key has been created. If you are using JWKS, provide a friendly name and the URL from your identity provider that is used to verify JWKS tokens.
Add more more providers via Add authentication provider.
An authentication provider can be removed by selecting the trash icon.
It is not recommended to use API keys with user-facing applications that are using the GraphQL API. This is due to the risk of the API key being visible to malicious users and very little control over GraphQL operations. A 3rd party identity provider with JWKS provides better security and allows for granular security rules, based on information within the JWKS token, to be defined within the type definitions to control GraphQL operations.
-
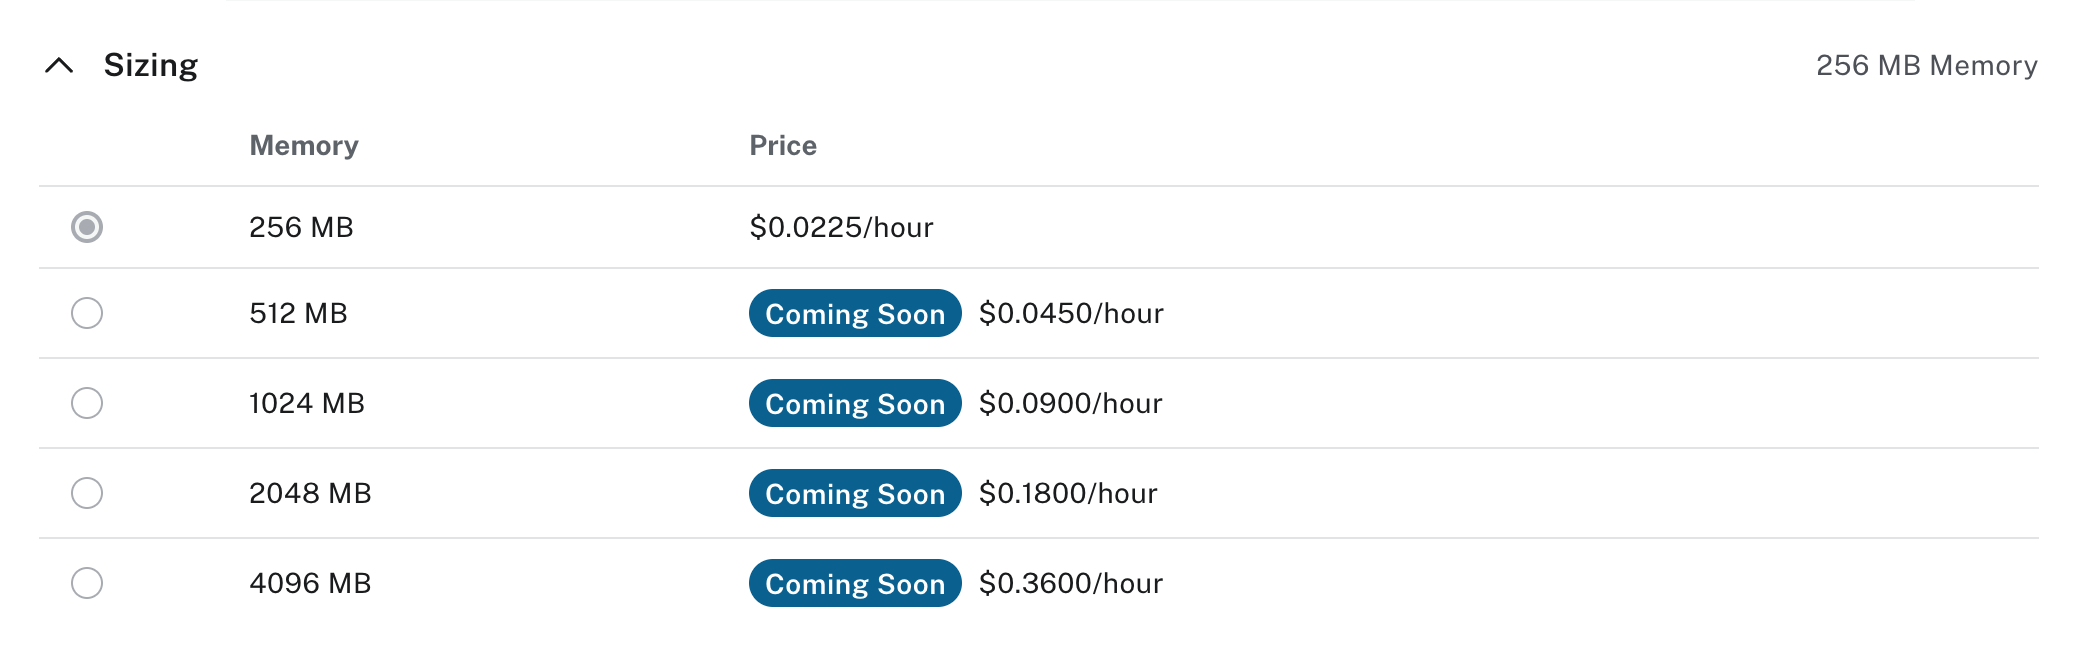
Sizing
Sizing a GraphQL API is based on the size and complexity of the type definitions and the workload that is serviced. Larger sizes have a higher hourly cost. If the cost is not displayed, refer to the agreement you have with Neo4j.
-
Creation
At this point the configuration is complete for the GraphQL API. Select Create to proceed and create the GraphQL API. Alternatively, go Back to previous steps to make changes, or navigate away to exit without creating the API.
-
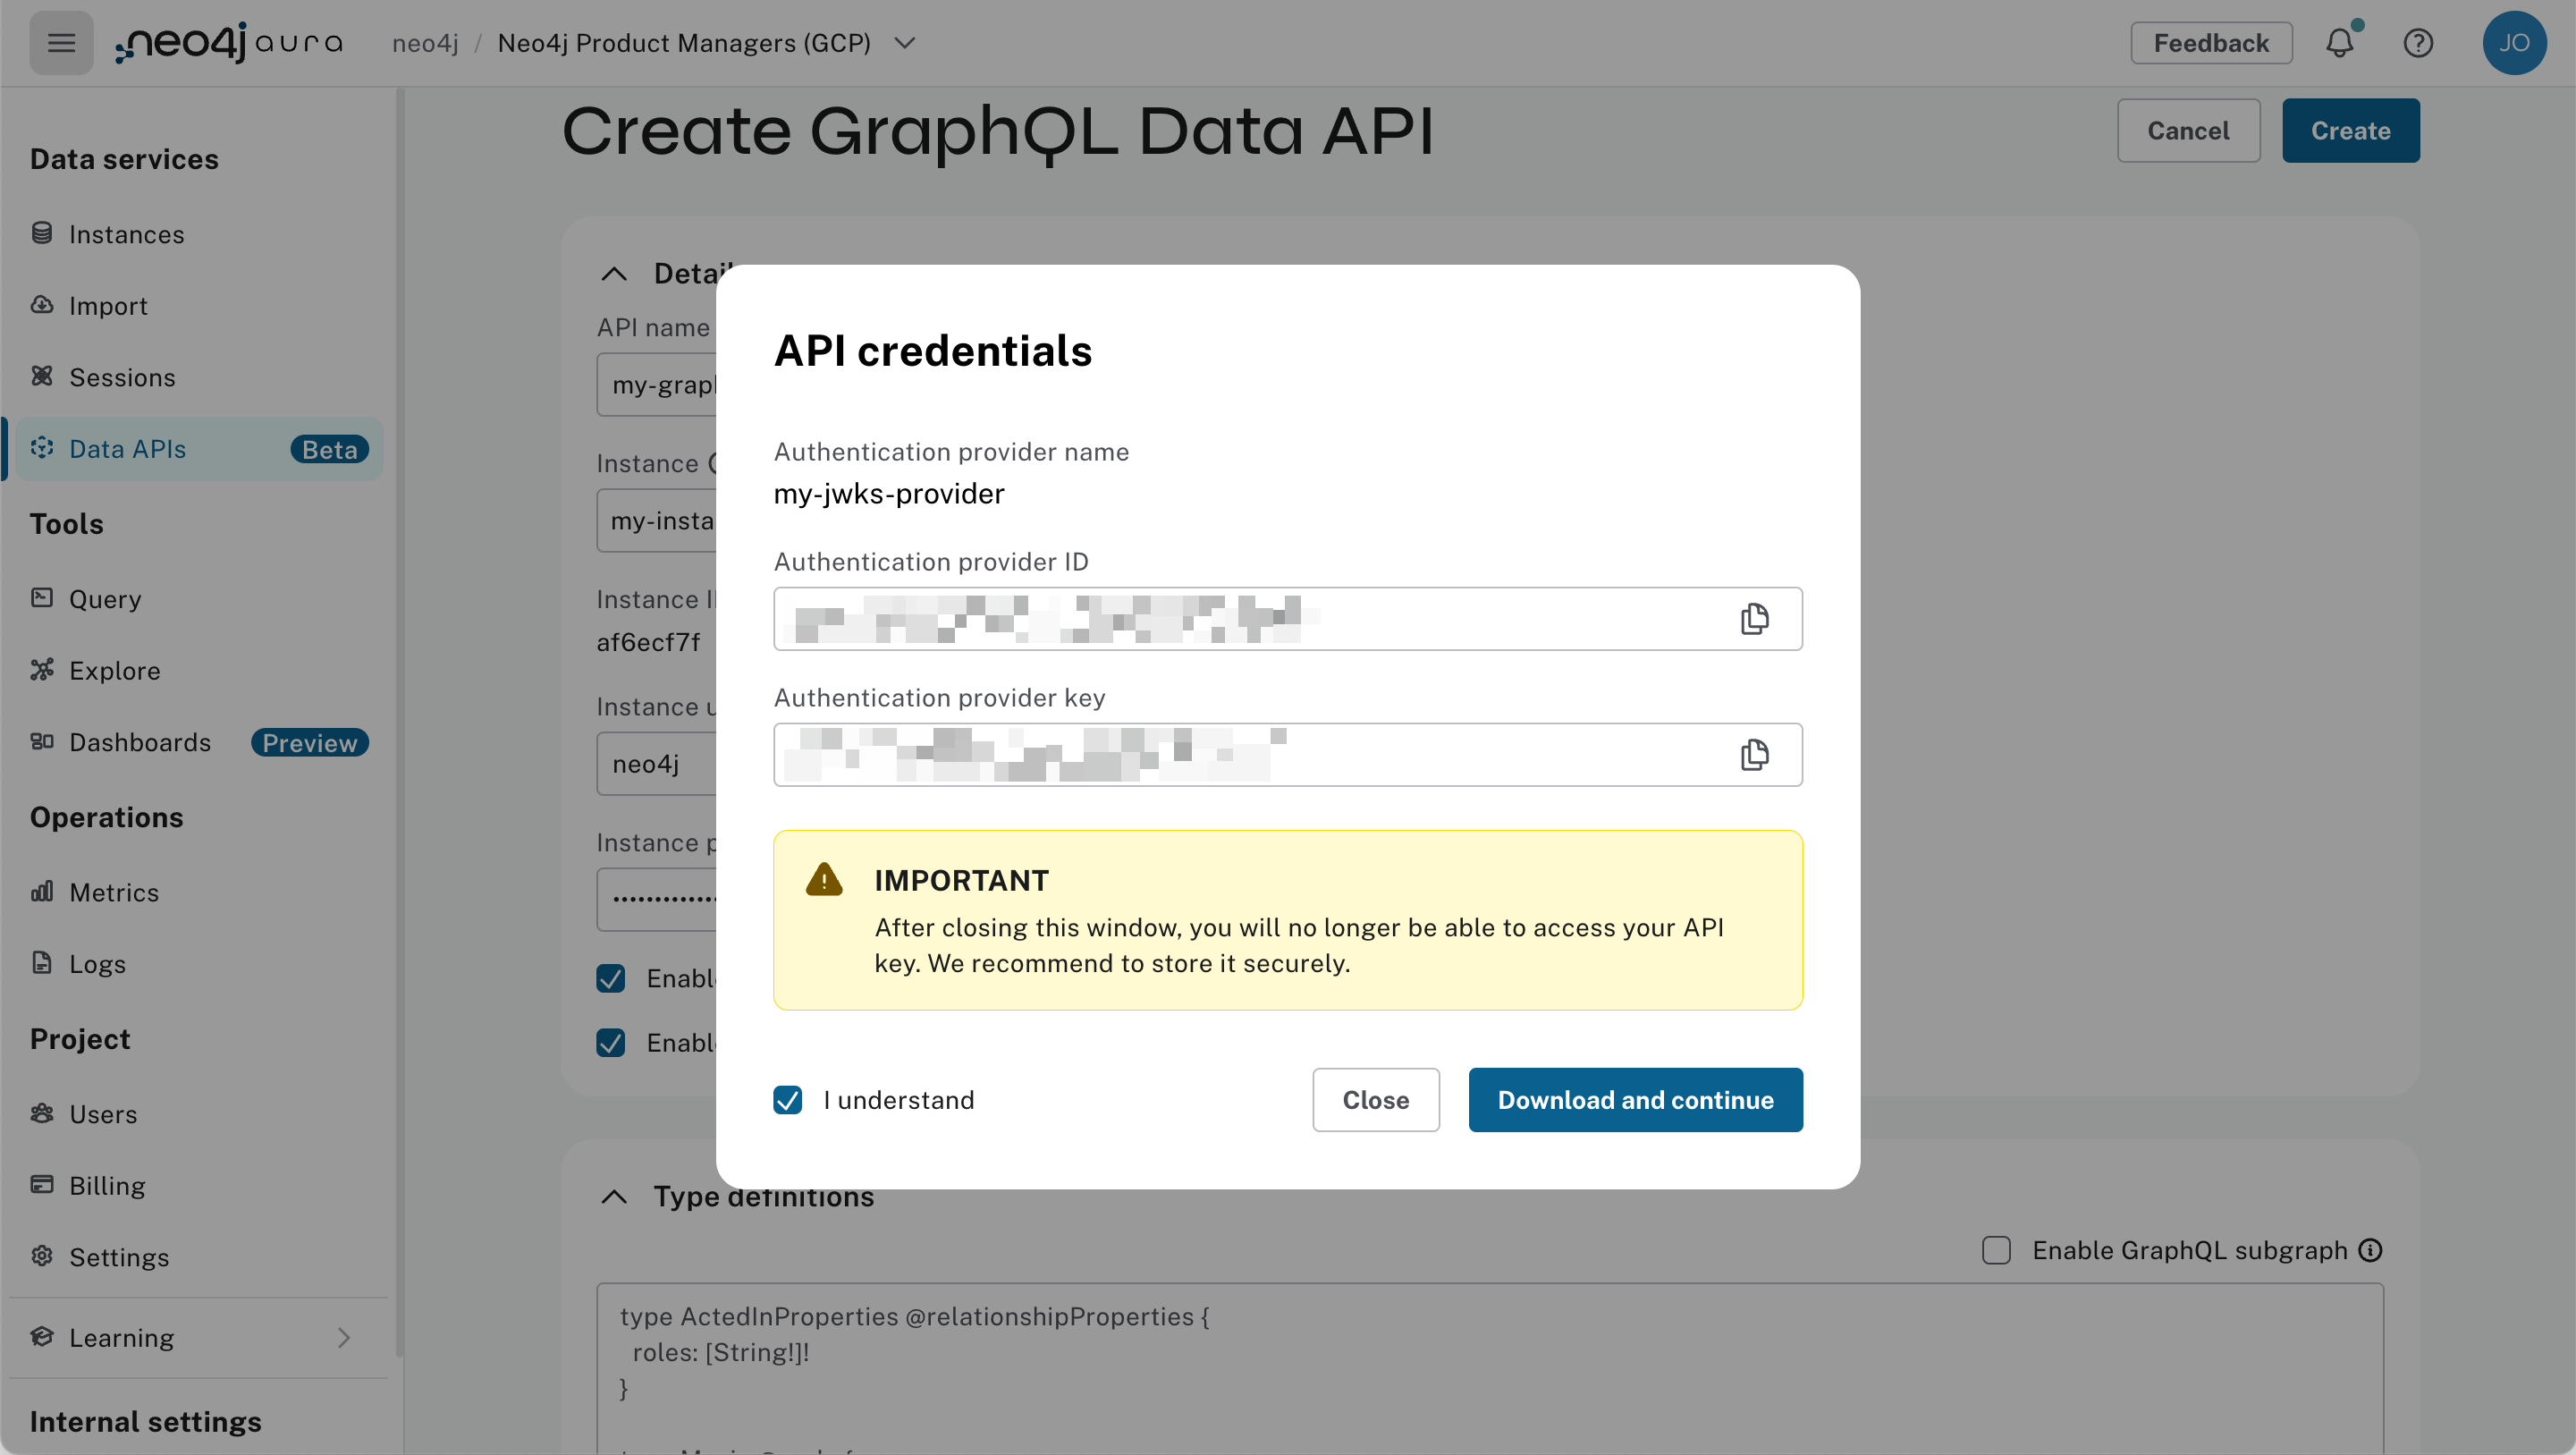
API key
If you chose to use an API key with the GraphQL API it is now displayed. Store this information securely as it cannot be retrieved again. Select I understand and then Close once you have done this.
-
The GraphQL API will now be provisioned. When the status changes to "Ready", the API is ready to use. If it has a status of 'Error', use the three dots icon and Edit from the menu to change the configuration.
Aura CLI
Like the Console, the Aura CLI can also be used to create a GraphQL API. There is a difference: on creation, only an API Key authentication provider is created. The authentication providers can be modified using subsequent CLI commands.
To create a GraphQL API with the Aura CLI, proceed as follows.
-
Find the AuraDB instance ID
From the table, locate the ID of the Aura instance that the GraphQL API will be used with.
aura-cli instance list -
Save type definitions
To avoid having to encode type definitions into base64 format to use directly with the Aura CLI, save them in a file.
-
Create
Provision the GraphQL API, replacing the values in UPPERCASE with your own:
aura-cli data-api graphql create --name YOUR_FRIENDLY_NAME --instance-id YOUR_AURA_INSTANCE_ID --instance-username YOUR_AURA_INSTANCE_USER --instance-password YOUR_AURA_INSTANCE_PASSWORD --type-definitions-file FULL_PATH_TO_YOUR_TYPE_DEFSThe response shows information about the new GraphQL API. Make sure you note the API Key and ID.
-
Check progress
To see if the GraphQL API is ready to use, run the following command:
aura-cli data-api graphql get YOUR_GRAPHQL_API_ID --instance-id YOUR_AURA_INSTANCE_ID
If the status is "Ready", the API is ready to use.