Using the Neo4j ETL Tool for Import
About this module
You have learned how to import data into the graph using Cypher, APOC, the neo4j-admin tool, and also using a client application.
Another way that you can import data into the graph is with the Neo4j ETL Tool.
At the end of this module, you will be able to:
-
Create a connection to a live RDBMS.
-
Customize mappings from the RDBMS to the graph.
-
Import data from the RDBMS to the graph.
Why use the Neo4j ETL Tool for the import?
-
The Neo4j ETL Tool requires that both the source RDBMS and the target DBMS are online.
-
It enables you to control how much of the data in an existing RDBMS will be imported into the graph.
-
It also enables you to customize how nodes and relationships will be created in the graph.
| The Neo4j ETL Tool can only be used if you are using Neo4j Desktop to access the graph application. With Neo4j Desktop, you can connect to a Sandbox database or a Neo4j Aura database, but you need Neo4j Desktop to use the Neo4j ETL Tool. |
Guided Exercise: Importing with the ETL Tool
Here are the steps you will follow:
-
Ensure the Neo4j DBMS is started.
-
Start the Neo4j ETL Tool.
-
Specify the target Neo4j database.
-
Specify and test the source RDBMS connection.
-
Prepare for mapping.
-
View the default mapping to be performed.
-
Optionally, modify the default mapping.
-
-
Save the mapping.
-
Import the data.
Step 1: Ensure the Neo4j DBMS is started
-
If your database will be hosted in the local DBMS, make sure that it is created and started in your Neo4j Desktop project.
-
If your database will be hosted in a Neo4j Sandbox or Neo4j Aura, make sure that you add a connection to it from your project in Neo4j Desktop and connect to it.
Step 2: Start the Neo4j ETL Tool
For the started local DBMS or remote connection, open the ETL Tool by selecting it in the dropdown list for the Open button:
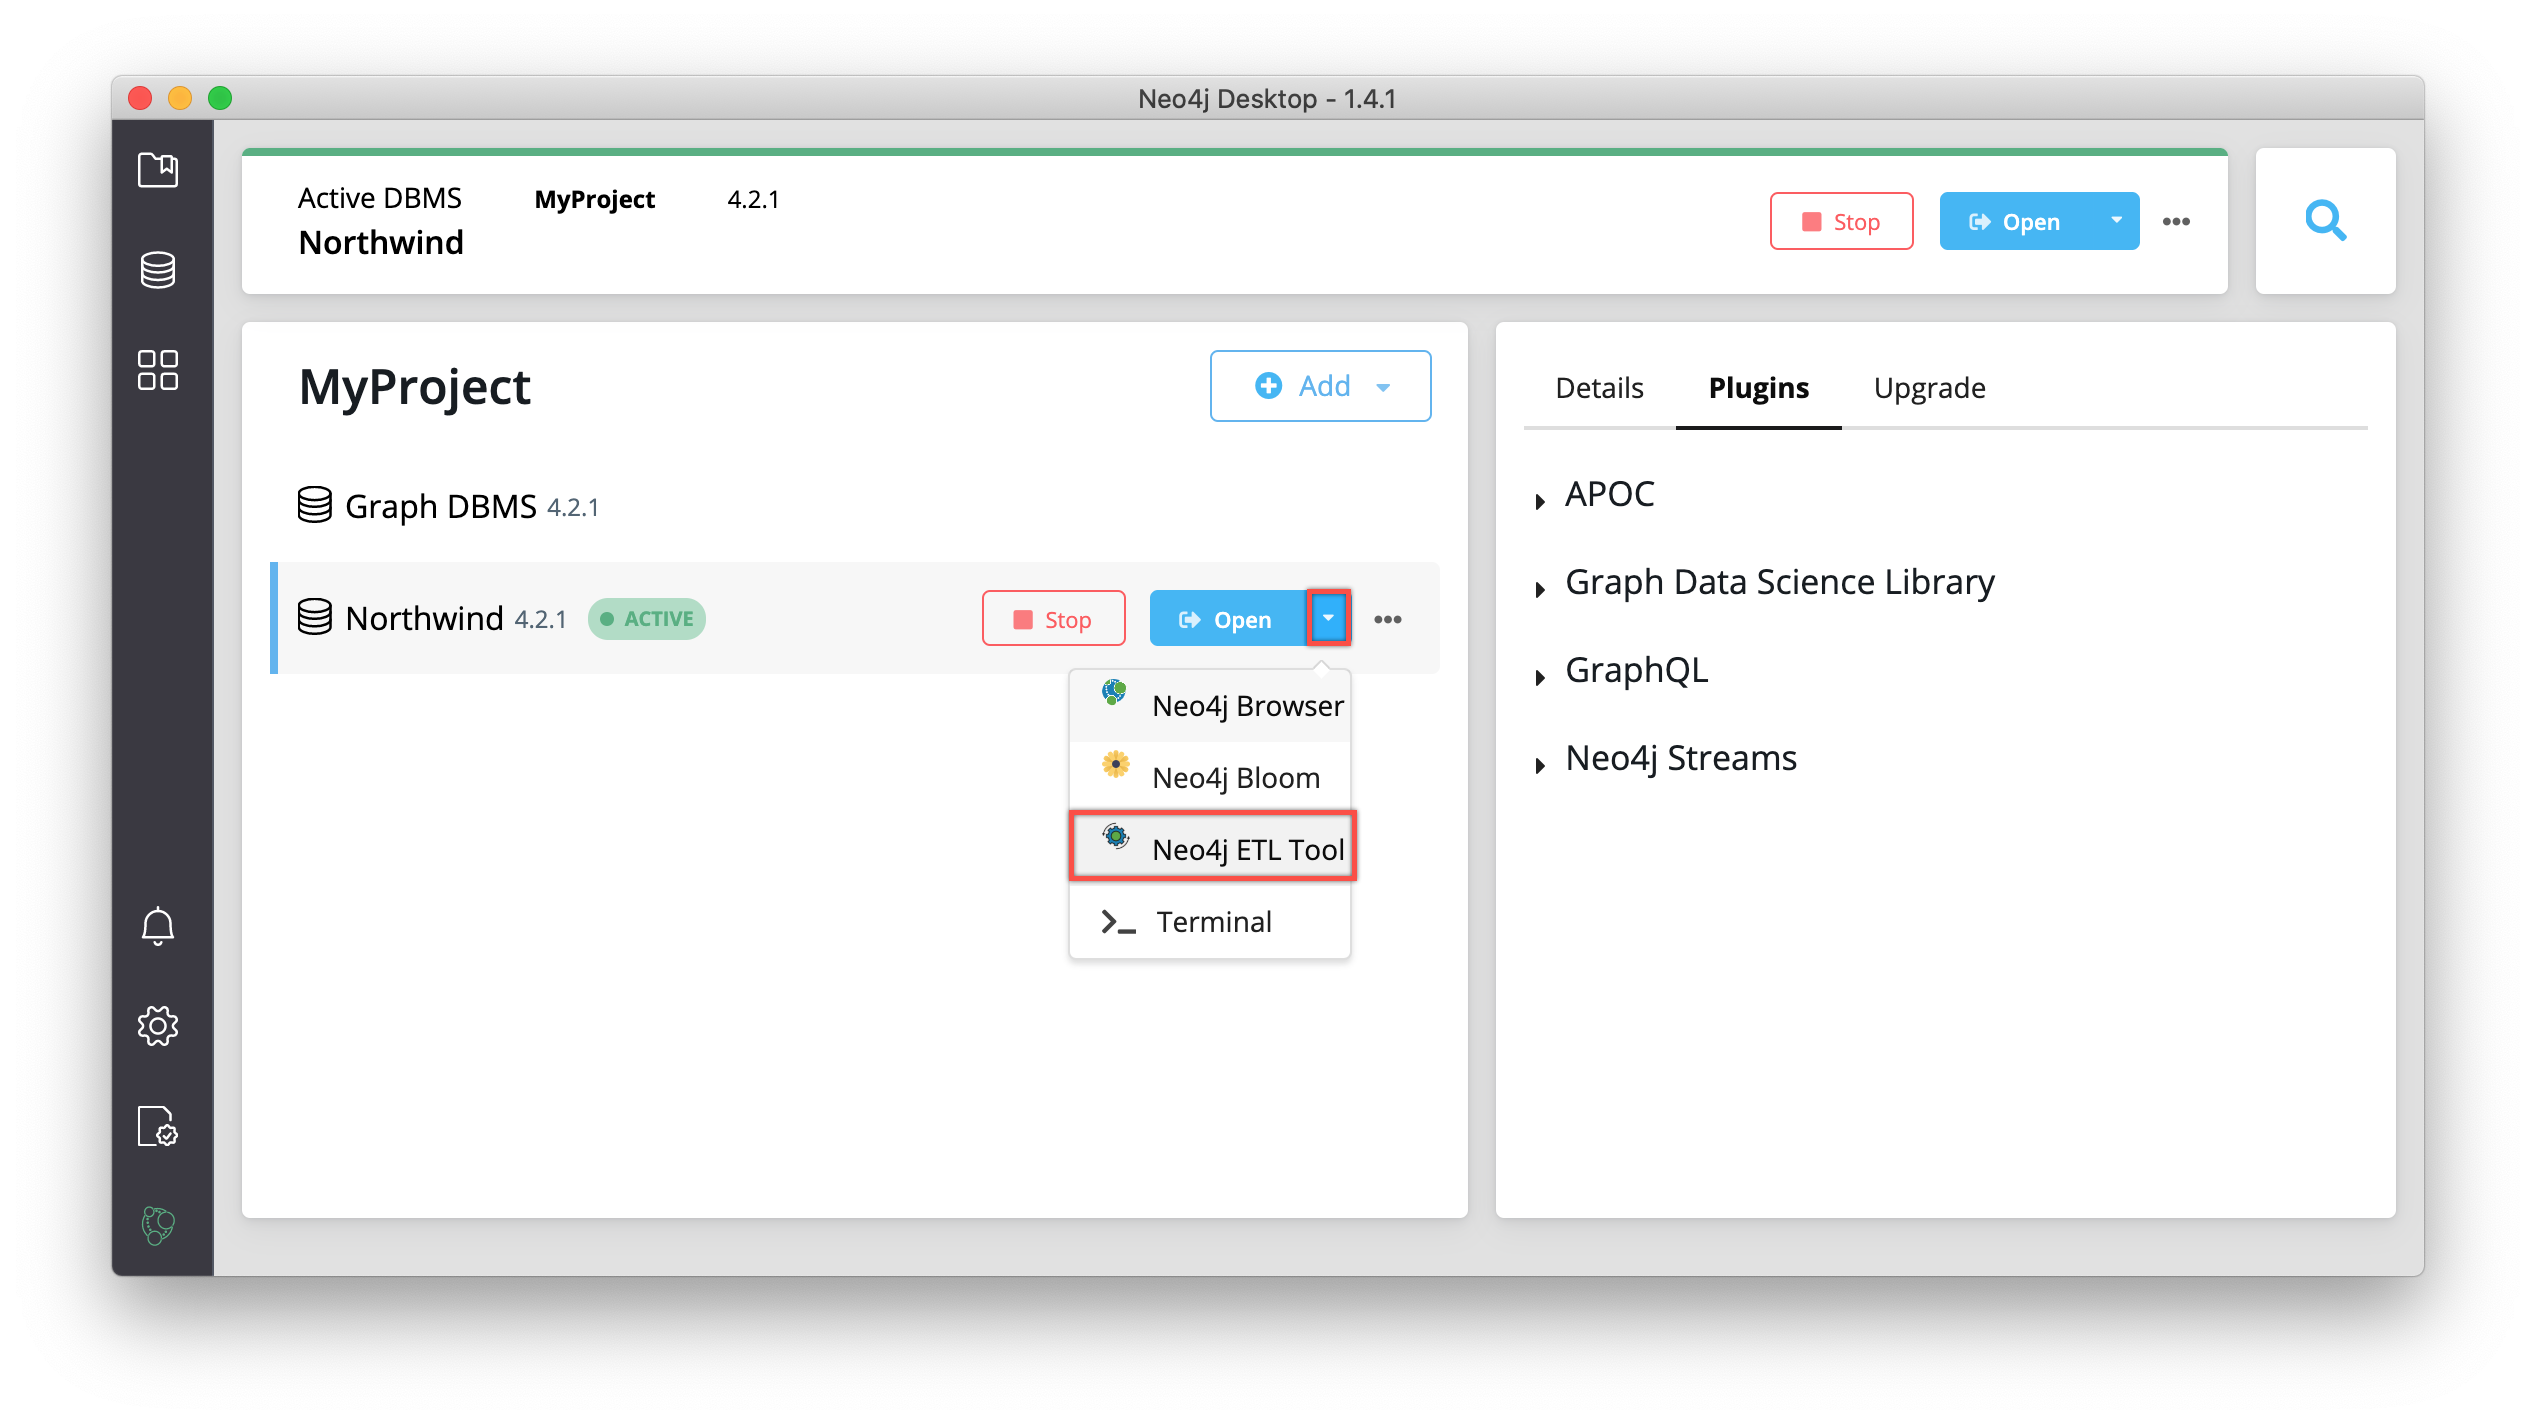
| Select Allow when asked if you want to allow background processes to execute. |
Here is the initial page you see when you start the Neo4j ETL tool:
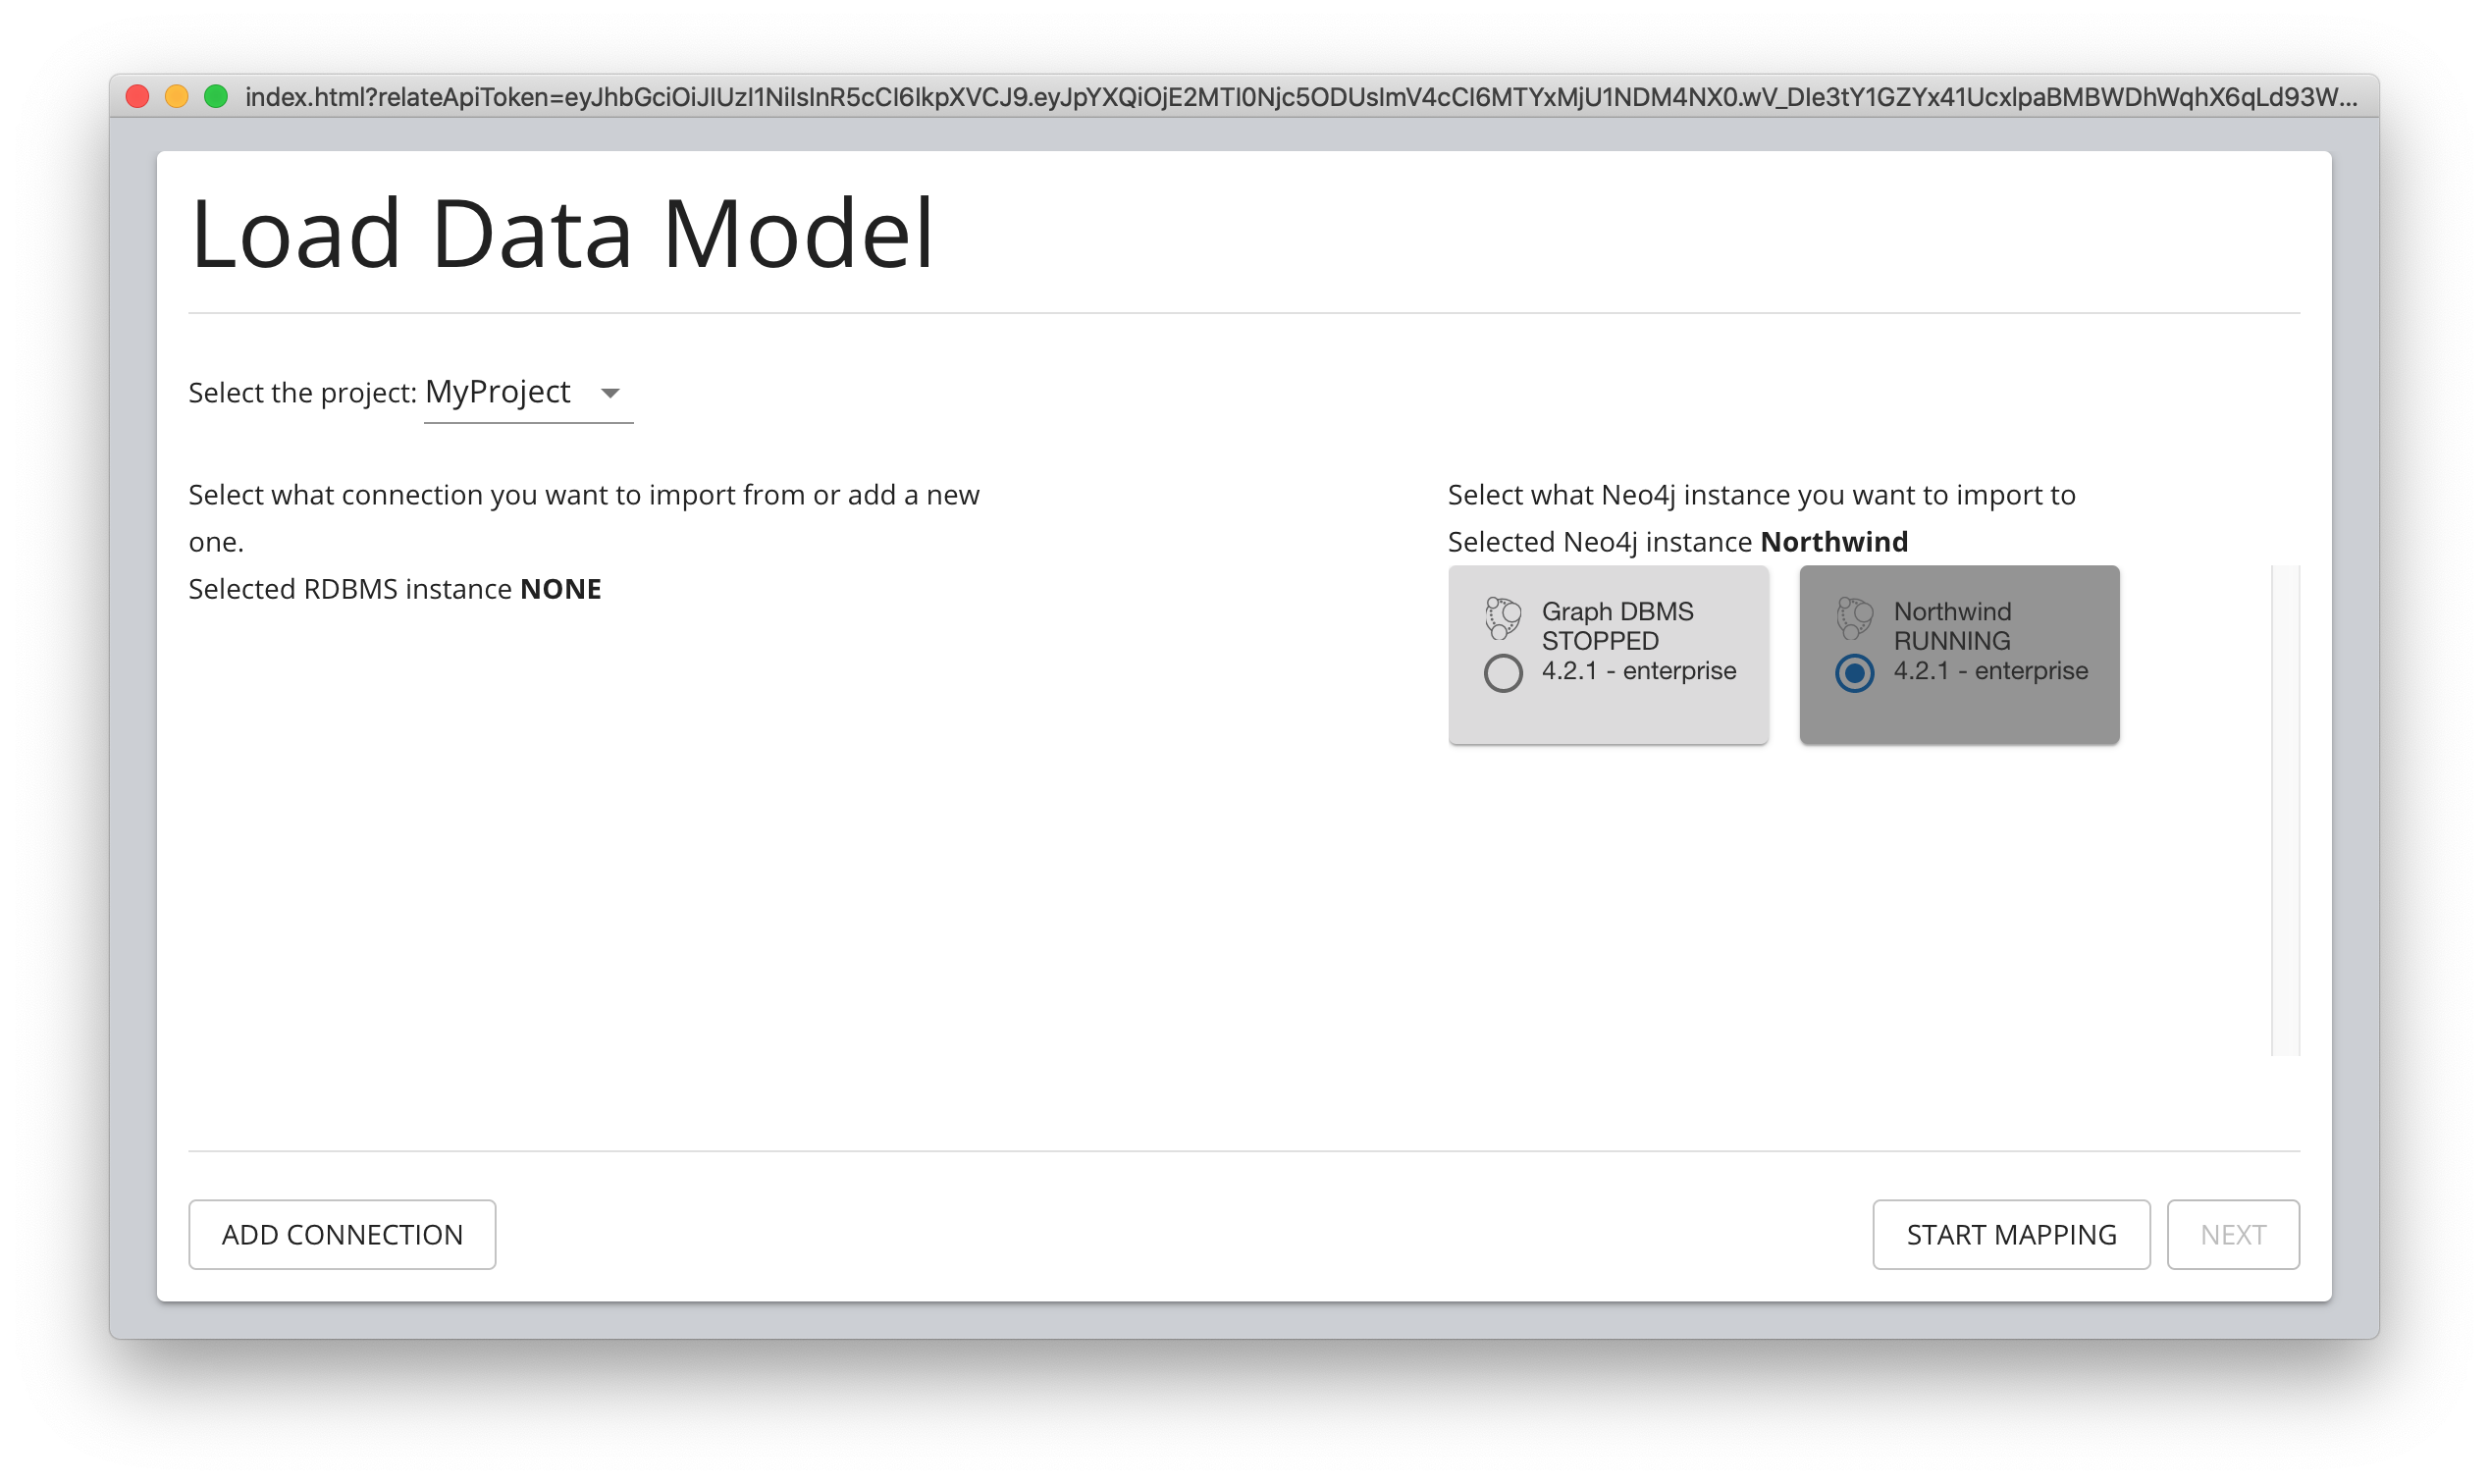
Step 3: Specify target Neo4j database
Next, you can select the Neo4j Desktop project and the local or remote DBMS that you will be importing into.
Step 4: Specify and test the source RDBMS connection
The next thing you must do is connect to the RDBMS. You click ADD CONNECTION.

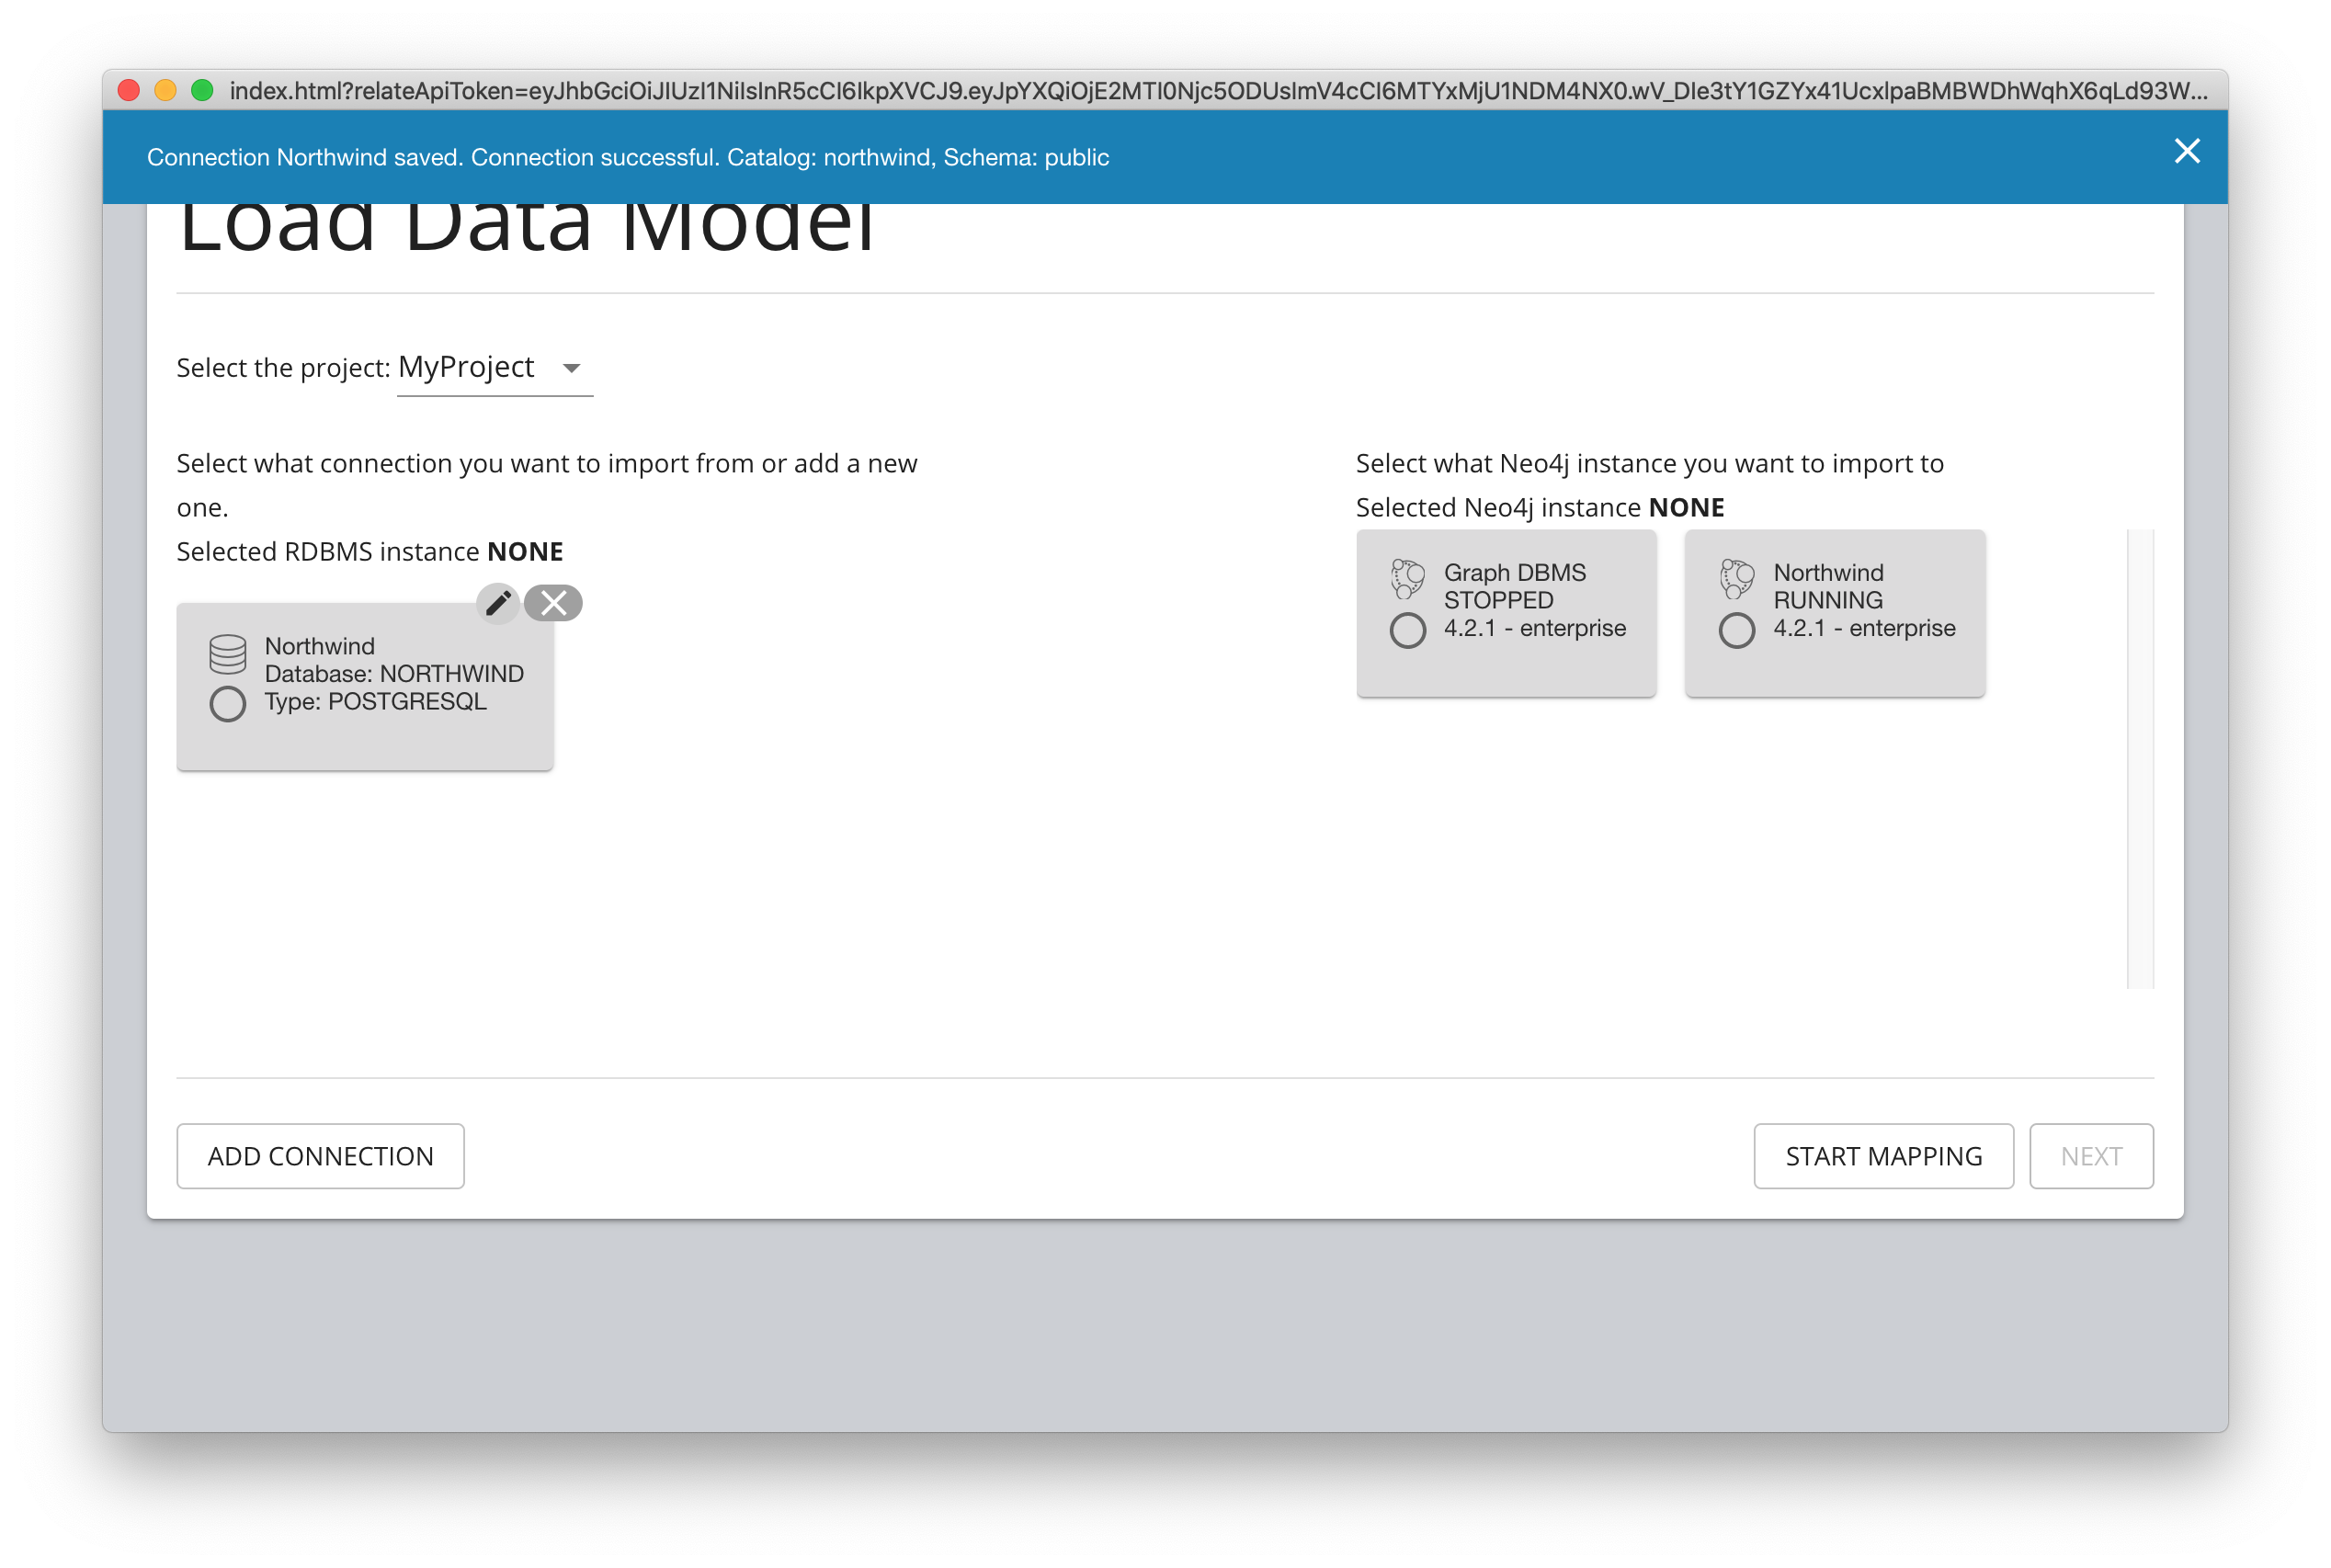
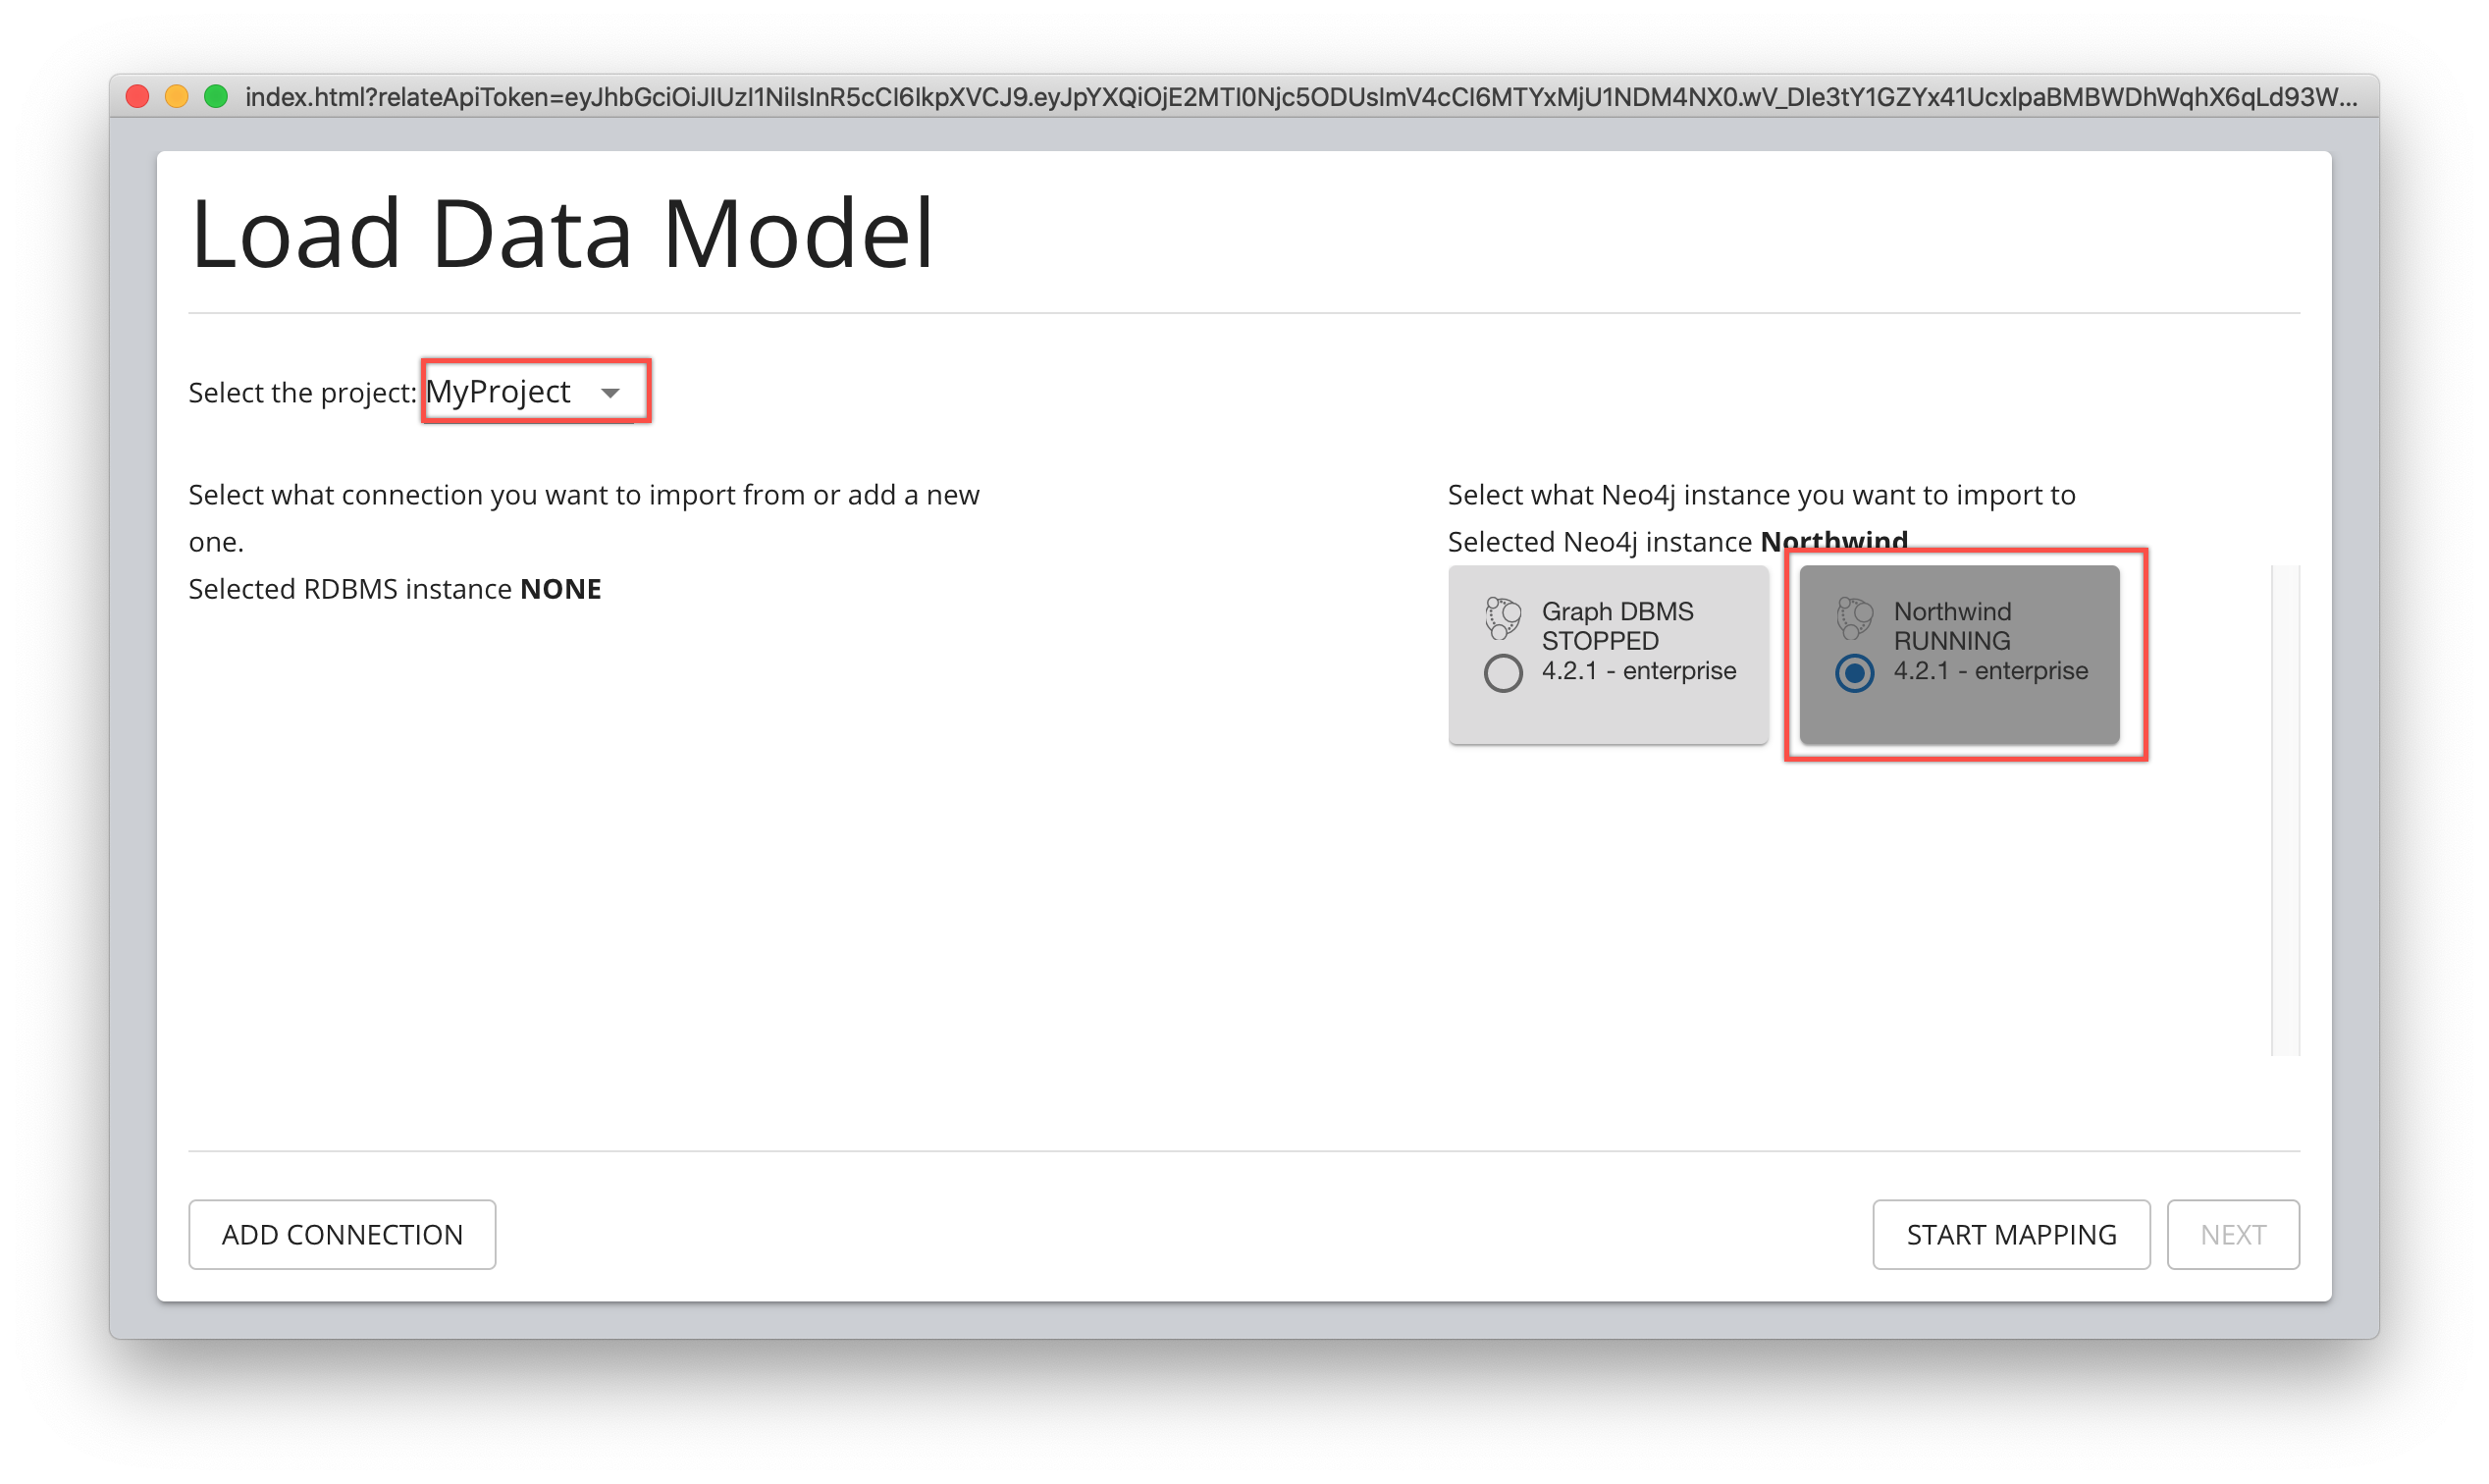
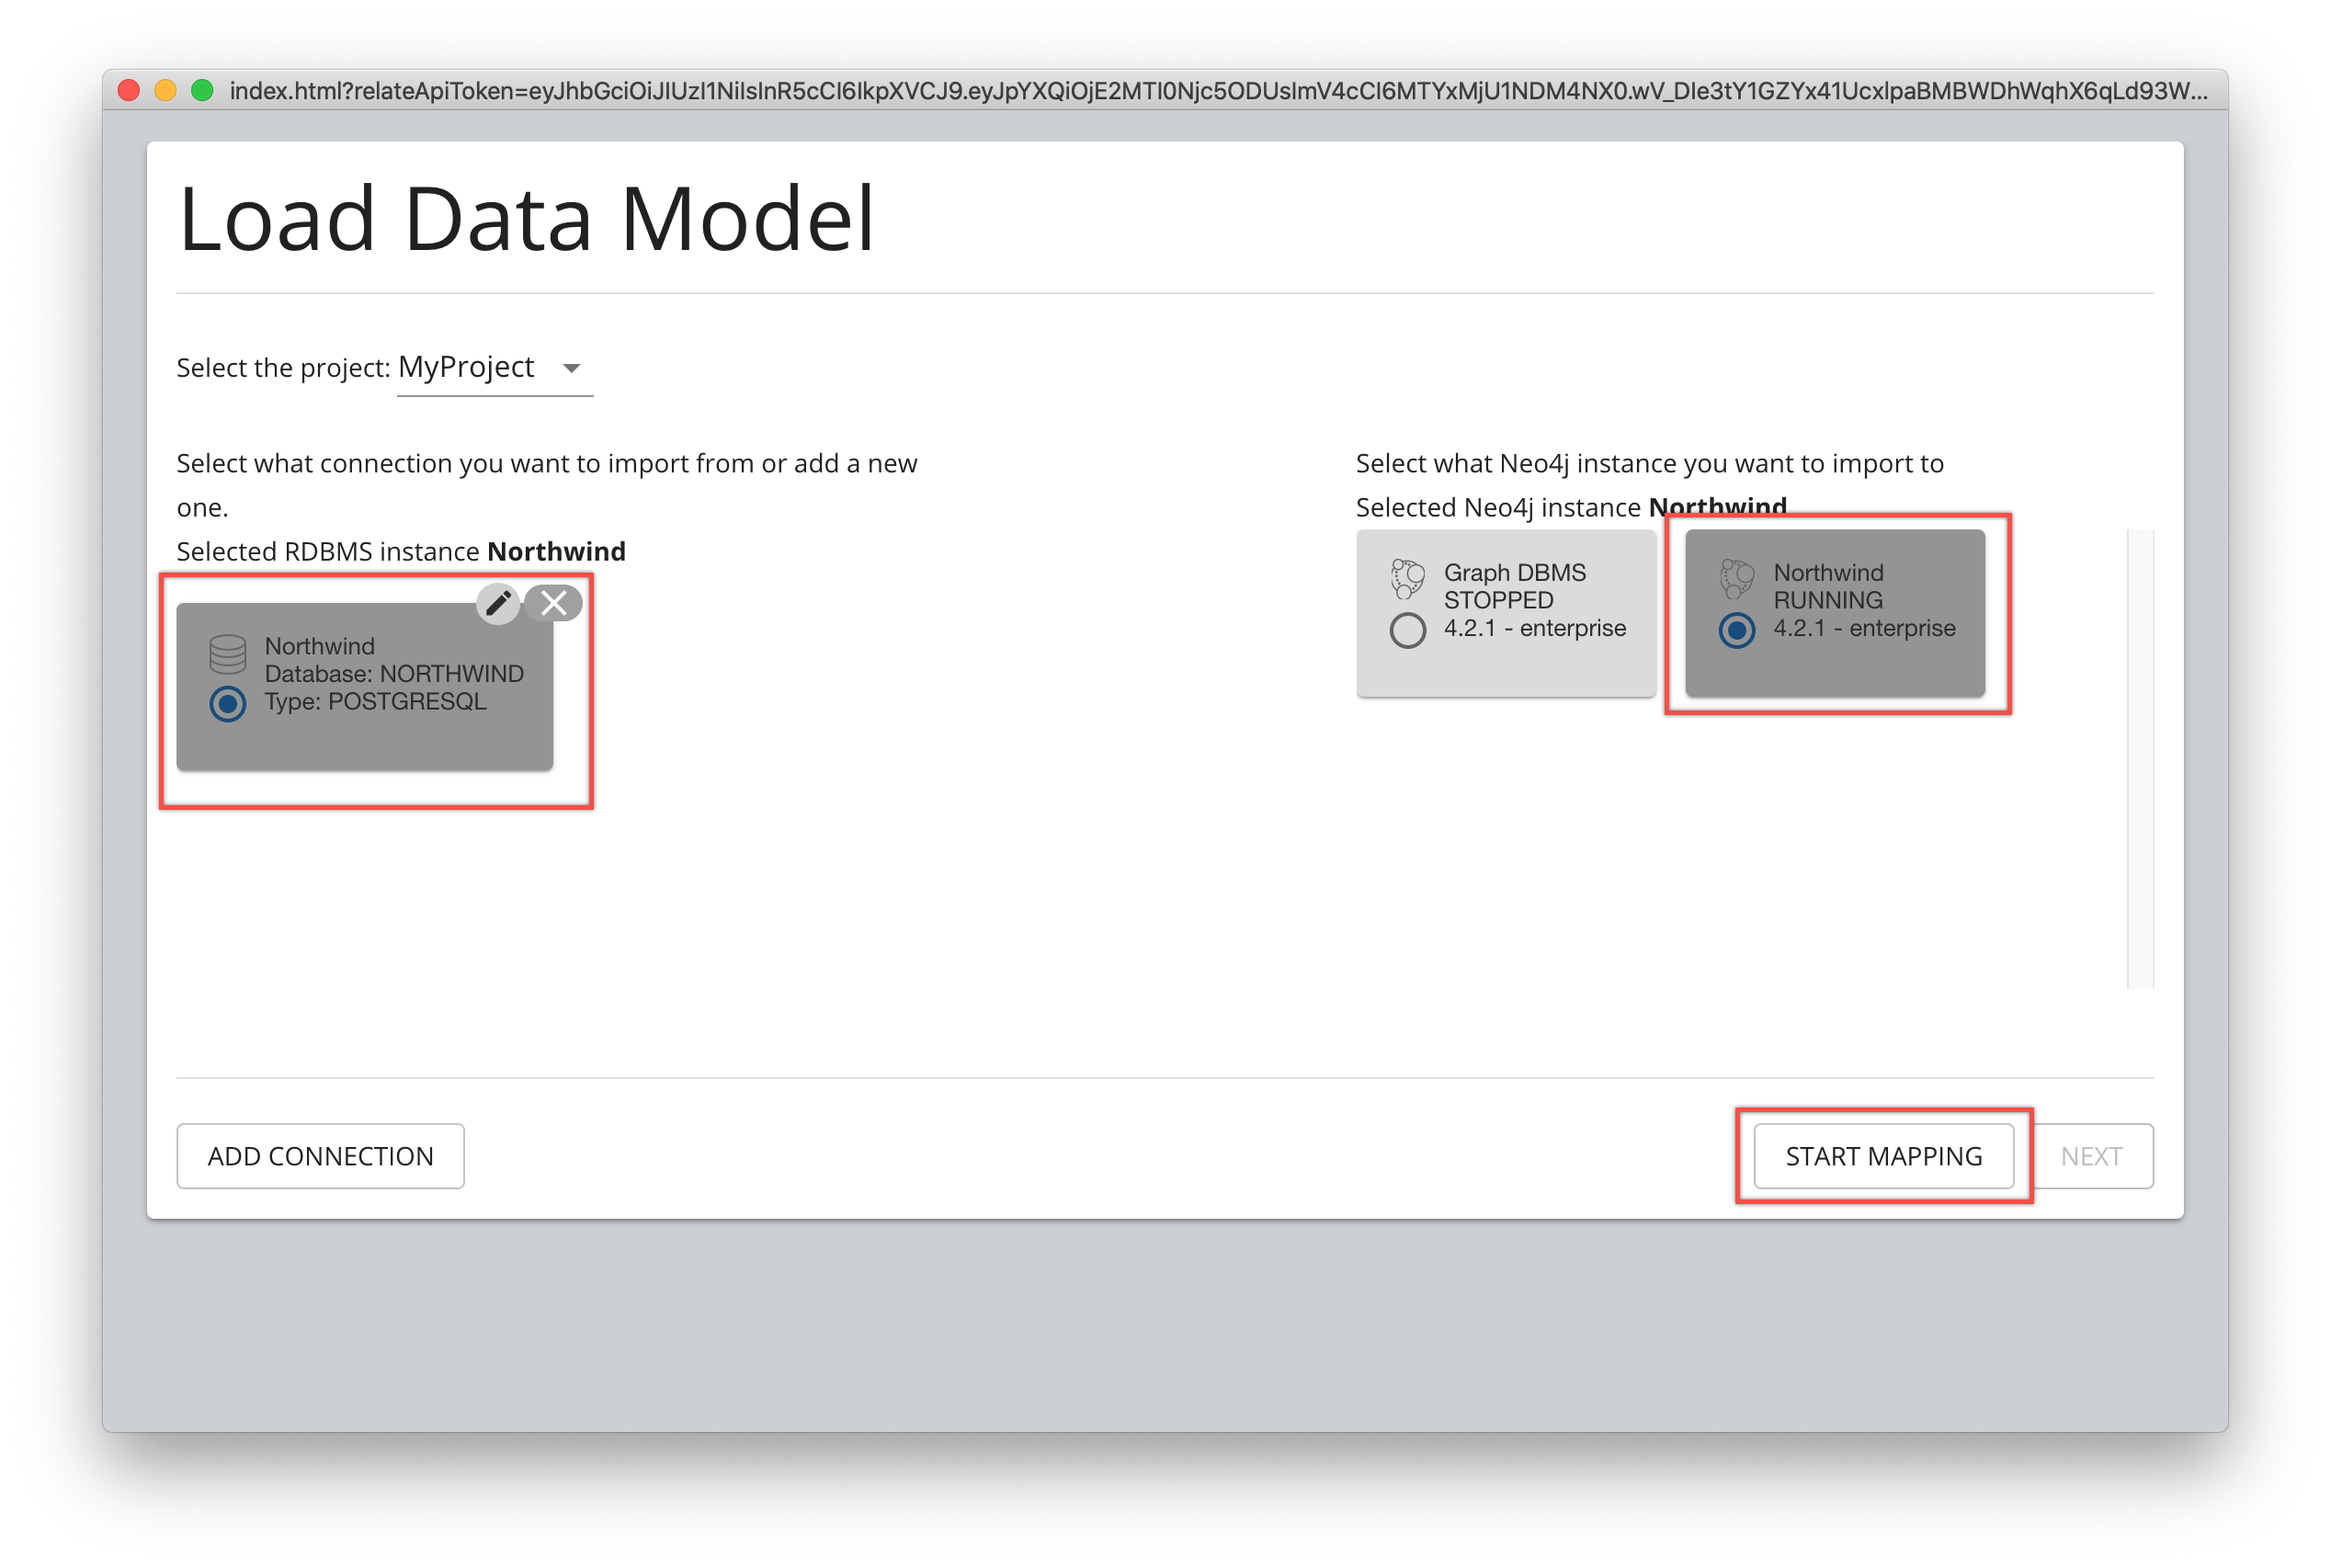
Step 5: Prepare for mapping
In the Load Data Model window, ensure that both the source and target databases are selected as shown here.
You then click START MAPPING to begin the mapping.
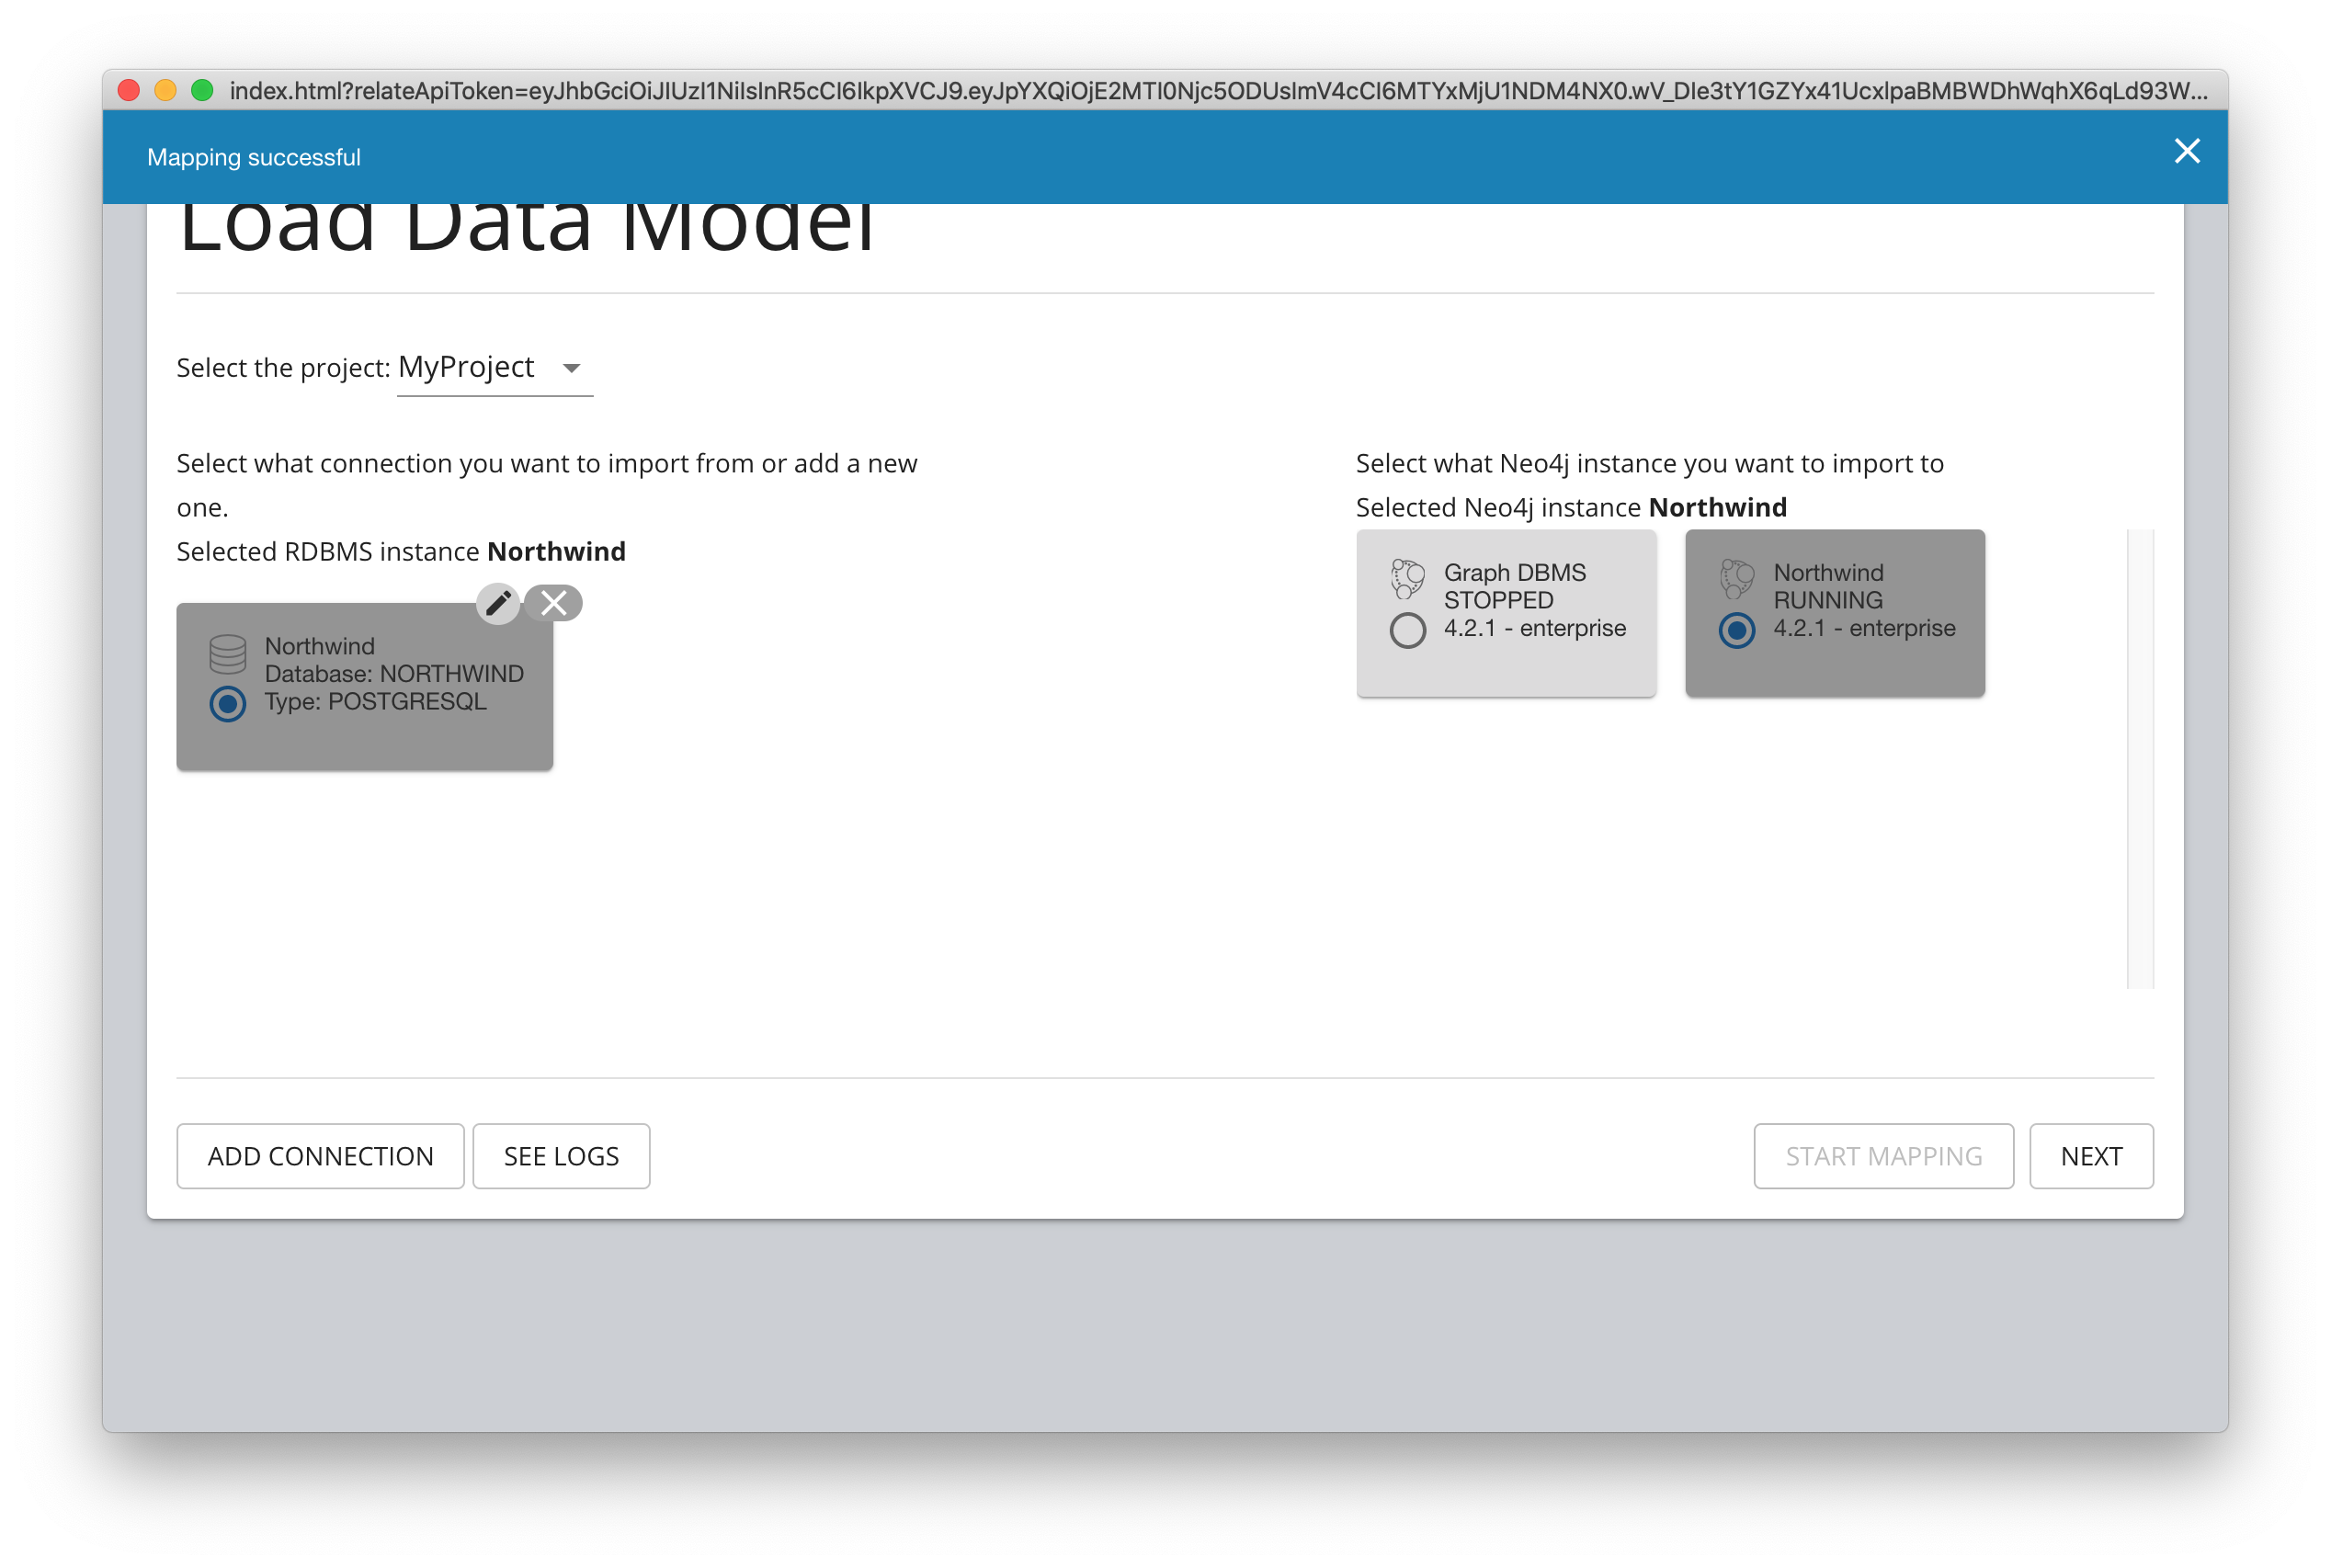
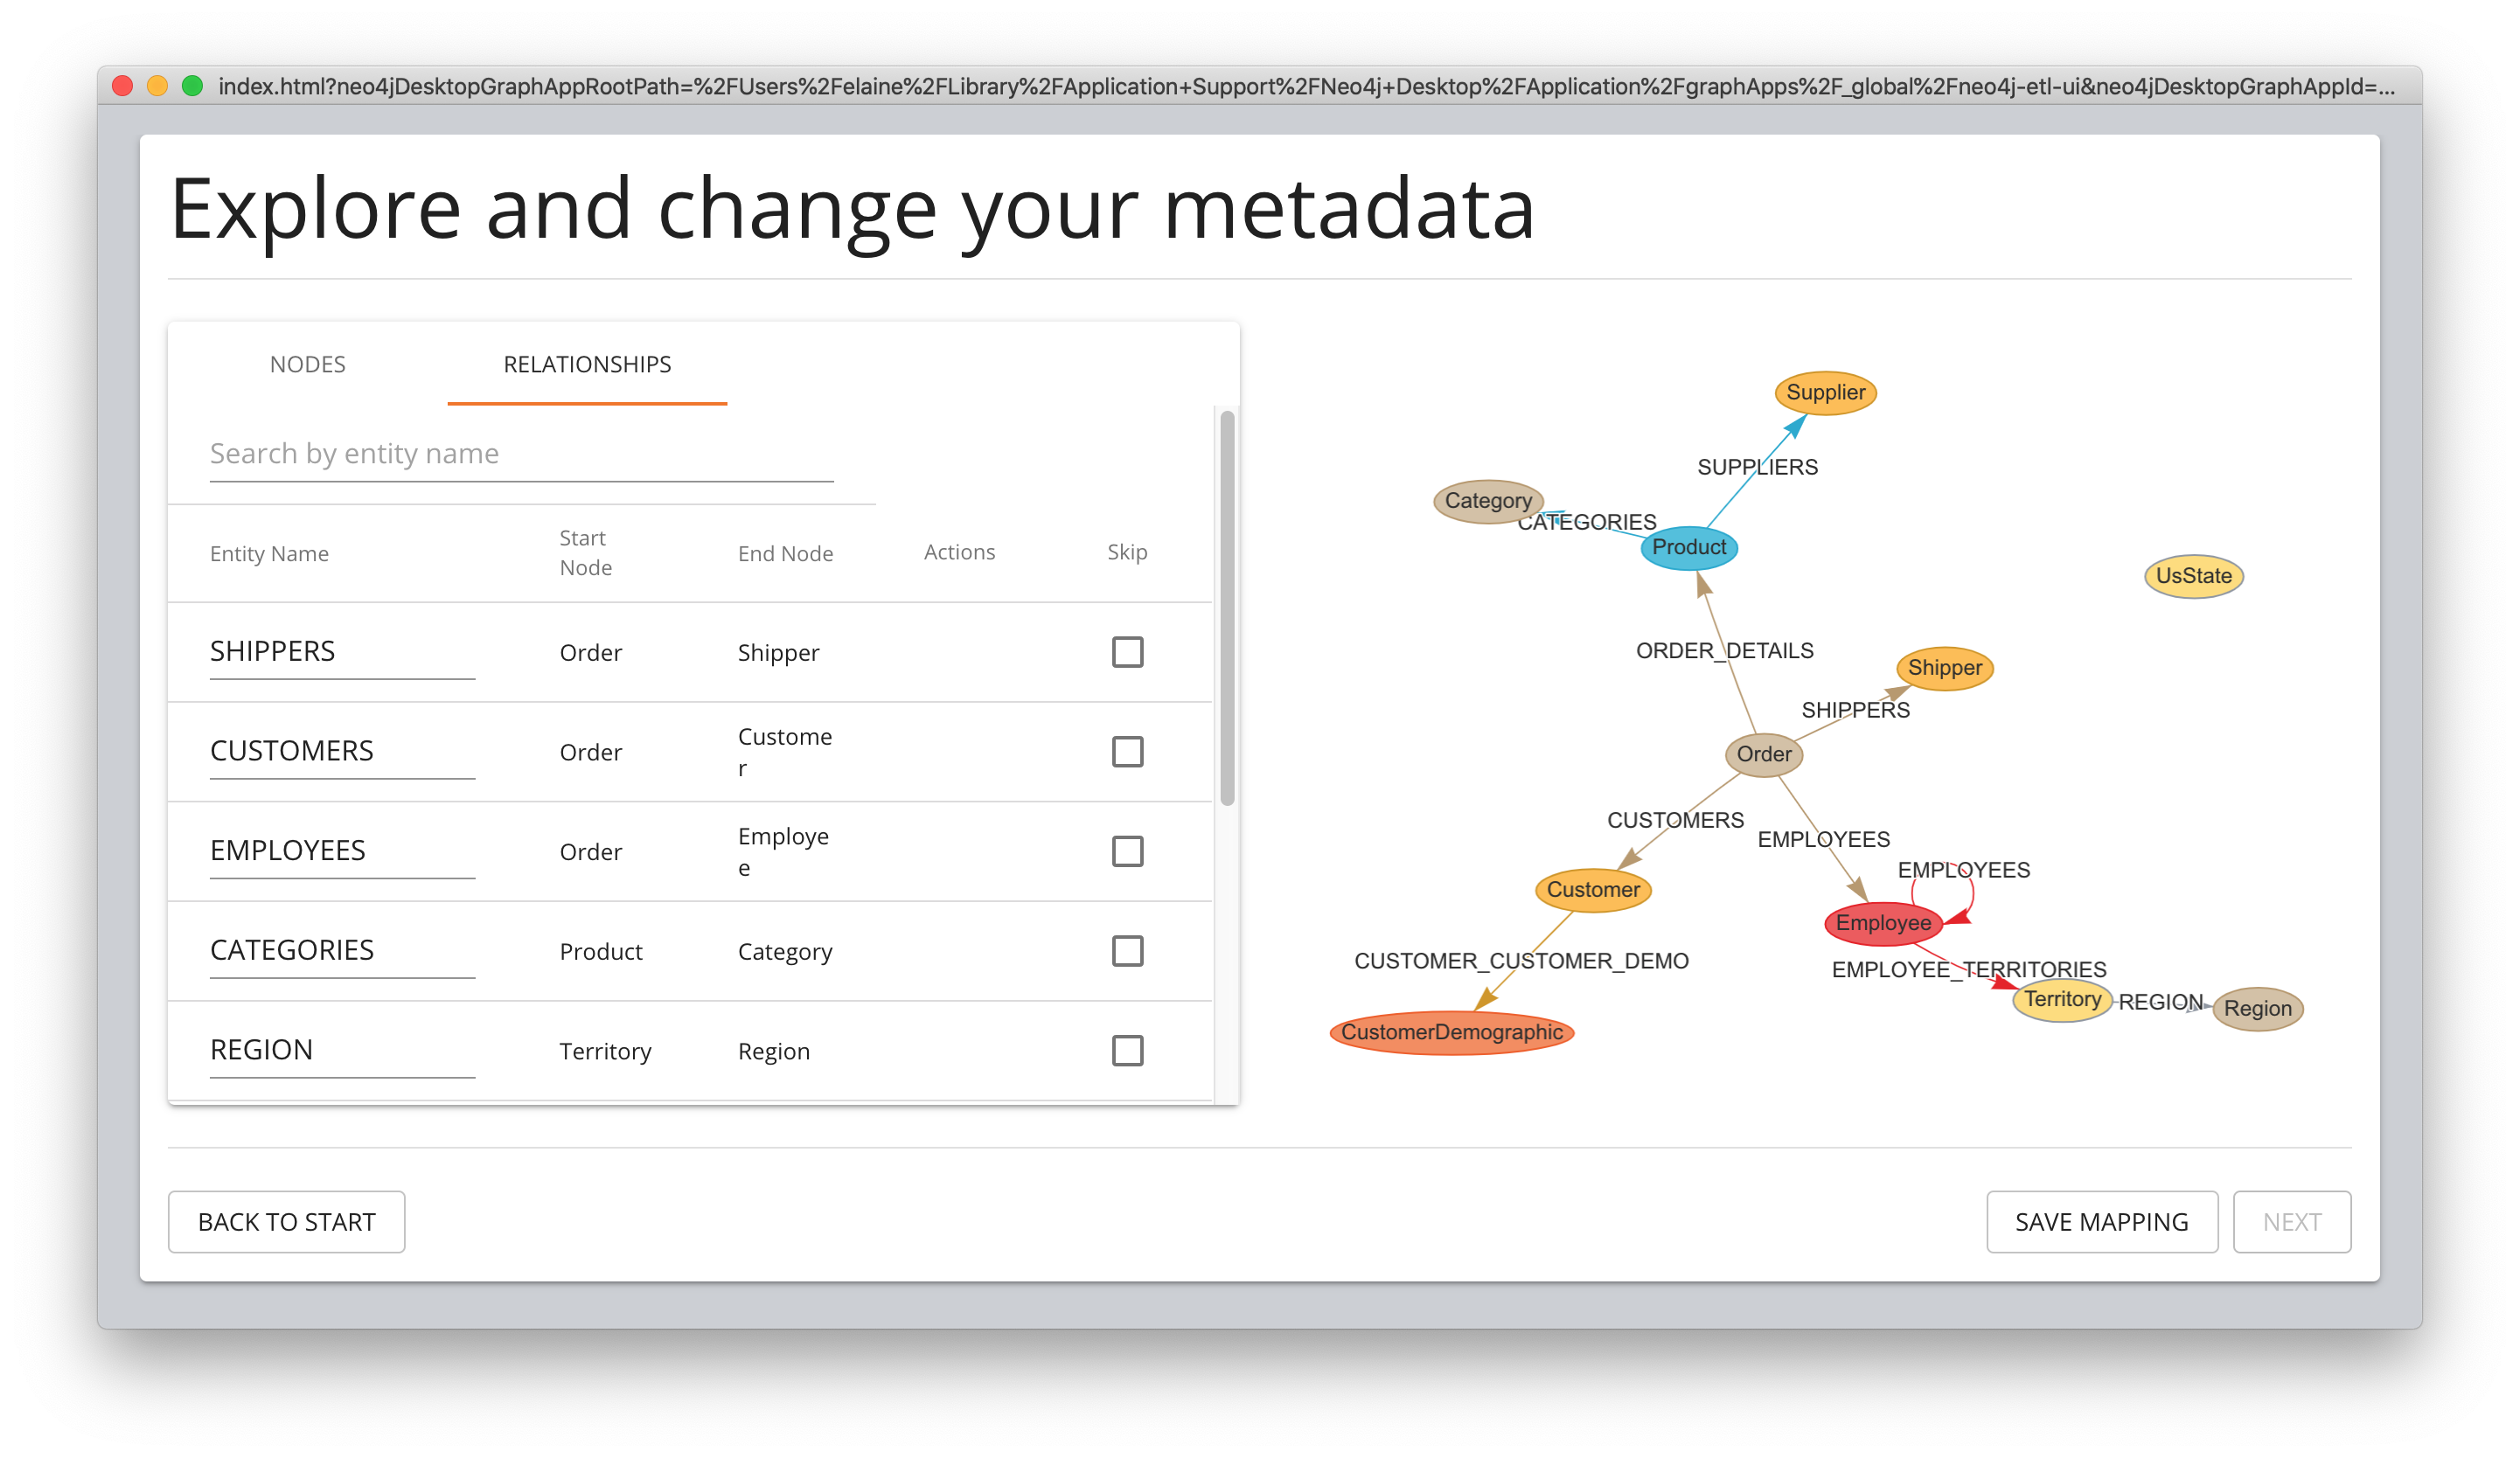
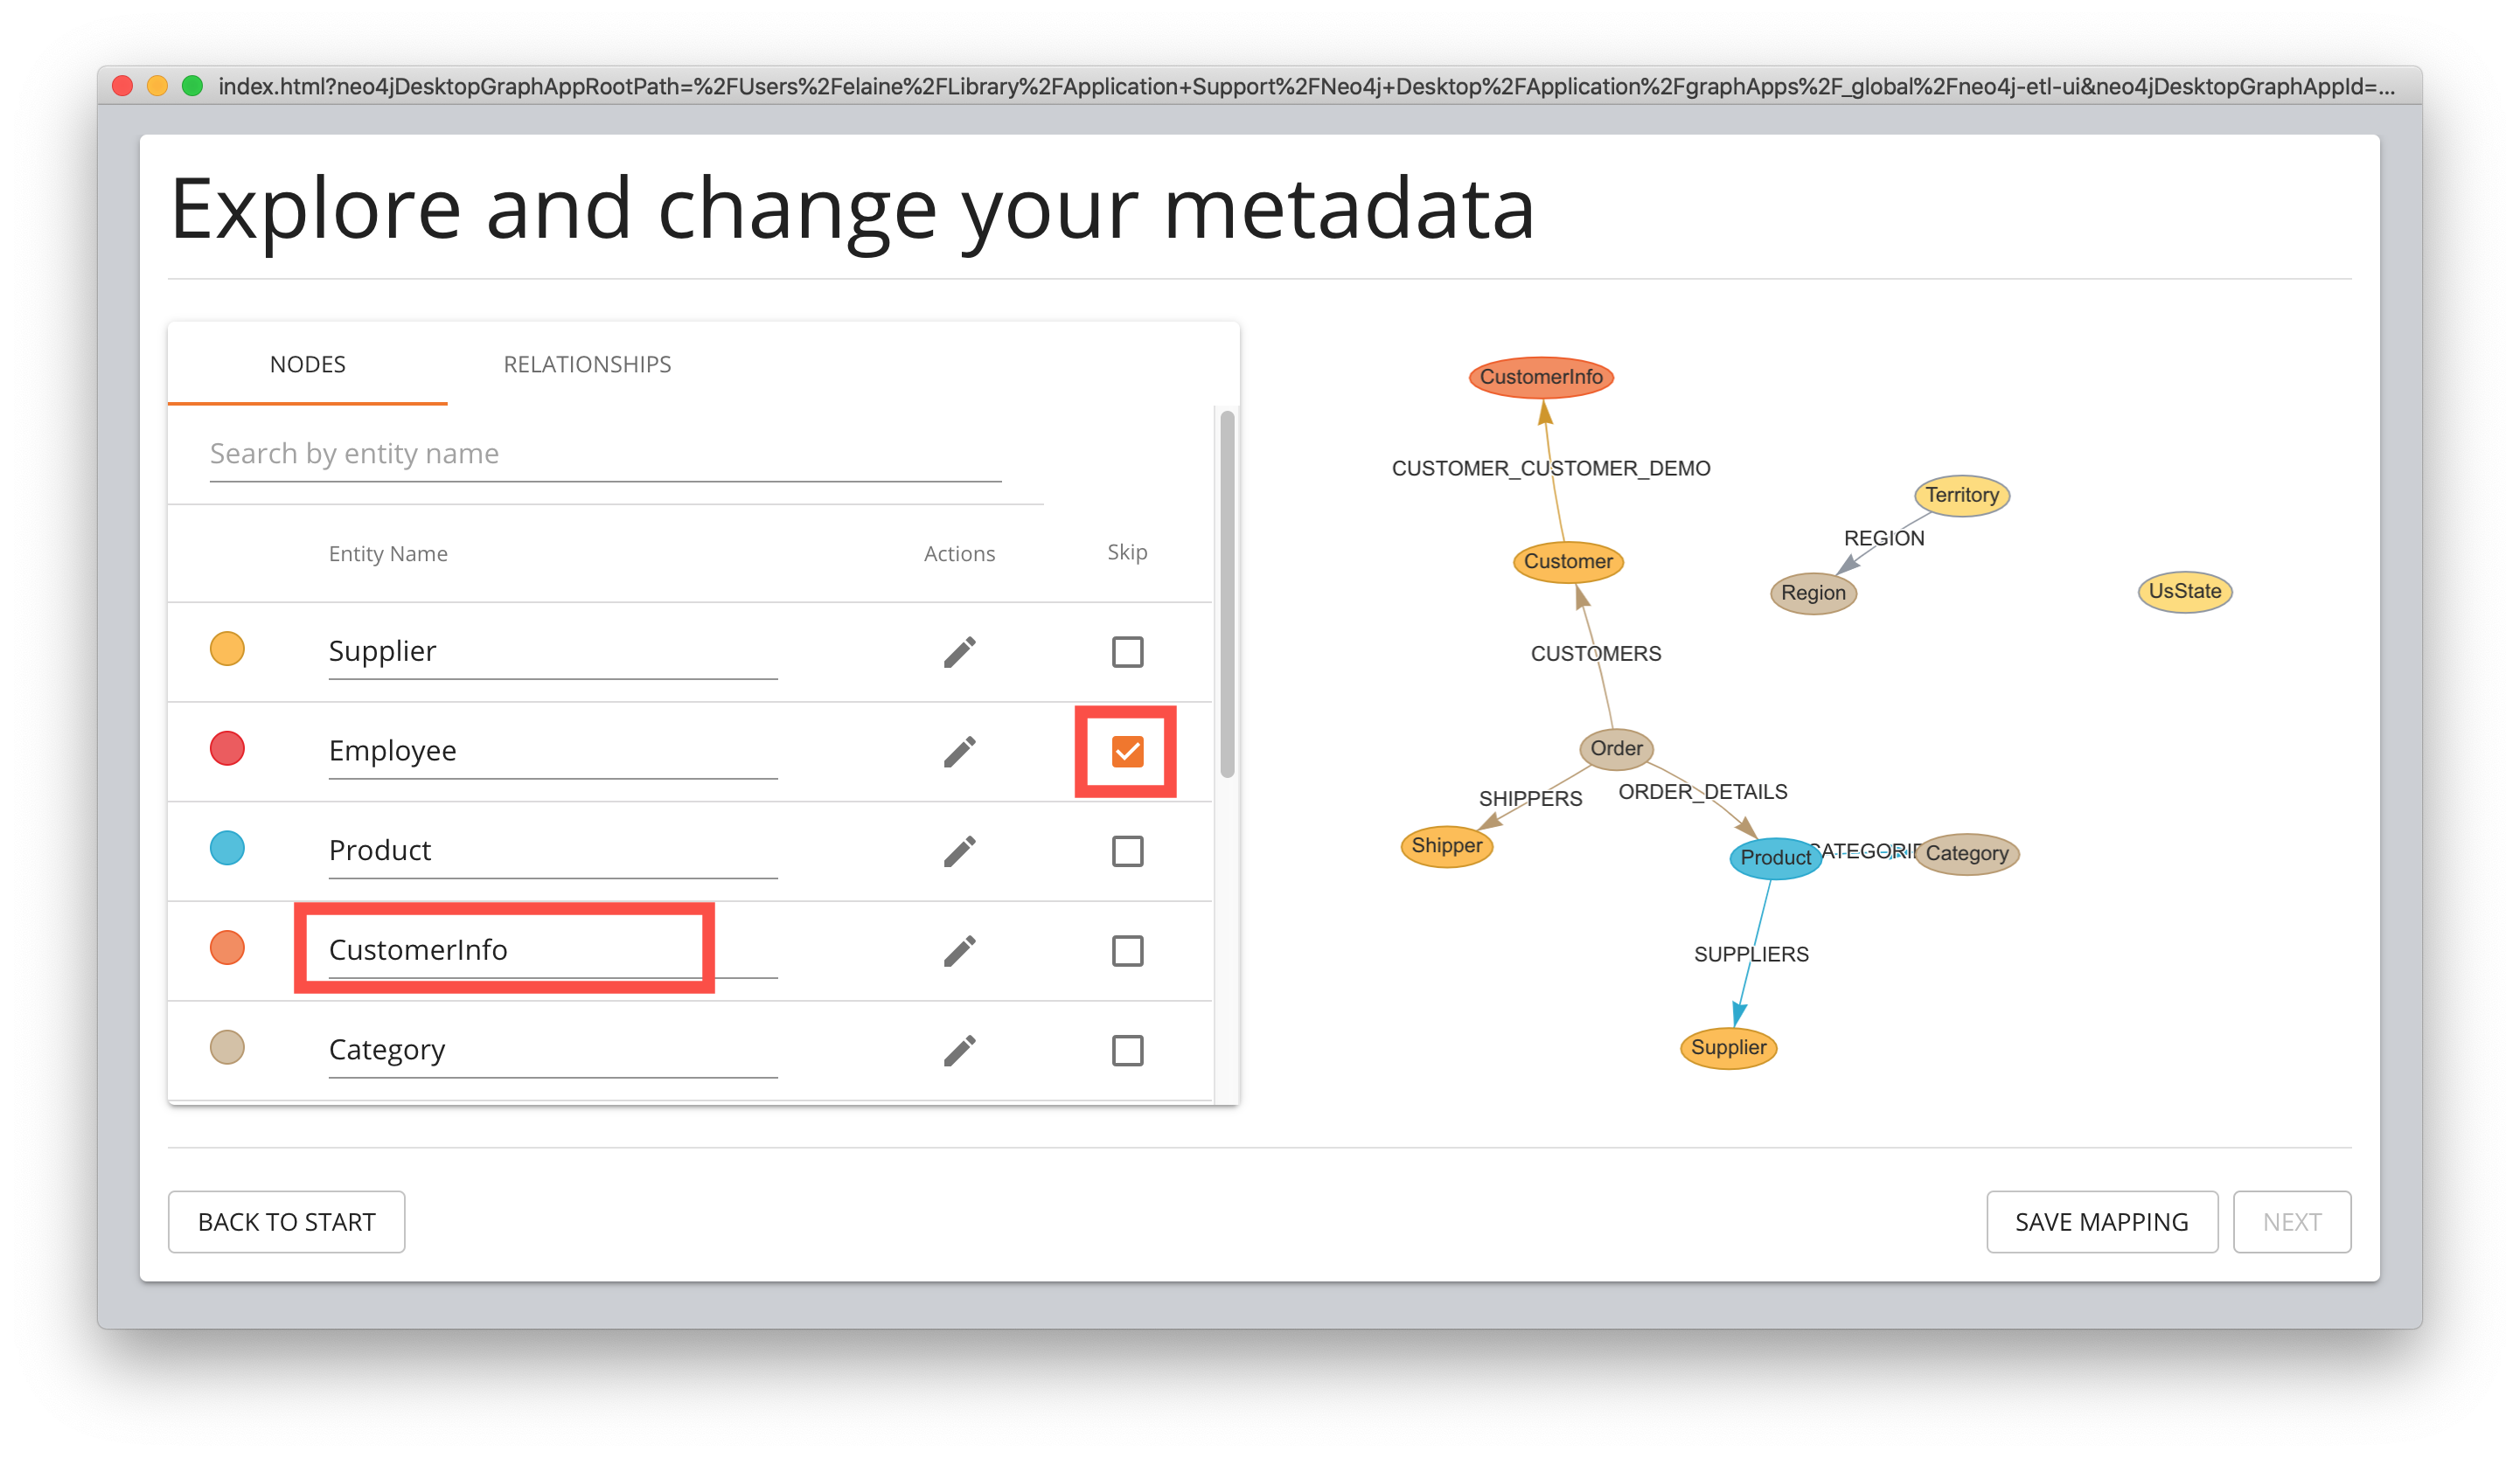
Step 6: Review the default mapping
For the northwind RDBMS, here is the default mapping that could be used to import the nodes.
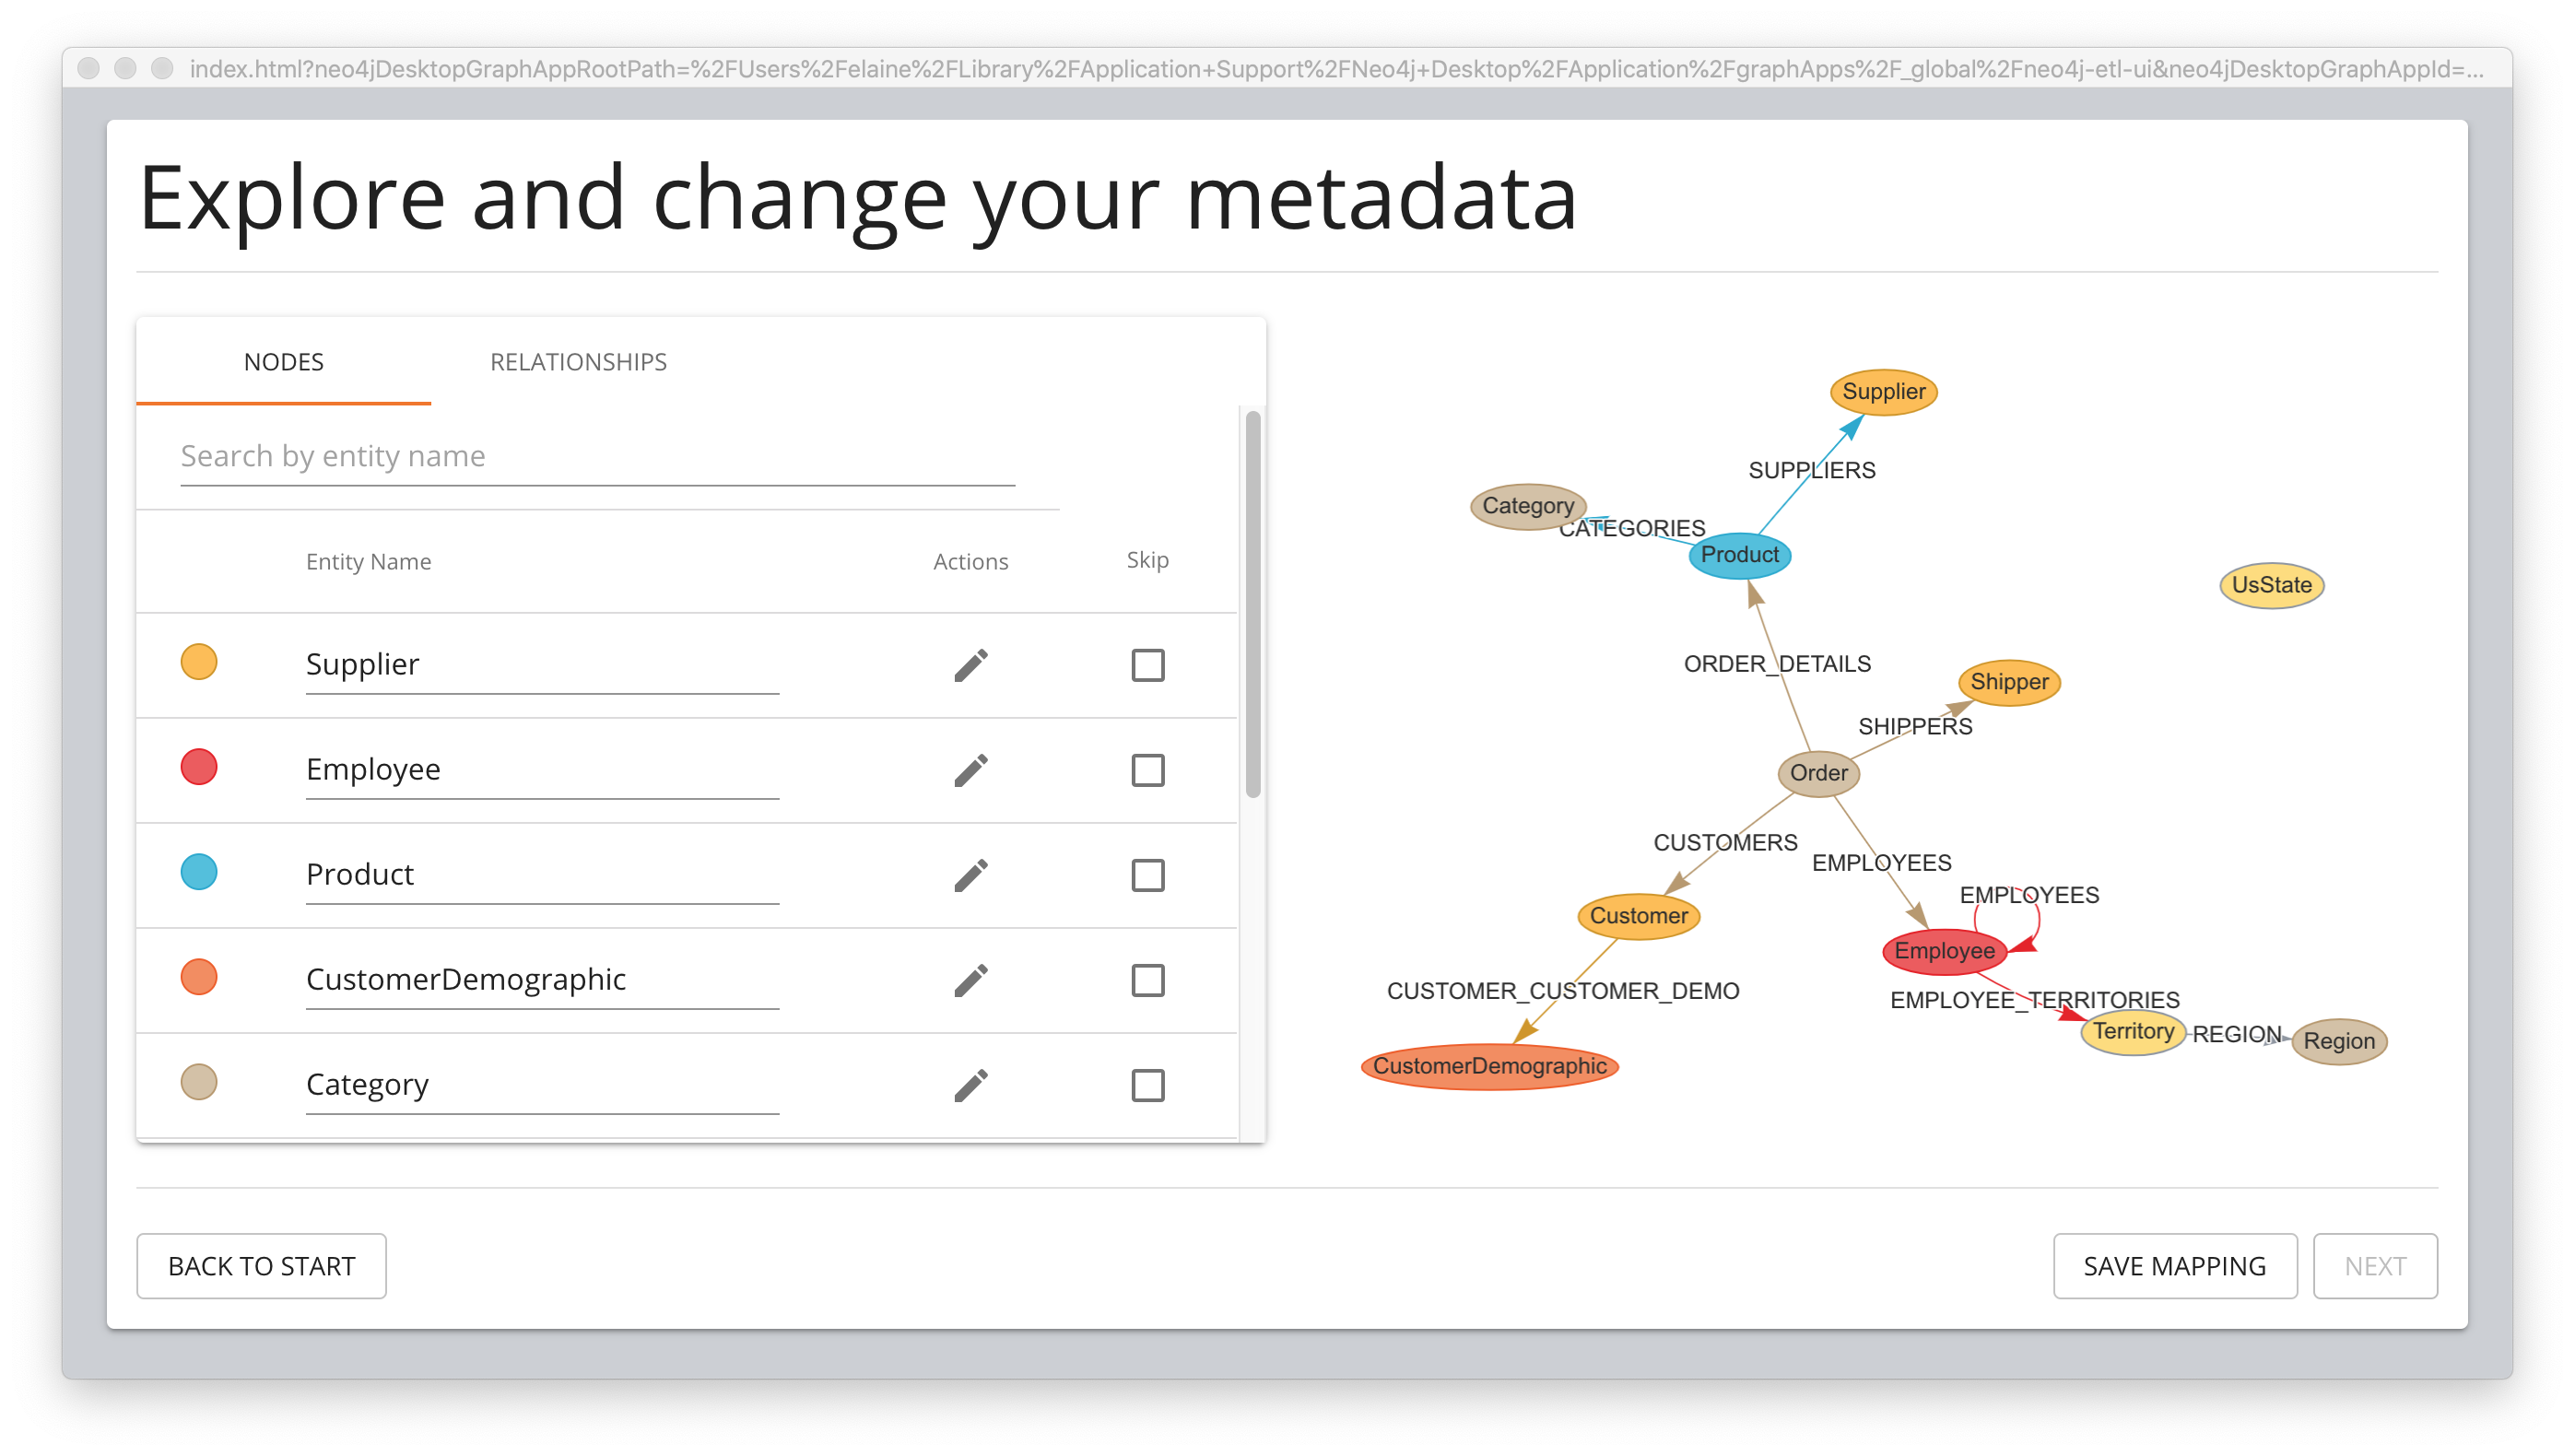
And here is the default relationship mapping.
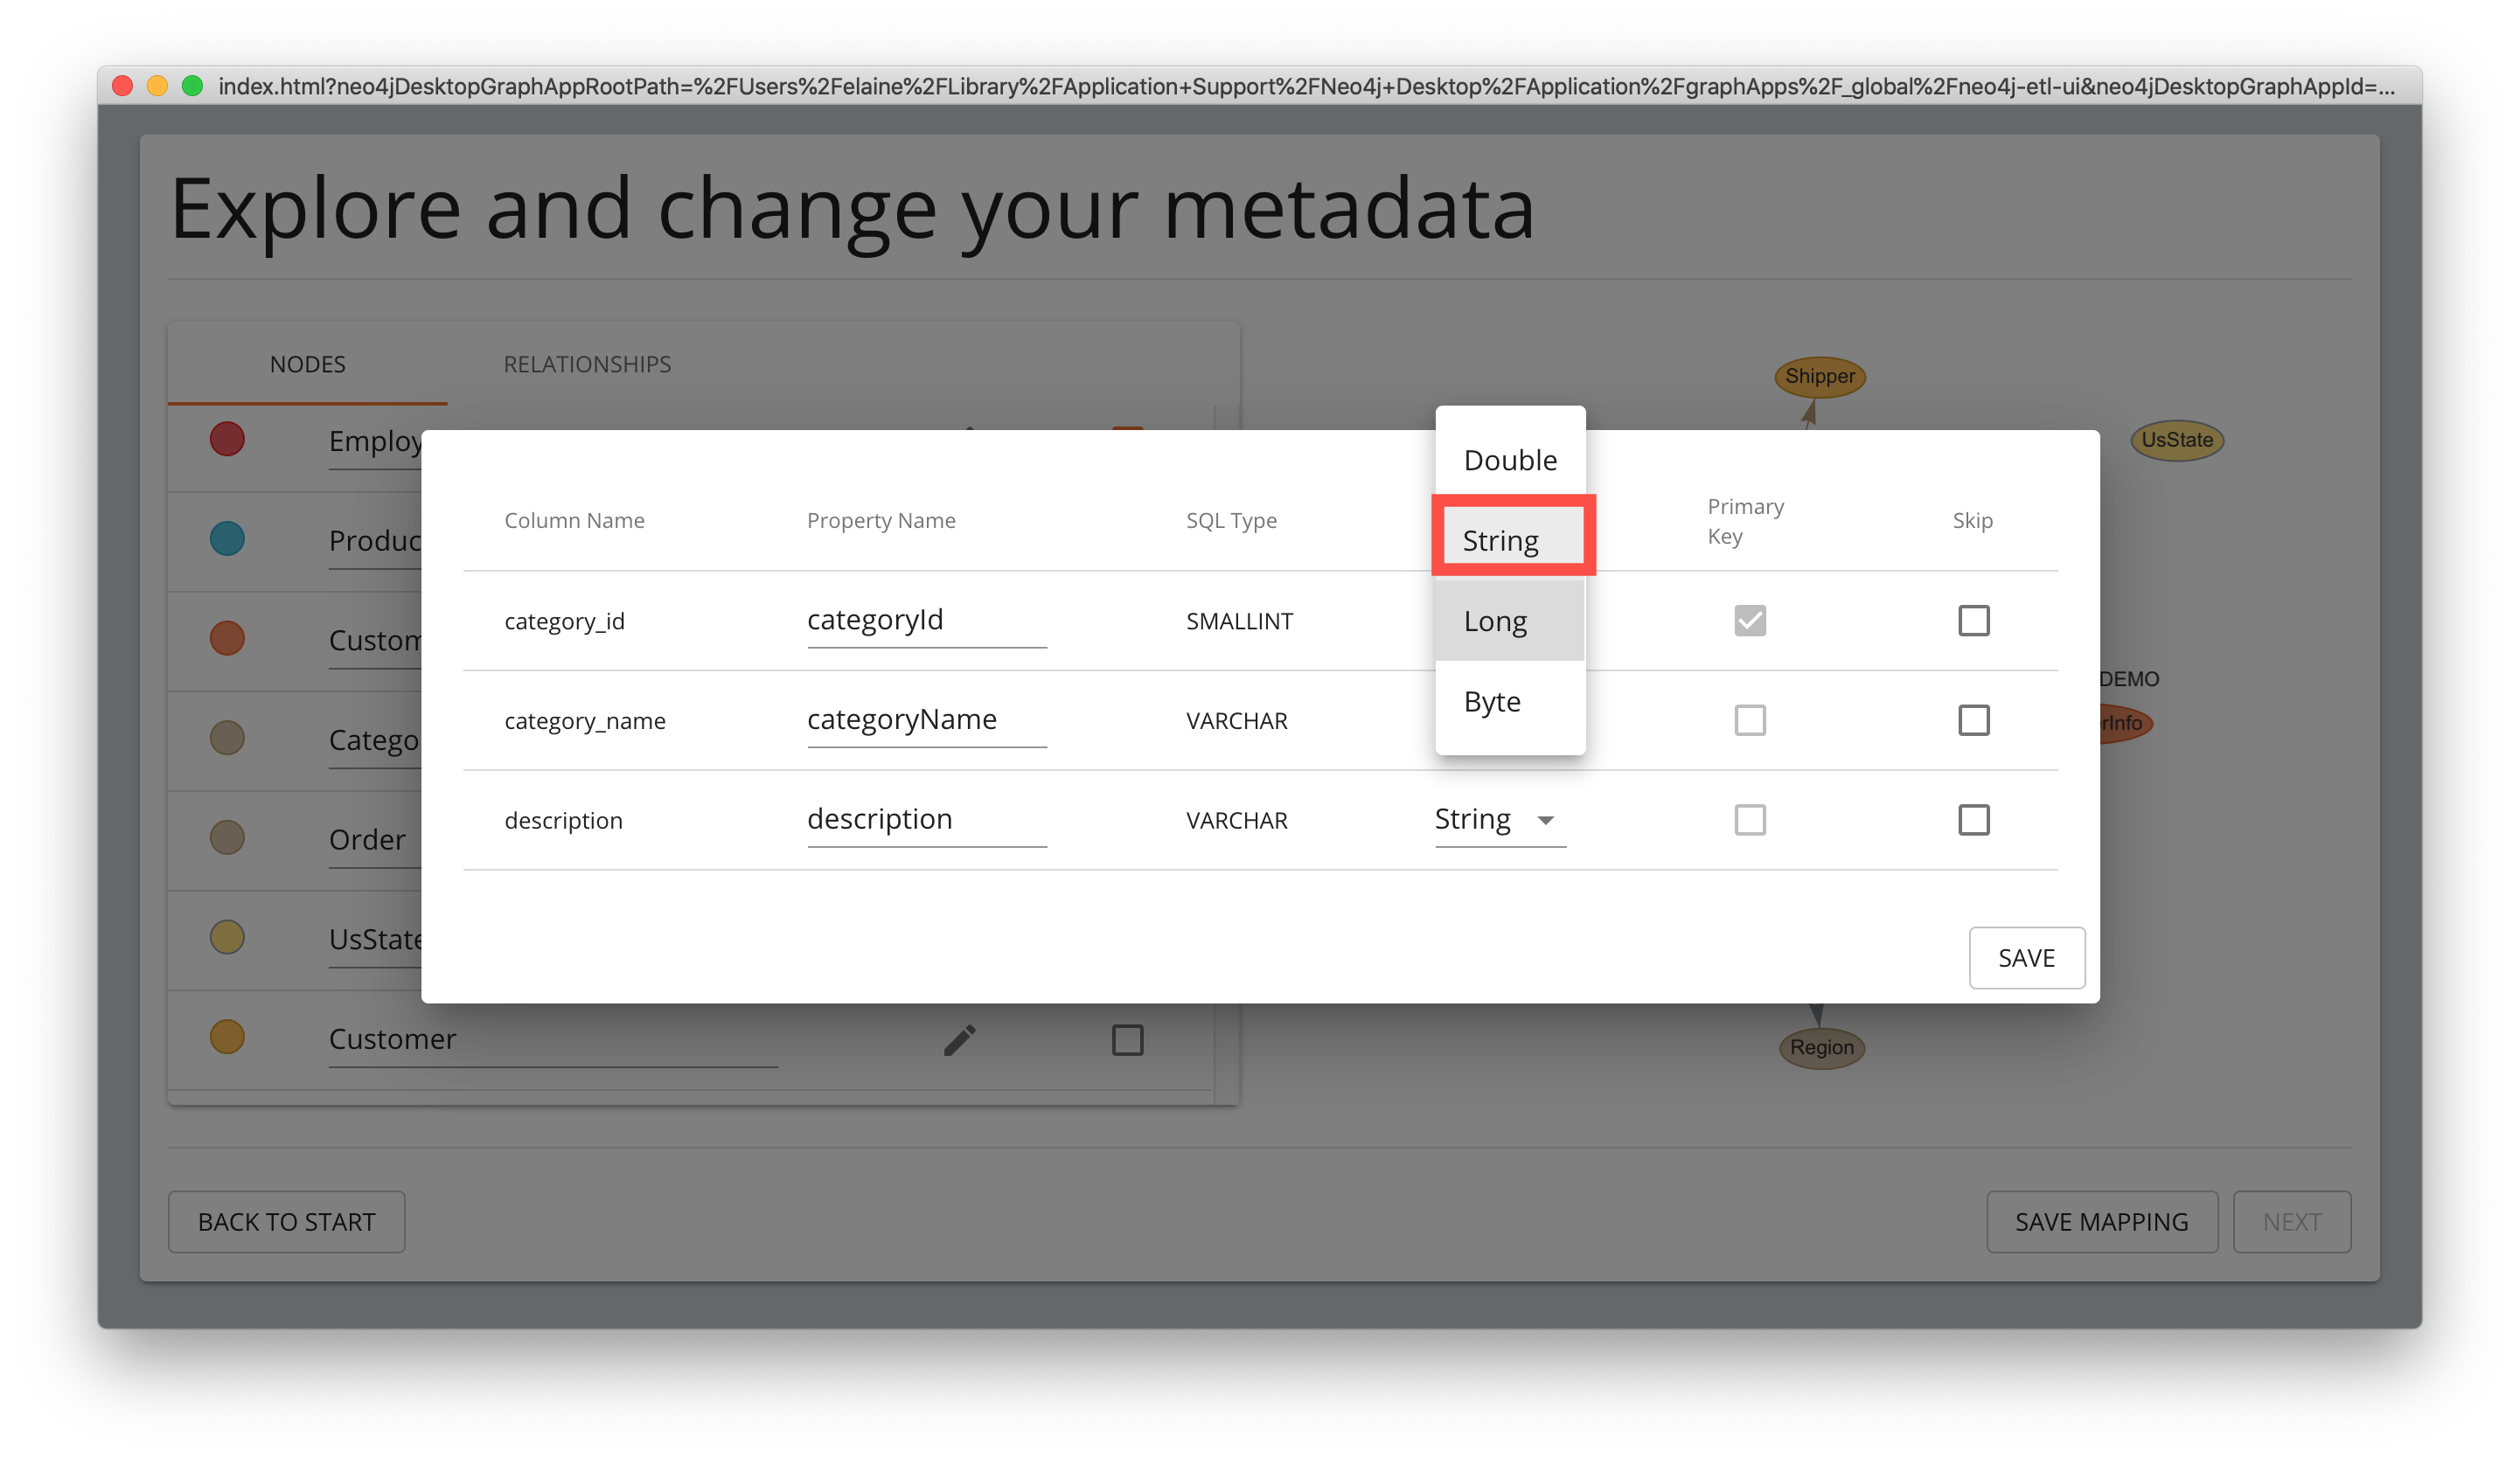
Optional: Changing node properties
You can even change what properties will be imported, their names, and types by selecting the edit icon for a node.
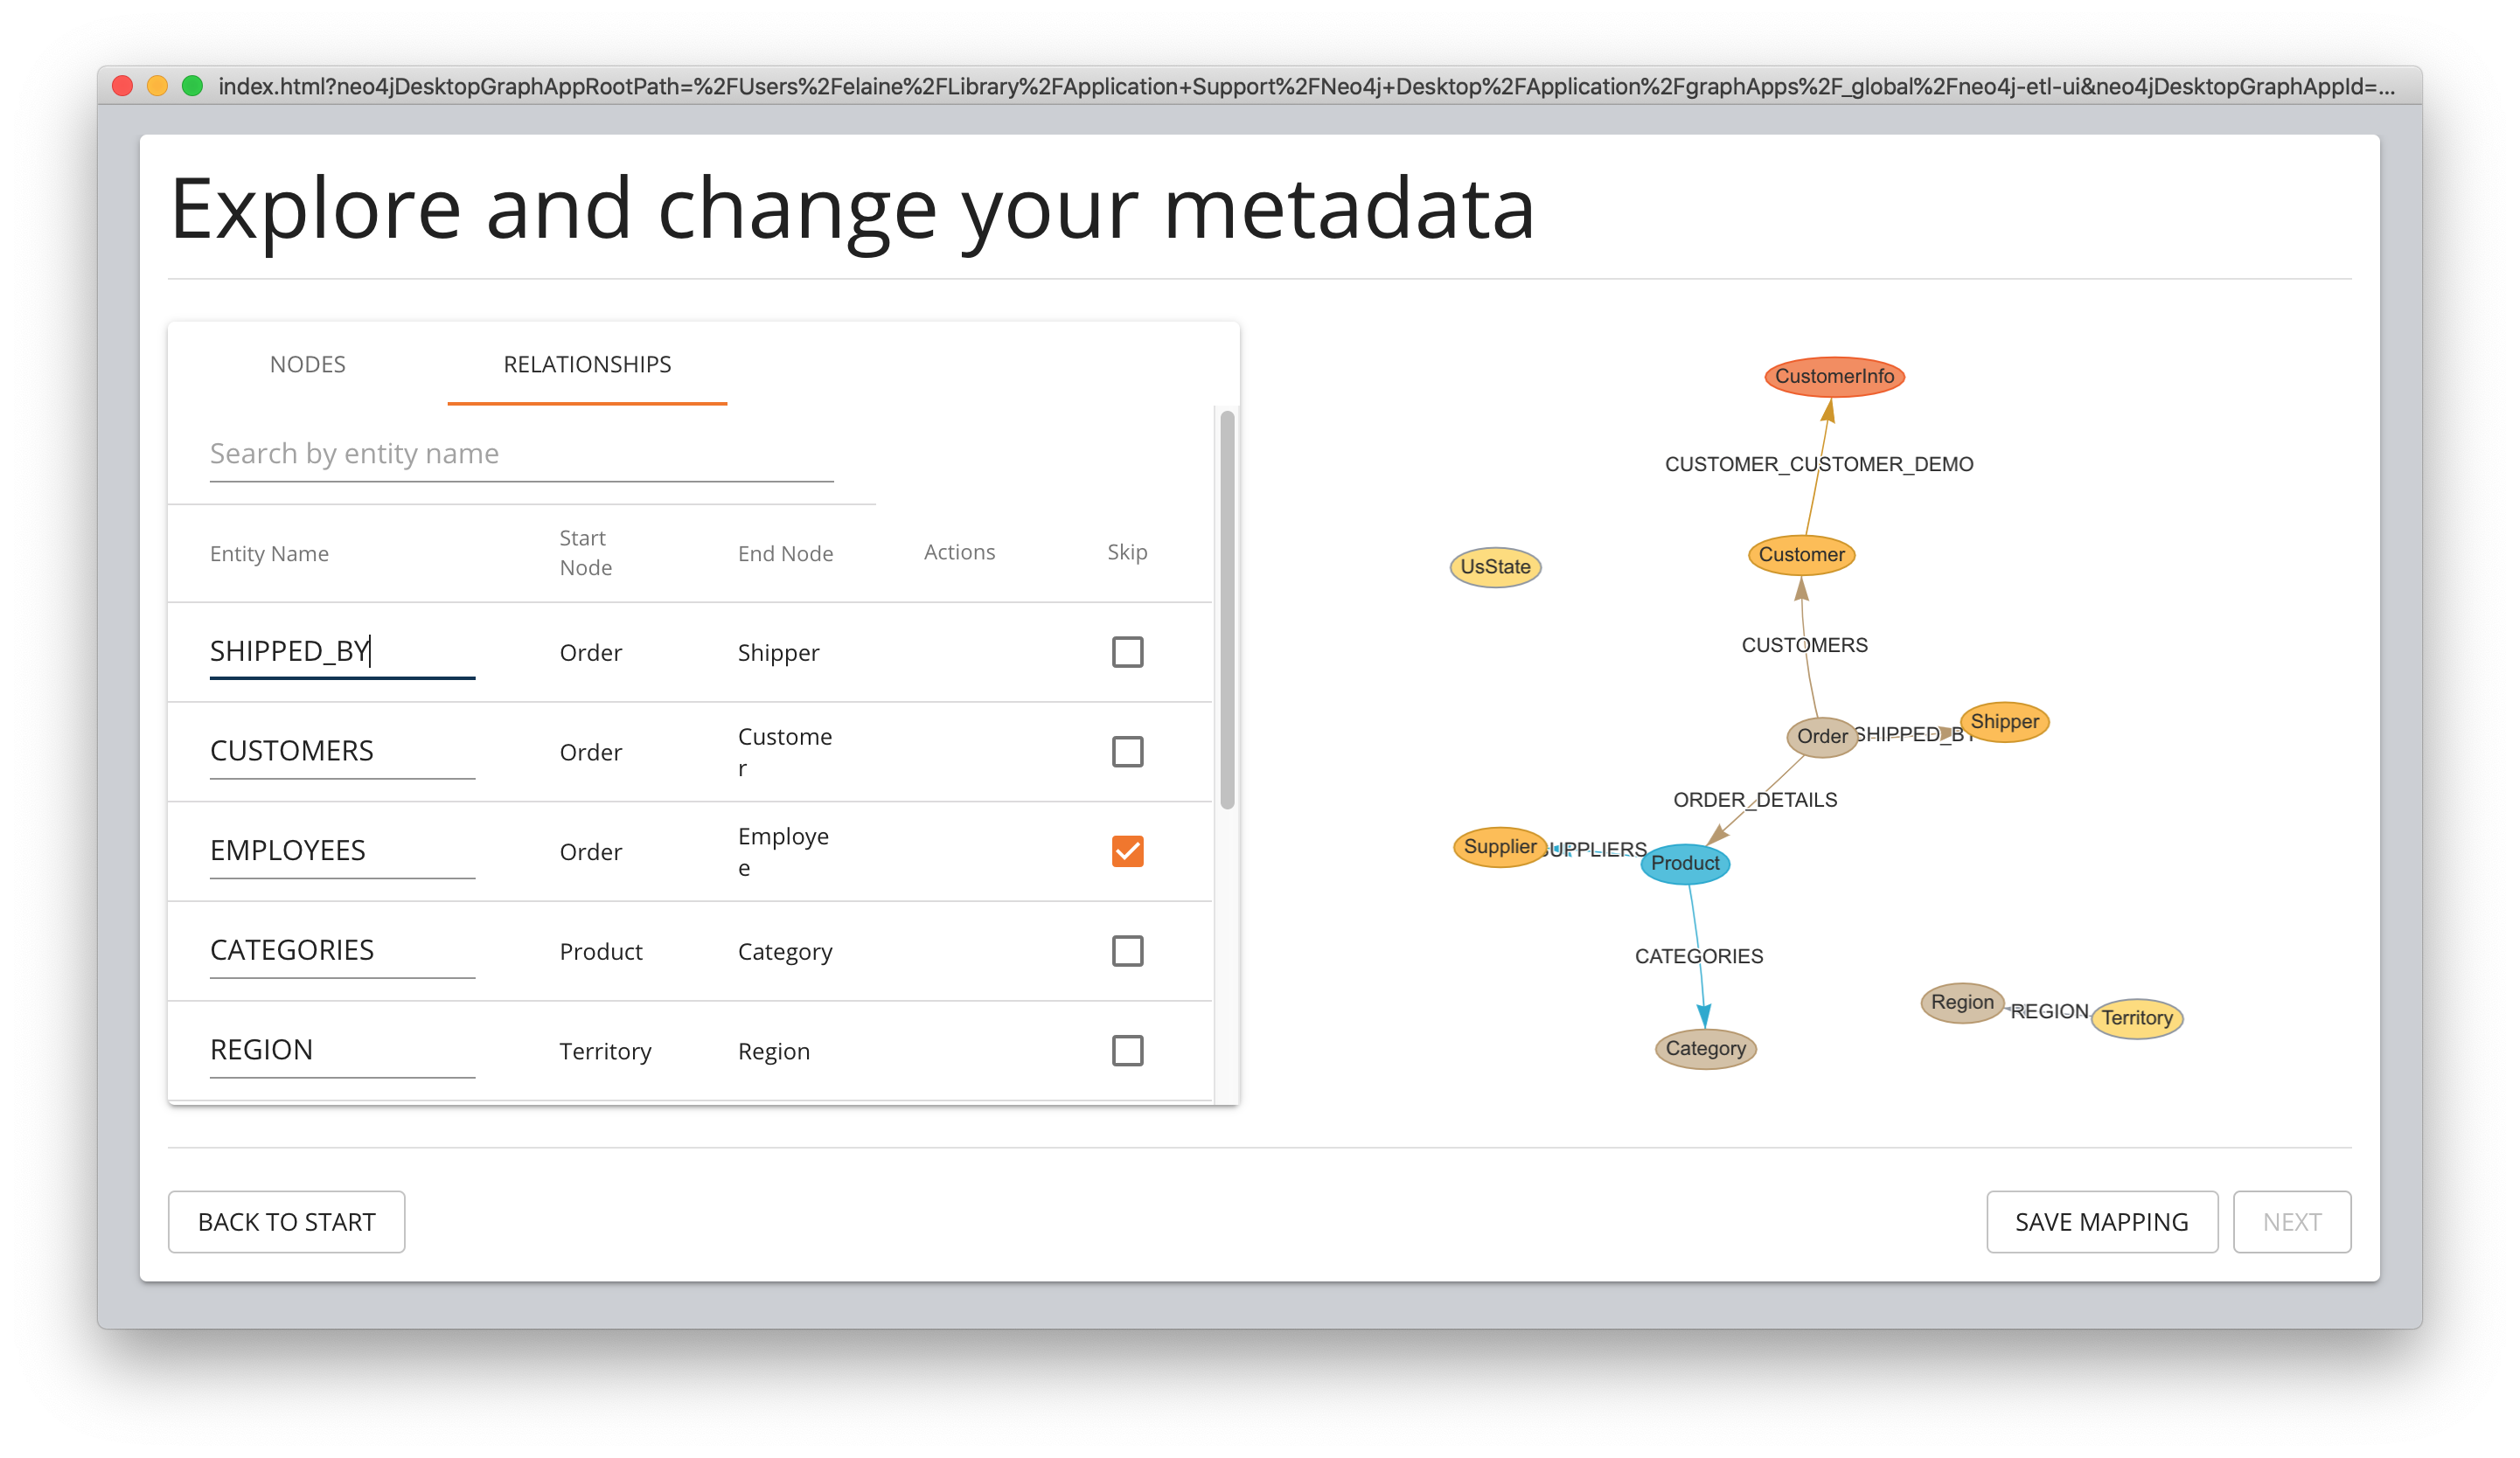
Optional: Changing relationship types
You can modify the names of relationships and if they will be skipped upon import.
Step 7: Save the mapping
After your customization of the mapping, you must always save it by clicking the SAVE MAPPING button.
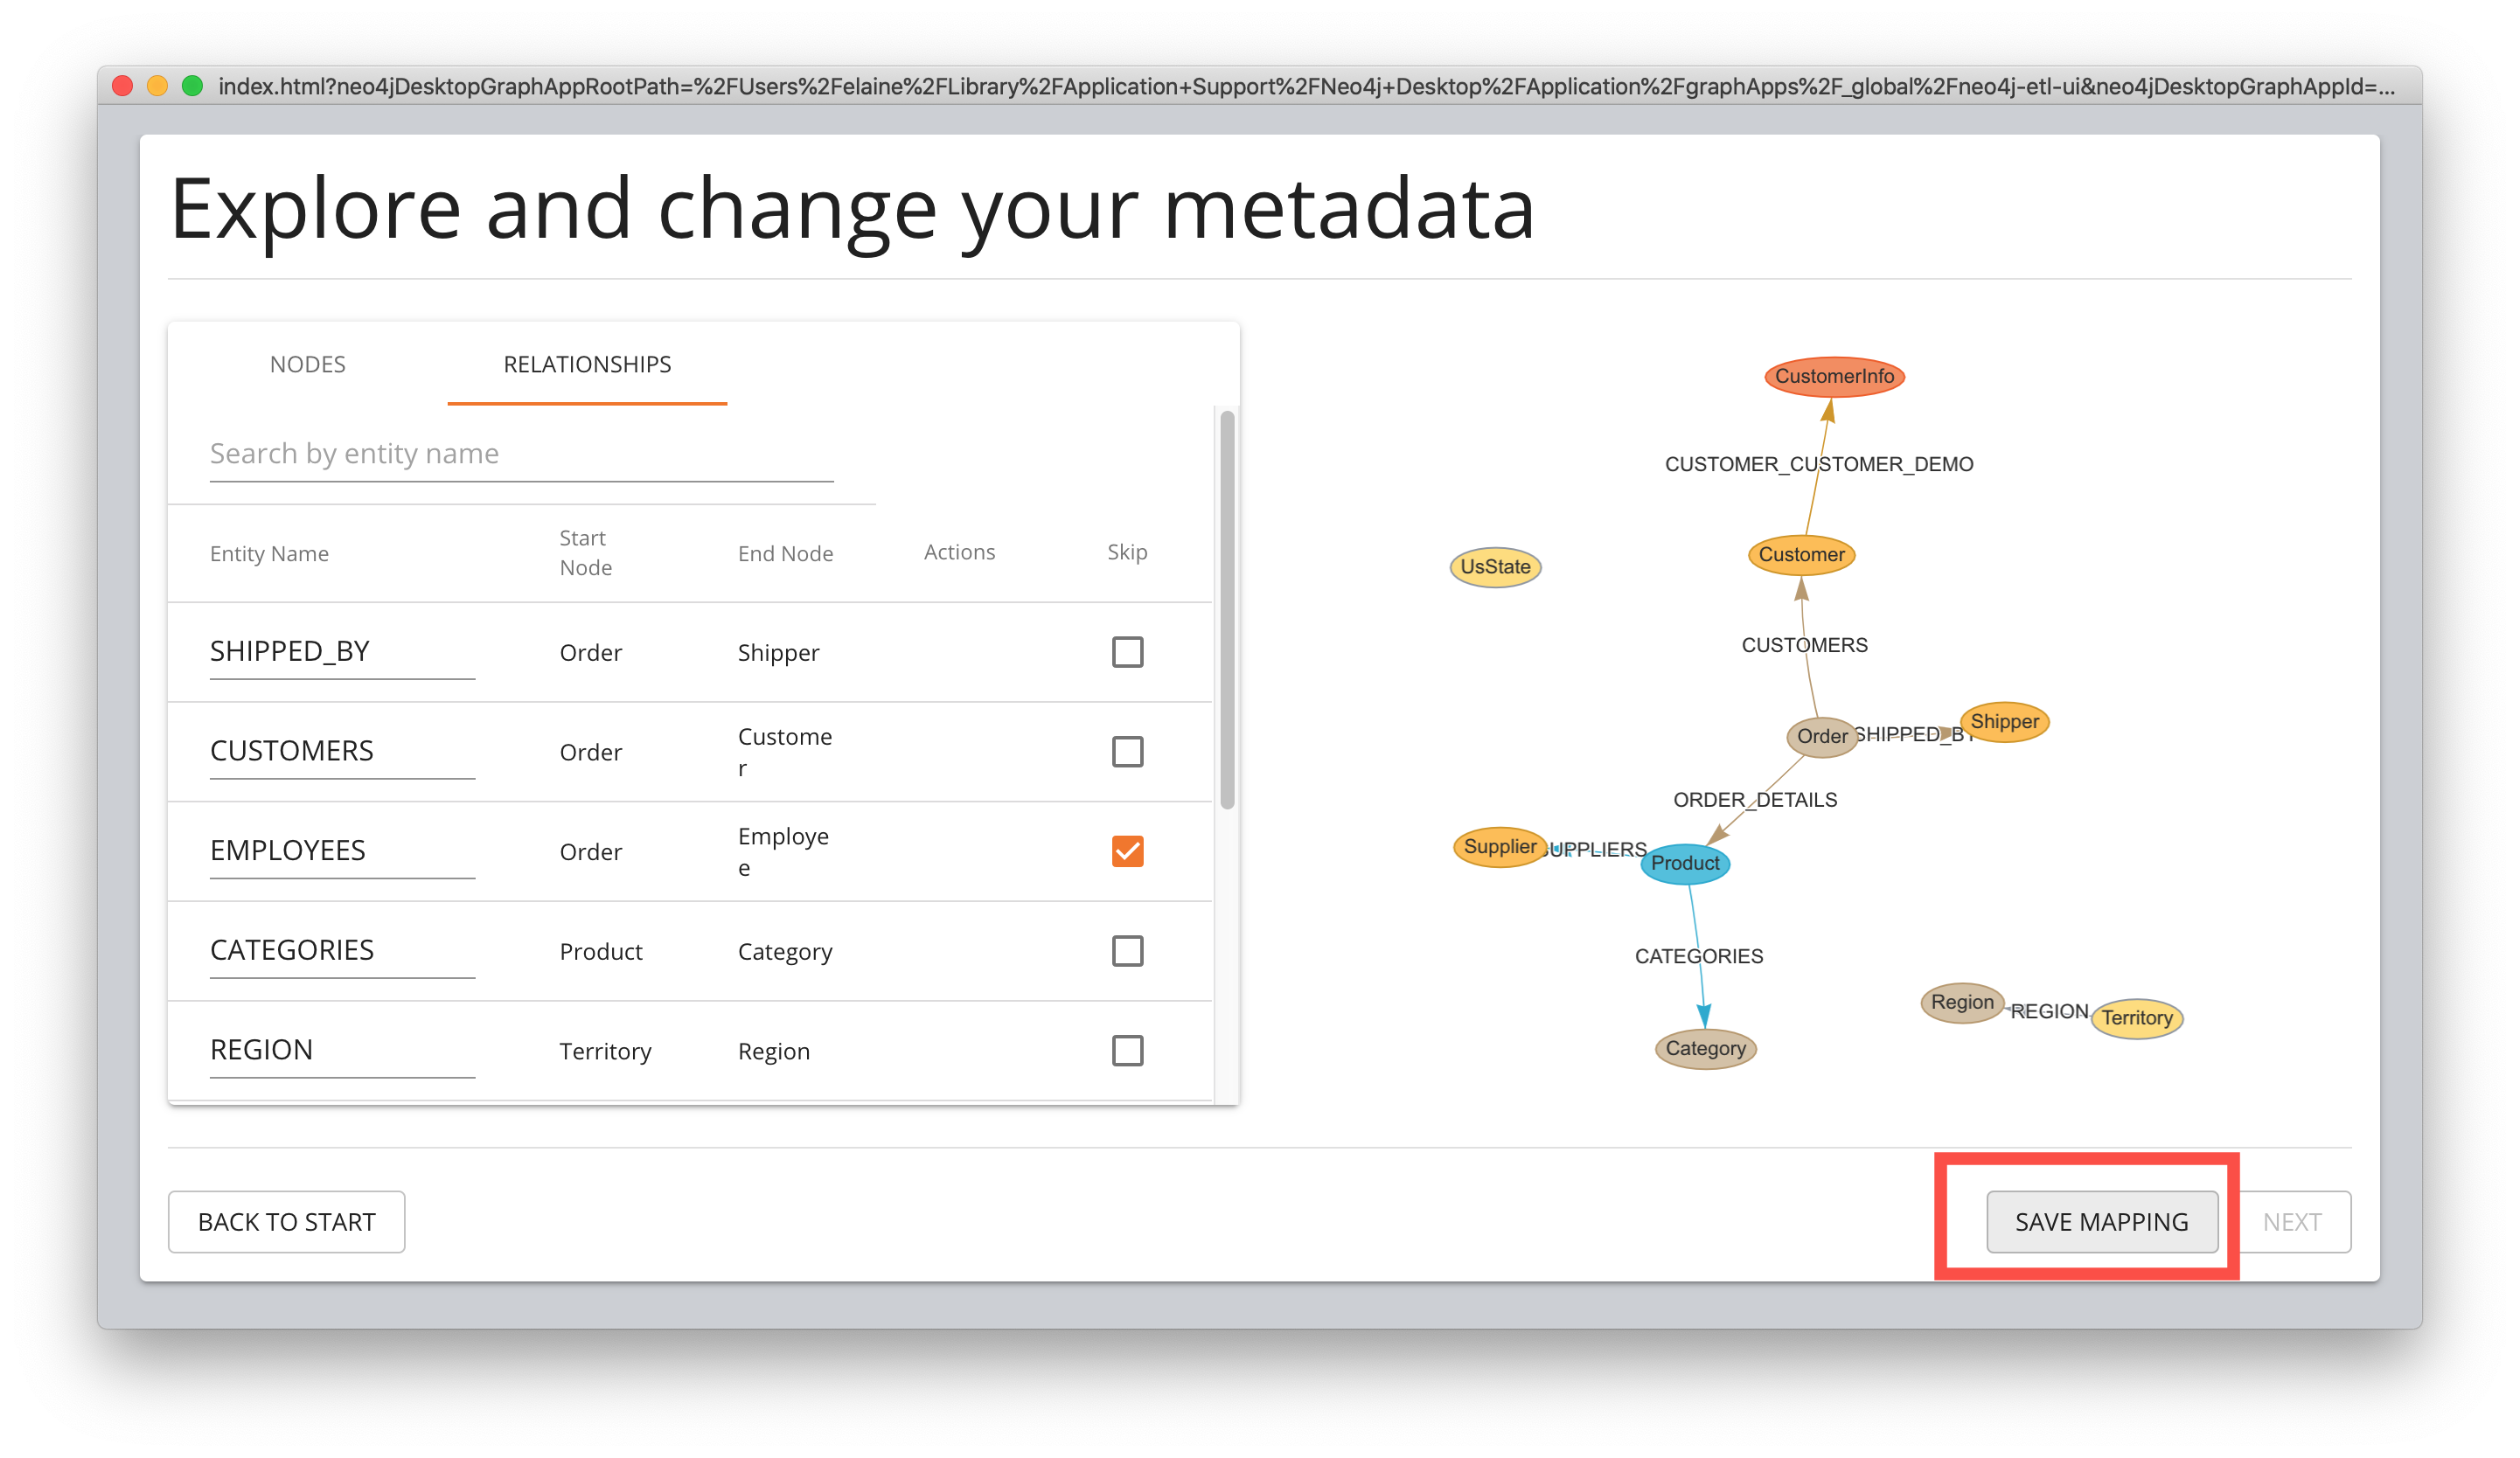
Then you click NEXT to continue to the import.
Step 8: Import the data
Next, on the Import your data into Neo4j window, you can review the import information displayed.
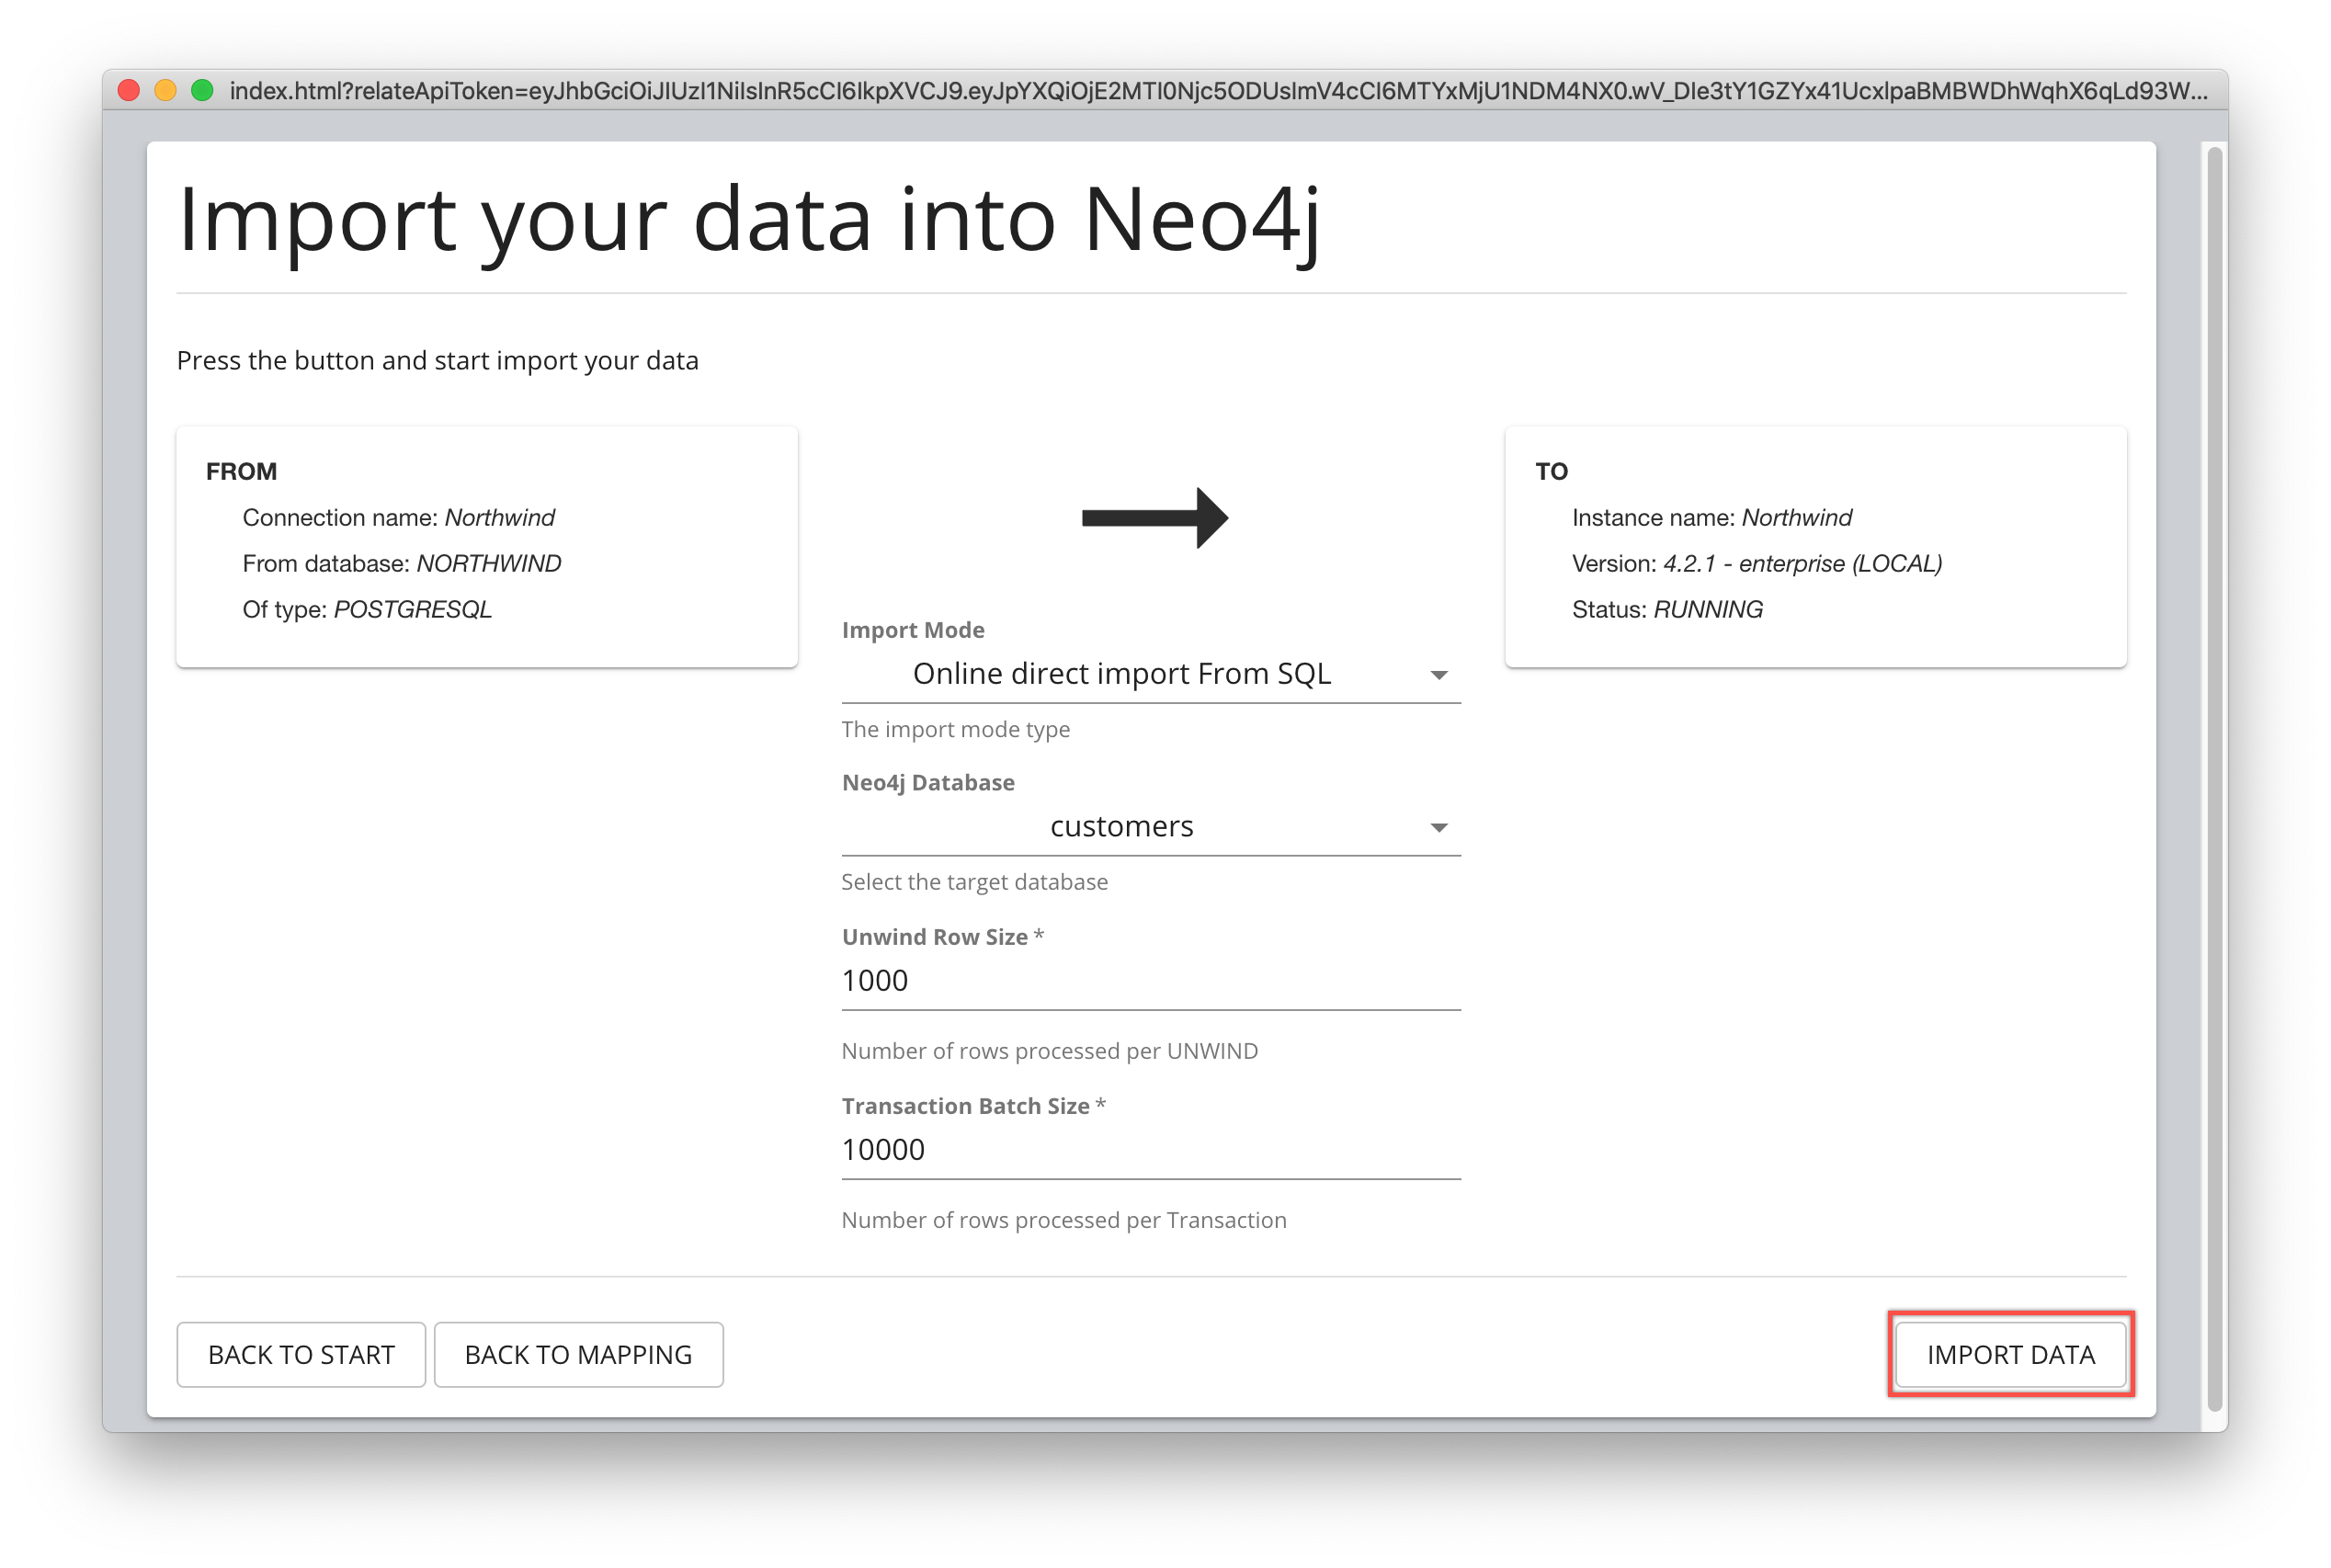
You then click IMPORT DATA to import the data.
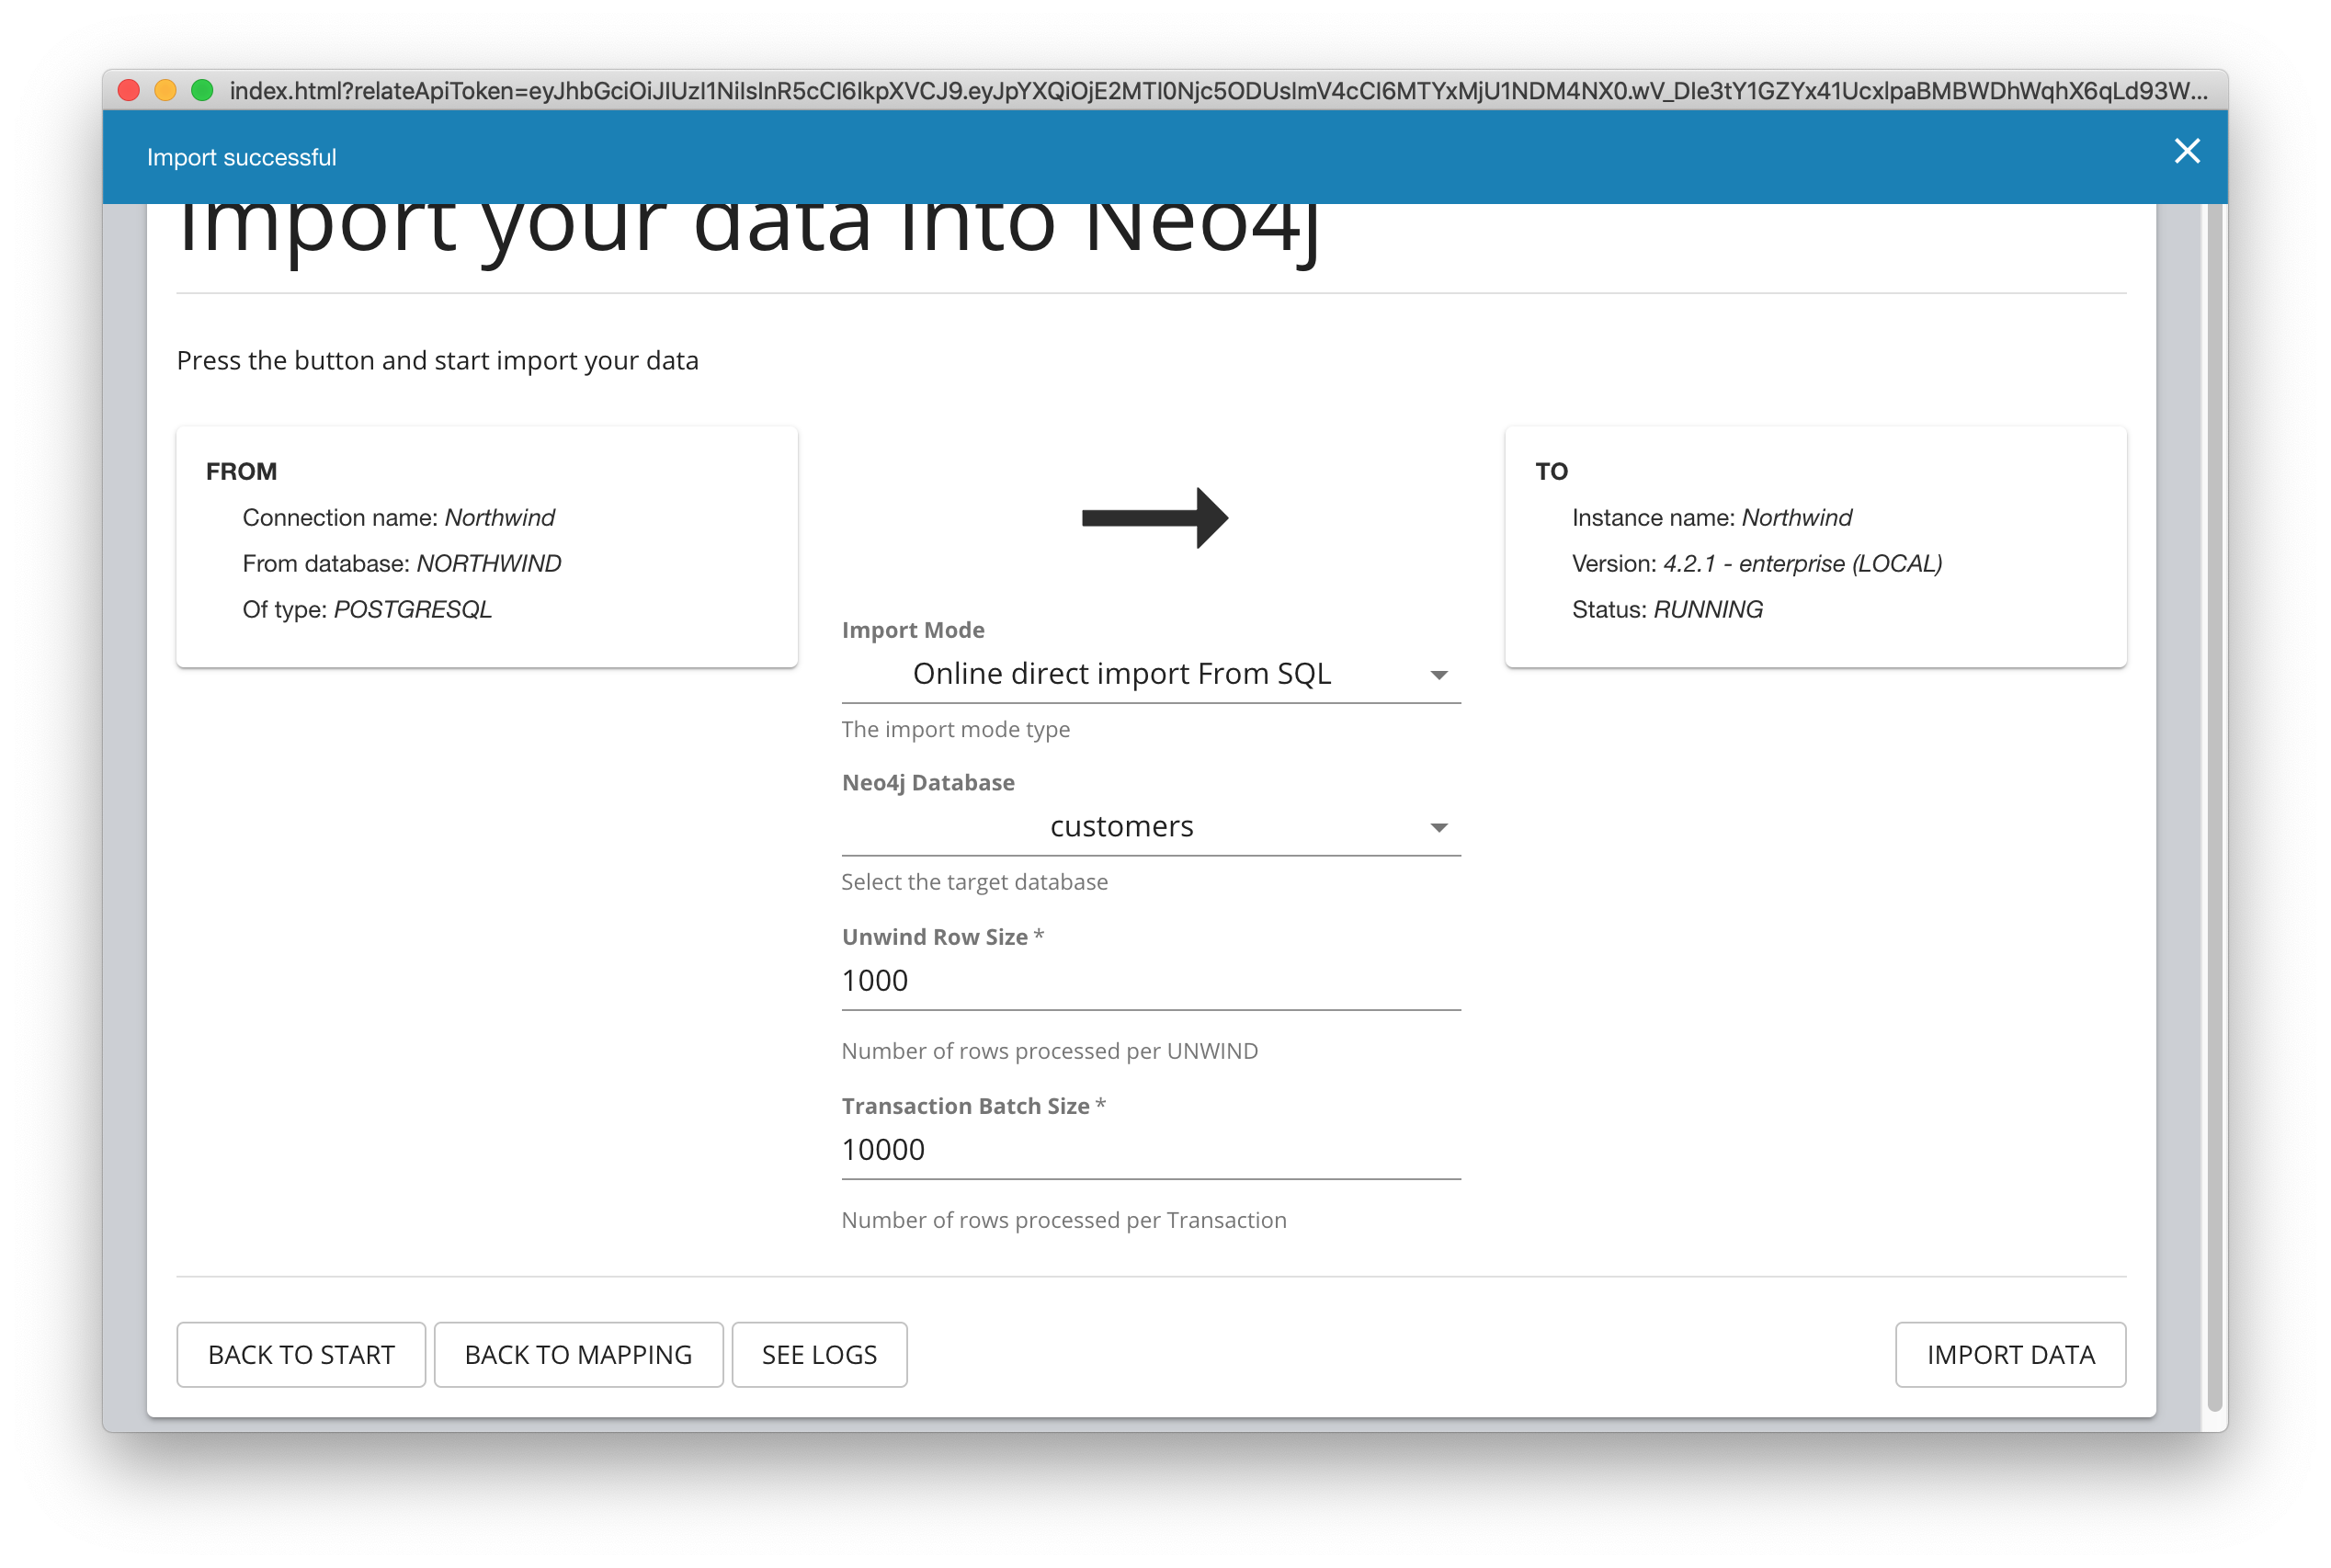
You can also confirm that the data is in the Neo4j database by viewing it in Neo4j Browser.

Check your understanding
Question 1
What type of connection to the RDBMS is used for importing from an RDBMS with the Neo4j ETL Tool?
Select the correct answer.
-
Java
-
ODBC
-
JDBC
-
Bolt
Summary
You can now:
-
Create a connection to a live RDBMS.
-
Customize mappings from the RDBMS to the graph.
-
Import data from the RDBMS to the graph.
Need help? Ask in the Neo4j Community