Securing Your Graph With Neo4j GraphQL

Software Engineer, Neo4j
9 min read

Good day, all.
Allow me to navigate you on a journey through Authentication and Authorization in the land of Neo4j GraphQL.
Bind your acquired knowledge of our GraphQL directive to
Type Definitions, where applied, enables sophisticated auth patterns.
This blog is the written format of my NODES 2021 talk, which you can also watch if you rather do that:
What is Neo4j GraphQL?
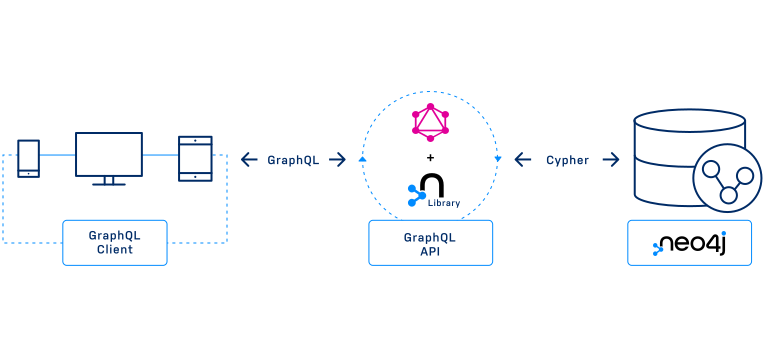
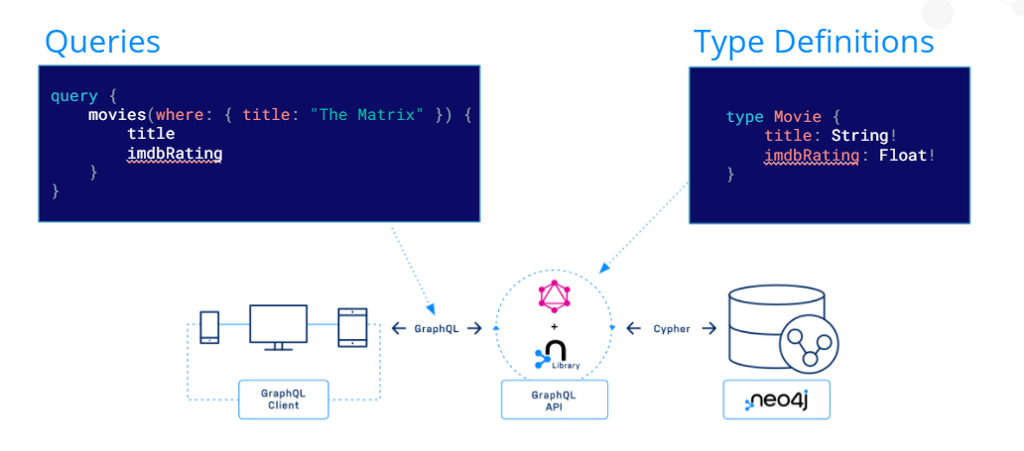
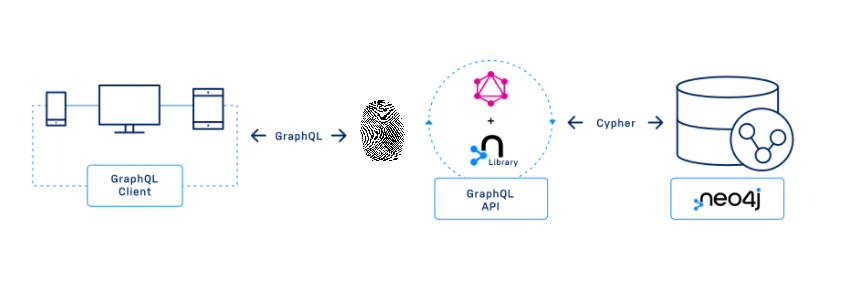
The Neo4j GraphQL Library is a GraphQL to Cypher query execution layer for Neo4j and JavaScript implementations. To use the library, you provide some Type Definitions and it will generate a GraphQL schema. The schema contains CRUD resolvers that produce Cypher and are backed by a Neo4j instance.
Once you have the schema, you can pass it into any compatible JavaScript GraphQL tool, such as Apollo Server, and have a functional API ready for your clients. This means you don’t have to spend time writing repetitive resolvers or logic, thus enabling you to focus on building great applications.
Find out more about the Neo4j GraphQL library here
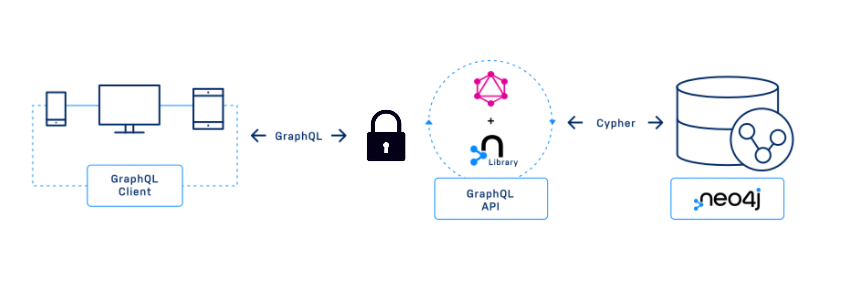
Auth in GraphQL

In GraphQL there isn’t one way of going about auth, and it’s highly dependent on your business requirements and needs. Due to GraphQL being a newer technology, and highly different from REST, lots of patterns need to either be replicated or repeated. There are, however, some really cool GraphQL tools and patterns for auth — though, many can be cumbersome and slow. Most either lead to surplus database calls or extra resolver invocations.
Due to the fact that Neo4j GraphQL aims to produce a single Cypher query from a given GraphQL operation, we wanted to roll our own auth solution so that we could embed rules into the Cypher query. Rolling our own auth means it’s easier for you, as a developer, to get started, plus it increases performance due to the reduction in database calls.
Auth in Neo4j GraphQL
The term “auth” is encapsulating both authentication and authorization. For the most part, you will use our GraphQL directive for authorization, and for authentication, we suggest using the OGM, which you will learn about shortly.
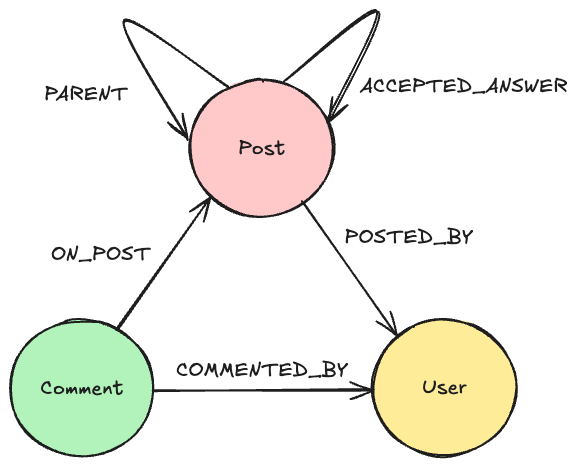
Throughout this blog we will use the following data model:
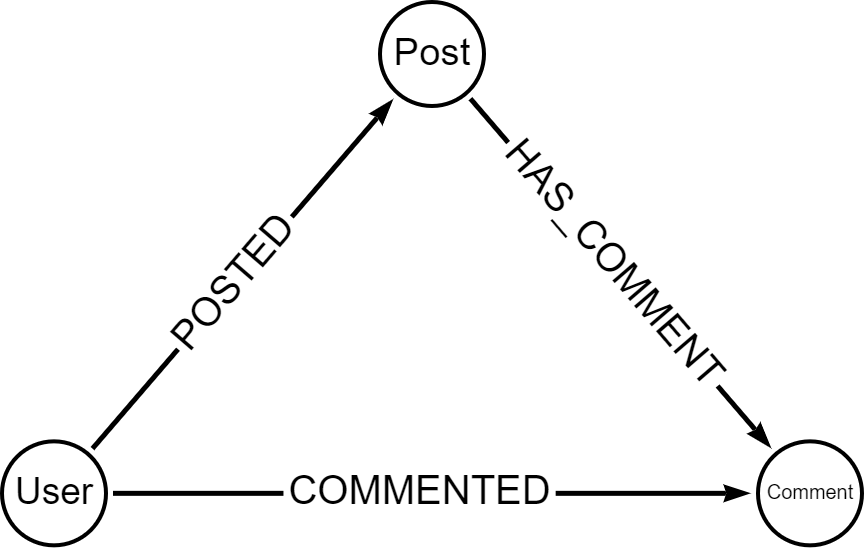
That can be expressed with the following GraphQL type definitions:
The model is arbitrary and I will add and remove fields to this as and when needed.
Authentication in Neo4j GraphQL
JSON Web Tokens
The Neo4j GraphQL library uses JSON web tokens. Below is a JSON representation of an arbitrary token:
Typically you will see the JWT attached to the authorizationheader of an HTTP request:
In the example above, the JWT has been encoded. https://jwt.io/ is a great tool for playing around with JWT’s.
When setting up your Neo4j GraphQL server you should dependency inject the incoming request into the context so we can pick up on the headers:
Injecting the req here allows the Neo4j GraphQL directive to pick up on the authorization header.
Due to the fact the library uses a JSON web token, you can authenticate users however you would like. One may use Auth0, keycloak, okta, or other authorization services.

Here we will use the Neo4j GraphQL OGM to authenticate users using a custom resolver:
OGM
The OGM is a wrapper around the Neo4j GraphQL API. You use the OGM by supplying some GraphQL Type Definitions, the same ones as your API, and out comes a class instance with lots of methods. Each method you invoke will call the relevant GraphQL query or mutation, and thus when invoked, Cypher will be produced and executed.
Below is an example of setting up the Neo4j GraphQL OGM:
Above, you can see we invoke the .model() method on the OGM. For each type in your definitions, you can receive a model. In our schema we would have access to all three: User, Comment, and Post models. Using a model, you can call the following methods:
Each method will call the GraphQL API and fundamentally interact with your Neo4j database.
With this knowledge of the OGM, below we will use it to sign in users. Here I define a custom mutation signIn in our GraphQL schema:
Then I create a function called signIn and pass it into the Neo4j GraphQL library as a resolver:
Finally, now users of your API can invoke that mutation by performing:
The returned value would be the JWT. With this token, you should append it to the header of the request. Here is a simplified fetch example of appending this header:
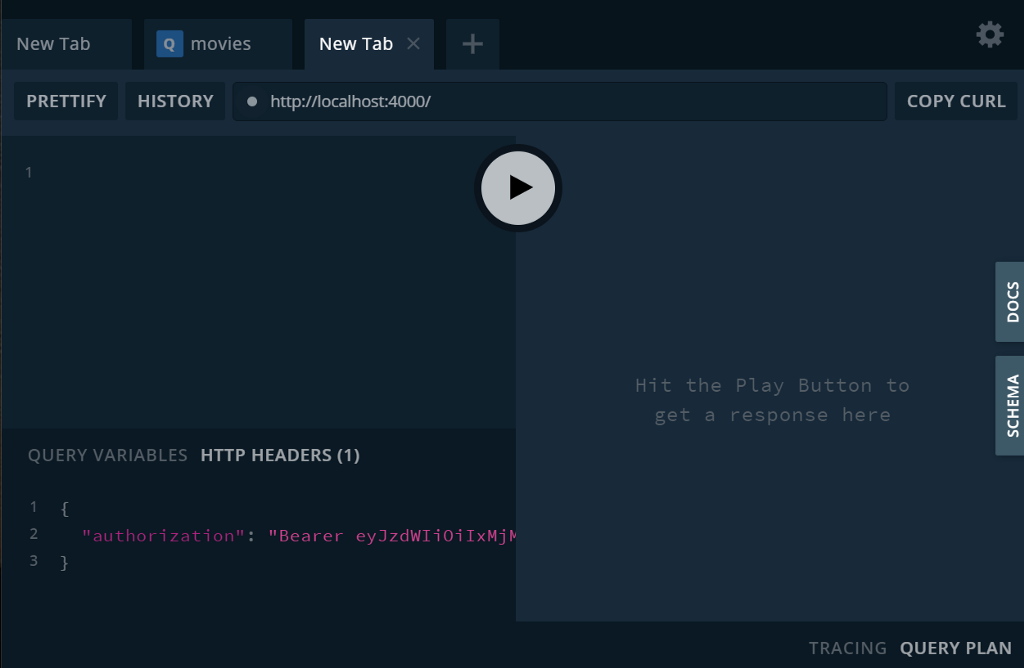
When in development, you can append this JWT in the headers section of GraphQL playground:
This was an example of using the .find() method on a Model. You could, however, use the OGM for a signup method where you use the .create() method.
Authorization in Neo4j GraphQL
Now that we know how to use the OGM to sign in users and return a JWT, in this section we can dive deeper into the auth directive. However, just before we dive deep into authorization let’s use a simple example to ease our way into this. In our application, we want to make sure that only signed-in users can create a post:
Here is your first introduction to the auth directive. The directive can be used on Type definitions, as seen above, and or on fields. Each auth directive must have an array of rules where each rule is evaluated inside a logical OR. The isAuthenticated key is enforcing that there is a valid JWT in the request headers.
Operations
In the first example, above, when using the auth directive you may have noticed the usage of the operations key. It does what it says on the tin and only applies the rule on that operation. The full list of operations are shown in the example below:
Often you will want to specify all the operations, and so if you don’t specify any operations all of them will be applied:
It’s worth noting that by default your APIs are insecure from all angles. When deploying to production you should ensure that each and every operation is covered.
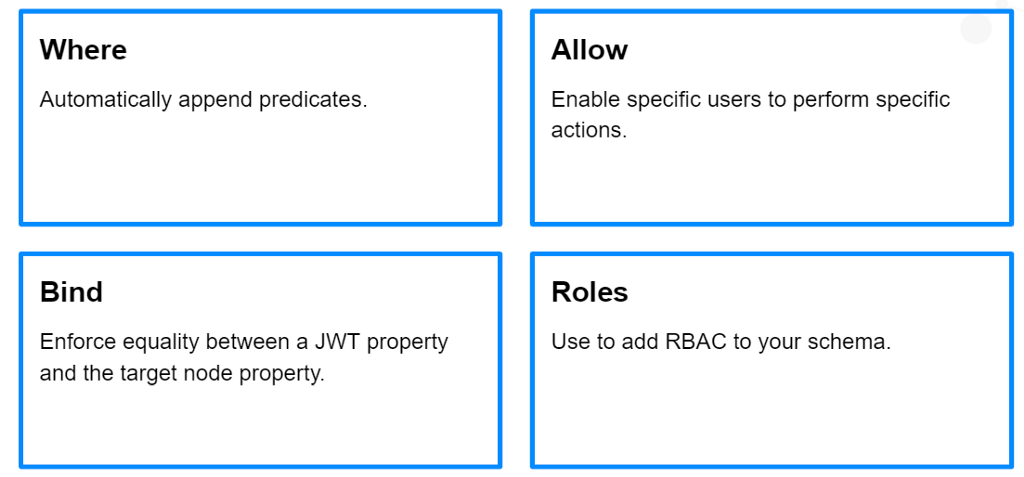
Where
Automatically append predicates
Briefly, we have seen how to use the auth directive to ensure that authenticated users can create a post. However, what about finer-grained auth rules? In the example below, we have Bob and Jane both creating many posts. The catch is that each post is private and hypothetically there are no public posts:

Given this example, we would like to ensure that Bob can’t interact with any of Jane’s posts and that Jane has the same restrictions on Bob’s posts.
First, notice how we have used extend here. Using extend is helpful when dealing with larger schemas and auth rules. For the rest of this blog, I will use extend.
You see that we have used the where key. This key is used to specify an equality predicate between the creator’s id and the JWT sub property. Normally without the where rule, applied users could query the API for users:
This would produce the Cypher statement:
However, with the where rule applied, and if applicable, the generated Cypher would be:
Using where will get you off to a great start, although it’s rather restrictive and would be hard to enable other interactions by anyone other than the creator themself. Read on to learn more about allow, bind, and roles where applied will enable you to express even finer-grained rules.
Allow
Enable specific users to perform specific actions.
For most use cases you will find yourself using allow. It enforces things! Here we have Jane, who is a troll, commenting on Bob’s post. How can we allow Bob to delete Jane’s comment?

First, let’s look at how we can enable Bob to delete his own comments:
Allow, in Cypher, will add a validate check just after matching a node. For this example, inside the check is a predicate that ensures the comment creator id is equal to the JWT.sub property, and if not throws out of the transaction.
Now we have enabled Bob to delete his own comments, let’s use OR logic to enable the post creator too:
Notice the nested traversal of the post creator.
Bind
Enforce equality between a JWT property and the target node property.
bind can be used in tandem with allow, and some may ask what’s the difference? allow enables the ability to perform an action, whereas bind enforces that patterns, on upsert, exist. Below is an example where we would want to enforce a pattern. Bob has posted for Jane, and this is something we don’t want:
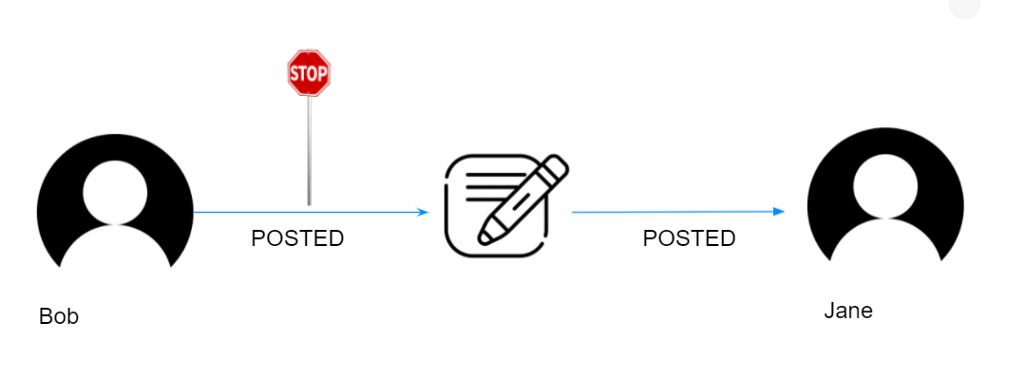
We can use bind on create operations so that when Bob tries to create a bog for Jane the transaction fails:
As well as allow, bind uses a validate check, however bind validation is done after the operation.
Roles
Use to add RBAC (role based access control) to your schema.
This is the last key we‘re’ going to dive into. You may have roles in your JWT claims, and you want to enable someone with a particular role to do something. Here we have a hypothetical recoveryCode on our user node, and not only are we putting auth on the field, but using OR logic to enable either the user themself or an admin:
Recap
Not only have we dived into all of the keys in the auth directive, but we also learned how to authenticate using our understanding of the OGM. The techniques used in this blog will enable you to build production-ready Neo4j GraphQL APIs. What are you waiting for?
Learn More About Neo4j GraphQL
Neo4j GraphQL Library is available today via npm.
We are Hiring

Links
Securing Your Graph With Neo4j GraphQL was originally published in Neo4j Developer Blog on Medium, where people are continuing the conversation by highlighting and responding to this story.
Share Article


Explore
Related Articles


How to Improve Multi-Hop Reasoning With Knowledge Graphs and LLMs