How to Set Up and Redeem Your Neo4j Startup Program Credits

Solutions Engineer, Neo4j.
4 min read
You’ve been accepted into the Neo4j Startup Program, congrats. This guide walks through the handful of steps between “approved” and “credits are live on my account,” since this is where most of the questions we hear come from.
What happens after you’re approved
Once your application is approved, you’ll get an email with your credit amount and next steps. That email is the only automatic part of the process; everything after it requires a couple of actions on your end before credits land on your account. If it’s been a while since you applied and nothing seems to have happened, it’s almost always because one of the steps below hasn’t been completed yet.
Here’s the whole flow at a glance, before we walk through each step in detail:
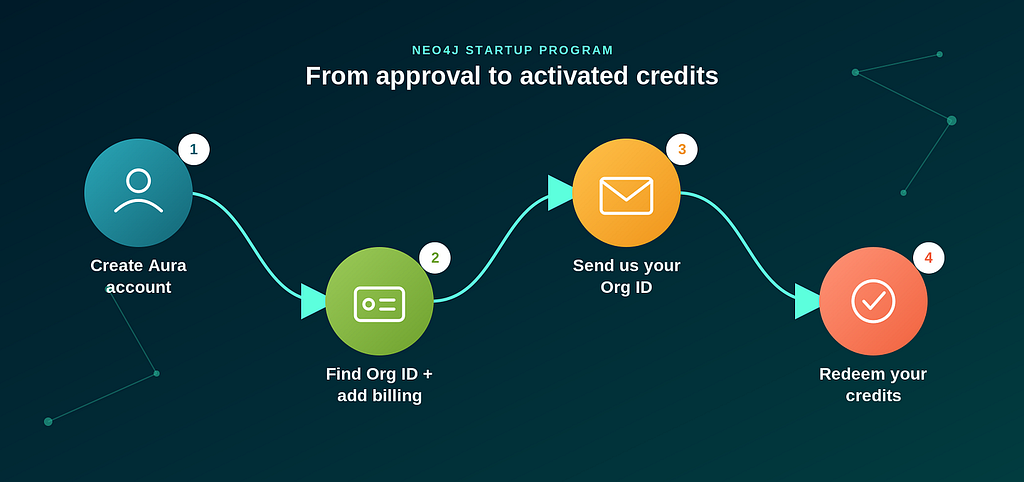
Step 1 : Creating your Aura account
Sign in or create a free account at console.neo4j.io. This is the account your credits will be applied to.
One thing worth knowing up front: sign up directly through the Aura Console rather than through a cloud marketplace listing. You can still pick whichever cloud provider and region you need (AWS, GCP, or Azure) during direct sign-up.
Step 2.1 : Finding your Organization ID
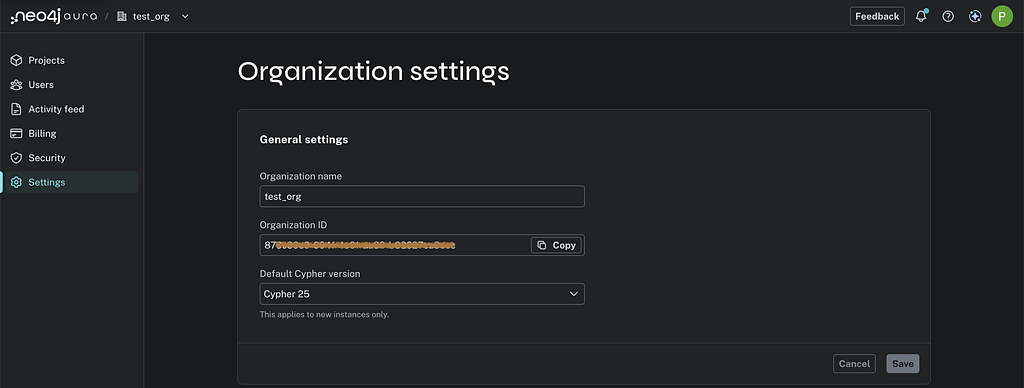
- In the Aura Console, click your Organization Name in the top-left corner, next to the Neo4j logo.
- Go to Settings in the left-hand menu.
- Under General settings, copy the code next to Organization ID.
Step 2.2 : Adding a billing method
A payment method is required to release the credits, but you won’t be charged unless the credits are fully used, which typically takes about 12 months. Add this from the Billing section of your Organization Details page.
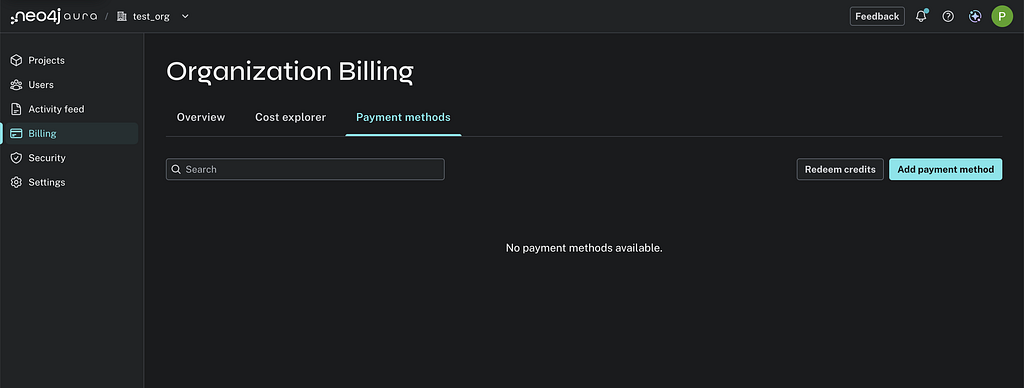
Go to Billing in the left-hand menu, then the Payment methods tab. If nothing’s been added yet, you’ll see “No payment methods available”; click Add payment method in the top right.
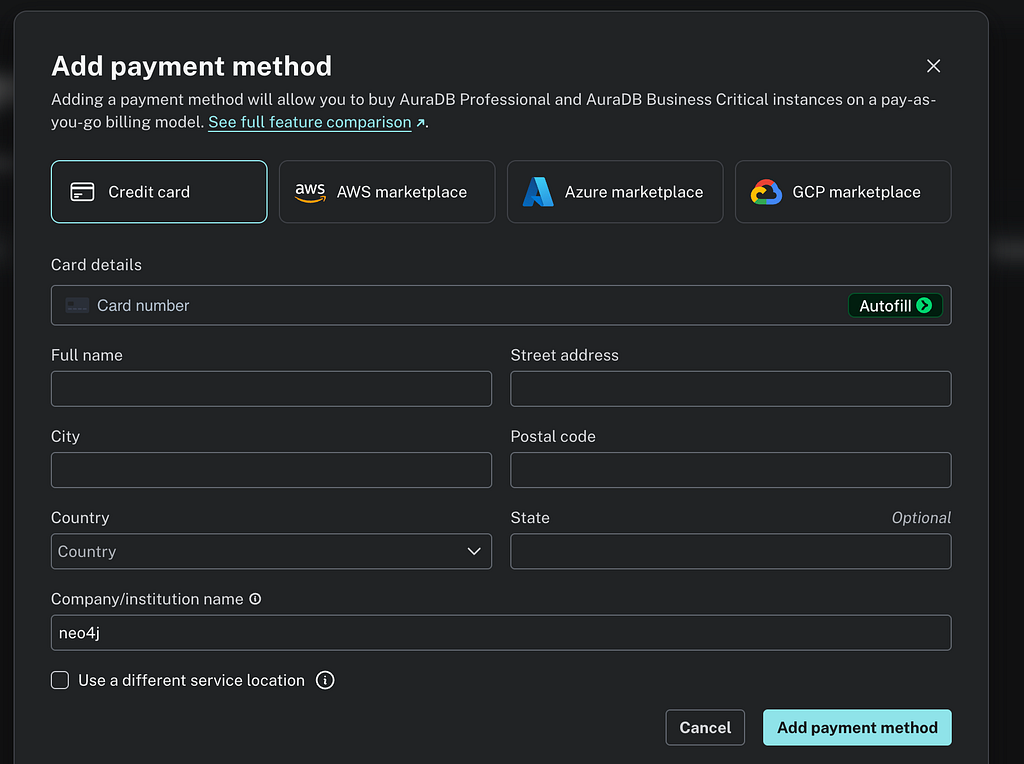
You can pay with a credit card, or through AWS, Azure, or GCP Marketplace billing if you’d rather it show up on your existing cloud bill. Whichever you choose, you’ll fill in your card or billing details and an address before it’s added.
Step 3 : Submitting your confirmation
Once you have your Organization ID send it to [email protected]. This is the step that actually kicks things off on our end; nothing gets applied automatically just because you were approved. Once we have your Organization ID, you’ll get an activation code by email.
Step 4 : Redeeming your credits
Your activation code arrives via email
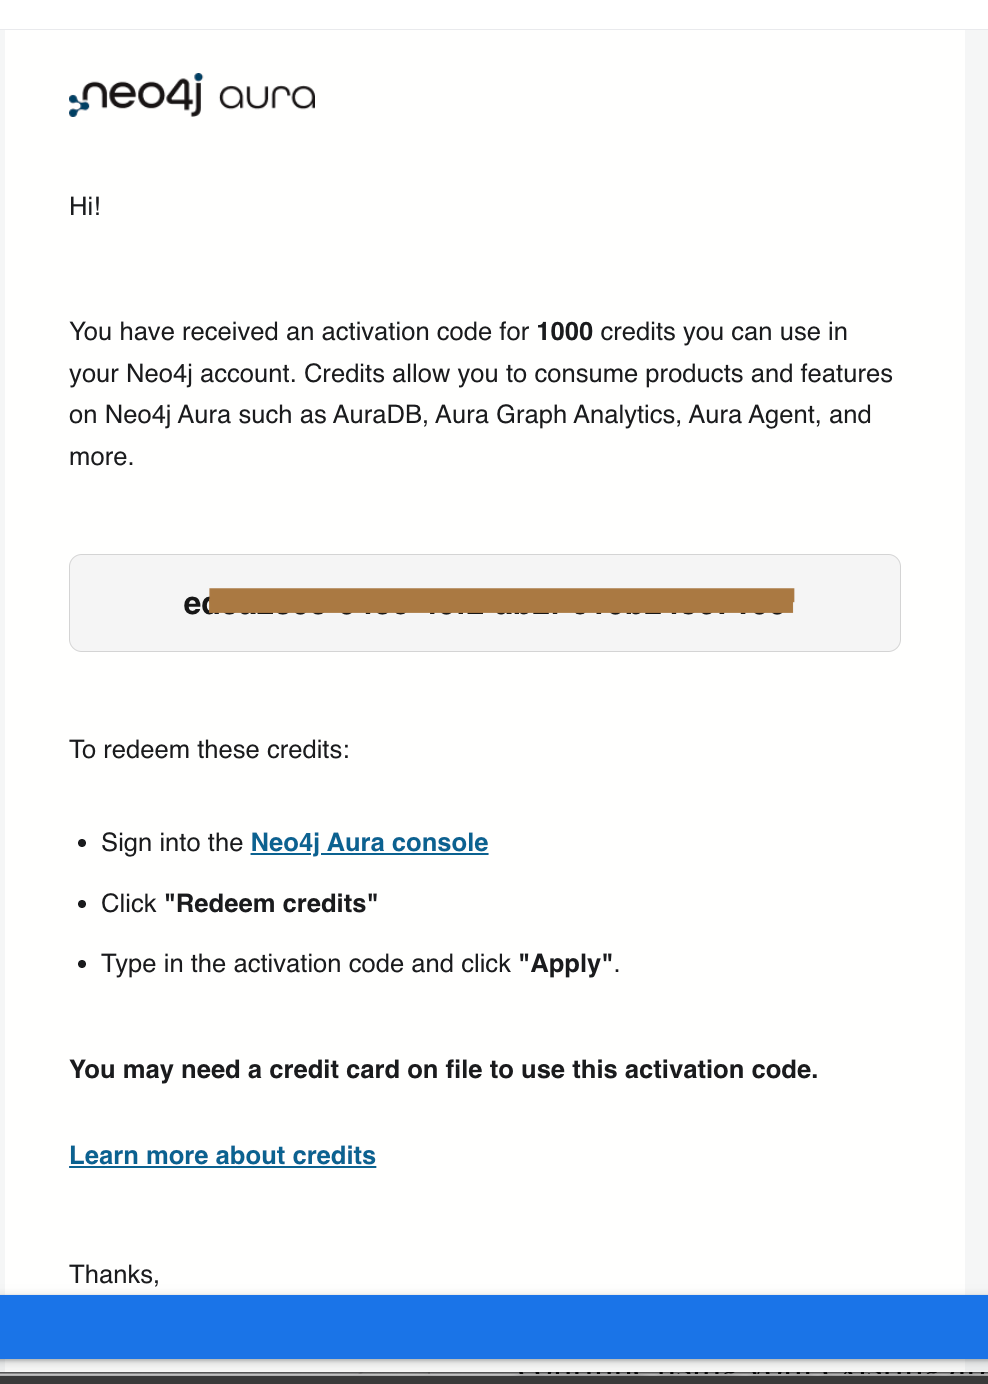
Redeeming it takes three steps:
- Sign into the Aura Console.
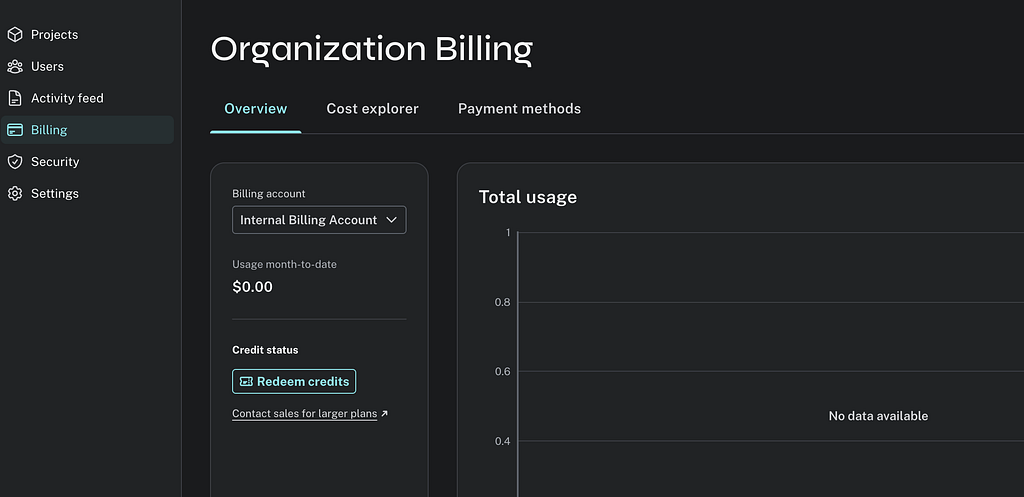
- On the Billing page’s Payment methods tab (the same one from above), click Redeem credits.
- Paste in the activation code and click Apply.
Frequently asked questions
How long do I have before my credits expire? The 12-month clock starts when your credit record is created, which happens after you submit your Organization ID, not at the point of approval. If you haven’t sent your Organization ID yet, your clock hasn’t started. Staying inactive for 10 business days (14 calendar days) may require reapplying.
Can I get more than the initial credit amount? The initial activation is a fixed amount, but higher tiers unlock with investor verification; either confirmation from your VC/investor partner, or a public announcement like a funding press release. Reach out to [email protected] if you think you qualify.
Our company rebranded, what do we do? You can generally continue using your existing approved application under the original name; no need to reapply. One catch: credit-related notifications (usage warnings, expiry alerts) keep going to the original applicant email on file. If that email’s still active, you’re fine as is. If not, it’s safer to reapply under the new name so you don’t miss anything important.
Two people at my company applied separately, now what? Only one application can be activated per company. If this might be you, let us know at [email protected] before activating, so we can sort out which application to use and avoid any billing mix-ups.
That’s it: four steps between “approved” and a running database with your credits applied. If you get stuck anywhere along the way, or your situation doesn’t match any of the questions above, reach out to [email protected] and we’ll sort it out.
Share Article



Explore
Related Articles

From memory to behavior: skills, user profiles, and the consolidation loop

Massive Parallel Imports in Neo4j Without Deadlock and Lock Contention
Auditing AWS infrastructure with Neo4j: questions inventory cannot answer