Kinesis is a powerful AWS suite for managing video and data streams. In this article we will see how to read a Kinesis Data Stream from Apache Spark into Neo4j, leveraging the Spark Structured Streaming API and the Neo4j Connector for Apache Spark.

Our Goal
Let’s say we are event organizers, and we have devices tracking attendees check-ins time at each event and sending them to Kinesis. We then want to save this check-in stream to Neo4j for applying some GDS algorithms in a later stage.
Let’s Get Ready!
We will get into the code later, we need to first setup our environment. Let’s see which steps we have to take in order to get to our goal. Note that if you have any of these already, you can skip to the next one:
- Signup for an AWS account
- Setup a IAM User
- Setup AWS Kinesis Data Stream
- Setup Kinesis Data Generator (requires a Cognito User Pool)
- Clone the Neo4j Spark Connector Notebooks repository
- Connect the code with your IAM User
- Watch the magic happen!
Depending on your experience with AWS, the setup part could be more or less tricky; for me it was extremely tricky.
Note: if you already have a Kinesis stream setup, you can jump straight to the “Neo4j and Spark: the missing pieces” section!
AWS Account
Well I think we first need an AWS Account. You can register here. It will probably ask you to add a payment method; you might be billed depending on how many data you stream and read from Kinesis. Here’s the billing policies for Kinesis. Just to give you an idea, I heavily streamed data for 3 days straight for preparing the code and I got billed less than 2 dollars.
A more detailed guide on how to setup an AWS account can be found here.
IAM User for the Consumer
We need to create an IAM User for the Spark consumer we are going to use to read from the stream. Here’s what I did:
I created an IAM Group called Kinesis with these policies.
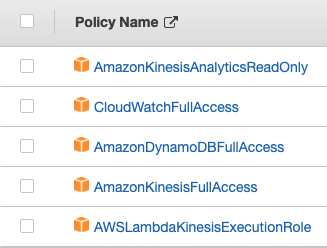
Please be sure that your group matches my exact policies, or you might encounter some issues in later stages.
After this, proceed to create a IAM User with programmatic access only:
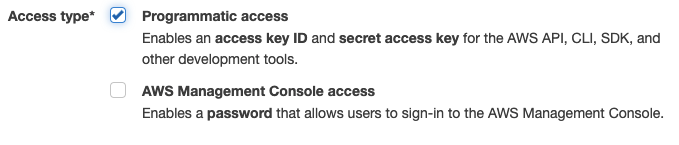
In the next step, link the user to the Kinesis group you just created.
The following step asks for any tags to add to the user, I put none, feel free to add some if you want, it doesn’t matter for this demo.
Once the user is created you’ll be shown the Access key ID and the Secret access key. Save them now! You’ll need them later.
AWS Kinesis Data Stream
Kinesis offers a few products, what we’ll be focusing on today is Kinesis Data Stream; go to your AWS Console and search for “kinesis” in the search bar, or go to this link.
One important note before moving on: always remember to check for the correct AWS Region, or you might have some difficulties. For this demo I’ll be using the eu-central-1, but you are free to use whichever you prefer.
From here you should see a “Create Data Stream” button, click on that.
To set up our stream we only need two things: the stream name, and the number of shards. We’ll use Kinesis2Neo4j as stream name and 1 as number of shards.
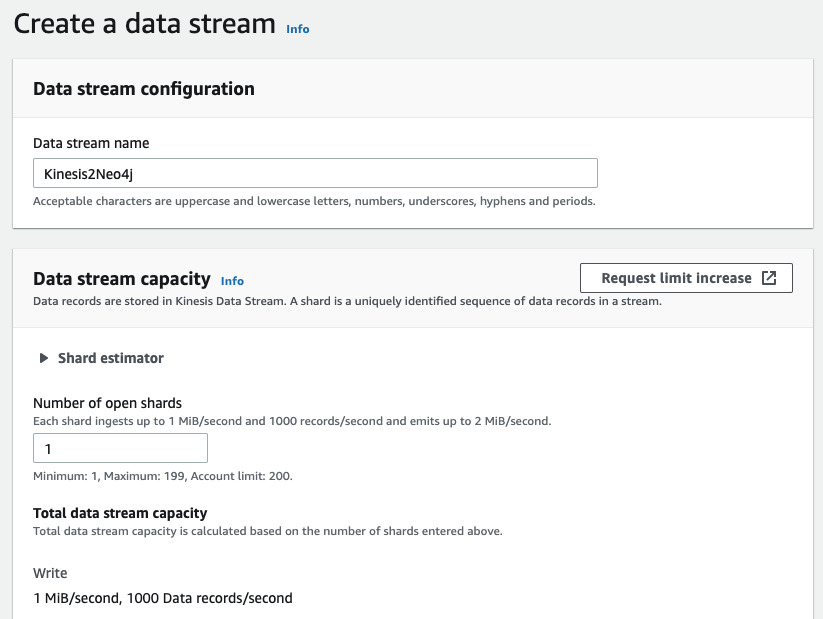
More info on creating a data stream can be found here.
Amazon Kinesis Data Generator
The Kinesis Data Generator (KDG from now on) is a random data generator for Kinesis, that will help us send dummy data to the stream. The random data are generated by the Faker.js library and it can be configured to send any text format (XML, CSV, Json, etc…).
Let’s go to the KDG homepage. To be able to use the KDG we need to sign in with a Cognito user. If you already have a Cognito user, skip this section.
If you don’t have a Cognito Pool set up, click the Help link on the KDG homepage; you can read the initial paragraphs if you want to understand what’s about to happen, but what you really need to do is clicking on the big blue button “Create a Cognito User with CloudFormation” you can find scrolling down a bit.

Click it and follow the instructions. The first part of this article describes the process in more detail. Again, be sure to use the same AWS Region!
At the end of the process, you should end up with something like this:

Click on the link in the Value column, you’ll get redirected to the KDG homepage (I suggest to bookmark this link), login with the user and password you just created, and you should be seeing this:
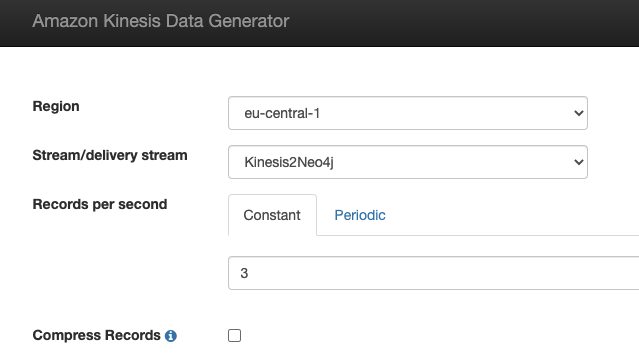
Select the region where you created the Kinesis Data Stream, and the stream name will appear in the select box below.
Set as many records per second as you want, for now I will set 3, but feel free to increase it. This number tells the KDG how many records will be sent to the stream each second. Remember that the more data you stream, the higher chance of getting billed by AWS.
Down, in the Record Template section, paste this template:
{
    "user_name": "{{name.firstName}} {{name.lastName}}",
    "event_name": "{{random.arrayElement(
      ["My Fairy Fair", "Euro 2020 Final", "Nodes2022"]
    )}}",
    "user_checkin_time": {{date.now("X")}}
}
What you see between double curly braces is a Faker template, the content will be replaced with the value returned by the function; if you click on “Test Template” you can see it in action:
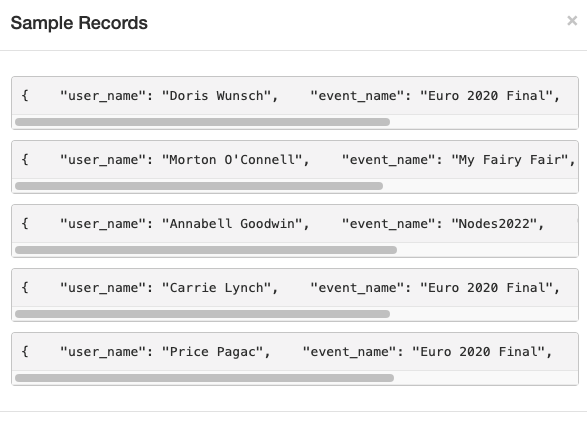
Later on we will click on the “Send data” button to start streaming the data on Kinesis, but for now just leave this browser tab open.
So, it looks like we are done with the setup!
Neo4j and Spark: The Missing Pieces
Ok, now some serious business. First of all, clone this repository that contains some Apache Zeppelin notebooks you can use to play with Spark and Neo4j. Everything runs on Docker so if you don’t have it on your machine please look here.
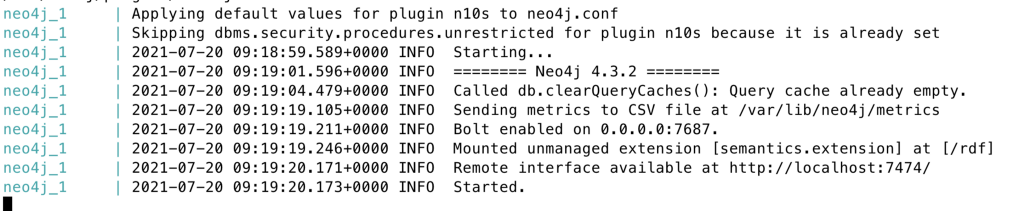
To start the environment just run docker-compose up and wait for everything to be ready:
When everything is up and running, open https://localhost:8080 for the Zeppelin interface, and open the notebook located in Streaming / From Kinesis to Neo4j (https://localhost:8080/#/notebook/2GAXPN2BH).
At https://localhost:7474 you have access to Neo4j Browser, you can login using neo4j as user and password as password.
Spark
Now let’s see the different cells and comment on them.
A quick but interesting note: the following bits of code are applicable to basically any streaming service you are using as source. The only critical information here are the Kinesis specific options (endpointUrl, AWS access keys) and the Dataframe transformation we will see in a later cell. The pattern would stay the same.
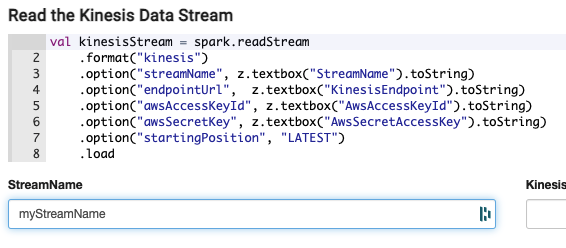
val kinesisStream = spark.readStream
  .format("kinesis")
  .option("streamName", z.textbox("StreamName").toString)
  .option("endpointUrl",  z.textbox("KinesisEndpoint").toString)
  .option("awsAccessKeyId", z.textbox("AwsAccessKeyId").toString)
  .option("awsSecretKey", z.textbox("AwsSecretAccessKey").toString)
  .option("startingPosition", "LATEST")
  .load
z.textbox is a Zeppelin utility that creates a text box under the cell where you can put your parameters, like this:
The required parameters are:
streamNameis the name of the Kinesis Stream you set when creating it- The
endpointUrlcan be found here - The
awsAccessKeyIdand theawsSecretKeywe saved earlier when creating the IAM User
The startingPosition option tells Kinesis which data we want to start reading from, in our case we want just the data streamed from when we started reading.
We are ready to read the Kinesis Data Stream from Apache Spark, to do so we use the Kinesis Connector for Structured Streaming, a package that allow us to easily leverage the Apache Spark Structured Streaming API .
We now have a Streaming DataFrame that contains all the data coming from Kinesis, and it have this schema:
kinesisStream.printSchema
root
 |-- data: binary (nullable = true)
 |-- streamName: string (nullable = true)
 |-- partitionKey: string (nullable = true)
 |-- sequenceNumber: string (nullable = true)
 |-- approximateArrivalTimestamp: timestamp (nullable = true)
We just need the data field that contains our randomly generated JSON from the KDG, but since it comes in binary format we have to convert it to string first, and then decode it to JSON using the from_json Spark function. This function requires a string to be decoded as first parameter and a StructType as second parameter, that represents the Schema of the JSON being created.
This is our schema:
val kinesisStreamDataSchema = StructType(Seq(
  StructField("user_name", DataTypes.StringType, nullable = false),
  StructField("user_checkin_time", DataTypes.TimestampType, nullable = false),
  StructField("event_name", DataTypes.StringType, nullable = false),
))
And this is our Spark DataFrame transformation:
val kinesisData = kinesisStream
  .selectExpr("CAST(data AS STRING)").as[String]
  .withColumn(
    "jsonData",
    from_json(col("data"), kinesisStreamDataSchema)
  )
  .select("jsonData.*")
We now end up with a Streaming DataFrame with 3 columns:
kinesisData.printSchema
root
 |-- user_name: string (nullable = true)
 |-- user_checkin_time: timestamp (nullable = true)
 |-- event_name: string (nullable = true)
What do we want to do with this? We want to write these 3 columns to Neo4j in a way that allows us to have nodes of type Attendee connected with a CHECKED_IN relationship to nodes of type Event. This would be the schema:
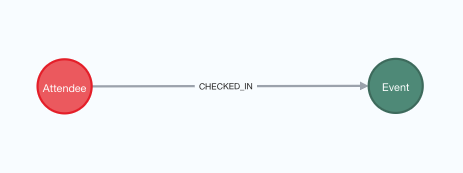
The attendee will have a property name, the event will have a property name as well, and the relationship will have a property at containing the timestamp the attendee checked in at the event.
The time has come, brace yourself and prepare to dive into the code that will make the magic happen! To write the Kinesis Stream in Neo4j we will use the Neo4j Connector for Apache Spark, the official package to leverage the powerful features of Neo4j directly from Apache Spark.
First the code, that can be a bit scary first but don’t worry because I will explain it in detail:
val kinesisQuery = kinesisData
  .writeStream
  .format("org.neo4j.spark.DataSource")
  // connection options
  .option("url", "bolt://localhost:7687")
  .option("authentication.type", "basic")
  .option("authentication.basic.username", "neo4j")
  .option("authentication.basic.password", "password")
  .option("checkpointLocation", "/tmp/kinesis2Neo4jCheckpoint")
  // end connection options
  .option("save.mode", "Append")
  .option("relationship", "CHECKED_IN")
  .option("relationship.save.strategy", "keys")
  .option("relationship.properties", "user_checkin_time:at")
  .option("relationship.source.labels", ":Attendee")
  .option("relationship.source.save.mode", "Overwrite")
  .option("relationship.source.node.keys", "user_name:name")
  .option("relationship.target.labels", ":Event")
  .option("relationship.target.save.mode", "Overwrite")
  .option("relationship.target.node.keys", "event_name:name")
  .start()
The first part is nothing more than connection options. We also need to specify the checkpoint files location.
What’s happening in the second part? First of all, we will write using the relationship mode, and via the save.mode = Append option we are telling the connector to use the MERGE keyword when writing the relationship. relationship.save.strategy = keys means we want to specify the merging keys manually.
That’s what we are doing with relationship.source.node.keys and relationship.target.node.keys where we specify which column of our DataFrame should be mapped to which property on the node. The labels of the nodes to be written are specified via the relationship.source.labels and relationship.target.labels. We use Overwrite save mode for both source and target nodes, in this way we will be merging Attendee and Event nodes based on their name property.
That code will generate a Cypher query similar to this:
MERGE (a:Attendee {name: df.user_name})
MERGE (e:Event {name: df.event_name})
MERGE (a)-[rel:CHECKED_IN]->(e)
SET rel.at = df.user_checkin_time
Let’s Give It a Shot!
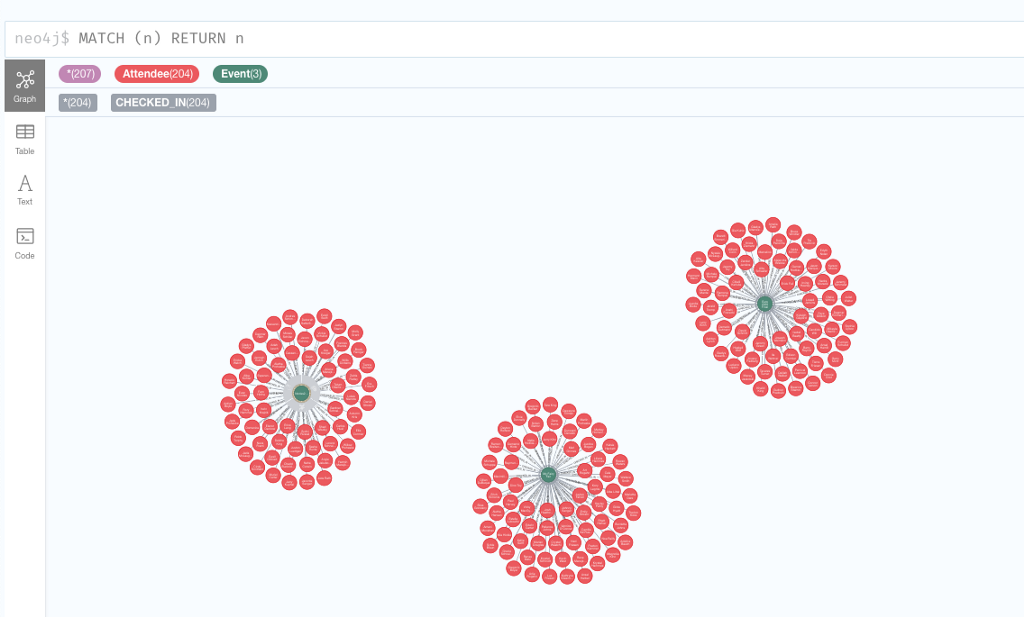
Now that we have the KDG ready to start streaming and our Docker Neo4j instance up and running, we just need to execute the code cells in the notebook, go back to the KDG tab, and press the Send data button; after a few seconds you can stop the generator (so we don’t waste AWS resources), go to Neo4j Browser and run MATCH (n) RETURN n to see what happened!
Conclusion
Apart from the initial AWS configuration, we saw how easy it is to write your Kinesis stream into Neo4j using just a few lines of Spark code. This is obviously an easy example, but what could change it’s really just how you want to write the data in Neo4j.
I hope you enjoyed the walkthrough, if you have any questions you can open an issue on the repository or reach out to me via Twitter.
If you want to know more on how to write any Spark DataFrame into Neo4j check out the Neo4j Connector for Apache Spark official documentation.
(from:Kinesis)-[:VIA_SPARK]->(to:Neo4j) was originally published in Neo4j Developer Blog on Medium, where people are continuing the conversation by highlighting and responding to this story.