Quick startPreview
AuraDB Free AuraDB Professional AuraDB Business Critical
|
This feature is in preview and is offered AS-IS and should only be used for internal development purposes and not in production. |
In short, the process for importing unstructured data into a knowledge graph consists of five steps:
-
Provide the data
-
Generate a data model
-
Refine the model
-
Fix model errors
-
Run the import
You need to have a running Aura instance available, currently Document Intelligence supports the Free, Professional, and Business Critical tiers.
|
Document Intelligence uses generative AI assistance and this usage can be disabled on the Organization level. See Visual tour → Organization settings. |
Provide the data
This quick start uses local files, see Data provision for more information and other options.
Navigate to the Graph model tab and select Create graph model.
In the data source panel on the left, use the Add data source dropdown and select Local files. When you provide local files, these are uploaded to a temporary cloud bucket, and if you reload the page before you run the import, you may need to add the file(s) again.
You can add up to 20 documents.
Generate initial graph data model
It is recommended to have a running instance for this step, but not strictly necessary until your run the import. Note that if your instance is an AuraDB Professional or AuraDB Business Critical, you need to have Tool authentication with Aura user enabled for your Project. Once your data source has been added, use Create graph model to move to the next step in the process.
If you have any additional context about your documents, you can add a prompt to describe the data. It is recommended to provide as much information as possible in order for the graph model to be useful. This step is optional, and regardless of whether you add a prompt or not, continue the generation process with the Save button.
The system identifies the node labels and relationship types present in your files and depending on the size of your files, this process can take a moment.
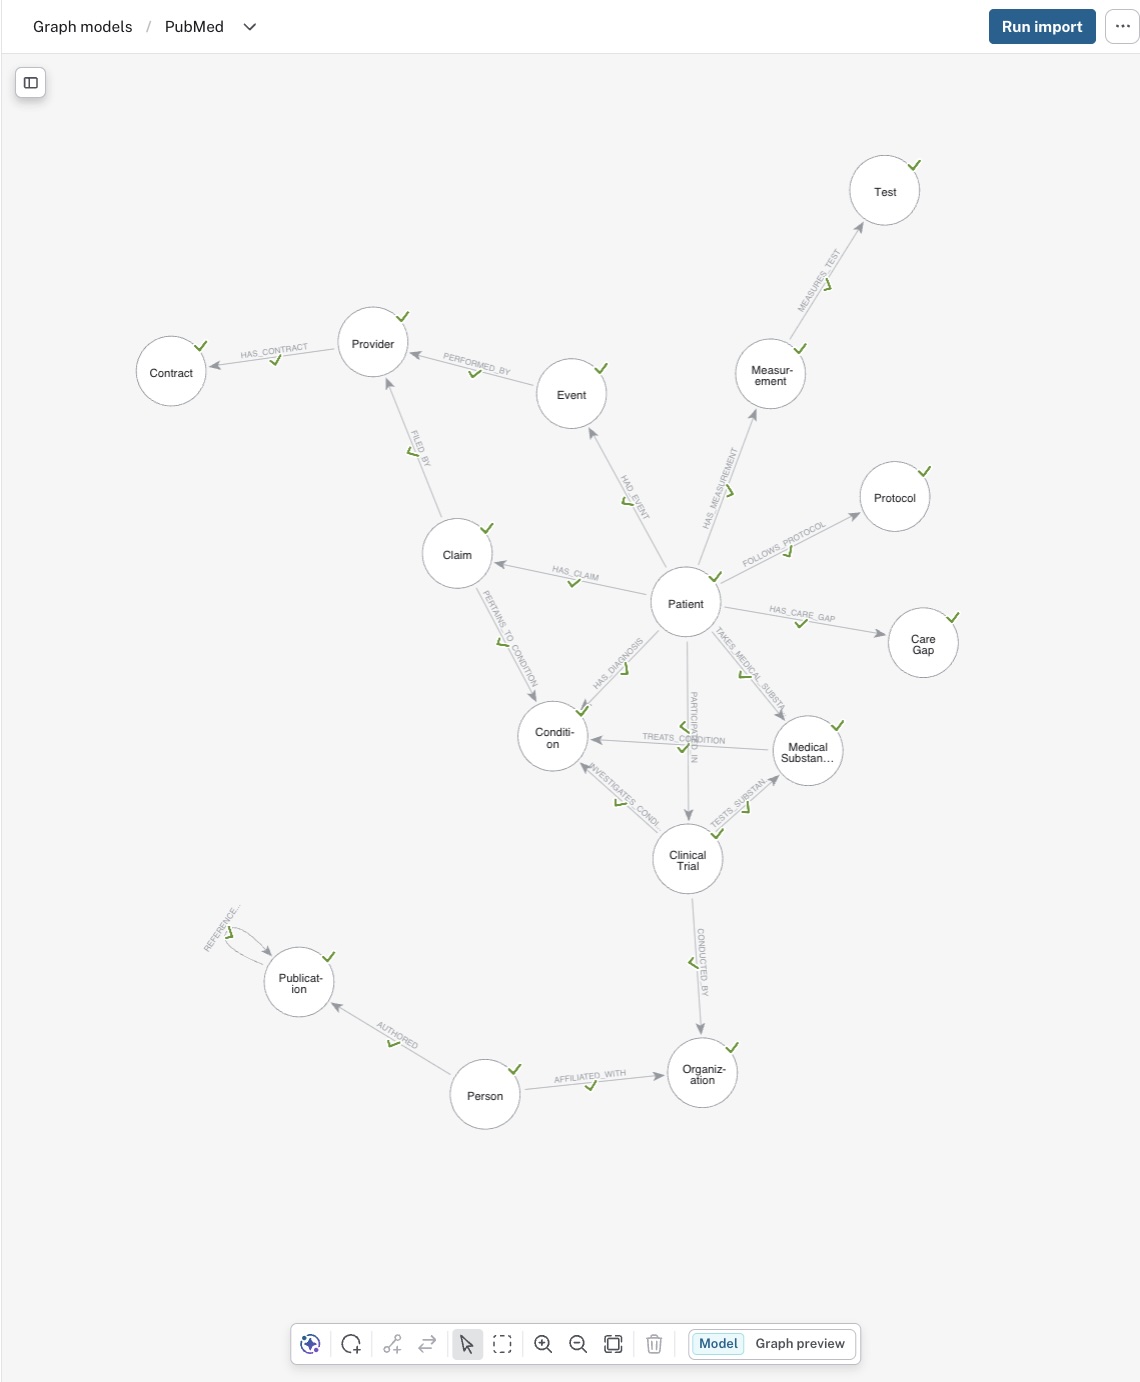
Once done, an interactive model is displayed in the data model panel. It contains the identified different node labels and relationship types.
This model is a proposal and you can keep it as it is or you can refine it.
Refine graph model
The proposed model can be refined manually or with the AI assistant.
Once you select a node or relationship in the model, the details panel opens up. You can edit definitions, add or modify properties, create indexes, and review existing constraints.
Additionally, you can use the tools in the tool bar on the bottom of the canvas to add new nodes, relationships or reverse relationship direction.

Refine with the Document Intelligence Agent
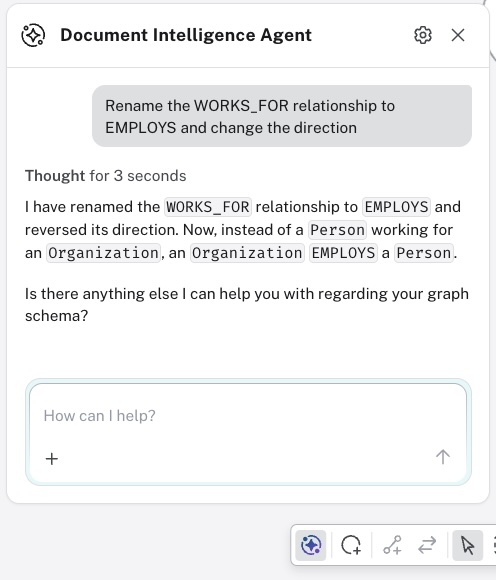
The Document Intelligence Agent is open by default when you open the graph model view. If you close it, you can find it on the left in the tool bar. The agent is interactive and can assist you with not only refining your model but also audit and answer questions about the proposed model. Additionally, it can generate Cypher queries for you based on the model.
Open the agent and use natural language to describe what you want to do. For example, you can ask the agent to change relationship type and direction and see the results update momentarily in your model.
You can use the agent as a consultant to verify that your model is optimal for your use case. For example, you can ask it to explain the model and why it is useful. If you are new to graphs and data modeling, you can ask for an explanation suitable for for someone new to the area.
You can ask the agent to look for potential issues such as ambiguous relationships or anti-patterns such as super nodes. If any issues are detected, you can use the agent to rectify accordingly.
The agent can also write Cypher queries for you that you can execute against your graph once imported. It can also execute them for you behind the scenes and interpret the results and return them to you in natural language as well.
Fix model errors
When you have refined the model, you have to resolve any errors before you can run the import.
Errors in the model are marked with a red exclamation mark. To resolve, select the offending node or relationship to open the details panel and adjust accordingly.

Run import
Once you are satisfied with your model and it is free of errors, you can run the import. You need to have a running Aura instance to import the data into, as described previously.
The Run import button is located in the top right corner, use it to start the process.
You need to specify the target instance and provide the credentials then start the import job with the Run button.
You can monitor the progress in the Import jobs tab.
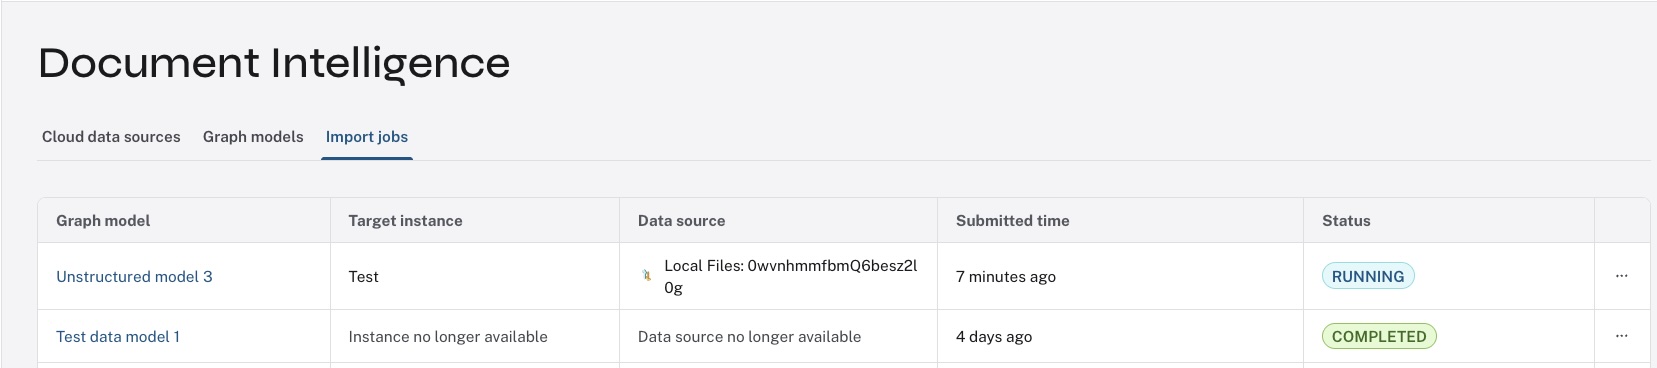
Use the […] menu on the individual job to see more details.
Once the import is completed, navigate to the Query tool to verify that the imported data matches your model. You can run the following command to visualize the data.
CALL db.schema.visualizationNote that there is some extra data in the model, _ _Chunk_ _, _ _Document_ _, and _ _Entity_ _ nodes and corresponding relationships.
See Lexical graph for more information about this.