Instance actions
Perform multiple instance actions directly from an instance card: connect to tools, pause/resume, inspect the instance’s details, take a snapshot, restore a backup, clone to new instance/clone to existing instance, edit secondaries, delete, resize, view resources/view all metrics.
Connect to tools
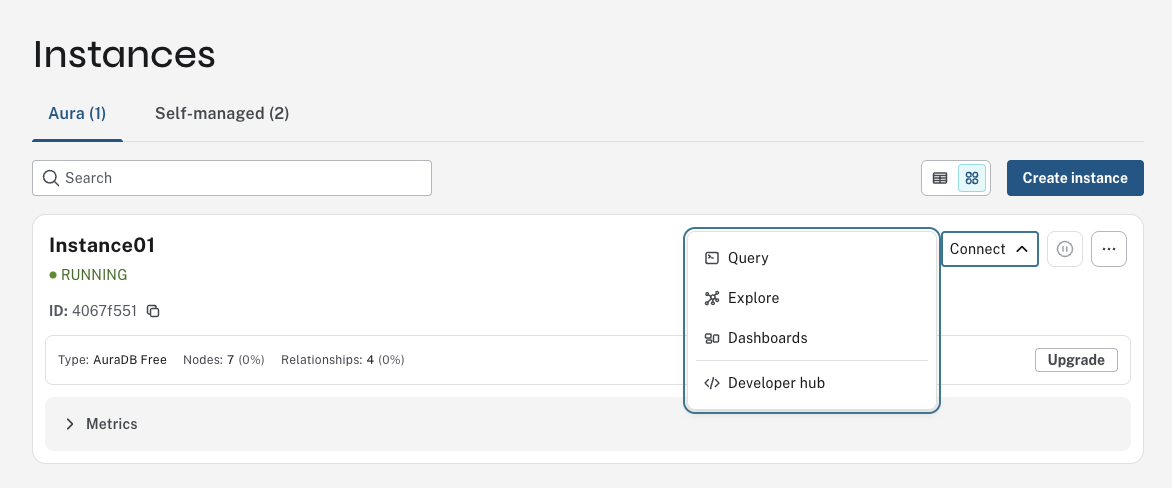
The Connect button allows you to connect your instance to one of the tools; Query, Bloom, or Dashboards, or to the Developer hub. This is possible from both Aura instances as well as self-managed deployments (see Self-managed instances), as long as the instance/deployment is running.
Pause an instance
Pausing a Neo4j instance temporarily stops the database, which means:
-
No connectivity: Any applications or users trying to connect to the instance won’t be able to run queries or retrieve data until the instance is resumed.
-
No processing: The database won’t process any operations or transactions while it is paused. Any ongoing operations are halted.
-
Data is preserved: Your data remains safe and unchanged while the instance is paused. You may export a backup of your data within its exportable period. When you resume the instance, you can pick up where you left off.
|
You cannot manually pause an AuraDB Free instance; they are paused automatically after 72 hours of inactivity. |
When you pause an instance, Aura performs a backup operation behind the scenes. It can take a while to pause, depending on your instance size, because Aura is creating the backup.
|
Paused instances run at a discounted rate compared to standard consumption. You can pause an instance for up to 30 days, after which point Aura automatically resumes the instance. |
Use the Pause button on the instance card. A confirmation window opens. After confirming, the instance begins pausing, and a play button replaces the pause button.
POST https://api.neo4j.io/v1/instances/{instanceId}/pauseFor more information, see the Aura API specification.
Resume a paused instance
When you resume an instance, Aura restarts the instance and restores it from the backup. After confirming, the instance begins resuming. Resuming the instance can take a few minutes to a few hours, depending on its size.
|
Aura Free instances do not automatically resume after 30 days. If an Aura Free instance remains paused for more than 30 days, Aura deletes the instance, and all information is lost. |
Resume a paused instance with the Play button on the instance card.
POST https://api.neo4j.io/v1/instances/{instanceId}/resumeFor more information, see the Aura API specification.
Delete an instance
Deleting an instance removes all associated snapshots, so they cannot be used to backup and restore data.
|
There is no way to recover data from a deleted Aura instance, including snapshots. If you need the data later, take a snapshot before deleting the instance. |
Delete an instance using the trashcan icon on the instance card. Type the exact name of the instance and confirm with Destroy.
DELETE https://api.neo4j.io/v1/instances/{instanceId}For more information, see the Aura API specification.
Reset an instanceAuraDB FreeAuraDB Professional
You can clear all data in an instance using the Reset to blank action.
Select Reset to blank from the (…) more menu on the instance card. You need to confirm your intention since this action cannot be undone.
You can reset an instance from the Aura console only.
Inspect an instance’s details
Return details about a specific Aura instance.
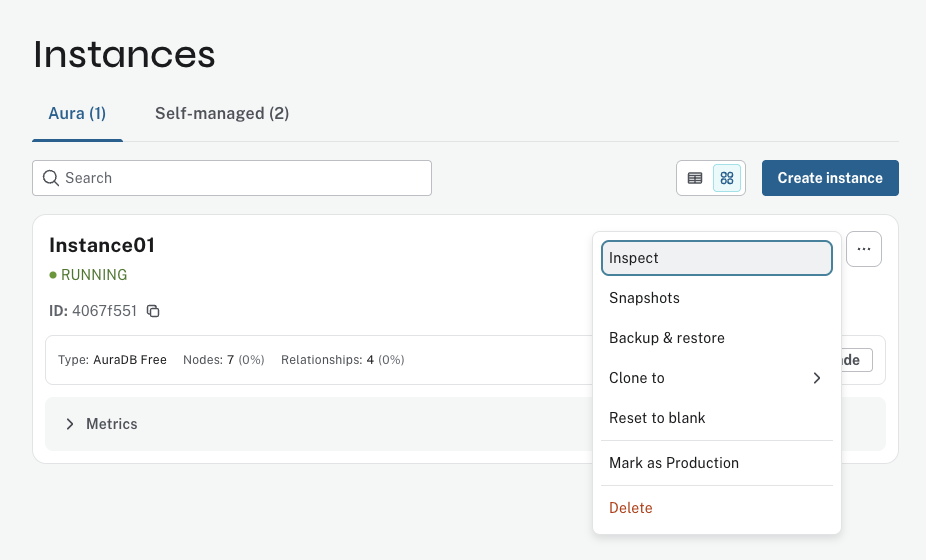
From the more menu […] on the instance card, select instance details. You can rename an instance and view instance details among other things. See Instance details for more information.
GET https://api.neo4j.io/v1/instances/{instanceId}For more information, see the Aura API specification.
Snapshots and backups
Snapshots are taken at regular intervals and can be used to download or dump your data to a new instance. You can also restore backups of 4GB or less. See Backup, export, restore, and upload for more information
Clone an instance
You can clone data from an Aura instance to another existing instance or a new instance.
|
To move your instance to a different region, clone to a new instance in the desired region and then delete your original instance. |
Note that you have to use the Aura console to clone, it is not supported via Aura API.
The time it takes depends on the amount of data (and factors such as number of indexes and constraints, or the capacity of the destination instance).
You can clone from a Neo4j version 4 instance to an instance running the latest Neo4j version. You cannot clone from latest Neo4j version to Neo4j version 4.
Clone to a new instance
Cloning to a new instance creates a new destination instance containing a duplicate of the source instance data.
-
From the more menu […] on the source instance select Clone to > New instance.
-
Configure the new instance including the required region under Cloud provider & region and confirm with Create instance.
-
Save the credentials and Continue.
|
Store the username and password securely. The credentials cannot be recovered. |
The destination instance progresses through states, including Loading. When cloning is complete, the status changes to Running and it is ready to use.
Clone to an existing instance
The destination instance can be empty or contain data.
|
Any data in the destination instance will be overwritten by the source data during cloning. If you want to keep the current data, take a snapshot and export it. |
The destination instance connection URI and credentials are not affected.
Only instances with enough capacity for the cloned data are available for selection.
-
From the more menu […] on the source instance, select Clone to > Existing instance.
-
Select the target AuraDB instance.
-
Select the I understand the target instance will be overwritten checkbox.
-
Select Clone.
When all the steps are completed, the instance will show a Running state and is ready to be used.
If you want to export your RBAC settings, see the tutorial at recreate users and roles in Neo4j Aura.
Upgrade an instance
Different tiers serve different operational needs. Should your needs change, you can upgrade. Tiers and prices are described at Neo4j.com/pricing
An upgrade does not change the original instance ID, meaning that your application strings remain valid.
GDS plugin removal: If your AuraDB Professional instance uses the GDS plugin, it is removed during the upgrade. The GDS plugin is not supported in AuraDB Business Critical.
Minimum instance size: If you try to upgrade a 1GB Professional instance, you need to resize it to at least 2GB of storage, because this is the minimum supported size in AuraDB Business Critical.
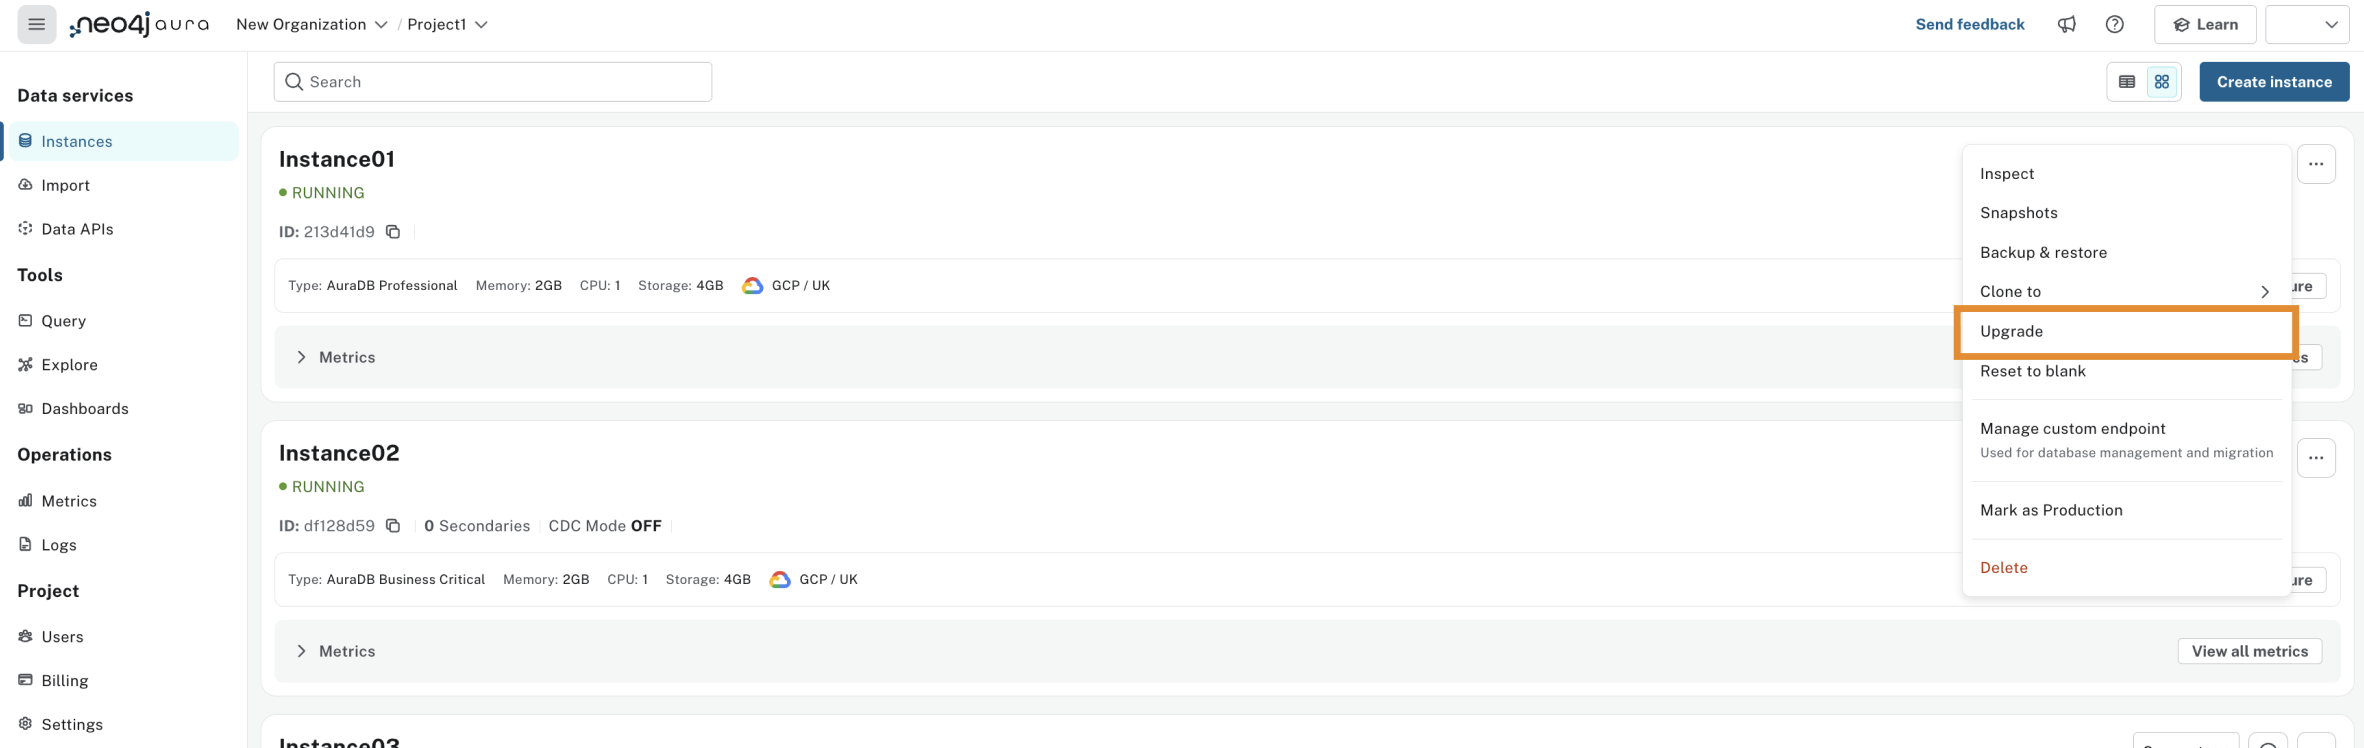
Open the instance more menu […] and select Upgrade.
POST https://api.neo4j.io/v1/instances/{instanceId}/upgradeFor more information, see the Aura API specification.
Mark an instance as productionAuraDB Business CriticalAuraDB Virtual Dedicated Cloud
Admins can mark a database instance as production in AuraDB Virtual Dedicated Cloud and AuraDB Business Critical.
When Neo4j updates the Aura Database version, instances marked as production are the last to receive the update.
This gives customers time to monitor any potential impact on less critical instances first.
In a standard Neo4j Aura Database version update, instances marked as production receive an update at least 48 hours after the update has completed on the preceding group of instances.
|
Neo4j may shorten this interval when an update is urgent, such as a critical security patch or a fix for an issue that risks data loss, data corruption, or service disruption. |
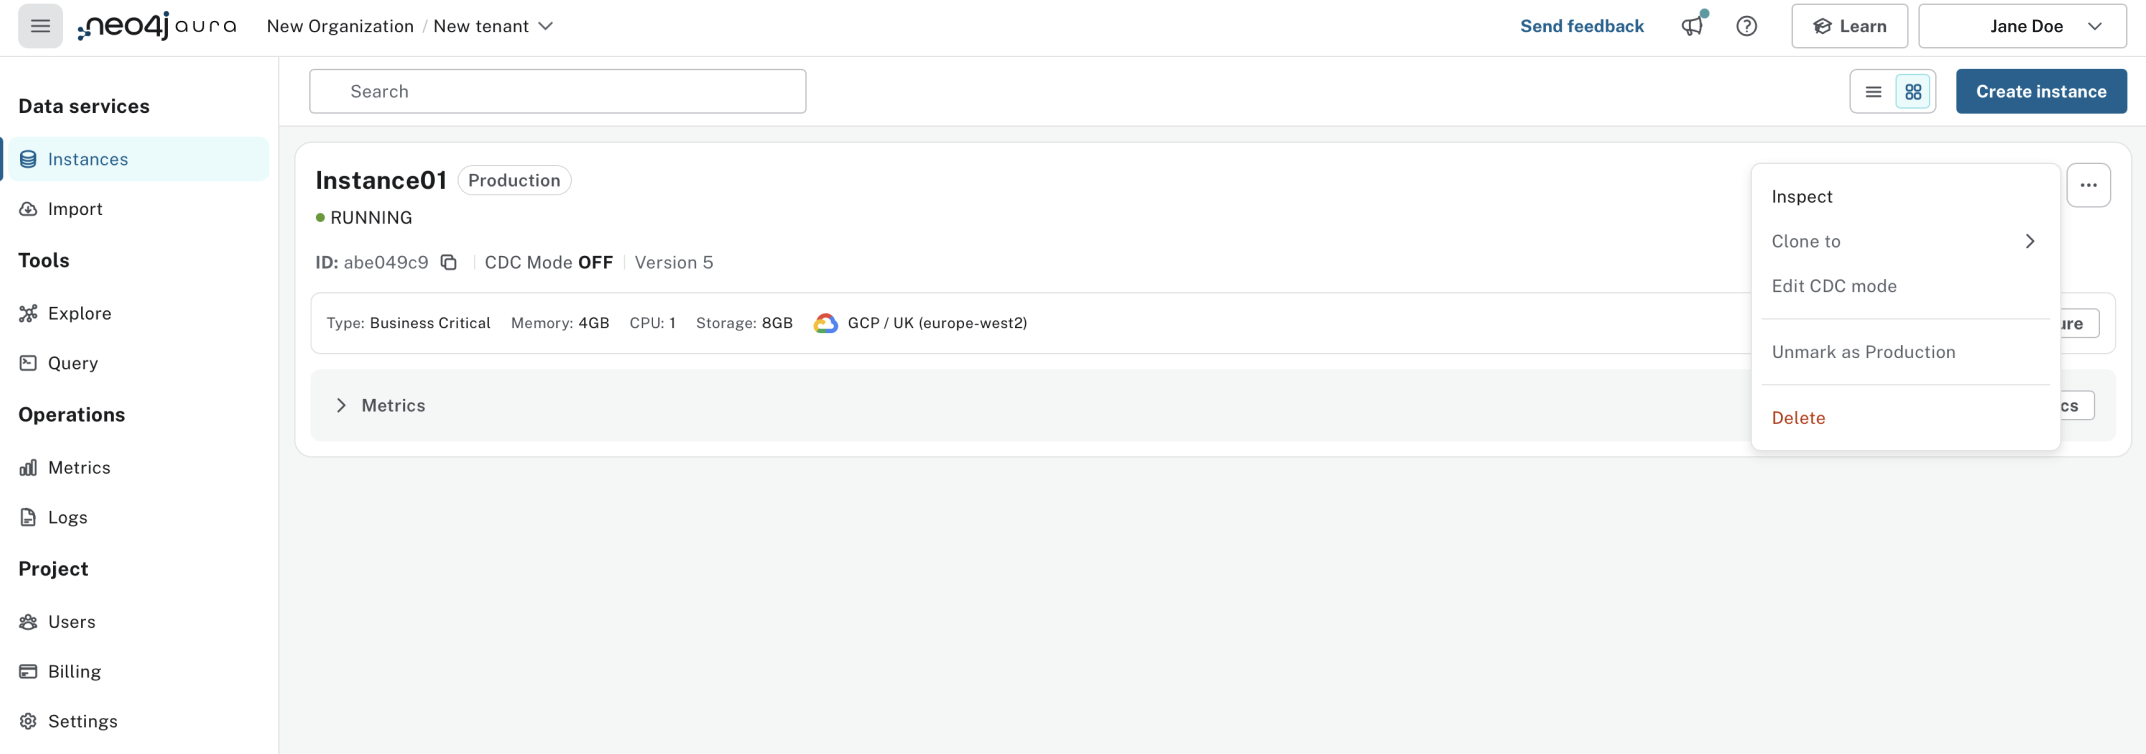
After marking the instance as production the label is applied immediately, and all instance actions (such as pause or clone) are temporarily unavailable while the instance is set to production in the Neo4j backend.
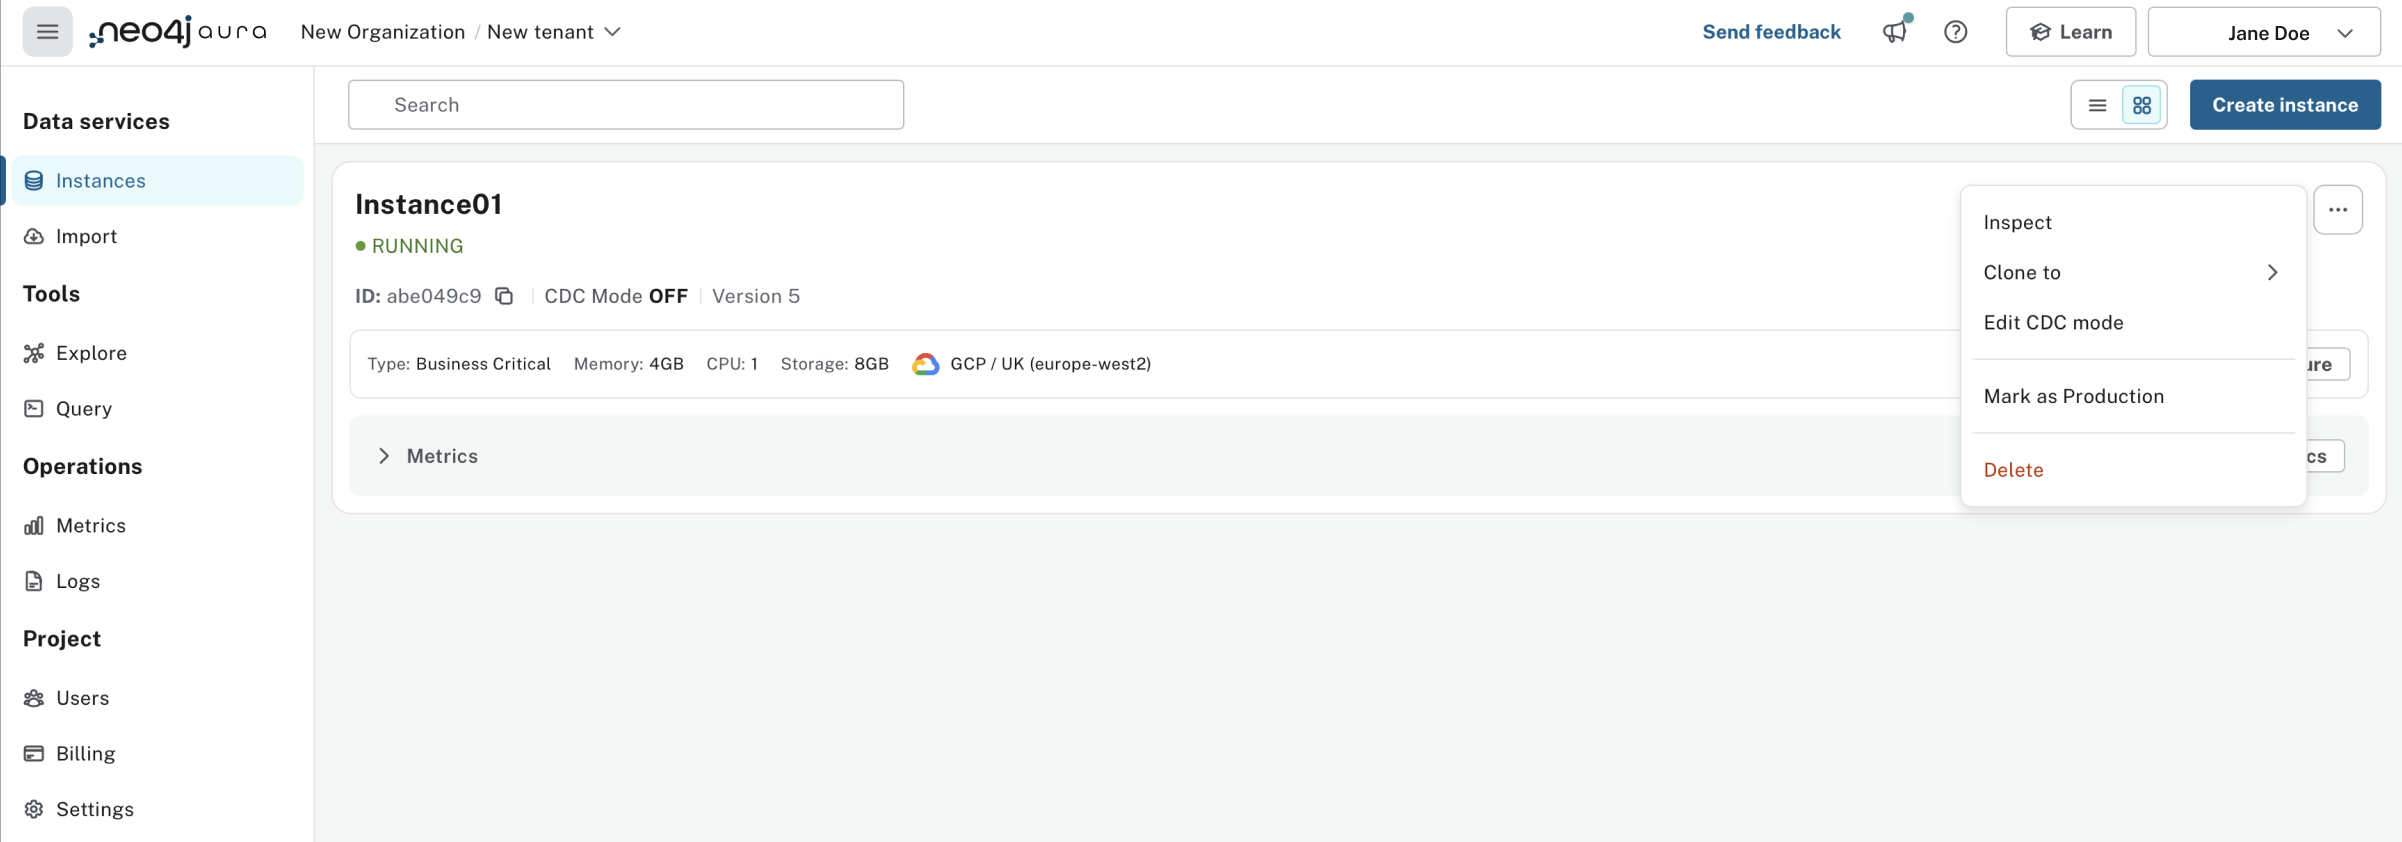
Use the more menu (…) on the instance card to mark it as production.
Edit secondary countAuraDB Business CriticalAuraDB Virtual Dedicated Cloud
Secondaries are read-only copies of your database used for scaling. You can edit the number of secondary copies on applicable instances. See Secondaries for more information.
Resize an instance
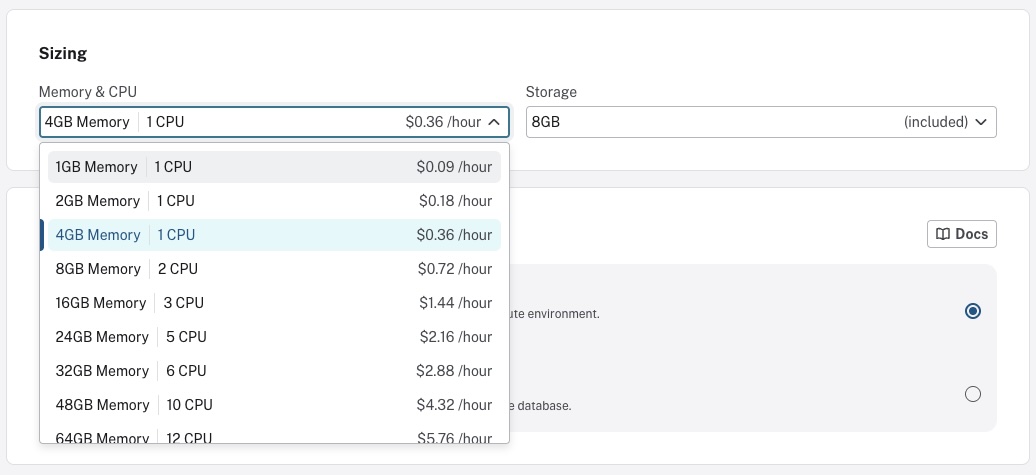
Resizing an instance means adjusting memory, CPU, and storage size. Memory and CPU are configured together, since each instance size pairs a specific amount of memory with a corresponding number of CPUs. A base allocation of storage is also included with each configuration. If you change the memory and CPU, the storage allowance also changes. However, you can also change the storage size independently.
An instance remains available during the resize operation.
Note that this option is not available for Free instances.
You can change the size of an existing instance using the Configure button on the instance you want to resize. From the Configure Instance settings, go to Sizing and then select the preferred sizes from the dropdown.
Adjust memory and CPU
You select the amount of resources you need when you create your AuraDB instance, but this can be adjusted at any time if your needs change.
To adjust memory and CPU, use the Configure button on the instance card and select a new value. Note that the included storage value changes automatically when you change the memory and CPU value, but this can be adjusted (see below).
You may reduce your memory and CPU, provided that the new value is equal to or greater than your current usage.
Adjust storage
|
Adjustable storage is available for all AuraDB tiers on the latest Neo4j version — with PAYG (direct) or Prepaid on AWS, Azure and GCP. Available as PAYG on GCP Marketplace for new subscriptions after September 19, 2025, and on AWS Marketplace for new subscriptions after November 19, 2025, and on Azure Marketplace for new subscriptions after January 13, 2026. |
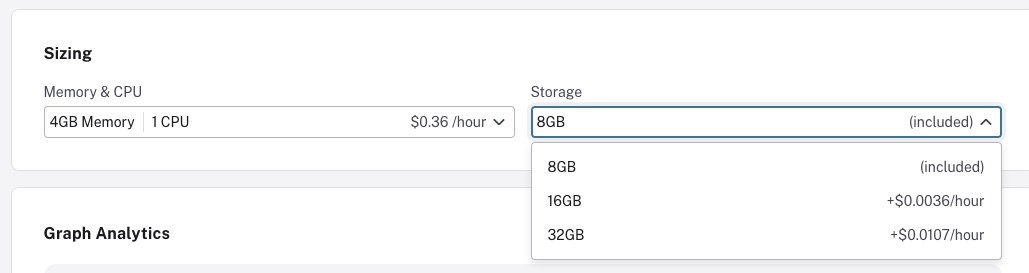
Adjust the storage size of your instance at any time. Each AuraDB instance includes a standard storage allocation and configuration; additional storage is chargeable.
To select the storage size during instance creation, select the desired value in the Storage (Adjustable) column.
To adjust an existing instance’s storage, use the Configure button on the instance card and select a new value for the storage size.
You may reduce your storage allocation, provided the new size is equal to or greater than your current usage. For example, if you are using 8GB of data, the minimum selectable option will be 8GB. Selecting a size smaller than your current usage is not permitted. This store size policy also applies to general instance downsizing.
Manage custom endpointsAuraDB Business CriticalAuraDB Virtual Dedicated CloudAuraDB Professional
Custom endpoints are used for database management and migration. You set up endpoints in the Project settings. See Custom endpoints for more information.
MetricsAuraDB Business CriticalAuraDB Virtual Dedicated CloudAuraDB Professional
On the bottom of the instance card you can find a selection of collapsible metrics. Use the View all metrics button to see more. See View metrics for more information.