Quickstart: Snowflake
|
This is the public preview documentation of Neo4j Virtual Graph. To provide feedback, please use the feedback form you were granted access to. During the public preview, we advise you not to use sensitive or production data with Virtual Graph. |
This page presents the general workflow of virtualizing an example dataset from Snowflake into Neo4j Aura with Virtual Graph.
Requirements
-
An Aura account with access to Virtual Graph. Refer to Create an account and Create an instance in the Aura documentation.
-
A Snowflake instance with example data; this page uses the Movies dataset (relational database equivalent).
Preparing Snowflake
Create an SSO key pair
Run the following to create a key pair of a public and a private key.
openssl genrsa 2048 | openssl pkcs8 -topk8 -inform PEM -out snowkey.p8 -nocrypt
openssl rsa -in snowkey.p8 -pubout -out snowkey.pub
Add the public key to Snowflake
In Snowflake:
-
Navigate to Project → Workspaces and create a new SQL file
-
Paste the following SQL query to the newly created tab "Untitled.sql" and run the query:
CREATE USER <VIRTUAL_GRAPH_SERVICE_ACCOUNT> SET RSA_PUBLIC_KEY = '-----BEGIN PUBLIC KEY----- <YOUR_PUBLIC_KEY> -----END PUBLIC KEY-----'<YOUR_PUBLIC_KEY>is the public key data from the file snowkey.pub.
|
Virtual Graph only ever requires read access.
You can and should restrict the |
Creating a Virtual Graph
In the Aura console:
-
Select Instances from the left-side navigation.
-
Select the Virtual Graphs tab and proceed with Create virtual graph.
-
In the Configure Virtual Graph step, select a name, a cloud provider and a memory volume for your Virtual Graph.
Connect Snowflake as the data source
-
Use Add new data source and select Snowflake.
-
Complete the form.
-
Assign your data source a name.
-
To look up your Host in Snowflake, select your user icon from the bottom of the left-side navigation and then Connect a tool to Snowflake. Your host is the Account/Server URL.
-
Set "Movies" as your Database and "V2" as your Schema.
-
Enter your Snowflake user name and paste the Private Key from the file snowkey.p8 created in Create an SSO key pair.
-
-
Proceed with Next and wait for your connection to be verified, then Confirm.
Select a graph model
-
Under Select graph model, proceed with Create new graph model.
-
When the model has been prepared, select Generate from schema.
Inspect and complete your graph model
The inferred schema likely doesn’t fully reflect the tables from your Snowflake data source.
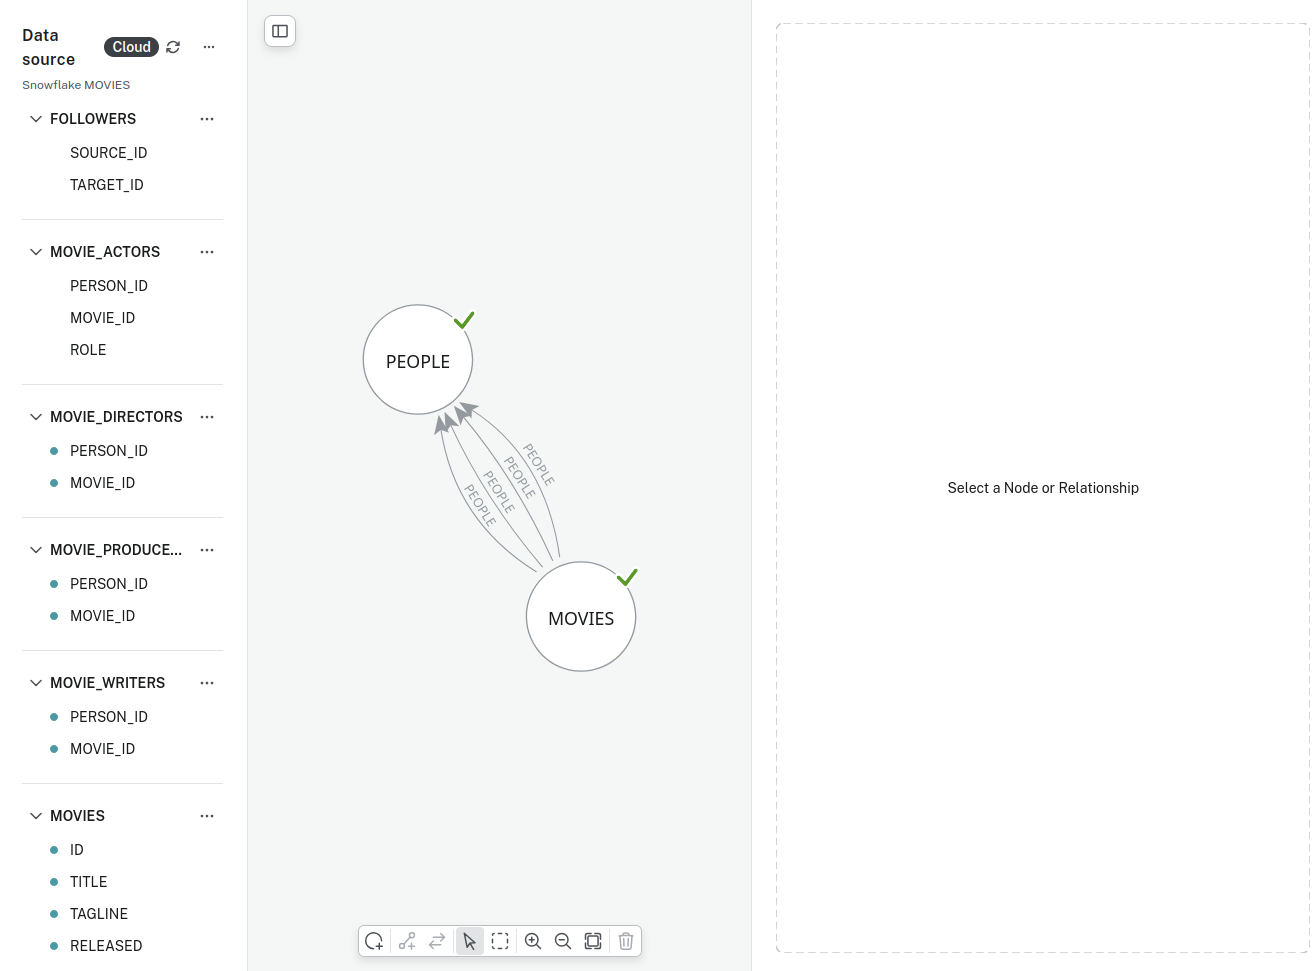
For instance, A model generated from schema with errors shows a generated model that is missing two relationships (FOLLOWS and ACTED_IN).
This is also indicated by the missing dots for the fields under FOLLOWERS and MOVIE_ACTORS in the Data source panel.
The existing node and relationship labels may not be suitable either: the example model uses PEOPLE and MOVIES instead of Person and Movie as well as the same type for all relationships.
The relationship directions are reversed and should go from Person nodes to Movie nodes instead.
Finally, selecting the nodes and relationships may reveal that IDs or fields are missing.
The following steps are required to fix the model:
-
Select the nodes and relationships and change the Label or Relationship type accordingly.
-
Make sure that all fields are set for nodes and relationships. Map from table → Select all infers them when you have selected a table for the node or relationship.
-
Select relationships with wrong direction and reverse it with the Reverse relationship direction button in the tool bar on the bottom of the model panel.
-
For missing relationships:
-
Select the node or nodes you want to connect.
-
Add a new relationship with the Add new relationship button (two circles, a connected line and a plus).
-
Assign a Relationship type.
-
Select the appropriate table under Properties and add missing properties.
-
Add From and To references under Node ID mapping.
-
Assign IDs as necessary.
-
-
Field names can be edited, and data types assigned.
|
Relationship types and node labels must be unique, see Entity type uniqueness. |
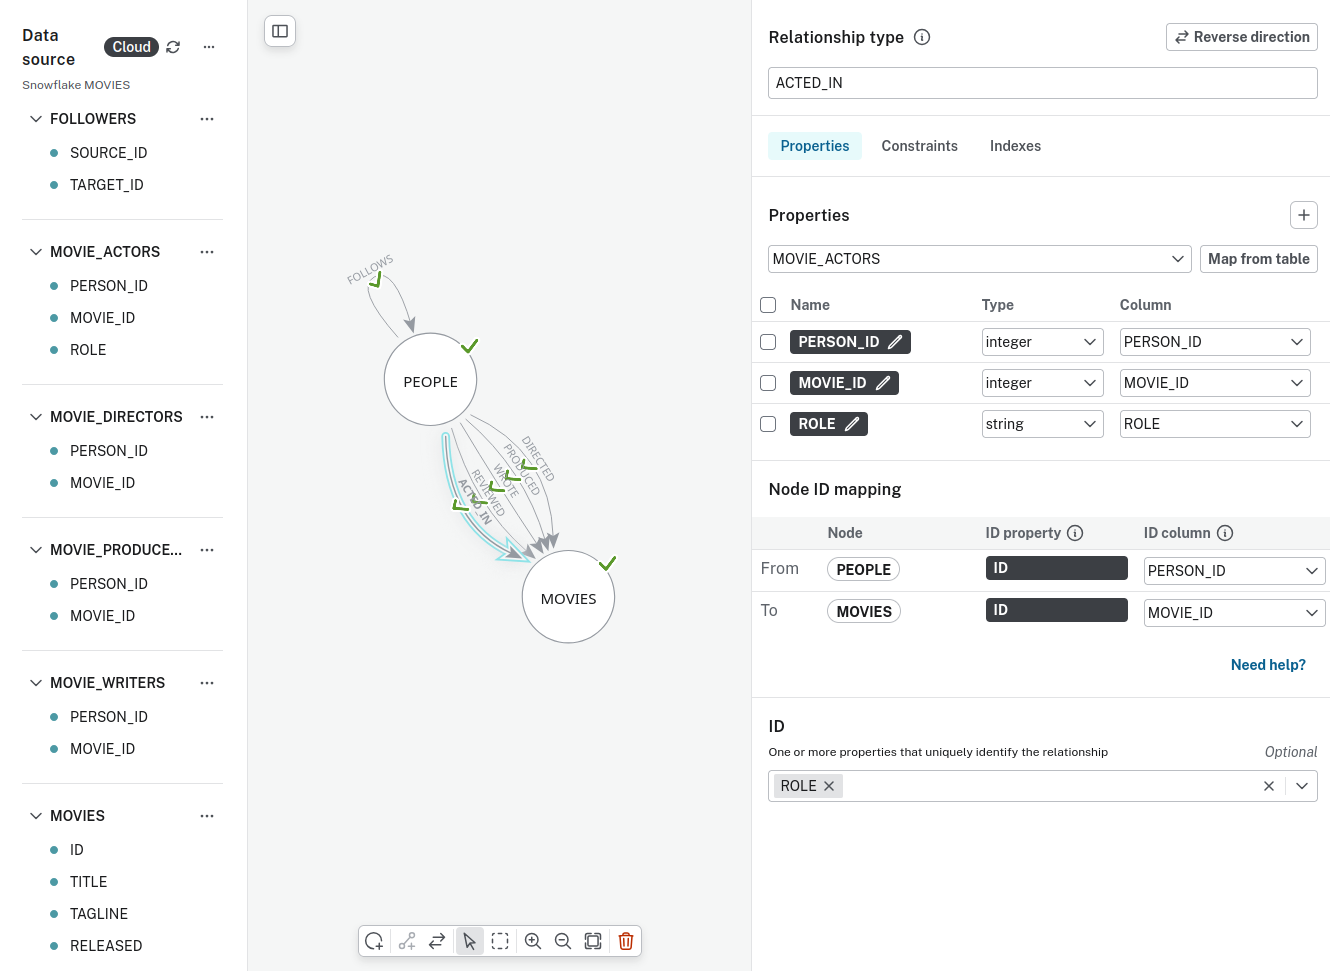
Your model should look like A corrected model for MOVIES.
Finish with Create Virtual Graph and download the credential data.
Inspect your graph
Select Query from the left-side navigation and query your graph, for example with the following query:
MATCH (p:Person)-[r:ACTED_IN]->(m:Movie)
RETURN p, r, m LIMIT 10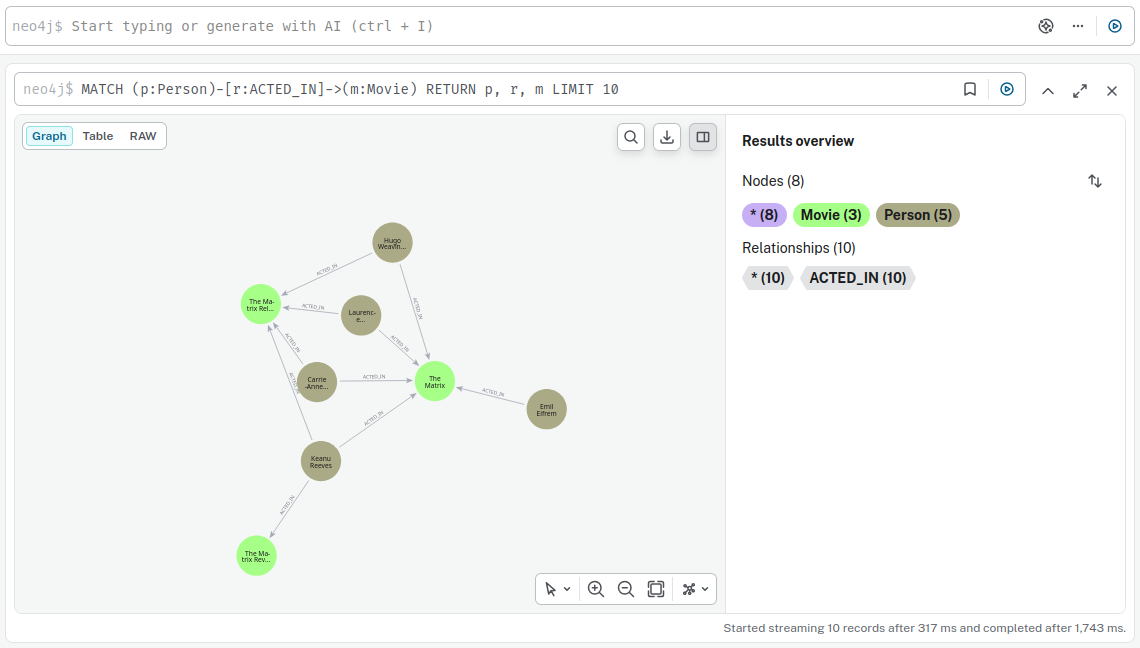
You have successfully created a virtual graph.
Keep learning
-
For more data source options, see Virtual Graph data sources.
-
To learn about schema fine tuning, refer to Virtual graph models.
-
To learn about Virtual Graph’s current limitations for Cypher®, refer to Cypher coverage.